Dorico is the biggest thing to happen to notation software for years. We explore the initial release and discover the thinking behind its innovative design.
On October 19th 2016, after nearly four years of development, Steinberg released the first major new scoring application to appear on the market in years. Named after the late-15th-century music engraver Valerio Dorico — a code name that stuck — Dorico aims to set the new standard in scoring software.
Before we begin, let’s first address the elephant in the concert hall. Dorico’s genesis began when Avid closed the UK office where Sibelius was being developed and moved its development elsewhere, leaving most of the original team with a good deal of time on their hands. Recognising an opportunity, Steinberg decided to hire the group to develop a brand-new notation application, and, over the last four years, Product Marketing Manager Daniel Spreadbury (former Sibelius Product Manager) has been documenting the team’s effort on his Making Notes blog (blog.steinberg.net). To say that expectations are high for Dorico would be something of an understatement, given the general affection people have had — myself included — for Sibelius over the years.
This article was largely written during Dorico’s beta period, and finished just after the first beta release of version 1.0.20, so it should be considered as a preview rather than a review. Also, in writing this article I spoke with Daniel Spreadbury and composer Thomas Hewitt Jones, who was commissioned to write a piece for the Dorico launch at Bush Hall in London. Tommy is a friend of mine and one the most skilled Sibelius users I know, so we’ve spoken about Dorico for a while and I’ve included some of his comments alongside my own. (If you’re unfamiliar with his work, I fear he is now best known for his ‘Fantasy on David Cameron’, based on the now-infamous post-Brexit hum, which can be downloaded from the Classic FM web site.)
Prelude
 The Steinberg Hub provides access to news, templates and more.When you open Dorico you’ll be greeted by the Steinberg Hub, which serves much the same purpose as it does in Cubase and Nuendo, and is not unlike Sibelius’ Quick Start window. There are various links to web resources, along with the ability to open existing projects, and you can create a new project that’s either empty or based on a template. Templates cover familiar instrumentations, such as string quartet, brass band and solo piano, giving you a quick way to get started if you already have a line-up in mind.
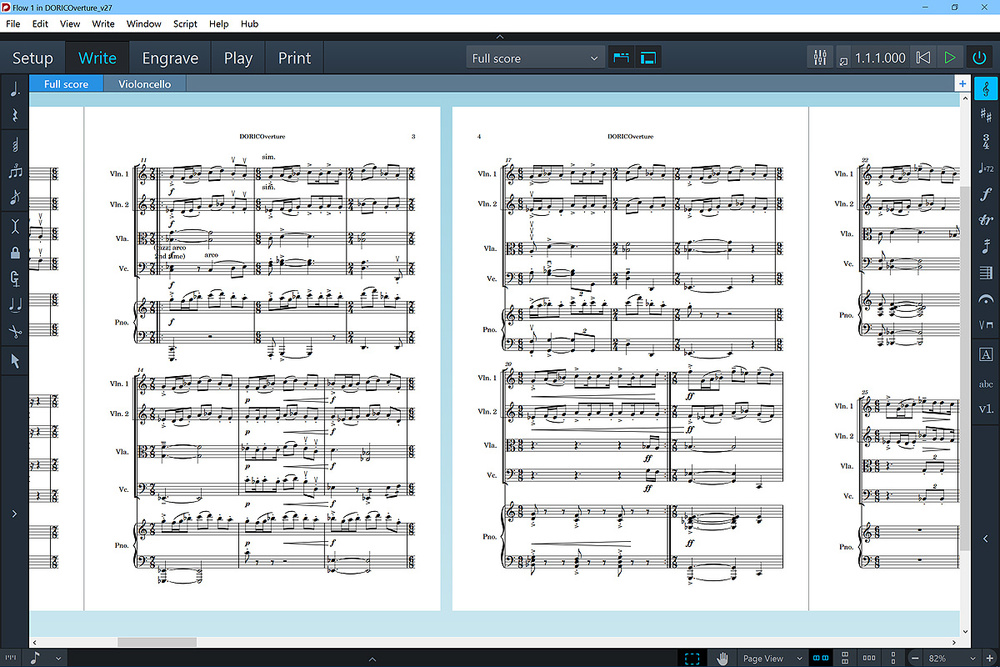
Once you open a project you’ll be presented with the application’s main window. Whereas Sibelius’s traditional menu and toolbar-driven interface was replaced by the Microsoft-style Ribbon in version 7, the team have reverted to good old-fashioned menus in Dorico, and have implemented a single-window interface as opposed to the multi-window world of Sibelius. This approach will be especially appealing to laptop users, although Dorico also supports a multi-monitor workflow with the ability to open multiple instances of the main window.
Dorico’s user interface is unapologetically modal, meaning there are different modes of the program you’ll enter to perform different scoring tasks: Setup, Write, Engrave, Play and Print. Setup is where you add Players to your project, and Write mode is where the actual input takes place in terms of notes, text and performance directions. Engrave mode allows you to carry out detailed formatting of every element on the page, and Print mode, unsurprisingly, lets you preview and print the actual score. Finally, Play mode makes it possible to adjust the way notes are performed during playback without affecting how they appear on the page. The different modes are accessed via buttons on the toolbar at the top of the window, or by using the handy Key Commands: press Ctrl (Windows) or Command (Mac OS) and 1 through 5.
Although each mode provides different functionality, there are some user-interface elements common to all modes. The aforementioned toolbar remains the same across all modes, and then there are left and right panels that provide editing tools appropriate to the mode. Some modes also offer a bottom panel, giving access to properties or other, mode-specific behaviour. These elements can be hidden or revealed by clicking little arrow buttons located on the edge of the panel closest to the score, although a better approach is to use the key commands. Again, holding down Ctrl/Command, you can toggle the visibility of these elements by pressing 6 through 0.
Dorico’s modal, single-window approach is reminiscent of Adobe’s Lightroom, which has similar modes for seeing your ‘Library’ of photos, to ‘Develop’ or ‘Print’ a photo, and so on. Indeed, there are other areas of Dorico’s interface that also seem very Lightroom-inspired, such as the left and right panels that leave the content front and centre, and the help modes that explain the user interface the first time you enter a mode. Not that this is any way a bad thing, and when I asked Daniel if the team had be inspired by Lightroom, his reply was: ”Absolutely! Unashamedly inspired by Lightroom, I would say.
“I think the thing we really like about Lightroom is that it’s a program that’s clearly designed with a single display in mind. It’s designed for the photographer to be able to use it not only in his studio at home when he’s going through his stuff, but also to use it when he’s in the studio, so he can directly take in the photos, work with them, and do everything efficiently on one screen with everything docked against the window edges.”
Bring In The Players
We’ll begin our exploration of Dorico in the same place as if you were beginning a new project: Setup mode. This is where you manage Players, Flows and Layouts — all key pieces of Dorico terminology.
 Setup mode is where you manage Players, Flows and Layouts. Here’s what it looks like after starting a new project with the Concert orchestra template.
As you would expect, Dorico is familiar with a wide range of instruments, and knows what clefs to use on the required number of staves, any necessary transpositions, and so on. However, instead of simply adding an instrument to a project, as you might with other notation programs, in Dorico you add a Player that has an instrument assigned to it. Now, that might sound like a subtle distinction, but it turns out to be a useful abstraction, as there are two types of Player that can be added to a project: Section Players and Solo Players.
A Section Player represents multiple musicians all playing the same instrument, such as the first violin section in an orchestra. A Solo Player, on the other hand, is an individual musician who might perform on many different instruments during the course of the score — such as a flute player who might occasionally switch to a piccolo, or a clarinettist who also plays tenor saxophone. The line-up of Players is listed in the left panel, and you’ll notice that Solo Players feature a plus button that enables you to add extra Instruments to that particular Player. Future versions of Dorico will build on the functionality that can be offered by knowing whether a Player represents one musician or many musicians, such as support for divisi, where a group of musicians playing the same part divide into subsections when polyphonic material appears.
Go With The Flows
The next concept to understand is Flows, which make it possible to have multiple blocks of music in the same Project. The term Flow is deliberately ambiguous, but it means that if you were writing a symphony, for example, as one does, you might store each movement of the work as a Flow within a single project. Alternatively, on a film score a Flow could be used for each cue in a film, which is much more convenient than opening and closing multiple projects all day long — especially given that Project load times are not exactly rapid at the moment.
Flows are displayed in the bottom panel, and a Project always consists of at least one Flow created by default. You can create additional Flows by clicking the plus button in the Flows panel, or delete an existing Flow by selecting it and clicking the trashcan button. When a Flow is selected, you’ll notice that a tick box appears for each Player in the Players panel, enabling you to specify which Players should be part of a given Flow. Alternatively, you can do this the other way around, such that when a Player is selected, you’ll notice a tick box in each Flow, letting you specify which Flows the Player is employed in.
I think composers and orchestrators are really going to like Flows, and Tommy is already embracing them as part of his working approach: “Since the Dorico launch, I have been using Flows to compile a complete score of a new musical within the same window. Having been so used to writing each movement of a large project separately and then using ‘append score’ to consolidate all the separate sections of music into one long file, it took me a while to trust that the software wouldn’t crash with 32 different Flows representing each musical cue of this new project. It hasn’t so far!”
Layout West
Finally, we come to Layouts. A Layout describes a score that can be printed on the page, or exported as a file, based on one or more Players and one or more Flows. If that’s not entirely clear, consider the example cited in Dorico’s online help (it seems silly to arbitrarily transpose the example to different instruments). Imagine you have a string quartet with three movements. For such a work, you might want to create five Layouts: one for each of the parts (Violin I, Violin II, Viola and Cello) and one consisting of the Full Score.
To aid in this process, Dorico offers three different Layout types: Full Score, Instrument Part and Custom. Full Score and Instrument Part Layouts are created automatically as you add Players to the project, and both Layout types receive new Flows as you create them so you don’t have to add them yourself: Full Score Layouts automatically receive new Players as well. Custom Layouts, on the other hand, are completely independent, where you manage Players and Flows manually, making it easy to produce a very specific score, such as one that only contains the second movement of the Violin II part. As we explore Dorico further, you’ll start to see why being able to create multiple Layouts — even for seemingly identical instrument parts — can be incredibly useful.
Come Write Me Down
Write mode is probably where you’ll spend most of your time when working with Dorico, and it can be thought of conceptually as the ‘Flow editor’. It follows the conventions established in Setup, where there are panels on the left- and right-hand sides of the window and at the bottom, but adds another interface concept called toolboxes. These are located at the left and right edges of the window next to the panels, and this is where you select what objects should be displayed in the respective panels. On the left side is the Notes toolbox, which is where you can select different note input tools; and on the right side is the Notations toolbox, where you’ll find non-note-based items such as clefs, key and time signatures, dynamic markings and so on. The bottom panel provides access to various properties depending on what items are selected in the music area.
 Write mode. The bottom Properties panel shows properties available to the selected note, which is shown in orange in the music area.
Getting started in Write mode is delightfully straightforward: to begin inserting notes, you simply double-click on the staff where you want the input to begin, and an orange caret will appear showing you where the next note will be inserted. You can start entering notes using the keys A through G on your computer’s keyboard, and note lengths can be selected via the keys 1 through 9, with enharmonic adjustments specified via the plus and minus keys (without pressing Shift) to indicate sharps and flats, and the 0 key for a natural. So to enter an A# of eighth-note length, for example, you would type 5 + A. Entering notation in this way soon becomes second nature, and there are special modes for enabling the entry of chords, tuplets and grace notes.
As you begin entering notes, you might notice something a little strange: there are no bar lines! This is by design. Dorico has a very fluid sense of time, meaning that you don’t have to enter any time signatures until you want to. This can also make re-barring much easier down the line.
Small Steps
It’s also possible to enter notes using a MIDI keyboard, but currently only in step time. This initially seemed disappointing, but when I thought more about it, I realised that it’s a feature I barely use myself in other notation packages. Tommy had much the same thought when I asked him about it: “I have rarely used real-time or step-time input modes in previous notation software. Of course, we all use sequencers when scoring commercial music, but when composing straight into notation software I prefer to type everything in using the QWERTY keyboard.”
“I think people have a very high expectation of what that should be able to do,” said Daniel, “because they want the software to notate what they meant to play and what they were thinking of, rather than what they actually played. But we will do it, and the challenge for us will be to try and actually make it work more usefully than it has in other programs. It’s kind of an R&D issue, because I don’t think it’s really a solved problem.”
Also unsupported at present is pen input, which seems a shame for a modern notation program. I suspect this is due to the design of Write mode being optimised for extremely efficient QWERTY input: using a pen is admittedly slower, but newer apps like StaffPad have shown just how natural pen input can be, and even Sibelius supports pen-compatible computers like Microsoft’s Surface Pro for basic, mouse-like note entry and, more usefully, annotation.
“Ink is very interesting,“ explained Daniel, “but it makes sense for us to focus on things where we can strongly differentiate ourselves from the competition, and input methods is not a strong enough differentiator. Also, the technology is only available on, at best, 50 percent of the hardware people are going to be running Dorico on, which means it just isn’t a natural fit for us to put major R&D efforts into. And it isn’t going to be as good as using an indirect method that allows you to directly specify the result that you want. There’s a level of interpretation that has to go into understanding the action you make with a pen, so you’re immediately much slower anyway, just because the program might not interpret what you’re doing properly. Writing music notes with a pen — even on paper — takes a lot longer than pressing 6 A.”
One thing that was noticeable in the first release of Dorico was how sluggish the program could become when entering and editing notes. This lag was almost comically bad when performing operations on multiple notes; for example, when transposing a series of notes, you could see the individual notes moving to their new locations! I was running Dorico on an i7-based Surface Pro 4, which, while not the fastest system on the planet, is far from the slowest. At the time, this seemed like a 1.0 kind of issue, with the developers not wishing to engage in premature optimisation and instead just focusing on getting the functionality correct. And mercifully, when the first update to Dorico appeared (1.0.10), a month after the initial release, many areas where the program had been sluggish — such as the aforementioned transposing of notes — were now far more responsive. What a difference a month makes!
The Mighty Pop-over
One of the neatest features in Write mode is something Steinberg call pop-overs, which can really speed up the process of adding certain non-note-based notations to your score. For example, when you do want to add a time signature, you can simply select the object that represents the first object of the new bar (such as a note or rest) and press Shift+M (for meter). A pop-over will appear over the staff where the meter change is to occur, offering a text field ready for you to type into. If you want to insert a 4/4 time signature, simply type ‘4/4’, press return, and a 4/4 time signature will be added to your score. Want to change it to something else? Simply select the time signature, press Shift+M again, enter a new value, and press Return. And if you want more complicated time signatures, such as additive meters, it’s as easy as typing something like ‘3+3+2/8’ — pretty neat. But it gets better.
Key signatures are added in much the same way: press Shift+K and enter lower-case letters for minor keys, or upper-case letters for major keys. So, for example, ‘c’ would be C minor, resulting in three flats, and ‘F#’ would be F# major, giving you five sharps. But where pop-overs really start to shine is when adding dynamics. There are no prizes for guessing that Shift+D is the key command for opening the Dynamics pop-over, nor for hazarding that entering ‘pp’ in the pop-over will result in a pp (pianissimo) marking being added to you score. However, you can also select a range of notes and enter an expression such as ‘p < f > p’, whereupon Dorico will add a piano symbol followed by a crescendo hairpin, a forte symbol, a diminuendo hairpin, and another piano symbol perfectly laid out over the duration determined by the selected notes. Brilliant!
, you get the result shown at the bottom.") By selecting the notes and entering the text shown into the Dynamics pop-over (top), you get the result shown at the bottom.
By selecting the notes and entering the text shown into the Dynamics pop-over (top), you get the result shown at the bottom.
Entering tempo markings is a little more cryptic, although is easy once you get used to it. This time you press Shift+T, and if you wanted a ‘quarter note = 120’ marking, you would type ‘q=120’, or ‘q.=120’ if you wanted dotted time. There’s also a pop-over for adding bars and bar lines (Shift+B), where you can use simple input like +16 or -16 to add or remove 16 bars, or more complicated input to change the appearance of barlines, such as ‘|:’ (or the word ‘start’) to enter a start repeat bar line. And there’s even a pop-over for Holds and Pauses (Shift+H) where you can type ‘fermata’ to add a fermata to a note, with 14 other options available. With the more complicated pop-overs, the best approach isn’t to try and remember everything, just the expressions that are most useful to you.
“Pop-overs took a while to get used to,” commented Tommy, “but over the course of writing ‘DORICOverture’ I found that accessing the most useful musical functions quickly and efficiently in this way undoubtedly sped up the writing process. Of course, having a sensible default formatting of dynamics, tempo markings and so on means that the initial inputting is faster than before, and layout fixes can be applied later in the Engrave mode.”
I asked Daniel if they’d thought about creating a ‘universal’ pop-over that allowed for any kind of entry, whether meter, clef, key signature and so on. “Yeah, we thought about it. The trouble is that because you’ve got to be able to parse it, it’s actually very difficult when you’re doing things like tempo versus dynamics to actually work out what the user really means. The problem is if the program guesses wrong, then it’s very annoying that the program has guessed wrong. So you tell the program you’re creating a clef, and you know that you’re creating a clef, after all — so is that really that hard for you to press Shift+C rather than Shift+U for universal pop-over?”
Of course, you don’t have to use pop-overs if you don’t want to. Everything you can do with pop-overs can be achieved with the Notations panel, albeit less efficiently in most cases. Overall, Write mode is powerful and stunningly well thought out. The key commands feel natural, it’s now quick to get around, the notation looks great, and all the Dorico team need to do now is keep stocking it with some of the symbols and functionality missing from the initial releases (see box).
Engravements
If Write mode could be thought of as the ‘Flow editor’, then consider thinking of Engrave mode as the ‘Layout editor’. This is the mode where you can tweak the way the score will look on the printed page, from re-positioning items to perfecting the shape of a slur. In many ways it resembles and behaves more like a desktop publishing (DTP) program than any scoring program you might have used in the past. Which is to say it provides you with a great deal of control.
Engrave mode lays out your score based on Frames, of which there are three types available: Music Frames, which show musical notation from a Flow, Text Frames that contain arbitrary text, such as the title of the score, and Graphics Frames, where you can load an image to be displayed on the page.
The right-hand Pages panel will be familiar to anyone who’s ever used a DTP program such as InDesign before, and consists of three sections for Pages, Master Pages and Master Page Sets. Pages simply shows you the page layout of your score, although you can’t yet click or double-click one to jump to, say, page 14. Master Pages are templates that are applied to a given page, and Master Page Sets are a collection of Master Pages.
By default, there are two Master Page Sets — Default Full Score and Default Part — and each of these Sets contains a First and Default Master Page. The First Master Page is automatically applied to the first page of the score, and the Default Master Page is applied to every page thereafter. The First Master Page consists of three Text Frames at the top for title, composer and lyricist, a Music Frame, and a further Text Frame at the bottom for a copyright notice. Default Master Pages have two smaller Text Frames at the top, for the title and page number, and a larger Music Frame that fills the rest of the page. Master Pages can be edited by simply double-clicking on them in the panel, and it’s easy to create your own, which I can see being very useful for those creating educational materials such as worksheets.
 Engrave mode lets you fine-tune a score’s layout with DTP-like tools. Note the two Text Frames, outlined in green, for the title and page number, and the Music Frame, indicated with a blue outline.
As well as arranging Frames and Pages, Engrave mode, as I’ve said before, is where you can move items around. So, while a dynamics symbol is immovable in Write mode, you can drag it anywhere you like in Engrave mode. The online help states that “Engrave mode allows you to manipulate and modify every item in your project,” but when I tried to move notes around in horizontal space (essential if you’re writing senza misura — without meter — for example), I found that it was impossible. I asked Daniel about this and he laughed, explaining “every non-note item, it should say!” He went onto say they were working on it and that it should be available in an update at the beginning of the year, maybe even by the time you’re reading this.
Engrave mode can seem a bit daunting at first, but it’s good to know you have this level of control if you need it, which will presumably be invaluable to professional engravers. Some users, however, may never even need to touch this mode, as Dorico’s automatic layout algorithms already make a score look great, without you having to do any of the heavy lifting.
“The default engraving engine within Dorico is, frankly, fantastic.” said Tommy. “When I created the parts for ‘DORICOverture’ for the London launch, I was so short of time that I didn’t tweak the formatting of the parts at all in Engrave mode, emailing PDFs to the players without touching them. Even though they weren’t quite publisher-ready, none of the musicians complained about readability of the parts.”
Sequential Playback
Although you can play back the score in any mode, thanks to transport controls being available on the toolbar, Dorico provides a specific Play mode that will grow into a comprehensive way to finesse the playback of a score. The idea is to make it possible to edit a note’s playback behaviour separately from the way it looks on the page; so, for example, if you had a quarter note on the score and changed its length to an eighth note in Play mode, it would still be displayed as a quarter note on the page. But that’s just scratching the surface; already, in the first releases of Dorico, there’s support for VST Instruments and Cubase-style VST Expression maps.
Dorico is supplied with Halion Symphonic Orchestra (HSO) and more than 1300 sounds from Halion Sonic SE2. HSO (reviewed in SOS October 2006 issue) contributes a core orchestral palette, with instruments offering multiple playing techniques, such as legato, staccato and trills. However, you’ll need to bear in mind that this library is now over 10 years old, and although it’s probably adequate to get somebody started, don’t expect it to sound like some of the more modern offerings.
 Play mode provides a sequencer-like way to manipulate the playback of a score.
Dorico employs the same Plug-In Sentinel technology used in Cubase 9 to ensure that only well-behaved VST instruments are available within the program. And this strictness is even more severe in Dorico: by default, only VST3 plug-ins can be used, which is sure to raise some eyebrows. However, this is only a default setting, because Dorico contains a whitelist of supported VST2 plug-ins which can be manually edited to force a VST2 plug-in to be loaded. The process is a little fiddly, though, and on the Knowledgebase article describing the procedure, Steinberg state that “VST2 plug-ins that are not originally included on the whitelist are not officially supported”.
 Dorico is supplied with Halion Symphonic Orchestra, along with some of the sounds from Halion Sonic SE2, such as the GM and Yamaha S90 piano instruments seen loaded here.
Play mode presents the list of Players in a project much like a track list in a conventional sequencer, and where there’s musical data during a given range in the score, you’ll see these ranges represented by rectangular blocks, again, very much like a sequencer. If you expand these track headers, you can see and change what VST instrument that track (or Player) is assigned to, and the MIDI channel. But, more interestingly, where previously blocks were displayed, you’ll now see a miniature piano-roll editor, a bit like the in-place editors in Cubase’s Project window.
At present, the changes you can make in the editing lanes are somewhat minimal: you can change the length of a note (by dragging the end of the note to where you’d prefer it to be, which is slightly awkward as there’s no visual feedback while you drag), and you can delete the note using the eraser tool. However, during the beta period, I saw these track lanes also offering something akin to the controller lanes in Cubase’s Key Editor to show velocity and controllers, so these are some of the things that will no doubt be part of future updates.
Powering Dorico’s playback functionality is the same audio engine that’s used in Cubase, and this means that you can do more than just use VST Instruments in Dorico. With the inclusion of a Mixer window, each output from a VST Instrument has its own channel strip featuring four insert slots (for VST effect plug-ins, and many plug-ins from Cubase are included with Dorico), four EQ bands, four sends, and the usual volume, pan, mute and solo controls. By default, the first send is assigned to a reverb bus running an instance of REVerence, although this seems to be hard-wired at the moment so you can’t create additional effects busses.
Without wishing to be unduly mean, there is no getting away from the fact that, in its current form, the Mixer is the ugliest part of Dorico and a little incomplete, which is maybe why it’s one of the few Dorico features that’s hidden away in its own window! Given the single-window approach of Dorico, a logical place to show the mixer would be in a bottom panel, especially since Play mode currently doesn’t use this area.
When all the loose ends get tidied up, though, I expect Dorico will end up with the best playback abilities of any notation program; even in the first versions it’s capable of things not possible in the competition. And composers get the potential. “Dorico’s integration with the Cubase audio engine opens up a wealth of exciting possibilities for commercial composers,” commented Tommy. “The moment that highly polished musical demos will be instantly accessible from within Dorico, using musical notation as the focal point of a commercial music project will be so much easier.”
Cadential Extension
Steinberg are clearly onto something special with Dorico, and as you can tell from Daniel’s comments, he and his team are fully aware of what’s in Dorico and also what is not, and are working away on a series of updates to add polish and new features. One thing that impressed me during the beta was the speed at which the team worked. For example, when I received the first beta in August, you couldn’t even copy and paste! Dorico came a long way even in the few months before its release, and if you look at the progress made in the v1.0.10 update just a month after the v1.0 release, followed by 1.0.20, it doesn’t seem like anyone’s taking a holiday just yet!
The Dorico team clearly put most of their early development effort into building a fantastic overall architecture and engraving engine, perhaps at the expense of the application. But I think they made the right decision. If they had done the opposite, building in all the bells and whistles without giving as much thought to the architecture and engraving, the result would have undoubtedly been an inferior product with a weak foundation.
“If the architecture is good, and all that’s really wrong with it are the things that are missing, I think that’s a very promising place for us to be in,” remarked Daniel, “because you can’t fix architecture, basically. If you built the house wrong in the first place, then it’s never going to be a good house. But if you get the framework for it right and then you can furnish it the way you want to furnish it, then you’re going to have the house that you wanted. So I think that hopefully this turns out to be a positive for us in the medium term, or hopefully in the relatively short term.”
I think there’s a promising future for Dorico, and I can’t wait to write a full review in the coming months. Even in an article as lengthy as this one, I haven’t had chance to discuss every part of the program. In the meantime, though, anyone with an interest in notation should download the 30-day free trial and experience the first significant new notation program to appear in a very long time.
Writing Wrongs
There are many things that aren’t possible to ‘write’ in the first release of Dorico, and many of these omissions will undoubtedly raise a few eyebrows. For example, you can’t add first and second time repeat bars, chord symbols, fingerings, jazz articulations or rhythm slashes. And, on the other end of the spectrum, there’s a lack of avant garde techniques, which I think will disappoint the professional composers Steinberg would like to see using Dorico. However, Daniel Spreadbury had a very honest explanation for this.
“I’ve used this analogy before, but I see this like a bell curve, basically. If we’d spent time working on some advanced contemporary notation, but we hadn’t got, for example, beams working, or accidentals working, or slurs, or ties, or stave lines, or clefs, or dynamics, or tempo markings, or rehearsal marks, or lyrics, or anything else, then the program would simply not be useful for anybody at all. And that’s always the challenge that we’ve basically got. Nothing is quick in this world, particularly not to do things the way that we’re doing them, where we’re trying to imbue musical scores with a certain amount of semantic meaning rather than just slapping some text on the page, or slapping a symbol on the page.
“We’re building something here for the long term, and the long term does mean that yes, it’s going to take some time to put these features in, because you can’t build a good, high-quality feature in five minutes. So we’ve got to attack the bell curve, and if you’re attacking a bell curve you go for the middle, fat bit. You don’t go for the outliers at the beginning.”
When I probed a little further about the more modern composition techniques, Daniel continued: “It can already do a lot of contemporary techniques. It can do microtonality very well, it can do the beginnings of poly-meter and so on much better than the other programs, it’s got a great deal more rhythmic flexibility than any other program. So I think that we’re missing some of the avant garde techniques, but I think you can see from the bits we’ve already done that it’s not outside of what we’re aiming for.”
 Print mode lets you choose which Layouts to print, how to print them, and provides a large preview area to see what the output will be.Print mode is arguably the simplest of Dorico’s five modes. Its name speaks for itself — it’s where you print the score — and it is dominated by a large preview of the print job in the music area.
A list of all Layouts is provided in the left panel, and you can select one or more Layouts to be printed when you press the Print button. Each Layout has a number next to it, which can be adjusted with the accompanying plus and minus buttons, and this sets the number of copies that should be printed for a given Layout. The right panel contains various print options common to most Print windows, such as range of pages to print, the page setup, and also more complex options for duplex printing. And you also get the option of various annotations to the pages, such as the date and time, and a watermark, which will display custom text right across the score in a light-grey appearance.
Bravo, Bravura!
One of the most important aspects to any notation software is the music font used to render the notation, and Dorico features a brand new music font called Bravura that was designed by Daniel Spreadbury. However, in designing Bravura, Daniel didn’t just design a font: he came up with a whole new standard for how musical symbols should be mapped in fonts.
![Product marketing manager Daniel Spreadbury (right) with composer Thomas Hewitt Jones at the launch of new composing software Dorico [photo (c) Steinberg Media Technologies GmbH].](https://dt7v1i9vyp3mf.cloudfront.net/styles/news_large/s3/imagelibrary/d/dorico10-wneJa_upz2.42nH35b2j6ihWy9UCTYhe.jpg "Product marketing manager Daniel Spreadbury (right) with composer Thomas Hewitt Jones at the launch of new composing software Dorico [photo (c) Steinberg Media Technologies GmbH].") Product marketing manager Daniel Spreadbury (right) with composer Thomas Hewitt Jones at the launch of new composing software Dorico [photo (c) Steinberg Media Technologies GmbH].The motivation for defining SMuFL (Standard Music Font Layout) came from the fact that different music fonts, whilst often sharing some common mappings, are often inconsistent or incomplete, which makes it difficult to switch music fonts in a notation application and be guaranteed a correct rendering. SMuFL aims to solve that, and Dorico itself is compatible with any music font that conforms to the standard, which is now being developed by an independent standards group called the W3C Music Notation Group.
Product marketing manager Daniel Spreadbury (right) with composer Thomas Hewitt Jones at the launch of new composing software Dorico [photo (c) Steinberg Media Technologies GmbH].The motivation for defining SMuFL (Standard Music Font Layout) came from the fact that different music fonts, whilst often sharing some common mappings, are often inconsistent or incomplete, which makes it difficult to switch music fonts in a notation application and be guaranteed a correct rendering. SMuFL aims to solve that, and Dorico itself is compatible with any music font that conforms to the standard, which is now being developed by an independent standards group called the W3C Music Notation Group.
After Daniel finished Bravura, the team made the bold decision to release it — years before Dorico itself was finished — under the SIL Open Font License, meaning that it’s free to download, use, embed and redistribute. I was particularly curious about how they came to this decision.
“There were a few things going on really,” explained Daniel. “One thing was that we knew it was going to be years before we had anything in the marketplace, and so we wanted, in various different ways — my blog was part of it, working on Bravura was part of it — to show the market we were serious about what we were doing. I also just genuinely have a strong belief in the importance of openness wherever it can be done, and obviously we work for Steinberg, we’re working on proprietary software, but we can make contributions to things that are more open-source-like. And wherever we can do that, we want to do that, which is another part of it.
“Although Bravura does represent an enormous investment of time and therefore money on Steinberg’s part, since it took me the best part of a year to do, it’s only one tiny part of what makes Dorico look good. I think if we were worried about Bravura being the secret to what makes Dorico’s scores look good, then we probably wouldn’t have released it. There’s so much more that goes into making a page of music look beautifully balanced than just the font, although the font is a huge and important part of it. And to see the places where Bravura’s being used has been really fascinating and thrilling for me over the last couple of years.”
Indeed, because of the decision to make Bravura freely available before the Dorico release, Dorico wasn’t even the first application to use Bravura! It’s the music font that drives StaffPad, it can be used with MuseScore, many iOS applications make use of it, and Logic Pro X has even offered Bravura support since version 10.1! So it seems to have been a great success. And there are also many independent designers working on SMuFL-compatible fonts such as November 2.0, which is available from Klemm Music; also Leipzig, which is available as part of the Verovio music engraving library; and Gootville.
I really think Steinberg and the Dorico team are to be applauded for the SMuFL initiative, and the availability of Bravura means there is now a free, high-quality music font for anyone to use.
Get On The Forum
Some users may find getting into Dorico a little challenging, as there is currently no manual to explain all the program’s vast array of secrets. However, there is a help file available that launches in a web browser, and this is helpful in explaining the basics. There are also introductory tutorial videos on Dorico’s YouTube page (www.youtube.com/dorico) that are worth watching.
But the single best place to learn and share experiences is Steinberg’s official forum for Dorico, where Daniel and other member of the team spend a great deal of time answering questions and providing information, such as an FAQ, and an invaluable PDF that documents all the possible inputs for the various pop-overs. Make sure you’re sitting down before you open that file!
Compatibility
- Dorico is a 64-bit application that requires a minimum of 4GB memory (although 8GB is recommended) and 12GB free storage space.
- The Mac version can run on either El Capitan (Mac OS 10.11), or the latest Mac OS, Sierra.
- On Windows, Steinberg state that only Windows 10 is supported, although I do know of people who have used it successfully on Windows 8 — proceed at your own risk!
- One pleasant thing to note is that Dorico supports HiDPI screens on both Mac OS and Windows, and the application looked great on my Surface Pro 4.