The focus is on better project management in this month's Pro Tools workshop, as we explain the advantages of using template Sessions, and look at some tools that can help you avoid data loss.
Many Pro Tools users find that they frequently work on projects where a number of different Sessions are required, but there's a lot in common between each of these. For instance, if you're recording an album with a band, there are likely to be numerous similarities in instrumentation, effects and processing across all the album tracks. In these circumstances, you can save a lot of time by creating a single template Session as a starting point.
 To create a template, you build your Session in the normal way, adding tracks, plug-ins, routing and I/O settings to suit. Once you've saved and closed this empty Session, you can use your computer's operating system to configure it as a template.
 Template Sessions are very handy where you have multiple projects that require, for example, the same monitoring or routing arrangements. On the Mac, find the session you have just created in the Finder, single-click it to highlight it, use Get Info (Command+I) and set to Stationery Pad, then close the window. Now when you open the template Session Pro Tools offers you two options: Edit Stationery or Create New Session. If you choose New Session, Pro Tools asks you where you would like to save it on your system, and you can then use the new Session as a starting point for your project.
 On Mac OS X, the Stationery Pad option in the Get Info window is used to tell the operating system that a file should be treated as a template. On Windows machines, you need to find the Session you have just created, right–click the file and select Properties. Under Attributes, tick the Read Only box, and then click OK. (If you ever want to modify your template Session, you will need to untick Read Only, make your changes, save and then re-tick Read Only.) To use this template Session, open it in the usual way, then hit Ctrl+S to save. Pro Tools will ask you to give the Session a new name, and your original template will remain unchanged.
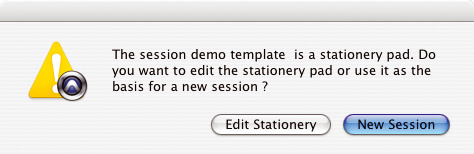
Template Tips
- You may want to add audio and MIDI to a template Session if it is likely to be used across most of the Sessions in the project.
- Because of how OS X is designed, on Mac systems you should either drag your template Session icon to the Pro Tools icon in the Dock or use the File / Open menu. Don't double-click the template Session: this will create a copy of the template in the same location on your system and you won't be offered the option to Edit Stationery or Create New Session.
- It is recommended that you have your template Session on the same drive as you want to record onto. This keeps Disk Allocation as simple as possible. If you don't, you can end up in a situation where Pro Tools starts to record audio onto the drive which has the template on, which can lead to confusion and, even worse, missing audio.
Making Connections
Talking of drive management, I am often asked what is the best way to connect external drives to a Pro Tools system, especially one that uses a Firewire interface, such as the M Box2 Pro or 003 range. It's a messy area, so I'll outline the issues and explain the options with their benefits and pitfalls.
The official line from Digidesign is that the second Firewire port on their Firewire interfaces is not intended for external hard drives or other storage devices, and that using it for this purpose may result in what they describe as 'unexpected behaviour'. They recommend that the interface should be connected as the last device in the Firewire chain, or preferably be connected to a dedicated Firewire port.
The reason they suggest this is that if the interface loses power, any drives daisy–chained off it would lose contact with the computer, which could lead to serious data loss. However, if you follow their recommendation and connect drives to the computer so that the interface is last in the chain, it isn't possible to hot-swap the drives, as Pro Tools will lose contact with the interface and complain!
Using a separate computer Firewire port for the interface is obviously the best option, but lots of computers have only one, so what I do is use a Firewire hub. I have to warn you that this isn't recommended or approved by Digidesign, but my experience has been very good. It makes it possible to hot-swap drives without disconnecting the interface; I have found that occasionally Pro Tools will complain that it has lost contact with the interface, but usually it will allow you to dismiss the warning and you can continue as normal. Only on the odd occasion has Pro Tools complained again and needed a restart.
Another benefit of using a Firewire hub is that it can act as a protective buffer to the computer's sole FW400 port. There is plenty of evidence of Firewire ports getting damaged when users hot-swap drives incorrectly. If a Firewire cable is inserted incorrectly, it is very likely that the Firewire port on the host and/or the drive will be permanently damaged. On many computers the Firewire port is attached to the main motherboard, so if the port is damaged, you are faced with an expensive repair bill. However, if you use a Firewire hub, it is likely to be the hub that gets damaged — and that will be much cheaper to replace.
Firewire is designed to support hot–swapping, but there are risks associated with it. If you do hot-swap your drives, whatever your Firewire configuration, you must remember to un–mount the drive from within the Pro Tools Workspace Browser. If you try to un–mount a drive from the Desktop while Pro Tools is running, at best the OS won't let you, but at worst you can suffer data loss. The safest policy is not to hot-swap, and ideally to shut down and turn off your host computer, but at least to quit Pro Tools before swapping drives.
Backup Tools
Talking of data loss, you may remember that we looked at some backup procedures in the June and July 2007 issues (see www.soundonsound.com/sos/jun07/articles/ptworkshop_0607.htm and www.soundonsound.com/sos/jul07/articles/protools_0707.htm respectively). Since then, a couple of plug-ins have come along that could help in this area: Synaptricity's Flashback and Steven Massey's Slacker.
 The idea of Flashback is that you will 'never miss the recording opportunity', as it is always recording in the background, so you can make the decision to write the audio to Pro Tools after the event. Flashback is a plug-in that uses your computer's RAM to buffer up to the last 15 minutes of live audio on any track, including the master fader, enabling you to go up to 15 minutes 'back in time', retrieve the audio and save it. It captures any incoming audio at full Session bit–depth and sample-rate, until you need it to save the otherwise-lost audio to a track, by clicking Freeze in the RTAS plug-in and Process in the matching Audiosuite plug-in.
This plug-in looks like a real life-saver for capturing that 'once in a lifetime solo' that you didn't record on the run-through because it was only a run-through. You insert the plug-in on a channel you want to 'protect', and it records into the RAM buffer all the time, whether Pro Tools is playing, recording or stationary. Synaptricity also suggest using Flashback as a Master Fader insert so that it captures everything going through the mixer, and outline a number of possible scenarios for this. You can set the buffer size from one minute up to 15 minutes; if you're using a number of instances of this plug-in, you need to make sure you have enough memory, and the Flashback manual has some tables to help you work out how much you can use.
![]() In HD systems, Flashback needs to be paired with a TDM plug-in to work properly.Once installed, I found Flashback in the Delay group of plug-ins, which is a strange category to put it under. To start with I inserted it on a vocal channel to capture anything the singer might get up to. We did a run–through, and at the end I hit the Freeze button on the plug-in window, followed by the 'RTAS — Audiosuite' button. Then I opened the corresponding Audiosuite plug-in, placed the cursor on the track, hit the Process button and got a blank Region! It dawned on me, of course, that Flashback is an RTAS plug-in, and on HD systems RTAS plug-ins are put into bypass when you go into Record or Input Monitor, as I was. As the manual explains, the workaround is to insert a TDM plug-in before the Flashback plug-in.
In HD systems, Flashback needs to be paired with a TDM plug-in to work properly.Once installed, I found Flashback in the Delay group of plug-ins, which is a strange category to put it under. To start with I inserted it on a vocal channel to capture anything the singer might get up to. We did a run–through, and at the end I hit the Freeze button on the plug-in window, followed by the 'RTAS — Audiosuite' button. Then I opened the corresponding Audiosuite plug-in, placed the cursor on the track, hit the Process button and got a blank Region! It dawned on me, of course, that Flashback is an RTAS plug-in, and on HD systems RTAS plug-ins are put into bypass when you go into Record or Input Monitor, as I was. As the manual explains, the workaround is to insert a TDM plug-in before the Flashback plug-in.
 The audio that's captured by the Flashback RTAS plug–in can be inserted onto a track using the Flashback Audiosuite plug-in, but is not time-stamped, so you'll have to move it 'by ear'.So, with my TDM plug-in in place, we had another go, and this time it worked as expected. However, as Synaptricity make clear, there is no time-stamp on the RAM files, so there is no easy way to sync up the files created by Flashback: you will have to line them up by eye and ear afterwards.
I had high hopes for this plug-in when I first heard about it, but most of them have been dashed (although, to be fair to Synaptricity, they may have been a little unrealistic!). Not being able to sync up the Flashback files means a lot of trial and error to get them in the right place. In addition, covering a multitrack Session on a track–by–track basis would be very difficult, as you can't hit a master Freeze button for all active instances, and using it in the Master Fader limits you to the mix you have going through the Pro Tools mixer.
To cover that 'killer solo' moment on the first run-through, surely the easiest thing to do is to put Pro Tools into Record anyway, or, failing that, use Quick Punch (see the workshop on Quick Punch and Track Punch in the December 2006 issue, on-line at www.soundonsound.com/sos/dec06/articles/ptworkshop_1206.htm) to capture that apparently unrecorded solo. If I were trying to capture an improvisation over a loop, which is one of the scenarios outlined in the Flashback manual, I would use Loop Record and just keep going till I got 'the one', which would be time-stamped and ready to use in the Session.
The unique feature of Flashback is its ability to capture audio when the Pro Tools transport is not playing or recording, and I am sure that will save someone's life more than once, but as a safety tool during normal session work, I am not convinced of its usefulness.
$199 from Synaptricity web site or £165.68 including VAT from Digistore.
www.synaptricity.com/productsflashback.html
Slacker
![]() Steven Massey's Slacker is an experimental tool for performing automatic backups of your Session's audio files (if you want to know more about Steven, take a look at the Pro Tools workshop in the September 2006 issue: www.soundonsound.com/sos/sep06/articles/ptworkshop_0906.htm). Slacker comes as part of his free Massey Tools set of plug-ins, which also includes a high-resolution audio level meter; this, too, is in the early stages of development, so that to reconfigure the meter you have to edit the Preferences file. The third plug–in, Listen, is, as Steve describes it, "the opposite of a meter plug-in". I will let you try it out yourself, so you can benefit at first hand from the improvements to your mix that this plug-in will bring.
Steven Massey's Slacker is an experimental tool for performing automatic backups of your Session's audio files (if you want to know more about Steven, take a look at the Pro Tools workshop in the September 2006 issue: www.soundonsound.com/sos/sep06/articles/ptworkshop_0906.htm). Slacker comes as part of his free Massey Tools set of plug-ins, which also includes a high-resolution audio level meter; this, too, is in the early stages of development, so that to reconfigure the meter you have to edit the Preferences file. The third plug–in, Listen, is, as Steve describes it, "the opposite of a meter plug-in". I will let you try it out yourself, so you can benefit at first hand from the improvements to your mix that this plug-in will bring.
Slacker comes in the form of a mono RTAS plug-in that can be inserted anywhere in a Session. It does not affect audio on that channel, acting like a permanently bypassed plug-in, and you only need one instance of it in a Session.
Whenever the Session transport stops, the plug-in will copy any newly created audio files in the Session audio folder to a specified backup destination. The square indicator next to 'Backup Path' in the UI will turn red to indicate disk activity. On an HD system, the plug-in clip indicator will also turn on during disk activity. If you're working with a very dense Session, Steve suggests that "you may wish to wait until the disk activity completes before restarting the transport".
Once the plug-in is inserted on a mono track somewhere on your Session, you need to click the area that says 'Click here to select backup destination folder' to configure a suitable backup location. Obviously, to make maximum use of this plug-in you should choose a folder on a different hard drive from your Session folder. Now, whenever you finish recording some audio, Slacker kicks in and copies any new audio files it finds in your Session's Audio Files folder to the backup location.
I tried it on a Por Tools Session we were adding some vocal overdubs to, and sure enough, as soon I had stopped recording, the red lights showed in the plug-in window. I was surprised at how long they stayed on for, given that we had only added a one–minute mono file to the Session, so I took a look at the backup folder, to find that Slacker was busily backing up all the audio files in the Session, and not only the one we had just added! I also found the plug–in reacted so quickly that it didn't pick up that I had renamed a file immediately after recording. However, the next time I stopped recording, Slacker copied the renamed file across, leaving the original file intact in the backup location as well.
Overall, I found this little freebie, even in its v0.2.1 state, much more useful in protecting me whilst working than Synaptricity's Flashback. It would be great if Slacker would copy the Session file too — maybe Steve could get it to look at the Session Backup folder and back up the latest Session file every so often as well? In conjunction with the audio file backups, it would then be relatively easy to reconstruct a Session if the main drive failed.
I would recommend you try the Massey Tools bundle for yourself, and I know Steve would love to hear from you with your experiences of them. I certainly plan to run Slacker on Sessions where I am tracking. In the July 2006 Pro Tools workshop on backups and archiving I described my previous approach, which used Synchronise! X Plus to backup my Session folder; this had to be run manually during tea breaks and so on, which has meant that until now my backups could be up to an hour or so out of date. With Slacker, I know that within seconds of hitting the Stop button all the audio will be backed up.
Free
All Workspace And No Playback?
 One of the new features in Pro Tools 7.4 is the option to start and stop playback of your Session while working in the Workspace Browser. There are two different keyboard shortcuts that you can use to start and stop Session playback. The first is the space bar and the other is the zero (0) key on the numeric keypad, providing you have Transport selected in the numeric keypad preferences on the Operations tab of the Pro Tools Preferences window.
When the Workspace Browser is the active window, these two shortcuts have different functions. The space bar starts and stops playback of selected samples in the Workspace Browser, while the zero key will start and stop playback of the main Session in the Edit Window. This arrangement makes it easy to preview loops and samples alongside your entire Session, without ever needing to leave the Workspace Browser.


