If you play live regularly, sooner or later someone will suggest that you use a backing track on stage to enhance your performance, so here's how to go about creating them, based on experience learned the hard way!
An incredible number of pop artists now use backing tracks, with applications ranging from total playback with a miming band (as on most TV shows) to a full band playing live, augmented by a few pre-recorded sounds and backing vocals. The latter approach is pretty much the norm for live pop shows these days. However, despite the ubiquity of backing tracks, putting together backing tracks and triggering them on-stage isn't necessarily a walk in the park, as I've found out through long experience as a live drummer. So in this article, I'm going to show you how to get the best results with live backing tracks, as well as providing tips for avoiding common pitfalls.
Simple Two-track Playback
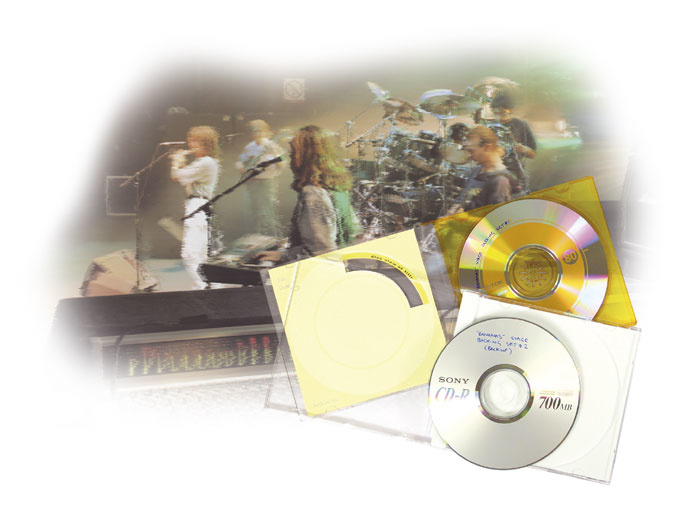
I'll start by dealing with simple two-track playback from CD, DAT or Minidisc. In a two-track backing track, track one (or the left channel of a stereo recorder) should be designated the 'click channel' (heard only by the musicians on stage), while track two carries the pre-recorded audio you want the audience to hear.
The click channel is solely for the band's (and specifically, the drummer's) benefit, and needs to be carefully put together. I detailed how to create suitable click tracks back in SOS August 2003, so I won't cover that ground again here, but it is worth mentioning that, in a live context, the click channel can also double as a cue track. In the heat of a gig, you wouldn't believe how easy it is to dial up the wrong index number on a DAT machine or CD player, so it's good practice to precede each song in the set with a recorded announcement of its name on the click/cue channel.
To avoid uncomfortably long gaps between tunes, this should be kept brief — if the song is called 'My Bananas Are Covered In Fluorescent Green Sump Oil', restrict yourself to saying 'Bananas', and start the two-bar count-in click a second or two later. This way, you can be confident that you're about to play the correct song!
One pitfall with CD-Rs is that their indexes sometimes start fractionally after the first click of a count-in, cutting off beat one and leaving the drummer in rhythmic limbo. Starting each song with a recorded spoken ID prior to the count-in will prevent this happening; if the CD index cuts off part of the ID, then it won't be the end of the world.
Setting Up A Good Ending
 When creating a mono music mix for a two-track backing disc/tape, it's advisable to trim the start to avoid a distracting burst of background noise before the music begins.The end of a song is as important as its start — remember to program the click so it stops when the track finishes, otherwise the drummer will be tempted to play on, thinking there must be another round before the finale. Once the final pre-recorded sound has died away, leave at least two minutes of space on the playback machine to give the drummer time to down sticks, pull a 'thank you' face at the audience, halt the playback, look at the set list and work out what index number needs to be selected next. (If you're working with a tape-based medium like DAT and later decide to extend a song, this space could be used to accommodate a longer arrangement.)
If you use shorter inter-song gaps, there's always a danger that the next song will start before you've finished playing the last chord of the previous one. Better to give yourself a generous margin, even if the extra recording time means having to use more than one playback disc or tape. In fact, if your show features two sets, it's advisable to use a separate disc or tape for each set anyway, as, if one gets damaged or lost, at least half the show will still be ready to roll!
I think it's pretty essential that a band member (usually the drummer) should be in control of the backing-track machine, rather than an off-stage tech. A technician is much less likely to know when there has been a cock-up in the arrangement (such as the singer coming in four bars early), and so know when to abandon ship and turn off the playback.
A Cautionary Tale: How Not To Do On-stage Playback!
A famous pop band of the mid-'80s (mainly known for their singles and videos) were unable to replicate their 'produced' record sound on stage, so were reluctant to attempt any live gigs. But then some bright young spark told them that it could all be possible if they went out on tour with two Fairlight III sampler/sequencer units (the happening machines of the day, costing a mere 30 grand each). The lead vocals from their studio tapes, along with some sequenced keyboards and percussion, were duly transferred to the Fairlight, and the group set off to do their first ever live (or shall we say, 'partly mimed') concert, accompanied by a four-piece band who would play along with the Fairlight sequences.
Despite its astronomical price, the Fairlight III held only 14MB of sample RAM, so the plan was to alternate machines throughout the gig, one machine playing its samples, while the bright young spark loaded up the other ready for the next song. Sadly, the plan didn't work out. Tragedy struck when both Fairlights crashed early in the gig, leaving the bemused stars with no vocals to mime to. After telling jokes to an increasingly fidgety audience for 25 minutes, they admitted defeat and slunk off stage, where they presumably rediscovered their vocal prowess in an intensive swearing session directed at the bright young spark and his f***ing Fairlights!
The moral of the story is always to have a back-up plan, and don't base your show so heavily on backing tapes that you can't actually play the show without them. Remember the old technicians' motto: if it can go wrong, it will — and usually on your most important gig.
Preparing Your Two-track Master
Using a two-channel playback system means that all the 'audience mix' audio on track two (the right channel of a stereo recorder) has to be pre-mixed in mono. If the original elements of your playback audio are stored in a multitrack hard disk format, you can use the system's built-in mixing facilities to constantly update the mono mix during rehearsals, production rehearsals, and even during soundchecks while you're out on tour. But at some stage you'll have to commit to a mix and record it, so here's how best to do that.
Start off by reducing any stereo sound sources (keyboards, samplers, stereo backing-vocal submixes and so forth) to mono. The best way is simply to pan the left and right channels into the centre — centralising sounds often makes them appear louder, so do this before you start mixing. Keep an ear open for phase problems; if the left and right channels of a stereo item were accidentally recorded out of phase, they will phase-cancel when combined in mono, causing the signal to get quieter or even disappear altogether!
 Mixing a stereo file to create a mono backing track can cause problems if one side of the file is out of phase with the other. Most software sequencers have built-in facilities for real-time phase inversion, allowing you to sort out such problems, but if yours doesn't then you can usually use a sample editor to apply an off-line phase inversion process to one side of the audio file instead.Such a problem can easily be cured by reversing the phase of one side of the stereo signal, but if your mixer lacks channel 'phase' buttons, you'll have to resort to rewiring an audio lead to reverse the phase. If you're working on your computer, you may be able to invert one side of the stereo file using your software's sample editor if there is no real-time phase-inversion facility.
If your playback uses loops, check that they are looping properly, quantised if musically necessary, and not speaking late because of poor sample trimming. Excessive MIDI traffic can cause timing wobbles, so always listen to loops against the click before recording them. Don't try to cram too many elements into your mono mix: a blend of loops, sequenced percussion and backing vocals is OK, but if you start piling on too many additional elements like church choirs and glockenspiels, it's going to start sounding a bit obvious to the audience. As a rule of thumb, go for a sensible balance which sounds musical, and don't overdo it with EQ or effects.
Mixing, Editing & Backing Up
I often mix some of the rhythm elements from the backing track (loops, percussion, quantised keyboards and so on) into the click track as well, because this makes the click a bit easier to groove to. (It's also much nicer to have these elements in your headphone mix rather than coming out of speakers, which may be some distance away and therefore sounding very delayed in relation to the click. Remember, every metre introduces around 3ms delay!) If musical elements are to be added to the click in track one, it's probably best that the drummer oversees the mix, as the balance of the click versus the music is absolutely critical.
It can be very hard to judge the playback mix while you're at home in your studio, especially if your studio uses small speakers. Large PA systems give a very different bass response, and rehearsal-room monitor speakers will introduce their own 'idiosyncratic' tonal characteristics! When it comes to committing to a mix, a practical solution could be to take your original multitrack machine (be it ADAT, Tascam eight-track, computer or whatever) to the rehearsal room along with a small mixing desk. Then you can set up each song and have the band play along to it, while a band member stands in front of the PA speakers and makes a judgement about the mix of the mono playback material.
The two-track mix you're creating is really two simultaneous mono mixes, so you'll need to send it from two independent outputs of your mixing desk (not the main stereo outputs) into your recorder. Once you feel you've reached an optimum balance, commit your click/cue track to the left channel of your CD-R/DAT/Minidisc while recording the playback 'music mix' to the right channel. Be careful to write down the record level settings, as you will need to repeat these levels with all the other songs you mix.
When recording, mute all the channels on the desk (except the click track and announcement) until a fraction of a second before the music starts. This will avoid a huge, distracting hiss belching out of the PA on the front of every song. Alternatively, you could import all the mixed two-track files into a computer or DAW and clean them up by 'topping and tailing' before making the final digital master.
When you've finished recording the whole set, make back-ups of everything and give the back-ups to a responsible band member or tech, for safekeeping in a different location from the masters. Unless you're extremely unlucky, flood, fire or other acts of God should then only destroy one set at a time!
Using Multitracks On Stage
 Roland VS2480 digital multitracker.The problem with mono playback is that, once you've set your mix, you're stuck with it. This inflexibility is not ideal, and when out on tour playing in different venues and acoustic situations, you may find that some things no longer sound right — some nights the tambourine in the pre-recorded mix might sound fine, other nights it might seem incredibly accentuated. BVs can suddenly appear too loud, and reverbs that you set in a dry rehearsal room turn out to be excessive when played in a venue with lively acoustics. The only way to cope with these variables is to use multitrack playback.
If you record a number of the separate musical elements to different tracks of a digital multitracker, such as the Roland VS2480 or Yamaha AW2816, this allows you the flexibility to adjust the mixes of your backing tracks at rehearsals and soundchecks.
Multitrack playback gives the sound mixer a far better chance of doing his job well. Having the playback sounds on separate tracks means that their channel EQ can be varied to suit each venue's acoustics, which makes it easier to blend the pre-recorded and live audio.
Sensible, consistent track laying will greatly help the sound mixer, so make sure the same sounds appear on the same tracks throughout the set: for example, sequenced percussion and loops could go on tracks one and two, bass lines on track three, BVs on track four, stereo keyboards on tracks five and six, and so on.
Any pair of tracks designated as stereo should remain stereo throughout the set, to save the sound engineer having to change desk pan positions — however, if necessary you can use a designated stereo pair to play a mono signal by recording the mono noise on both tracks. The highest-numbered track should usually be reserved for the click/cue track; in ADAT playback, for example, the click should be recorded on the recorder's track eight.
As with a mono mix, make sure that your levels are consistent throughout the set. The click level should never vary, and the levels of other sounds need to be musically compatible from song to song — if the sequenced percussion suddenly doubles in volume during your fourth song, the sound mixer won't be best pleased.
Recording multiple tracks simultaneously obviously requires a mixer with multiple busses, but at a pinch you can squeeze extra outputs out of any desk by using its echo and foldback sends, set to pre-fade to maintain independence from the channel's fader level.
A Real-world Example
 AW2816 hard disk workstation.By way of an example, have a look at the track layout and output assignments shown in the grey box. It's for a song I've been playing recently with a live band, using the Yamaha AW2816 hard disk recorder for playback. All the audio was transferred from a 24-bit Pro Tools system via an ADAT bridge into an ADAT interface card installed in the back of the AW2816. No machine synchronisation was involved, but the AW2816 was slaved to the Pro Tools word clock.
The AW2816 has six outputs. The click on track eight and the vocal cues on track 16 go to output three, which is connected directly to the drummer's headphone amp; I also like to mix in a small amount of the other tracks, so everything appears in my headphones and the percussive stuff feels comfortable with the click. Output four is used to send the click to the rest of the band's in-ear monitors.
In my headphones, the click plays throughout the song, but the band only hear it when I'm not playing (for example, during a song intro played on bass only). This sounds complicated, but is easy to do using the AW2816's automated mixing facilities — you just unmute the click in output four only for the sections on which the drums aren't playing.
We mixed the first seven tracks to outputs one and two (the main stereo outputs) for the front-of-house engineer. During production rehearsals (and even soundchecks) he makes requests about each song's mix, and I adjust the levels to his liking as the tour goes on — sometimes it's merely a question of tweaking the relative overall level from one song to another. I've found that it usually takes three gigs or so until the engineer becomes happy with all the mixes, after which we hardly ever change them.
Track Mix Element
1. Percussion loop (left channel)
2. Percussion loop (right channel)
3. Backing vocal harmony one
4. Backing vocal harmony two
5. Hammond (left)
6. Hammond (right)
7. Banjo
8. Click
9-15. (left empty)
16. Vocal cues (for the drummer's headphones only)
AW2816 Output Mix
1. Front of house mix (left)
2. Front of house mix (right)
3. Drummer's headphones
4. Rest of band's headphones (via monitor desk)
Encore!
That's all for now, but look out for more tips on honing your live performance and on-stage sound coming up in forthcoming issues.