Digidesign unveil a suite of powerful new mixing and automation features with this major HD release of the Pro Tools software, and throw in a surprising number of other goodies at the same time.
Only six months or so after the launch of Pro Tools 7 (see the review in January's SOS: www.soundonsound.com/sos/ jan06/articles/protools7.htm), the next major release is being previewed and shown at various trade shows, and looks nearly ready for release. Version 7 was the big GUI overhaul, and saw great strides taken in the area of music composition. Since then, we've had 7.11 to add native support for Intel Macs, the beefed-up Music Production and DV Toolkit 2, and the Hybrid and Xpand! Instruments. Version 7.2 adds a large array of new things, but the biggest single theme is a suite of high-end mixing and post-production features. It's a HD release, and is particularly useful if you have an Icon controller (reviewed in last month's issue), but a number of features will inevitably make it into subsequent LE and M-Powered releases. The official release date is 'second half of this year', but the beta I saw was solid, with only a few behavioural bugs to iron out, so there's a good chance it'll be out not long after you read this.

Pro Tools is used in such a wide range of environments that there are always several parallel lines of development running. The major line that surfaces in 7.2 is the project that started in 6.9: adding mixing and automation features that bring Pro Tools (and in particular Pro Tools plus Icon) up to the level of the high-end monster mix consoles found in film mixing theatres and top-flight music mix rooms. Most of these features are particularly fast and powerful when you're sat in front of a D-Control or D-Command — the bigger and smaller members of the Icon family respectively — but many can also be accessed from software, and some of the supporting features like the new group and editing functionality, and right-clicking, will probably make it into LE too.
Groups
Pro Tools ' track grouping system, which has not changed for several years, has been given a makeover in 7.2. There is an entirely new Groups dialogue which appears when you create a group, and also when you choose the new Modify Groups command. As well as the familiar options there are three new tabs: Tracks, Attributes and Globals. The Tracks tab lets you add or remove tracks, which up till now has been very fiddly. As the screenshot (right) shows, the Attributes tab gives you complete flexibility over which elements of mixer channels are linked, including some newly group-able parameters such as plug-in controls. You can store six presets (which are available to all Sessions) for commonly used configurations, plus a default set, which is set up in the Globals tab. You can then set groups to either follow the Global linking scheme, a preset, or a unique combination of attributes.
Panners can now be linked, whereas previously they were always independent of groups. Like faders, the panners maintain their relative positions when moved as a group. For example, you could have two grouped audio tracks that you've recorded a stereo mic pair to. With the panners linked, you can set a width (using the 'clutch' key to temporarily break the group), then set a position with the pans grouped. This common technique was not really possible before, as the pan linking on stereo tracks is either absolute, or mirror image. While we're on the subject of panning, you now have the ability to link the pans on sends to the main pan. Send windows now have a new FMP button (Follow Main Pan); a preference sets whether FMP default to on or off. Previously, when setting up headphone mixes, alternate mixes, or stereo effects sends, if you wanted to maintain the panning from the main mix you had to set it up manually or use the Copy to Send function. I hope this feature makes it into LE, which doesn't have the Copy to Send option.
Go With The Flow
As well as making Pro Tools ' automation more powerful, one of the clear goals in the last few releases has been to make as much as possible work during playback. Version 6.9 added the ability to switch automation modes and suspend/resume automation during playback. We also got Auto Match, Snapback and Join, allowing on-the-fly punch-out and resumption of automation recording. Version 7.2 continues this trend. Automation graphs are now drawn on-screen in real time as they are written, as are waveforms when recording in Quick Punch mode. The extremely useful Write to End/All/Next buttons in the Automation Enable window no longer stop playback when invoked. The irritating warning message that used to pop up as soon as you hit one of these buttons now waits until you press Stop, or is disabled entirely in the preferences.
Digital VCAs
Alongside the redesign of the existing group system comes a whole new way to control grouped tracks: VCA Master faders. VCA Masters are an idea borrowed from analogue mixing consoles. A traditional VCA Master fader adjusts the VCA (Voltage Controlled Ampilifier) gain in other channels, so for example the levels of all your drum tracks can be scaled with one fader. Traditionally, this saved the need to have motorised faders on all channels, and meant that you didn't have to buss all the tracks to one group (submix). Obviously, Pro Tools doesn't have any such limitations, but there are some advantageous working methods that come with this concept, and lots of mix engineers are accustomed to using them.
 The Attributes tag of the new Create Groups dialogue.A VCA Master fader is created with the standard New Track command, and is assigned to an existing mix group from the standard output selector. All the faders in the group then respond to the VCA Master as though it was a track in the group, but with some important differences. Firstly, the rest of the tracks will no longer affect each other when moved. This means that you can alter the balance within the group without having to hold down the 'clutch' key, using the VCA Master to set the overall level. The Master has Mute, Solo, Record Arm and Input Mode buttons, which control the same buttons on the grouped tracks intelligently. Pressing Mute or Solo has the same effect as doing so on all the grouped tracks, but their previous state is remembered, so if a track was muted to begin with, it will remain muted when you un-mute the VCA Master. Soloing a track in the group while the VCA Master is soloed overrides the group. Likewise, tracks you wish to record on must be armed individually; in other words, the VCA Master's Rec button toggles record status for tracks that were already enabled. On D-Control and D-Command, all VCA Master faders can be accessed in the centre section as part of the Masters custom group. Another cool feature is the ability to immediately summon all the members of a VCA Master's group to appear in the Custom Faders area.
The advantages of using VCA Masters are similar those gained by bussing your grouped tracks through an Aux Input track. You can adjust the overall level of the group from one place, without fighting against automation on the tracks, and you get a second stage of automation if you automate the VCA Master. However, there are some differences between using a VCA Master and an Aux buss, and reasons why you might use both. Firstly, when you buss tracks, you typically might put some compression on the Aux Input, allowing you to compress the whole submix at once ('buss compression'). If you use the same Aux track to adjust or automate the submix level, you are doing so post-compression. However, if you use both a VCA Master and a submix Aux, you can control the level of the submix feeding the buss compression. That's a creative choice, but there are also some handy new features that come with VCA Masters when it comes to handling automation. The screenshot on the previous page shows an audio track and a VCA Master that is controlling it. A new blue graph appears in the volume automation view, displaying the effect the VCA Master has on the track's fader position. At any time you can use the new Coalesce VCA Master Fader Automation command, which 'flattens' the automation so that the blue line graphs on the grouped tracks are hard-written as automation. At this point the automation on the VCA Master is 'reset', ie. removed.
Iconic Features
A number of new D-Control and D-Command features arrive with 7.2. You can now use the jog wheel for various extra tasks, such as scrolling, zooming and banking channels up and down the surface. You can now move your faders freely up and down the surface, positioning your Session's mixer channels anywhere within the available physical strips. There are more options for how many faders get used for Custom Faders. Additionally, you can now stop faders from being included when you edit plug-in on the strip encoders. This means you can still control the faders on tracks that have been hidden by Custom Plug-in mode.
A very welcome new feature allows you to specify your default EQ and Dynamics plug-ins, then add them instantly to any track and insert slot at the touch of a button. Once your defaults are chosen in the Preferences, you can switch to Inserts mode, then hold the EQ or Dynamics button and press the Select button on any encoder where you want to insert the plug-in. Probably the most useful new feature is that the Do To All and Do To Selected buttons can now be used for one action, without you needing to remember to switch if off. Pressed once, they flash until you've completed your global action. You can also hold them down while you perform several tasks. The buttons can still be latched on as before by a quick double-press.
Keeping Trim
Before you start thinking of the ways you might use VCA Masters when automating complex mixes, you should know there's yet another new option. Auto Trim mode is already one of Pro Tools ' great features. Switching any of Pro Tools ' normal automation writing modes (Write, Latch, or Touch) into Trim lets you make adjustments to existing automation. For example, suppose you've ridden the level of the lead vocal, leaving a trail of automated fader moves in your volume graph. Later you want to bring down the overall vocal level during the choruses, but without losing the existing moves in that section. Trim mode sticks the fader at 0, and lets you write relative automation, so holding the fader down by 3dB during the chorus just pulls down all the existing automation by 3dB. Until now, at the end of your trim pass, Pro Tools would write the new fader positions as absolute data, so you'd get a new level graph 3dB lower than before. Pro Tools 7.2 lets you store, view and edit Trim data as a separate graph, or Automation Playlist in Pro Tools-speak. Using the same display concept as the VCA Master Faders, the resultant fader moves of the original and trim graphs are drawn as a yellow graph. The Trim automation can be suspended, allowing you to A/B the original and trimmed versions.
There are three options for how long this data is kept: not at all (as with previous versions), as long as Trim mode is active, or indefinitely. As with the effects of VCA Masters, you can choose to Coalesce the two layers of automation onto the main volume playlist. This takes the pressure off writing Trim automation, as you can easily go back and make changes without having to commit anything to the main automation playlist straight away. What's more, Trimming has a new safety feature that makes it more usable. Often a trim pass (or an automation edit with the Trimmer edit tool) results in a section of automation going off the scale and becoming a flat line. This loss of data used to be permanent, so trimming back again would just scale the flat line. Pro Tools now remembers the moves that have 'gone out of bounds', indicating them with the blue breakpoints in the screenshot, and they can be restored by later trims.
The Right To Click
 Version 7.2 adds extensive support for contextual menus accessed by right-clicking.Pro Tools 7.2 is the first version of Pro Tools to make proper use of two-button mice. Having spent much of its early life as a Mac-only application, contextual menus accessed from right-clicking were never built into the program. Now, many common commands and tasks can be achieved with a right-click. For example, groups can be deleted by right-clicking in the groups list, a task that was previously a real pain. Editing features can be accessed by right-clicking Regions. Notice the new Snap to Next/Previous commands. These butt the selected Region up to the adjacent Region before or after in the timeline — a common task that took several steps and keyboard shortcuts until now. There are over a dozen different places in the GUI that will respond to right-clicks. As well as accessing various existing commands, right-clicking accesses some new functions, such as the ability to change I/O and buss names directly from the mixer. On a Mac, you'll need a two-button mouse — the normal Mac shortcut of holding Ctrl does not simulate a right-click, as Ctrl-click is used for existing functions.
Automation
Digidesign appear to have been spending a lot of time lately trying to learn how their customers use their software. The result is that there are many automation features that may seem esoteric or unnecessary to many users, but are aimed at specific working contexts. If you ever do any large-scale automation-based mixing, such as mixing films or long musical pieces, they make a lot of sense. One new feature that everyone will appreciate, though, is the option to have all plug-in parameters enabled for automation when you insert the plug-in: a real time-saver.
 When a track is being controlled by a VCA Master, that track's automation graph shows the combined effect of track and Master automation in blue.The new power-user features are mainly accessed via additions to the Automation Enable window. As usual, you get easier and more refined control of these features from an Icon controller. First off, you'll notice extra left-arrow buttons in the Manual Write and Write on Stop sections. These are called the Write to Punch buttons. If you are playing back and have moved any automation-enabled controls, these will write the current settings back to the point you started playing. Why? Well, often you start writing an automation pass at a new section in the mix and have to adjust levels. Instead of having to find the levels, stop, go back and get the faders into position before you hit the audio regions, you can set up the levels, then just hit Manual Write to Punch. Another new feature that can be used in this scenario is called Latch Prime in Stop, which can be turned on in the preferences, or from the Icon soft keys. This lets you put mixer parameters at the desired settings before you start playback. When you hit Play, these parameters will immediately begin writing in Latch mode. This is better than using Write mode, which just starts writing over everything.
Preview mode lets you move parameters that are in Auto Touch, Latch, or Write modes without fighting or overwriting existing automation. It's kind of like an Auto Suspend mode for individual parameters, but allows you continue writing if necessary. One of the best features is that you can suspend and re-enable Preview on the fly to 'A/B' new settings against the existing automation. The down arrow next to the Preview button lets you punch in to automation recording with the new settings you've previewed. Alternatively, you can stop, then begin writing the Previewed setting from the start point, utilising the Latch Prime functionality. If you activate Auto Join, you can roll back to before the punch point, and listen to the transition as it's written.
These features combined are perfect for a particular scenario that has been problematic in the past. Say you come to a point in the mix where several things change at once, and these changes must be automated. This happens whenever you reach a new scene in a TV or film mix, and can often happen between verses and choruses or movements in long music mixes. This is often referred to as automating 'snapshots', as the mixer setup changes from section to section. Mixers have adopted several ways to handle this situation. One method is to Suspend all automation, loop the section while you set up the mix (automation is suspended so parameters stay where they're put), then use the Write Automation to All Parameters edit command. This is the method I use, but the problems are that you don't get to hear the automation played back on tracks you aren't adjusting, and you have to be careful to only enable the right automation types and select the right tracks. Preview is a much more elegant solution. Now you can simply loop the new scene, or chorus, or whatever, and any parameter you touch will drop into Preview. You still hear the rest of the mix with full automation, and when you're happy just hit Punch Preview (then Write to All if necessary) to write the settings you've changed.
 New options allow you to keep Trim data as a separate automation graph and edit it if needs be.Finally, we have Capture and Capture Punch. Pressing Capture stores the states of any parameters that are currently writing, so they can be applied later to another point in the Session. More usefully, in my view, you can hold modifier keys to Capture all currently auto-enabled parameters, or parameters on selected tracks. The typical use for this is to reuse, or return to, particular mixer states later in your Session. This was possible before, using a kind of trick where you could capture automation states using Auto Suspend, then write them with the Edit Automation commands, but Capture is much more versatile. Say you've automated your mix for verse 1, and you now want to use this as the starting point for verse 2. You can capture the parts of verse 1 you want to use, move to the start of verse 2, then use Punch Capture to resume writing automation with the same settings from verse 1. An Icon surface makes this feature particularly nice (especially for post-production) because it can store up to 48 different 'scenes'.
Editing
The most notable change in editing capabilities is a much greater degree of flexibility when editing sections that include fades. No Pro Tools user will miss getting error messages when trying to trim a Region that has fades, or losing crossfades when moving Regions. Now, you can move or nudge a Region that is crossfaded with another, and the fade is recreated at the new boundary. Similarly, you can trim a Region in or out and fade ins/outs will be kept at the new Region edges. You can even pick up and move fades, or nudge them, moving the boundary between two Regions while maintaining the crossfade. The other main change is that you can now do a lot more with Regions in tracks that are in automation view, including Separating, Trimming and creating fades. Fades are also now correctly indicated in automation views.
Signal Tools Plug-in
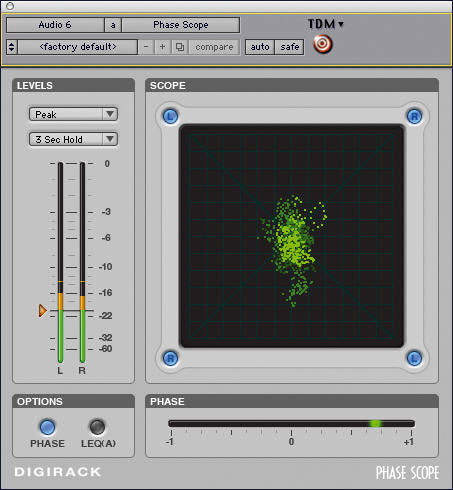
 A new free plug-in package is being released at the same time as 7.2, which will work with 7.0 and upwards. Signal Tools is a complete metering system split into a stereo version called Phase Scope, and the multi-channel Surround Scope.
Level metering can be switched between most of the formats you can think of, such as Peak, RMS, Peak+RMS, VU, Venue (the Digi live console), and PPM (BBC, Nordic or DIN).
Both the stereo and surround versions feature a standard -1 to +1 phase meter for measuring phase across the left and right channels, or any two selected surround channels. The stereo plug-in features a Lissajous scope display, while Surround Scope has a standard surround 'jellyfish' display.
Video
Pro Tools 7.2 supports multiple video tracks, although only one can be active at a time. You can even have both Quicktime and Avid-format video on different tracks, which could be useful when moving a Session between different locations. Video can now be edited in the same way as audio, so it can be chopped into Regions, trimmed, copied and pasted, and so on. If you've been reading the 'Making A Living From Music For Picture' series, you'll know that part of the life of a composer is coping with regular changes to the picture edit. A lot of time can be saved if you can cut the picture yourself and keep on working, rather than waiting for the latest version to be sent to you. Audio tracks can be edited at the same time as video, and you can even make Region groups that include both. So if you're told that two seconds have been cut from the commercial you're composing for, you can correct your own video track along with the guide FX and dialogue tracks. Video tracks also now have the same multiple-playlist functionality as audio tracks, so you can store any number of different versions of the video.
When working against a Quicktime movie, the video display now updates correctly as you perform audio edits. You can also resize the movie window freely, so you can fill a whole monitor with the video if you want. Finally, you can now play Quicktime movies through Avid video hardware, so it's much easier to move a Session to a studio using a Pro Tools system equipped with the AVoption V10 or Mojo peripherals.
Conclusions
There seem to be two main themes to this update: adding features that underline the 'Pro' in Pro Tools, and clearing away lots of annoying hindrances. It's obvious that someone at Digi is spending their time sitting in with the pros and designing features that directly address the way they work. For a long time, the challenge for Pro Tools as a mixing environment was to catch up to the level of the six-figure and above consoles and convince the high-end mixing world that it could do the job. With Icon, and the level of automation sophistication you see in this release, Pro Tools is turning a corner and showing that it now has the clout to innovate and lead in mixing and post-production. Obviously Pro Tools is different things to different people, and one danger is that the software could get over-complicated and clogged with niche features. This is not the case so far, and for the most part you could carry on as normal without noticing many of these features. One thing is true, though: for most of the newer mixing features to flow well you really need an Icon. Digi have tried to keep most things available to all HD users, even making Auto Match available in the software with this release, but you need to remember increasing numbers of keyboard modifiers. If you're an Icon user working on large mixes or in TV and film, this is a really impressive release that can make a big difference to the way you work. For everyone else, there's still plenty here to put a smile on your face.
New Features In Brief
Groups
- Maximum number of groups increased from 26 to 104.
- Easy removal or addition of tracks to groups.
- Enable or disable any parameters from linking and save combinations as presets.
- Plug-ins, record arms, and panners can now be linked.
- Send pans can follow main pans.
- Modify Group dialogue.
- Can modify the All Group.
- Easy deleting of groups with right-click.
- VCA Group Masters.
Automation
- Preview Mode: try new settings without fighting automation, then punch in on the fly.
- Capture Mode: store mixer settings and punch them in elsewhere in the Session.
- Latch Prime in Stop: set up mixer parameters while stopped, then start writing at playback.
- Manual Write to... commands no longer stop playback.
- Touch/Latch mode — faders in Touch while rest of channel in Latch.
- Write to Punch (playback start position).
- Separate Trim automation playlist gives two layers of automation per track.
- Can use Auto Join in Trim mode.
- Automation moves can be recovered even after they've been trimmed 'out of bounds'.
- Auto Match can now be used to glide individual parameters out of automation writing.
- Plug-in parameter all auto-enabled by default.
- Switches can be momentary or latching in Touch mode.
User Interface
- Many commands can now be accessed by right-clicking.
- Renaming of I/O and buss paths from the mixer.
- Automation graphs drawn in real time during recording.
- Waveform displays drawn during Quick Punch and Track Punch.
- Reorganisation of preferences.
- Import dialogues all consolidated and improved.
Editing
- Fades no longer restict region trimming.
- Snap to Next/Previous: quickly butt Regions to adjacent Regions.
- Crossfades, and Regions with crossfades, can now be adjusted fluidly.
- Can move Regions with selected silence using the Separation Grabber.
- Shuffle Mode Lockout.
- Control changes can be ignored in the Undo history.
- Save Session Copy In can now create a folder hierarchy that keeps media on different drives separate.
Video
- Video tracks now created from the standard New Tracks dialogue.
- Multiple video track support.
- Multiple Playlists in video tracks.
- Quicktime HD video support.
- Complete video editing abilities with Video Regions appearing in the Region List.
- Drag and drop from desktop.
- New video clip view in Universe Window.
- Video output offset to fix plasma TV latency.
- Manually resizable Quicktime video window.
information
Digidesign UK +44 (0)1753 655999.
+44 (0)1753 658501.


