Ah, the '80s... Fluorescent socks, marble‑wash jeans, and naff‑sounding synth pads! You might not want to resurrect the first two, but subtle use of pads can improve even the most contemporary‑sounding mix.

The word 'pad' can mean a lot of things in the studio. Depending on the context, it might be a large rubbery drum‑machine button, a switch that makes your mic preamp less sensitive, or a bunch of boring synth chords. Assuming that you don't want to make boring music, you'd be forgiven for shying away from the third of these, but in fact synth pads can be immensely useful for enhancing studio productions across a surprisingly wide range of different music styles — as long as you create and apply them effectively.
Pad Behaviour
 In this screenshot from 112dB's Redline Equaliser, you can see a typical EQ curve designed to keep a synth pad contained and unobtrusive in the mix. Gentle high‑pass filtering from around 300Hz avoids a build‑up of muddiness in the low mid-range, while a fairly narrow 5dB peaking cut recesses the area of the spectrum that the human hearing system is most sensitive to.
So what is a pad, exactly? Well, in its basic form it's just a simple chordal keyboard part that follows the chords of your song, its function being to fill out some aspect of the production sonics. What a given pad fills out exactly varies from case to case, though. An important part of the effect is usually in the frequency domain, where the concordant harmonics are capable of filling in spectral gaps and smoothing harshness. But there's more to many pads than that: the synth can also appear to increase the sustain of chordal instruments such as rhythm guitars and keyboards, and it can also be used to exaggerate the sense of stereo width in your mix.
While it's not too difficult to design a sustained synth part that makes its presence felt in all these ways, it takes a certain amount of artistry to achieve only a subset of the effects. Things get even trickier when you want to take advantage of the benefits of a pad, but at the same time you'd rather the general public didn't notice you were using one, in natural‑sounding acoustic styles or hard‑hitting rock music, for example, neither of which exactly like to brag about their synth chops. The key to managing this delicate balance between precision enhancement and minimum audibility is to concentrate on adapting the synth's performance figurations, chord voicing and timbre to its intended purpose — so it's best to be clear at the outset what you are hoping to achieve.
Appropriate Timbres & Parts
 This screenshot from Krakli Software's freeware Gargoyle virtual synth shows a fairly common range of oscillator waveforms. The Saw, Ramp, and Pulse options tend to work best for dense, fizzy spectral enhancement, while the more muted Sine and Triangle waves are more suited to subliminal enhancement of general warmth and individual note sustains.
Probably the most common type of pad part comprises sustained legato (smooth and connected) chords, which both fill out areas of the frequency range and extend the apparent sustain of other chordal parts. What's important in this case is how the synth's timbre and notes interact to produce the desired frequency‑range and density of harmonics. In the first instance, it's important to realise that different frequency ranges of your arrangement will tolerate different levels of pad contribution before it becomes too audible, so carving away some of the synth's more audible frequencies in response to this often pays off. What I normally do is fade up the raw pad track until it starts becoming too audible, and then use selective EQ cuts to tuck it back into the texture: that way, I'm left with more spectral goodness and fewer obviously synthetic artifacts. In practice, it's not uncommon to find that one of the overly prominent regions is around 3‑4kHz, where our hearing is most sensitive, and it's not uncommon for me to dip 4‑6dB there.
The synth oscillator waveforms you choose will inevitably affect the nature of the added harmonic information. Any pitched note consists of a regularly spaced series of frequencies, the lowest of which (the fundamental frequency) defines the perceived pitch, while the rest (the harmonics) define the timbre. So if you want a dense carpet of added frequencies to underpin some thin‑sounding areas of your mix spectrum, you should probably head for raw sounds that have lots of harmonics. Such sounds include the rich, buzzy sawtooth/ramp or square/pulse waveforms on an analogue‑style synth, or the bright source waves on a sample‑based synth — things like strings, accordion and harmonica. On the other hand, if you're not as concerned with broad‑brush frequency filler, but require more subtle emphasis of the body/sustain element of individual notes of another instrument in your arrangement, such complex sounds won't fit the bill. More appropriate will be duller sine or triangle waves (or source samples such as muted strings, French horn and ocarina), as these deliver more of the less characterful fundamental and lower harmonics and have less effect on the existing instrument's own timbral quality.
 Even if you use EQ to carefully isolate only a specific frequency region of your pad, the pitches of the notes you use still have a dramatic effect on the density of the harmonics added. For example, in these two screenshots, EQ has been used to restrict a synth sound to a narrow band of mid-range frequencies, but you can still clearly see the difference in harmonics spacing when the same chord is played in two different registers several octaves apart.Whatever waveform you choose, I'm not a huge fan of oscillator detuning for pads, because it dilutes the pitch clarity of the chord concerned and can easily make the mix feel cloudy or stodgy. Filter sweeps, heavy pulse‑width modulation, or inter‑oscillator vibrato can also be problematic if you're looking for unobtrusive enhancement, because the levels of individual harmonics in such changeable sounds can be quite unpredictable, making it tricky to stop frequency peaks sticking their heads over the parapet at mixdown.
The other major consideration is which note pitches to use in your chords. One reason for this is that the number of harmonics of a given note doubles for each octave you progress up the audio spectrum: the effect of a low chord and a high chord will still be dramatically different, no matter how you try to tailor the response with EQ. For example, a chord around the bottom end of the guitar register, band‑pass filtered tightly around 2kHz, will give a thick, fizzy mid‑range enhancement to the overall texture, where the same chord five octaves higher provides something much more pure and piercing — and good for extending treble instrument sustains without making much impact on the tonality of the production as a whole.
Rhythm Patches

Not all pad sounds need to be sustained, though, because sometimes more rhythmic parts are called for. In upbeat productions, for instance, a simple rhythmic repetition of synth chords can help reinforce the track's groove and increase clarity. Or you may want more chordal information or stereo width from a rhythm guitar or keyboard part, but without any extra sustain — in which case duplicating the rhythm part with shorter and perhaps more naturally decaying pad notes is likely to prove more successful than a traditional sustained pad.
Moving beyond this, there are often bonus points to be had in terms of added musical detail if you experiment with pads that use rhythmic modulation, perhaps driven by an analogue‑style sequencer. Wave‑sequencing synths, such as those in the original Korg Wavestation series, are another option that can provide a similar kind of timbral movement within your track, while also fulfilling the role of pad.
Dealing With Stereo Width
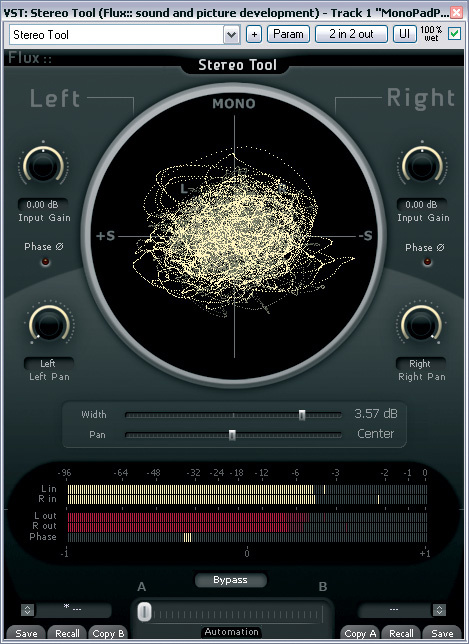
 If you want to increase the width of a stereo pad's soundfield, Mid/Side processing is one good tactic. If you don't have an M/S plug‑in, though, never fear: there are lots of freeware options, including GVST GStereo, Voxengo MSED, DDMF Stereooerets and Flux Stereo Tool.
Most of the time when pads are added to an arrangement, part of the attraction is how synths can expand the apparent span of the stereo image. One of the problems with using important musical parts to achieve stereo width is that the balance and tone of wide‑panned or width‑enhanced parts can suffer when the mix is heard in mono — as it is in a lot of real‑world listening environments. Panning is also exaggerated for headphone listeners, for whom panning locations at the extremes of the stereo field can feel disconnected from the mix as a whole.
 However, these difficulties rarely concern pads, because they don't perform any real musical function. Who cares if they lose definition, or even disappear completely, in mono? After all, most mono listening environments are pretty lo‑fi anyway, so the typically subtle effects are unlikely to be missed. Hence you can give a much freer rein to your stereo widening effects on pad sounds. Choruses, flangers and phasers are a good bet here, although you need algorithms that allow you to put the left-channel and right‑channel modulation waveforms out of phase with each other to get the widening effect. Independent left‑ and right‑channel pitch‑shifts are also a tried and tested widening approach, often in combination with short, staggered delays.

 Here's another classic stereo widener patch running in Schwa's CMX, a plug‑in specialising in such effects.Many pads already have some stereo width to them, but if it's underwhelming, the most straightforward way to boost it is to use 'Mid/Side' (M/S) processing, which allows separate control over the mono and stereo components of a stereo sound. There are lots of plug‑ins that will do this (including freeware: see above), but even without them you can achieve a similar effect:
- Duplicate your pad sound
- Sum the duplicate to mono and invert its polarity.
- Mix in with the stereo pad, cancelling out some of its mono component and thereby making it feel wider.
Expanding the width beyond the speakers is also possible using polarity inversion:
- Clone your pad track
- Swap the clone's left and right channels and invert its polarity.
- Fade up the clone alongside the original pad track to achieve the widening effect. You'll find that the centre of the image will recede at the same time.
Another tactic is to put separate graphic EQ plug‑ins into the right and left channels of a stereo pad, set up one plug‑in with the sliders alternating between maximum and minimum gain, and then use the inverse of that setting on the other channel. Although this method isn't that commonly used for important musical parts — because of the rather diffuse way it smears the frequency content across the stereo image — it can still be very effective for pads.
Mixing Pads
 This is a screenshot from a Mix Rescue remix session that happened to use a number of several different pad sounds. Notice how the levels of the pads are automated with both region envelopes and level automation, to provide the maximum enhancement of the mix sonics while at the same time avoiding the pads becoming too clearly perceptible in their own right.
When it comes to mixdown, well‑programmed pads can simply be left to their own devices, free of any processing. Warm‑sounding synth pads, in particular, will normally blend into the background of a track without reverb or delay treatments. In fact, it's often unwise to add such effects, because any effect tail will tend to make your chord changes appear sluggish — and may even give away the presence of a 'synth sweetener' that you're keen to keep under cover. That said, short reverb can be a legitimate response to bright‑sounding pads that aren't sitting in the mix, and which perhaps also require some stereo width. Ping‑pong delay patches can also be handy with more rhythmic pads, to increase the stereo rhythmic complexity.
Balancing the pad in the track is not without its pitfalls, though. It's rare these days that anyone wants synth pads to be clearly audible in the mix, and usually the biggest challenge in balancing them is to keep their sound as far out of earshot as possible, while still retaining some vestige of their euphonic effects. In this respect, the current attitude towards mixing pads has much in common with contemporary approaches towards reverb: if you can hear it, it's too loud! This is where automation can be a real friend, because it enables you to fade down the pads wherever a thinner texture might expose their presence, while still keeping them at a decent level when you're aiming for maximum warmth and width during choruses. You can profitably go beyond this basic level management, too, and use automation to support the musical momentum of the song, perhaps slowly beginning to fade up the pad to signal the run‑up into the chorus.
 If you're looking for a good, affordable Hammond/Leslie combination, check out GSI's great little cross‑platform VB3 virtual instrument.EQ is an important tool, of course, as I've already mentioned, especially if you're in the position of having little control over the setup of the original sound source. The only addendum I'd make to my previous advice is that it's rare, in my experience, for pad energy below about 200Hz to be useful for most mixes — because it'll usually just cloud things and make the mix woolly. I usually high‑pass‑filter pads to keep the low end clear.
Distortion offers a further set of options, allowing you to increase the density of pad harmonics if required, but be wary of digital bit‑crushers, because they'll often introduce dissonant digital aliasing artifacts which can undermine the pad's underlying harmony. By the same token, left-field modulation treatments such as ring/amplitude/frequency modulation are probably best left alone too, as their added frequency side‑bands will usually clash with the pad chord.
A Pad For All Seasons
The cheesiest excesses of the '80s have, understandably, earned synth pads a rather bad reputation amongst many studio types... but even if ghastly poodle perms still wake you in a cold sweat from neon‑bathed nightmares, there's still a lot that carefully crafted pads have to offer these days, across a whole range of more fashionable musical styles.
On-line Audio Examples
I've put together a selection of audio examples to demonstrate how some of the different pad effects discussed in this article sound in context. Surf over to /sos/may10/articles/padsaudio.htm and have a listen!
A Classic Pad: The Hammond Organ
One of the most successful pad instruments has got to be the Hammond organ — along with equivalents by Vox, Wurlitzer and others. Not only does it provide a wide range of note pitches, but the very nature of the tone‑wheel design allows you to adjust the harmonic content of those notes very subtly and precisely via its drawbars. The Leslie speaker that it is typically twinned with also lets you add extra harmonics by overdriving, while the rotating baffles can give a wonderfully wide and involving stereo picture if miked sensibly, especially if the player is playing with the rotor speeds in the real time. A really sensitive player can also use the instrument's swell pedal for many of the purposes that level automation now handles with programmed synths. All in all, this is an instrument that ticks all the boxes for creating great pad sounds, so if you've not considered it, you're definitely missing a trick. If you don't have a Hammond sound on hand, check out GSI's donationware Organized Trio VST instrument, which I find myself using to death, and its more recent 49 Euro cross‑platform update, VB3.