How do you create a four-minute masterpiece out of just a few measures? And what's the best reverb to make you sound like that drumming gorilla on the TV ad? These questions, and more, answered in this month's Digital Performer workshop...
 Loops in DP don't look all that exciting, but are hugely useful. Here the loop tool has been used to loop a two-measure MIDI drum pattern eight times.From 1960s minimalism to the most cutting-edge dance and electronica, loops are the foundation of a vast range of musical styles. Compared to DAW software specifically set up to work with loops, DP often appears resolutely 'linear', not even offering the object-based editing of Logic. In fact, though, it has some great tools for creating and manipulating loops, and in true DP fashion there are often several different methods you can choose from to achieve the same effect, letting you decide which will suit your working style best.
So in this month's Performer Notes we're going to take in a range of features, namely the Loop tool, the Repeat command, and the Paste Repeat and Merge Repeat commands. All of them are hugely useful, as we'll see.
Constructional Loops
Here's a common occurrence: you've recorded a great two-measure riff or drum pattern in a MIDI or audio track, and you quickly want to extend that out to fill an entire 16-measure section, as a guide for laying down more tracks. One insanely easy way to do this is with the Loop tool. Try this, which is pretty much what I've done in the screenshot above:
1. Switch to the Sequence Editor and make sure you can see your track and the riff or pattern you want to loop.
2. If it's not open already, open the Tools palette by hitting Shift-O. Then select the Loop tool (which looks like an arrow chasing its tail) either by clicking on it or tapping the 'L' key twice in quick succession.
3. Set DP's edit resolution grid to crotchet/quarter-note. This ensures you get a musically useful loop length that's properly aligned with the beats and measures in your sequence.
4. Now move your mouse pointer into your riff's track lane; the pointer should turn into a mini loop-tool symbol. Then just drag from the start of your riff to the end, selecting complete measures.
5. In the event information strip (DP4/5) or palette (DP6) you'll now see information about the loop: its start and end locations and, crucially, the number of repeats. In this example we want our loop to repeat eight times to fill the 16 measures, so click where it currently says '2' and enter '8' instead. Job done.
A loop like this appears in the Sequence Editor as a two-part horizontal bar — a transparent 'source' section and a darker, translucent 'loop' section to the right. You'll see that it has two thin vertical 'handles' too. Drag the one on the left to reposition the whole loop and the one on the right to change its length. But the number of repetitions can only be changed in the event info bar (or palette), after first selecting the loop by clicking on one of those handles. Deleting a loop is easy: click a handle to select it, then hit the backspace key.
One thing you soon notice when using the loop tool is that it can only work on one track at a time. What if you want to loop multitrack material? For that task, there's a menu command called Set Loop. Begin by making a time-range selection of the part of the tracks you want to loop. One good way to do this is to drag in the time ruler, then click (and if necessary shift-click) the names of all the tracks to be included. Then, in the Region menu, choose Set Loop... A dialogue box appears, with loop start and end times that should correspond to your time-range selection. However, be prepared to tweak the end time in DP5, because it's sometimes a bit out. There's also a field for the number of repetitions, so set this as required, and hit OK. Again, job done.
How you use the loop tool varies a bit between different editing windows. To start with, you can't use it in the Tracks Overview (although 'Set Loop' still works fine there). In the Drum Editor, loops appear and are placed, in track information lanes. In the MIDI Graphic Editor they go in the marker strip just beneath the time ruler, and only loops for the track you're currently editing (indicated by the little pencil icon in the Track Selector list) are shown.
One last thing: don't get fooled by the Track Overview's Loop column. This doesn't actually do anything except indicate the presence of a loop in a track, so trying to click or drag the little icons that appear is a fruitless exercise.
To Infinity & Beyond
![]() Loops in DP can very easily be made to repeat for ever — useful if you need to generate a quick, unchanging rhythm track (for example) while you're developing a track. There's an infinite option in the Set Loop... dialogue box, but for other loops, first select one in an editing window, then in the event information bar (or palette), enter the letter 'I', instead of entering a number to define how many repetitions there'll be.
Loops in DP can very easily be made to repeat for ever — useful if you need to generate a quick, unchanging rhythm track (for example) while you're developing a track. There's an infinite option in the Set Loop... dialogue box, but for other loops, first select one in an editing window, then in the event information bar (or palette), enter the letter 'I', instead of entering a number to define how many repetitions there'll be.
Get Real
The nature of DP's loop function is such that loop repetitions are 'live' copies of the source material they're generated from — so if you edit the loop source, all the repetitions instantly update to reflect that. That's great, until you want to make changes to some of the repetitions and find it's just not possible. An example of this might be when you want one drum pattern to run for most of your sequence, but have fills and little variations in several places.
 Repeating data makes 'real' copies that can be edited individually without affecting the other copies.In this case, a better alternative to the loop tool is to actually duplicate your loop source material multiple times, resulting in a track full of data but all of it independently editable. DP has some functions that exist specifically for this task. Let's look at a practical scenario, with a one-measure MIDI drum pattern that needs to be extended to fill up a 32-measure section of the sequence, ready for further editing.
In a MIDI editing window (which can be the Tracks Overview this time), drag the I-Beam tool over your drum pattern, with a suitable edit resolution grid in place, to precisely time-range-select the pattern. Now hit Apple-R, or choose Repeat from the Edit menu. In the dialogue box that appears, choose Merge or Paste (we'll discuss what these options do in a minute), and set the number of repetitions to 31. They'll be added after the original pattern, to make 32 measures in total (see screenshot overleaf). Click OK to finish the process.
So what are those 'Place copies...' options in the dialogue box all about? Well, Splice inserts the repeats into the track, and shoves along pre-existing data that follows them by the same amount. Paste and Merge don't do any shoving, but whereas Merge blends anything already in the track with the repeated data, Paste overwrites it. There's another subtle distinction between Paste and Merge: If the original time-range selection included MIDI data starting inside but finishing outside the selection region, repeating with Merge will ensure that they're correctly handled in the repeats too. Paste's approach is to truncate those events — a subtle but sometimes crucial distinction.
Filling A Gap
The Repeat command painlessly handles most straightforward musical situations, but is less good if you happen to be working on complex, polyrhythmic or 'free time' material that doesn't align so easily with beat and measure boundaries. Say you want to make a 'shimmering' effect with a harp-like synth sound, and fill up a four-measure section with a rapid, arpeggiator-like pattern of 32nd notes. While you could certainly try to use Repeat for this, you have a problem in that you don't know how many repetitions will be required to fill up the eight measures — at least, not without whipping out your calculator and doing some fiendish division. This is where the Merge Repeat and Paste Repeat functions come into their own. Let's see how they work, using exactly the scenario I just described.
 The Paste Repeat command has been used here to fill a four-measure region with a rapid three-note pattern, in a single stroke. 1. First, in the Sequence Editor, select the pattern to be repeated in the synth harp track.
2. Hit Apple-C to copy the data.
3. Now make a time-range selection of the region of the synth harp track to be be filled with the pattern, which should also include the original pattern notes.
4. Choose Paste Repeat from the Edit menu. The entire region should now be filled with the pattern. If there's a partially empty measure at the end of the section, it's because DP won't paste a partial pattern when one final whole pattern won't fit into the region. In which case, just do a quick additional cut and paste (or alt-drag) of the pattern manually, to fill up the space.
Using Paste Repeat rather than Merge Repeat in this example is better, because it ends up overwriting the notes of the original pattern within the region, ensuring you don't get duplicated MIDI events. But Merge is there when you need to add a repeated phrase to existing data in the track.
Algorithmic Reverbs In Digital Performer
With the advent of convolution reverbs, which can emulate real acoustic spaces and classic gear, you might wonder if there's a place any more for the conventional algorithmic or 'computational' reverb. But think about what a good non-convolution reverb offers — efficient CPU usage, specialised features and the flexibility of sometimes dozens of parameters rather than a few — and suddenly they look more attractive, especially when you're after something unusual or trying to achieve a specific effect.
DP's bundled algorithmic reverbs, eVerb and Reverb, seem to have been with us for ever, and have merit, but for the ultimate in algorithmic quality and flexibility, look to third-party MAS and Audio Unit developers. Here's the pick of the crop, all of which I've tested successfully with DP5.13.
 Free & Donationware Plug-ins
All of these are easily capable of matching the typical £100 hardware reverb unit in terms of quality.
Apple Matrix Reverb (AU)
If you have a recent version of OS X, you have Matrix Reverb. It doesn't show up in either of your Library/Audio/Plug-Ins/Components folders, but all the same DP displays it in plug-in pop-up menus along with all your other conventional plug-ins. Programming Matrix Reverb isn't very intuitive, but it can produce interesting artificial treatments, as well as a range of quite decent acoustic simulations, if you stick with it.
Freeverb (AU)
Freeverb dates back to DP2 and OS 9 days but has survived to be ported to various current plug-in formats. It has a grand total of three actual reverb parameters — Room size, Damping and Width — alongside wet and dry level controls and a toggle switch that freezes the output indefinitely. The basic sound is very good. http://destroyfx.smartelectronix.com/audiounits.html
Ambience (AU)
Magnus's Ambience is donationware. In fact, you can run it for free, but even a tiny donation gets rid of an annoying nag screen. This is a fairly flexible reverb with a built-in gate and EQ, and a parameter for adjusting CPU use. Low values use up little CPU and still sound interesting rather than bad! The AU version gets only a generic graphic interface, but if you run the VST version in something like VST Wrapper it's much prettier.
http://magnus.smartelectronix.com
Budget Plug-ins
PSP EasyVerb (AU, $69)
When PSP say easy, they mean easy. This plug-in has a very small footprint and a non-intimidating interface. Despite the ease of use, the results are great: tails are smooth, complex and rich, and there's surprising flexibility. May be the best value for money reverb plug-in out there.
 RaySpace (AU, £50)
Although it can do standard reverb treatments, RaySpace is more of a sound-design tool. It does away with conventional reverb parameters, and instead lets you build 3D models of halls, rooms, boxes and corridors, and place virtual sound sources and listeners within them. Some of the sounds you can get out of RaySpace have to be heard to be believed.
* Premium Plug-ins
IK Multimedia CSR (AU, 300 Euros)
CSR (Classic Studio Reverb), is four separate plug-ins: CSR Hall, CSR Inverse, CSR Plate and CSR Room. Each initially offers an 'Easy' page, but fine control is offered by Advanced mode. There's even a modulation matrix and on-board EGs and LFOs. Crazy effects can be achieved, as well as very good-sounding classic treatments. Not cheap, but this is a serious tool.
WaveArts MasterVerb (MAS/AU, $199.95)
MasterVerb has been out for quite a while, but each new version improves on the last, and the current v5 offers good tweakability and very elegant displays. Sound-wise, I happen to think MasterVerb sounds a tad more 'stuck on' and artificial than some of the other reverbs in this round-up. However, it's won plenty of accolades over the years, so it's obviously working well for many people.
Sony Oxford Reverb (AU, £235)
The Sony Oxford Reverb places a huge range of parameters at your fingertips, in a really effective, elegant user interface. It excels at ambiences, plate emulations and highly coloured post-production-style treatments as well as more conventional acoustic simulations, and the way the wet and dry signals seem so naturally enmeshed will make you wonder if you're not listening to a convolution reverb after all. Requires an iLok.
 Nomad Factory BlueVerb DRV2080 (AU, $179)
BlueVerb is an unashamed homage to the reverbs of the 1980s, so while it won't be giving Altiverb a run for its money in recreating real acoustic spaces, it has bags of character. Vocal treatments are particularly good, with luxurious tails that seem to glow around the voice. If you prize character and colour over correctness, this could be the reverb for you. Requires an iLok.
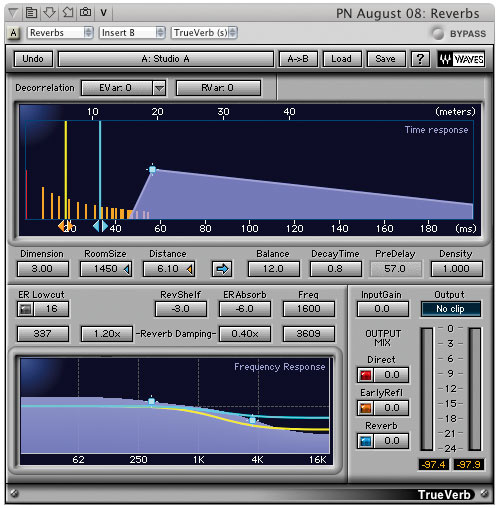
Waves Trueverb (AU, part of various bundles, from $500)
TrueVerb has that late-'90s plug-in look, but it's a really useful, underrated tool with a clear, honest character that's not at all old-fashioned. What I find most impressive is its smoothness; all the early reflection patterns are neat and dense, which makes it superb for drums and percussion. Requires iLok.
Waves Renaissance Reverberator (AU, part of various bundles)
Renaissance Reverberator is Waves' flagship algorithmic reverb. Fundamentally it sounds great, with a natural, organic quality when required. Needs iLok.


