Recording simple ideas quickly often helps you to capture a good, fresh-sounding performance — but it can also leave you with frustrating technical problems in the mix. This month, we tackle just such a recording...

When the inspiration for his song 'The Road Ahead' struck Timo Carlier, he didn't hang around, recording the main acoustic guitar and lead vocal parts into Steinberg Cubase SX in a single continuous take alongside a simple bongo loop. His recording gear comprised a Rode NT1 large‑diaphragm condenser through an ART Tube MP preamp for the vocal, and a Shure SM58 through a Behringer Eurorack mixer for the guitar. Following the main take, he quickly added a guitar improvisation and a vocal harmony as separate overdubs to complete the arrangement. Mixing was also a no‑frills affair, the most hi‑fi touch being a touch of one of the bundled UAD1 compressors on the vocal mic.
Yet despite (or perhaps because of) this drop‑of‑a‑hat production process, Timo managed to capture a fragile quality reminiscent of Nick Drake, and found himself returning to the song time and again. However, even though he felt that his first mix had captured his intentions pretty well, he was dissatisfied with the final outcome, which he felt sounded rather soft and hissy, as well as generally rough around the edges. A few vocal slip‑ups in the first verse bothered him, and the relative levels of the vocals and guitars also seemed to vary a lot, depending on what listening system he was using.
Because he liked the song Timo revisited the mix on a half a dozen occasions, first in Cubase SX and later in Cockos Reaper, but to no avail. The background noise from the guitar's mic (the higher noise floor of dynamic models such as the SM58 doesn't really suit sound sources this quiet as this) and the spill between the main mics prevented him from processing the mix to any useful degree without obvious detrimental side‑effects. Try as he might, he still preferred his first rough mix, despite its apparent flaws, and by the time he sent the song in to Mix Rescue he'd pretty much resigned himself to the view that this mix was as far as he could get given the less‑than‑perfect source material.
Noise Reduction, EQ & Compression
 Timo's method of recording had stored up problems for him at mixdown. In the first instance the Shure SM58 dynamic mic was adding a lot of noise to the guitar part, and was also positioned in such a way that the guitar body resonances were being emphasised and were making some low notes boom unevenly. The vocal mic's foam wind sock also wasn't helping, as it was dulling the mic's high‑frequency pickup while still letting problematic plosive air blasts through to the mic's capsule.Photo: Vanessa McCulloch
Many engineers will tell you of difficulties they've had trying to improve on the sound of a much‑loved rough mix, so I have to say that I initially approached this particular remix with some trepidation. In this instance, I figured the whole mix would stand or fall on whether I could get the sound of the main guitar/vocal pass working.
The first main problem was that the guitar mic had a lot of noise on it, and it was clear that specialist tools would be required, so I opened up the Waves X‑Noise plug‑in. I don't normally have much call for noise‑reduction processing — so I can hardly claim to be a power user — but it was nonetheless easy enough to juggle the main Threshold and Reduction sliders to pull down the noise substantially. Most hiss‑removal processors will work better if you can give them a section of noise‑only signal against which to calibrate their noise‑reduction algorithm, but Timo hadn't recorded any silence at the beginning of the part, and had also slightly truncated the final guitar chord when dropping out, so there was nothing for me to work with on that count. As a result, the noise‑reduction process was also losing me a fair bit of the guitar's high‑frequency information, but I decided to compensate only a little for that with X‑Noise's high‑frequency shelving EQ (adding +2dB at around 4kHz) and live with the duller sound for now, because I was anticipating brightening the lead vocal part and I knew that this was bound also to lift the high frequencies of the guitar via the spill on the vocal mic.
 Excessive noise from the guitar's mic was dealt with using Waves X‑Noise, but the lack of a section of solo noise for calibration purposes meant that quite a lot of high‑frequency information was lost before a satisfactory reduction in the noise level was achieved.The dynamics of the guitar part were causing problems with the threshold‑based noise‑reduction, though, as a suitable threshold setting for the quieter introduction was far too low for the more powerful strumming later on. I could have automated the threshold control here, but I felt that the guitar level issue was likewise a problem for the song as a whole, so instead I inserted GVST's useful little Gain plug‑in before the X‑Noise instance to reduce the part's dynamic range over the long term. I ended up applying about 8dB of gain during the introduction, tapering it slowly off to unity as the strumming picked up steam.
Listening to both mics together again with the recorded noise better under control, I first panned them very slightly left and right to give the image some width — not enough to be distracting, but enough to avoid a completely mono presentation. The tonality now needed some work, so the next stop was a couple of instances of Stillwell Audio's Neve‑inspired 1973 EQ plug‑in. The low end of the sound was pretty woolly, so in went the high‑pass filters (at 50Hz for the guitar and 160Hz for the vocal) and some low‑frequency shelving cuts (‑4dB at 110Hz and ‑4.5dB at 220Hz) to balance things a bit better. This processing also sorted out some low‑frequency plosive thumps on Timo's vocal mic which had survived his attempts to stop them using the NT1's foam wind sock — in future he'd do better to use a proper pop shield for this purpose instead, as they work better and impact less on the high end of the recording. Had these low frequencies been left intact, they'd have potentially caused unnatural lurching in the gain‑reduction of any compressor further down the signal chain, so it was as well to toast them early on.
 The lead vocal part had some pronounced low‑frequency thumps on plosive consonants, one of which you can see highlighted in the waveform display in the top screenshot here — the spectral content of that section of audio can be seen in the spectral display screen. The vocal EQ setting Mike used within Stillwell Audio's 1973 plug‑in included a high‑pass filter which stopped these low‑frequency thuds interfering with dynamics processing later in the mix, and you can see how it removed the low‑frequency waveform excursions in the screen at the bottom left.One of the reasons I chose the Stillwell plug‑in was for its smooth 12kHz high‑frequency shelf, because the vocal required a good deal of extra clarity. A shelving boost of 8dB on the vocal mic made it more immediate and intimate to suit the mood. The effect of this boost on the vocal mic's guitar spill significantly supplemented the high end of the accompanying instrument too, as I'd expected, but there was still further to go in that regard, so I also boosted the guitar's high shelf by 3dB and added another 4.5dB of peaking boost at 7.2kHz.
Another Neve‑inspired plug‑in, this time the Waves VComp compressor, further emphasised the intimacy of the vocal sound, and I used its 3:1 ratio and (pretty slow) automatic release time to keep a fairly natural sound. Although the gain‑reduction meter was registering up to around 9dB at points, the very slow release meant that the actual reduction in short‑term dynamic range was in practice much smaller than that might seem to imply. The Analog control I left turned up to 100 percent because I liked the extra roundness it imparted, but that did also incur a certain amount of emulated background noise, even when no audio was going into the plug‑in, so I automated the vocal fader to avoid this noise drawing attention to itself at the end of the song, where a fairly swift fade‑out was required to conceal the aforementioned truncated chord tails.
Surgical Acoustic Guitar Troubleshooting

That was the bulk of the broad‑brush processing, but there were still a couple of specific problems to solve. The first was that the guitar mic was close enough to the guitar that it was picking up the body's resonant modes rather too strongly, which resulted in a couple of sporadic booming harmonics in the low‑mid region of the spectrum. The difficulty with this kind of thing is that normal broad‑band EQ cuts will take out much more than just the resonant peak, undesirably thinning out the sound overall and effectively throwing the baby out with the bath water.
 So I took a more precise approach, zooming in the display of Schwa's excellent Schope frequency‑analyser plug‑in to find the exact frequency of each resonance (201Hz and 225Hz respectively, as it turned out) and then automating a very narrow EQ notch in Reaper's ReaEQ to tame the boom whenever it occurred. It took a few minutes, but sorted the problem with negligible side‑effects, so it was well worth the effort.
The second technical problem was rooted in the guitar spill on the vocal mic, which contained rather too much pick noise and was becoming overbearing now that the lead‑vocal processing had lifted the top end. Again, I couldn't just globally EQ the vocal mic to reduce the pick noise without compromising the vocal sound that I already liked, so more surgical processing was required to dip the high frequencies only during the very brief bursts of pick noise.
 This is certainly not something I'd relish trying to do manually, so I was grateful to have Waves TransX Multi on hand to help out. What TransX Multi does is detect and process transients across four different frequency bands, but I only wanted it to do its magic on the high frequencies, so bypassed all but the highest band. Setting this to its maximum transient-reduction setting (a sensitivity of 10 and a range of ‑24dB) allowed me to hear clearly what the band was operating on while I adjusted the its lower boundary by ear to around 2.8kHz, after which I returned the sensitivity and range controls to more sensible settings: a sensitivity of 6.1 caused the gain‑reduction to kick in only for the pick noise, and then a range setting of ‑12dB was enough to take the edge off each of these detected transients. The final touch was to bypass the processing completely during the finger‑picked sections, where the processing was redundant.
Adding In The Remaining Parts
 In the analysis display here you can see one of the two low‑frequency resonances that were causing the guitar sound to 'boom' sporadically. Mike dealt with these frequency peaks by setting up a pair of narrow EQ filters and then carefully using Reaper's automation to cut only when the resonances occurred — you can see this automation data for both the filters superimposed on the audio waveform.
Having achieved a passable sound for the main guitar and vocal, I began adding in the rest of the arrangement. The bongo loop came first, and this had a bit too much low end to it given the richness of the guitar tone, so I high‑pass filtered it at 66Hz and employed a narrow 10dB EQ cut to duck out a prominent 126Hz pitched resonance. I could then balance this sound in the mix without any further processing — except during the introduction, where I reduced the 126Hz cut because it was making the loop sound too anaemic in isolation. Remember, an EQ that works within the context of a full mix may not work for when that same sound is heard on its own.
The second improvised guitar part had been recorded with the same mics as the first, so I decided to use the spill on the NT1 to spread the guitar widely across the stereo picture, surrounding the main guitar and vocal. This part again needed a dose of X‑Noise to overcome the noise-floor shortcomings of the SM58, and while this once more dulled the sound a little, I wasn't worried, because I was happy for these guitars to take a background role. As such, there was very little EQ to do, just a simple high‑pass filter at 40Hz and a broad 2dB peaking cut at 340Hz to avoid too much muddiness creeping in.
 In line with their background role, and because I wanted to avoid tampering with the rhythm set by the main guitar, I deliberately compressed the second guitar part hard (2.7:1 ratio and a low threshold) with Jeroen Breebaart's PC2 compressor, setting fast attack and release times to duck the rhythmic transients and concentrate the ear on the sustain phase of each note and chord. This compressor was actually inserted over a bus through which both mics were routed, so that there'd be no danger of the instrument's stereo image wandering owing to unequal gain‑reduction on the two channels.
 Reducing the levels of pick noise on the strummed section of the track required carefully directed use of the powerful Waves TransX Multi plug‑in, because most of the pick noise was actually a result of spill on the vocal mic.The vocal harmony overdub needed a high‑pass filter to keep the plosives at bay, as with the lead vocal, but in this case I used the most gentle curve in ReaEQ and raised it high enough to lighten the vocal's timbre into the bargain. Scarcely a brush with Tin Brooke Tales' TLS3127 Leveling Amplifier plug‑in completed the processing for that channel and I could then complete a static balance, which was sent on to URS Console Strip Pro for some gentle 1.5:1 ratio gain‑riding (care of what I understand to be a model of the Manley Vari‑mu valve compressor). All that then stood between me and a first‑draft remix was a bit of lead vocal level automation to maintain the audibility of the lyrics, and when this was done I sent it off to Timo to get some feedback from him.
Eleventh‑hour Overdubs
 When the main static balance was working well, Mike bussed all the instruments through URS Console Strip Pro, using an emulation of a celebrated modern valve compressor to warm the sound slightly while gently restraining the overall mix level.
As is quite often the case when a mix nears completion, other parts begin to suggest themselves to the artist, and so it was with Timo. Although he liked the direction I'd taken the mix, he asked whether he'd be able to send through a few more overdubs to expand things further beyond the original version of the song. These extra recordings didn't take him long to do, and he sent me three new tracks within a couple of days. These comprised a lovely resonant kick‑drum sample, an unusual live tambourine part, and a subtle bass drone towards the end of the song.
The bass drum warranted the most attention, first and foremost because it seemed to me that the straight repeated part that Timo had provided didn't support the song as well as it might. So I decided to try adding a bit more variation. Initially just omitting every other pick‑up hit helped, transforming a one‑bar pattern into a more extended two‑bar one, and I then edited out a few more hits to simplify the part during the song's last section. Chopping out all the pick‑up beats and putting them on their own track turned out to be the easiest way to manage this, and while I was at it I slightly reduced the low‑end and overall level of the pick‑up track to make those hits slightly lighter‑sounding than the downbeat, aiding the musicality of the phrasing.
 This screenshot illustrates a couple of different techniques used for the kick sound: first you can see how the pick‑up beats have been separated onto the '_Bassdrum_c' track, where they were EQ'd to lighten them and create a musical phrasing; and secondly, the region levels in the '_Bassdrum_a' track show how the hit levels were massaged to make the fill sections more natural‑sounding.The last kick‑drum edit I did took a few more liberties, substituting a faster kick pulse underneath the chord‑changes that accompany lyrics such as 'you shouldn't let go'. This took greater work, as I needed to gauge the levels of each of these hits to keep a musical flow and avoid getting bogged down. After a little massaging of audio-region levels, though, it was fine, and Timo liked the way the new part worked.
Sonically, there wasn't much to do with the kick drums, beyond some low‑pass filtering to keep them well behind the main instrumentation. I seem to spend a lot of time in Mix Rescue trying to add punch to kick drums, but in this case it was nice to have the opportunity to demonstrate that I don't operate some kind of 'one size fits all' policy in this regard. Here I deliberately softened the kick drum's attack with Reaper's Jesusonic Transient Controller to avoid it tampering with the mellow mood of the song as a whole. I also tried boosting the sustain strongly with Stillwell Audio's Transient Monster (another transient‑shaping plug‑in which is a bit more musical than Transient Controller, but not as firm in its control), and that brought up all sorts of lovely pillowy rumblings that sounded great in context. In most mixes there simply isn't space to have those kinds of things going on at the low end, but there was no other real bass instrument taking up any space in Timo's arrangement so I could afford to run with the idea.
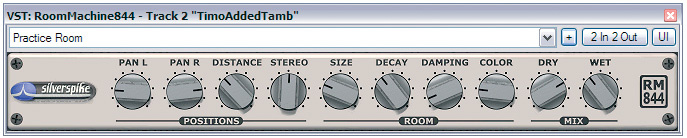
 The tambourine part was too sharp‑sounding and upfront for this mix, so Mike transformed it into something more understated using a combination of Reaper's built‑in ReaEQ, Silverspike's Room Machine 844, and Mda's Limiter.The new drone part was bracketed by filters at 55Hz and 7.3kHz to keep it pretty understated, and that was all it needed to sit it into the balance. The tambourine part, on the other hand, was a bit trickier to deal with, because it was very bright and dry‑sounding, and was leaping right to the front of the mix and making a nuisance of itself, so I combined a variety of measures to push it right into the background. As far as I was concerned, the vocal had to be king here, and I wasn't about to let the tambourine distract from that.
A low‑pass filter at 19kHz allied with 4.5dB peaking cuts at both 5.4kHz and 8.6kHz distanced the sound straight away, but some slightly lo‑fi room sound from an instance of Silverspike's Room Machine 844 helped out here too. A peak limiter, MDA's Limiter plug‑in, controlled a few little level spikes that were still punching through a little much until the sound was sitting more comfortably behind the rest of the instruments. Panning this sound and the bongos slightly to opposite sides of the stereo made sense at this point, leaving the middle ground freer for the lead vocal, main guitar, and kick drum.
 I already mentioned that the tambourine part was a bit unusual, by which I mean that its little phrases had quite big gaps between them, lending the whole part an endearingly halting quality. However, on balance I felt that this feature of the part also took a little too much focus away from the lead vocal, so I applied one more effect just to soften the gaps: a simple tempo‑sync'ed delay with enough feedback so that it would echo on through and reconnect the separate phrases to some extent.
A Pinch Of This, A Pinch Of That

All in all, there wasn't a tremendous amount of processing going on in this mix, but that doesn't mean that there weren't some unusual and powerful techniques employed where necessary. Clearly a multi‑band transient shaper like Waves TransX Multi isn't the kind of thing you'd use every day on what is ostensibly a vocal mic, but the reason for it being there in this mix was to deal with a specific and tangible balance problem that had arisen. What this underlines is that the point with mixing is first to listen and decide what the problems are, and only then to take a decision on what a good solution might be, rather than just processing all your instruments the same way every time.
Corrective Measures
Unlike many Mix Rescues, there wasn't an enormous amount of corrective editing involved in this remix. This was partly because the imperfections of the original recordings were actually a part of the appeal for me, constituting an important part of the direct emotional connection that the song was making. It was, of course, also partly because the simultaneous recording of the main guitar and vocal parts made corrective editing almost impossible ‑‑ any tuning or timing changes to one track would have conflicted with the uncorrected spill from the other.
However, there were a couple of tuning moments in the first verse which I felt couldn't be ignored and were detracting from the song as a whole. As I was scratching my head as to how they might be improved, I noticed that the same musical material appears at the end of the song. I could just steal from the end to patch up the beginning! Timo had played along to the bongo loop, so the copy and paste job was pretty straightforward to do. I did need to copy slightly more than I thought I needed, though, in order to find an unobtrusive edit point, because the performances naturally weren't exactly the same.
By contrast, the backing vocal part had been recorded as its own overdub, and thus had no guitar spill on it, so I was free to chuck that into Melodyne and tidy up a few little corners. I took the opportunity to shift its tuning a bit more into agreement with the lead at points, and also headed off some messy‑sounding conflicts between the parts in terms of the placement of certain consonants.
Fairy Dust: Plate Reverb, Vinyl Noise & Subliminal Synths
 These two plug‑in windows shown two of the subtle additions that Mike used to gel the instruments in the mix into a cohesive whole: a stereo plate reverb running as an impulse response in Christian Knufinke's SIR2 and moulded tonally using the plug‑in's onboard EQ; and some simulated vinyl noise care of Retro Sampling's Audio Impurities plug‑in.
The only global send effect I used on this track was a plate reverb, running as an impulse response in Christian Knufinke's SIR2 convolution plug‑in. The comparatively space‑less sound of plate reverb is nice for filling out sparse textures like this without changing the environment unduly. In this case I gave the reverb 25ms of pre‑delay and gently rolled off the high end about 3kHz with the built‑in EQ to keep it fairly unobtrusive. Almost everything was sent to this reverb to some extent, which helped the track blend, making it warmer and more sustained. The only fly in the ointment was that the vocal sibilants and guitar pick noises on the vocal mic were scattering into the reverb distractingly, so I passed the vocal‑mic send through a simple Waves De‑esser first to sweep those undesirables under the carpet.
Something else that helped glue the track together was the addition of a dash of vinyl noise. I'm not talking about the overt crackling you might expect on a hip‑hop record, but the soft smooth sound of a high‑quality LP, as simulated by Retro Sampling's little freeware Audio Impurities plug‑in. It's amazing what a little overall background noise can do in this regard, and here it had a few ancillary benefits too: firstly, it gave the whole track a slightly vintage feel in line with those Nick Drake records; secondly, it gave an impression of a wide stereo image despite the restricted stereo width of the recordings; and, thirdly, it concealed any remaining noise in the main guitar and vocal take, the modulation of which by X‑Noise, VComp, and the vocal level automation was slightly unnatural‑sounding.
A final slightly sneaky addition on my part was a barely audible low synth drone underpinning the lowest guitar notes, which effectively just added some extra fullness and consistency to the low end of the guitar sound. I didn't want it to sound like there was a synth playing as such; rather that the guitar was just a touch more consistent in body and level on the lower strings. However, when the strumming really got going I also added in a sub‑octave to this synth line to widen the frequency range in use, although the level was still pretty subliminal.
Rescued This Month
 This month's Mix‑rescuee Timo Carlier.Photo: Carina Gossele
The song featured in this month's Mix Rescue, 'The Road Ahead', was written, performed and produced by SOS reader Timo Carlier, with some additional input from his friend Michiel. Timo teaches English Literature for International Baccalaureate students at an international high school in Belgium, and also runs a songwriting and recording elective in the college's recently revamped studio. His home system is based around a seven‑year‑old PC and an M‑Audio Delta 1010LT audio interface, and includes a vintage '70s‑era Tascam mixing desk and a pair of Yamaha MSP5 monitors.
Remix Reactions
Timo Carlier: "This recording of 'The Road Ahead' was never meant to be a final take. I recorded this version almost immediately after writing the song, and liked what I heard, so I stuck with it. The problem was that I had not thought the recording process through carefully, and as result had not separated the sound sources enough. Mixing a song where almost every track contained bleed from other sources turned out to be a nightmare. I was ready to give up when I bumped into Mike Senior on one of the Reaper forums. I'm glad I did! He took the individual files, and the first draft he sent me was already a lot warmer than my own mix. Mike was able to hide some of the flaws in the vocal performance and balance the different parts to create a much more pleasing sound. He also reined in my rather generous use of reverb and delay on the vocals, and took the edge off of the guitar strumming. Now that Mike has edited the extra layers of the bass drum and tambourine to create more variation, the final mix has more depth, more suspense, and a much warmer sound. Sending a track off like this and receiving a new mix is a great experience, and I am really grateful for the time Mike's put into this! It is also great that the SOS writers check out the various forums where we live. It adds a whole new dimension to the magazine.”
Hear The Difference

As usual, we've placed audio examples of the before and after mix, as well as individual tracks, on the SOS web site at /sos/apr09/articles/mixrescueaudio.htm, so that you're able to hear what Mike is writing about.