How do you develop a mix strategy for a song when you don’t understand what the artist intends?
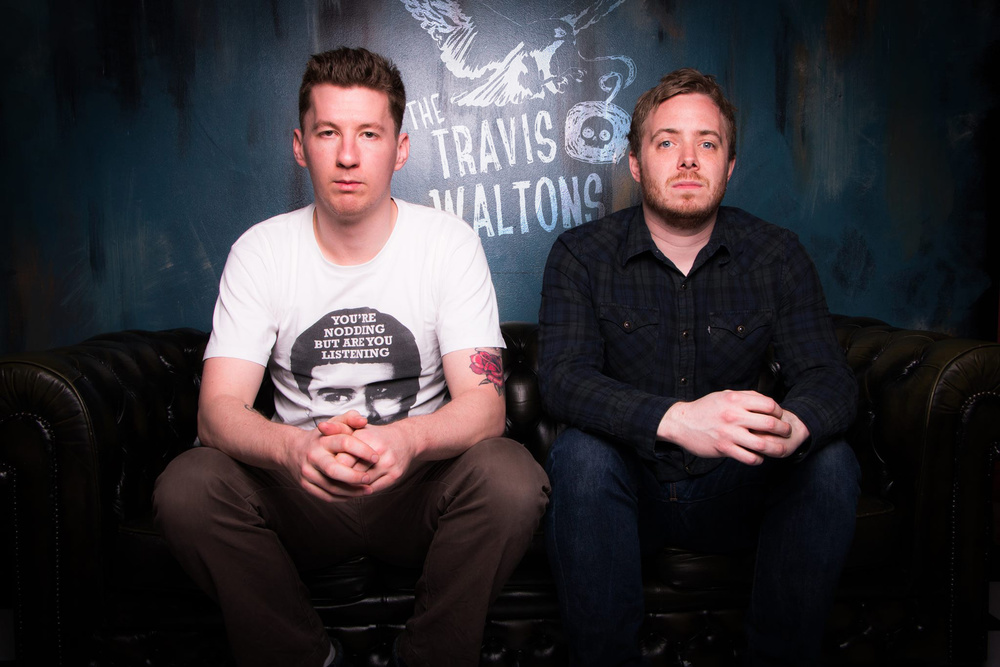
Having recently received the finished CD of an album I’d mixed for the Travis Waltons (a band who’ve featured in these pages before — see the Mixed This Month box), and having got over that inescapably strange feeling I always experience when listening to mixes I finished some months previously, I realised that ‘Red Envelopes’, the song I’m writing about this month, was one of the stand-out tracks on the album. Its success came as a very pleasant surprise, given that I’d initially thought the unusual vocal arrangement couldn’t possibly be made to work.
Guest artist Paul Gonzenbach performed the lead vocal part that begins early in the track. Paul had recorded his own vocal part to an earlier rough mix, and sent through the result as a WAV file. It was a great vocal part, although the recording might have been better technically — there was a fair amount of hiss and a crackle or two, which meant I needed to do a little restoration work. My misgivings lay not here but in the way Paul’s vocals interacted with a duet part provided by Daniel Flay (singer-songwriter in The Travis Waltons), that didn’t start until halfway through the track. Not only did the two parts have completely different timing and intonation but the listener would have heard a good two minutes of the track before Dan’s part arrived, by which time they’d be very used to hearing the lead vocal on its own. Another element adding to my doubts was that this concept was precisely that — a concept which had not yet been put into practice; Dan and Paul had never actually sung this part together in rehearsal or any other setting.
Seeking Direction
When I began setting some rough levels and pan positions, it all just sounded somehow wrong to my ears, leaving me a little uncertain of how to approach the mix. After a little fiddling around trying to figure out ways to resolve the issue, I decided I needed to talk to Dan and try to better understand his vision for the track. Thankfully, I’d worked with Dan on a previous album and had developed a good working relationship, so we’re able to be quite candid about our opinions without the risk of wounding one another’s pride! After a few pleasantries, our telephone conversation ran something like this:
Me: So it’s meant to be a male duet then?
Dan: Sort of.
Me: I could see it working if your part was more of a backing vocal, perhaps with an effect to make it more ‘instrumental’.
Dan: No, I want the vocals to be equal partners, level-wise, once my part comes in. Trust me.
Me: I do trust you, but... having two vocals singing across each other like that, it feels kinda like there’s too much ‘information’ for my brain to process.
Dan: It works in my head, I promise, and I reckon you can make it work. Just see what you can do!
To give the two vocals ‘equal billing’ in this way would require some very careful mix management if the result were to sound convincing, but, without better ideas of my own, I put my reservations firmly to one side and decided simply to trust in Dan’s artistic direction: I’d do all my usual mix preparation and just see how things developed.
Before tackling the vocal parts themselves, though, I’d need to create a basic instrumental platform, to get things moving and provide a context in which the vocals could do their thing. The rest of the instrumentation in ‘Red Envelopes’ is quite straightforward, consisting of acoustic drums playing a classic downbeat, a couple of electric guitar parts, piano chords, bass guitar and a Hammond-organ-style pad. Not such a challenge, then, but I still had some decisions to make...
Drum Compression
I was keen that the drums should not sound too ‘big’ or ‘aggressive’, but still wanted them to drive the track along in a fairly assertive way. When you have a simple drum pattern, particularly a downbeat part, compression and other processing tools can exert a great deal of influence over how the beat pulses and breathes with the track. In this case, I achieved the feel I was aiming for by using a few different types of compression on different elements in the kit. It’s an approach I use a great deal for drums because it usually seems much more effective than just slapping a single compressor on the drum bus, a scenario in which cymbals, in particular, always seem to suffer. I prefer to leave my overheads relatively untouched but bus my close snare and kick mics to a single compressor. This means I can ‘lay into’ the close mics a bit more, if I wish, yet still keep things quite sounding natural overall. For the close-mic compression I applied about 4dB of gain reduction courtesy of an API 2500 modelling plug-in. I also had an additional ‘over the drummer’s head’ mic, which often gives a pleasing balance of the kit when compressed. This had already been compressed a little at the recording stage but I applied some further compression here.
The final ‘layer’ was provided by a small amount of parallel compression on the overall kit, which I applied using a plug-in as a send effect. To make this work, I greatly exaggerated the amount of compression and spent some time playing with the attack and release controls until I felt the compressor was giving the drum part a nice little rhythmic bounce. Once it was doing that, I juggled the threshold and wet/dry mix until the point where the cymbals still sounded natural but I still had that bounce. There was about 4dB of gain reduction. Small amounts of compression were used on certain parts of the drum kit to create a slight pumping effect whilst still retaining the natural feel.
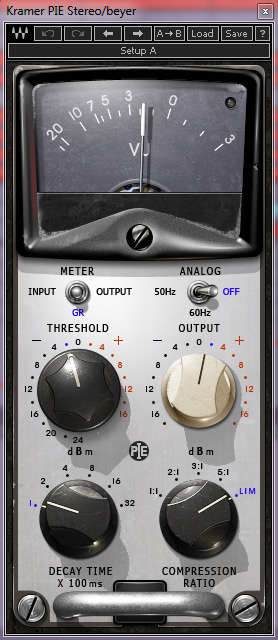
Guitars & Keys
The guitar parts had been played and recorded well and the style of the parts leant themselves nicely to being panned hard left and right. Not only did this approach give the track a nice sense of width, but it would help me by leaving a nice big space in the middle in which to solve the vocal conundrum. I kept the processing fairly minimal and, with just some high-pass filtering, a little boost around 3.5kHz and a decibel or so of gain reduction, the guitars seemed to be sitting nicely with the drums. The other major instrumental element was the haunting acoustic piano part, which was provided by two separate stereo parts playing a high chord stab and an additional lower part. These already had a nice natural sustain, but I wanted to exaggerate it. To do so, I looked to SoundToys’ excellent Decapitator plug-in to add some unsubtle-sounding distortion — not always the best choice for piano, but here it seemed to give the tracks a nice sense of gravitas. I panned the higher part hard left and right, and the lower bass part more narrowly, about halfway left and right. That just left the Hammond-style bass, which bracketed with high- and low-pass filters: I didn’t feel there was anything of much use around 2-3kHz and beyond, so I removed frequencies above that region, and set the high-pass to around 30Hz, just to remove any unwanted rumble and inaudible but headroom-hogging frequencies. The guitars required no more than a little brightening EQ before being panned hard left and hard right.
Vocals: Tackling The Noise
With the instrumental elements sitting nicely in anticipation of a good vocal, I turned my attention to prepping Paul’s lead part. As I mentioned earlier, although this was a good vocal performance the recording quality wasn’t brilliant. It’s often the case that you can get away with a fair amount of background noise if you have enough going on in the mix and the style of vocal delivery means there’s always a reasonable signal-to-noise ratio. A little hiss is also something that many listeners won’t mind — they’re familiar enough with it on lots of older tracks — so it’s often not worth worrying about too much. However, if the hiss is intermittent, or you have a sudden quieter section in the track to contrast with it, the noise will become very noticeable indeed. If you then add to this the side effects of compression, brightening EQ and any final mix or mastering processing, it can become a real problem.
With this in mind, before I turned to noise-removal tools, I wanted to get a feel for what my vocal compression would do to the noise. I’m a fan of the fast/slow vocal compression technique, in which two compressors with different attack and release characteristics are used. I used a Sonnox plug-in for the fast compression, delivering about 4-5dB of gain reduction on some of the louder sections, and I followed this with a slower LA-2A-style compressor plug-in. The latter’s 5-6db of gain reduction contributed a useful smoothing and levelling effect. As expected, the noise had become far more audible. Indeed, it was now most definitely in the ‘problem’ category, especially in the quieter section during which the drums drop out. What was also apparent, though, was how this reasonably generous compression helped the vocal part sit in the track. In fact, I began to get an inkling of how the track was going to come together — but I would first need to attend to that noise! Two compressors, each with different attack and release characteristics, were used in series to help the main lead vocal part sit nicely in the mix.
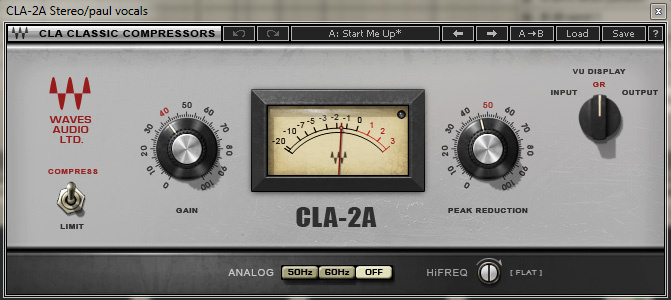
There are quite a few software tools available these days for dealing with undesirable artifacts, both real time and offline. However, the only real option I had available to me for this particular mix was Waves X-Noise. This plug-in has a slightly crude but effective ‘learn’ function: you find a piece of the audio where the noise exists on its own and from this create a profile for your hiss. You then decide to what extent you want to suppress this element of your signal. It’s always a balancing act to get usable results — you need to find the point at which you get an acceptable level of noise reduction, rather than trying to eradicate the problem altogether, as that will inevitably alter the sound of the vocal too. As I was already fairly confident that the vocal compression I’d set up would be a key feature of the mix, setting up the compression and noise processing was a parallel task, with each requiring iterative adjustment until I’d struck the right balance. During the quieter sections of the track, the Waves X-Noise plug-in was used to help bring some hiss on the vocal recordings under control. To avoid any of the artifacts from this becoming distracting, automation was used to turn the plug-in off when not needed.
To avoid having to be too heavy handed with the noise reduction, I also found myself automating the level of the vocal track down in between phrases. I was able to do the bulk of this work during the quieter part of the track and it also allowed me to tame some hard breaths, esses and so on. Such close attention is time consuming but not unusual — you might be surprised at just how much time some engineers spend prepping lead vocals. In compression-heavy pop music, in particular, an enormous amount of time is devoted to getting the vocal in shape, and rightly so in my view: no matter how proud you might be of your snare, guitar, hi-hat or cowbell, most ‘ordinary’ listeners will connect first and foremost with the vocal. Automation was used to help bring down the level of the noise on the vocal between phrases.
Two Become One
Paul’s freshly cleaned and compressed, but otherwise untreated, lead vocal was sitting quite nicely now, with the guitar and piano panning creating a perfect space for it, but now came the real challenge: getting the two vocals working in tandem.
I knew at this point that my choice of effects could play a useful role, but before resorting to such flattery, I decided to spend a few moments seeing what could be achieved just with EQ and panning. Dan’s vocal didn’t have any of the noise issues of Paul’s but I still set about trimming any unnecessary ‘fat’, just to create a lean vocal part that would have the best possible chance of being worked successfully in the mix. I’d mixed tracks featuring Dan’s voice a few times before and know that it would normally lend itself to generous compression if I could get his esses under control. This can make things a little thick-sounding, though, so this time I decided a good initial tactic would be to remove a chunk of lower mids on Dan’s vocal that I’d probably have chosen to leave alone if this weren’t a duet — I’ll discuss this more in a moment.
An obvious option with duet vocals is to pan them a little (or a lot!) to either side, but although this worked well while both vocals were present, it proved an awkward solution at first: while Paul’s was a lone vocal part it really needed to be slap in the middle; it would be weird to have it suddenly slip over to one side, particularly for anyone listening on headphones. Fortunately, Dan’s ‘part’ actually comprised two takes — two separate lines singing a sort of harmony with each other. This meant I could leave Paul panned centrally and try positioning Dan’s two parts slightly to the left and right. To my delight, it worked quite well as long as I kept the panning quite narrow.
Unlike with a typical girl/boy vocal duet, in which each part often tucks neatly into its own frequency range without much work, I had to put a little more effort into equalisation. My general approach, as I mentioned in passing, was to thin Dan’s vocal out to the point where it had less ‘weight’ than Paul’s lead vocal, and for it to be generally sitting a little above the lead vocal in the frequency spectrum. I set my high-pass filter quite a bit higher (around 130Hz) than I normally would for a male vocal and took quite a generous chunk out up to around 350Hz. I also boosted a little around 1.5kHz and applied a high-shelf boost to brighten things up a fair bit. For Paul’s lead vocal I generally left things a bit more natural aside from the standard fair of a high-pass filter around 100Hz and a little dip around 5kHz, just to tame a little harshness.
Although I was conscious that, by this stage, my ears would be growing accustomed to what I was hearing, I was at last beginning to see through the mist: I felt that I finally understood what Dan was hoping to achieve here!  Duet vocals often require different treatments to conventional lead parts: EQ was used to remove some of the ‘weight’ of Dan’s vocal part, helping it sit just behind the other vocal.
Manipulating The Space
Now to give some serious consideration to how the use of effects might help the vocals work even better... Again, I started with Paul’s vocal, making sure it had a nice sense of space and character as a stand-alone lead performance. I settled on a fairly classic tape slap-delay effect, courtesy of about a 100ms delay time on Waves’ excellent Kramer Master Tape plug-in. This had a really nice thickening effect, smoothing off some of the ‘rough edges’ to give the vocal some depth without pushing it too far away. To this I added a little of my general mix reverbs — a reasonable amount of a short plate-style effect (with a reverb time of around 0.8 seconds) and a whisker of a more medium-room-style effect, set to around 1.8 seconds.  Waves’ Kramer Master Tape plug-in, set to a 101ms delay, provided the main vocal effect and this was heavily EQ’d to allow it to be used more generously.
For Dan’s part, I planned to create the illusion that he was placed just behind the lead vocal. After playing around with all sorts of elaborate combinations of effects I found that all this required was a generous helping of the medium reverb I had already set up. Feeling satisfied with how I’d managed to frame the two vocals, I was able to spend a little time gently automating the levels of each vocal part until they seemed to be working well together.
Takeaway Lessons
The main lesson I took away from working on this track was a pleasant reminder about the value of trusting what a songwriter can hear in their mind and respecting their vision, even when you don’t initially understand it. For all the tools I used and the mix techniques I tried out on this track, the thing that was most fundamental to the mix’s success was having a good working relationship with Dan, with mutual trust and respect. Having raised my doubts and been urged to keep the faith, the biggest single thing I did to help realise Dan’s vision was not to do lots of work on the vocals themselves, but to build the rest of the mix so as to create space in which they could do their thing. It’s not always as easy to do this as it was in this case, particularly if you have a single guitar track or somesuch, but most good mix engineers will find a way of keeping that middle spot free for the star of the show. Of course, the rest of the work was important — the use of effects certainly helped polish things nicely, the noise-processing was important, and the EQ work prevented the two vocal parts from trampling on each other — but by the time I got on to those things, the mix battle was almost won.
Depth Issues
Positioning and processing mix elements so as to create a sense of front-to-back depth is one of trickiest things to get a handle on, and I suspect that it’s something most great mix engineers don’t consciously spend a great deal of time thinking about. Rather, it’s a natural result of doing a lot of other stuff particularly well. Spacial effects, panning and the automation of various parameters including pan, level, send levels and EQ settings, can all help to create space and movement. Tonal balance is very important: when something is brighter, we tend to perceive it as being closer, and if everything’s of equal brightness you sacrifice some of the depth you probably crave — that’s one reason it’s common to filter effects returns: it helps with the illusion of depth. In my view, though, it’s probably the arrangement itself which has the biggest impact of all: a well-arranged song with nicely balanced instrumentation will often seem to have a natural sense of depth before we mixers even get our grubby hands on it!
Mixed This Month
The brainchild of singer-songwriter Daniel Flay, the Travis Waltons are an alternative indie rock band based in Bristol, UK. The track ‘Red Envelopes’ is from their second album Separation Season, which was released earlier this year. The album features a number of guest vocalists including Charlie Simpson, Jamie Lenman, Matt Prior, Andrew Futeral and, of course, Paul Gonzenbach, and it’s available now via Big Cartel and iTunes.
Audio Examples Online
We’ve placed a number of audio examples relating to this mix on the SOS web site. Why not download them and check them out in your DAW?
Mix Rescue: Audio Examples
The audio files on this page accompany the Mix Rescue article in SOS November 2015 about the track ‘Red Envelopes’ by the Travis Waltons. As well as the final mix of the track I’ve supplied some before and after audio examples that demonstrate the effect the processing had on different elements.
01 Red Envelopes Final Mix
The final mixed and mastered version of ‘Red Envelopes’. The vocal duet arrangement discussed in the article begins at around 2m15s.
02 Drums Pre-compression
This is the sound of the drums with no compression applied.
03 Drums Post-compression
The drums with the compression described in the article. Notice how the overheads are able to breathe, whereas the kick and snare have been firmed up and pushed forward by the compression.
04 Guitars Raw
The hard-panned guitars prior to any EQ and compression.
05 Guitars Processed
The guitars with their EQ boost at 3.3kHz and a little dip in the low mids around 250Hz. 1-2dB of compression was also applied. Notice that the guitars sound a touch harsh when heard in isolation — but not when heard in the context of the mix.
06 Dan’s Vocal Raw
Dan’s duet vocal part, without any mix processing.
07 Dan’s Vocal Processed
Dan’s vocal was deliberately thinned using EQ to prevent it clashing with the lead vocal. The part was also fairly heavily compressed and was treated to a little reverb.
08 Paul’s Lead Vocal Raw
Paul’s lead vocal without any mix processing — despite being a great there’s some problematic hiss and lip noise.
09 Paul’s Lead Vocal Part Processed
Notice the reduction in the level of the hiss and see if you can hear the effect of the high-pass filtering, EQ, de-essing and some fairly heavy compression. To help you hear these things, this clip doesn’t include any of the spatial effects.
10 Paul’s Lead Vocal Full Processing
Paul’s lead vocal with all the mix processing applied. As well as the EQ and compression described, a tape-echo-type effect was deployed and a little was sent to the shared mix reverbs.