What better place to start building your mix than the kick‑drum and bass parts? Get them to work well together and you're on your way to a good mix...

After some recent, and occasionally frustrating, experiences working on readers' remix projects, I thought it would be useful to offer a bit of advice on getting drums and bass instruments to work well together in a mix, and in particular how to get the kick drum and bass working in tandem. For the most part, I'll assume that all the parts in your track have been well played and recorded, and that only the sounds of the instruments need attention. However, I'll say a little about editing to improve timing, and remedial work required to bring recorded kicks up to scratch, because in my experience getting a great recorded drum sound in a small home studio can be a real challenge.
These observations apply mainly to acoustic drums and to bass guitar — simply because that's what these projects used — but most tips will also be applicable at least to some extent when working with electronic sounds. Rather than write another 'everything you need to know' article (you'd need a book!), I've set out to offer a selection of practical tips and techniques that should help you make tangible improvements to your mixes very quickly.
There's always the option of drum replacement or reinforcement with samples, of course, but that's often a less straightforward process in practice than the theory suggests it should be! We've covered that subject in depth relatively recently (/sos/mar11/articles/cutting‑edge‑drums.htm and /sos/apr11/articles/trigger‑happy.htm), so have a look at those articles if you want to know more about that.
Timing, Edits & Phase
 If you're editing your bass part to tighten timing, be sure to use the drum part as a reference, rather than snapping everything to the grid.
Good timing is crucial, so it pays to put some time and effort into rehearsing, and thus to capturing a good, tight performance. Where an otherwise strong performance would benefit from tighter timing, most modern DAW software offers simple ways to make audio timing adjustments. Often, it's enough to view the kick and bass waveforms side by side and nudge any errant bass notes into position, so that they line up with the drums where appropriate. Don't get too carried away trying to satisfy your eyes, though, as the on‑screen waveforms may not be 100 percent accurate — and things still need to sound in time.
For bass guitar, the duration of notes can be almost as important as when they start: there's nothing worse than a long, flabby note where you want it to stop tightly. You could use your DAW's time‑stretch utilities to shorten notes, but I prefer simply to edit the length with a scissor tool, adding a fade-out if needed. If there's a real problem note, you can always search through the track for another note that can be cut and pasted into place. Don't go overboard with such editing if you want a natural sound, because it's almost always better to record a fresh take if the part is too problematic, but it's well worth looking through the take and tidying things up.
If a part comprises multiple signals (mics inside and outside the kick, for example, or a miked bass cab and a DI), it's important to make sure the two are 'in phase'. In other words, when one waveform is going 'up' the other is too. You might want to time‑align the transients, but not necessarily (that, again, is something to set by ear). The 'Mix Mistakes' article in this issue gives some useful pointers for working with phase.
Kick Gating
A miked kick will invariably need gating to get rid of the spill from the other drums in the kit, though you don't need to get it completely isolated. If the snare breaks through from time to time, for instance, that probably won't make a noticeable difference when the whole kit is playing. Setting the upper side‑chain filter of your gate plug‑in down at 1.5kHz (or even a little lower) will help avoid false triggering. A fast attack coupled with a release time set by ear to match the drum decay usually does the trick, and setting the gate to attenuate by around 12-15 dB rather than cutting the sound off completely often gives a more natural sound. If your DAW's built‑in gate doesn't include a 'floor' or 'range' control, it's worth searching for freeware that does.
Kick Filtering & EQ
 These two screens show how you can use EQ to make the kick and bass parts complement each other and the track. In both cases, you can see that the two instruments have slightly different dominant frequencies, so that they don't mask each other. In the second screen, you can see that EQ has been used to change which instrument sits beneath the other.
Further 'cleaning' of the kick can be achieved using filters. A close‑miked kick can generate a lot of spurious, ultra‑low‑frequency sound that does nothing useful or audible, but still eats up mix headroom. Applying a low‑cut (high‑pass) filter to anything below 30-40Hz will help to keep this under control.
With the cleaning job out of the way, I usually turn my attention to any tonal sculpting work that's required. If the kick lacks 'punch', as it seems to do on many home recordings, some boost centred at 70‑90Hz can help fatten things up. This runs the risk of making the sound boxy and less well‑defined, so I usually add some EQ cut around an octave above where I've placed the boost (typically around 180Hz). A hint of boost at 3‑4kHz will bring out the attack of the sound, if you feel that's lacking. Whenever EQ'ing, remember that there's no magic cut or boost amount: it depends entirely on the sound you start out with. Some EQ presets can help you find the right frequencies to cut or boost, but only your ears can tell you how much, if any, cut or boost to apply.
Complementary Equalisation
One question that crops up repeatedly is how to get the kick and bass to 'make space' for one another. I see lots of vague advice about EQ'ing the kick to make room for the bass, or vice versa, but what does that actually mean in practice?
The fundamental bass frequency will change with each note, but I think the trick here is not to worry too much about the fundamental frequencies. Our ears have great difficulty in making sense of very low frequency sounds, after all: they're felt as much as they are heard. Each instrument will have a fairly consistent sound character, in much the way that the human voice has relatively fixed formants even though the singer is singing a range of different notes — so it's more important to find the part of the audio spectrum that defines the general sound of the instrument.
If you sweep an EQ boost through the lower mid‑range of the bass guitar, for example, you'll probably identify that part of the sound that gives the bass its essential character somewhere in the 220‑300 Hz region. Boosting that slightly will often help the bass stand out more when played over smaller speaker systems. A 'general rule' when EQ'ing for a natural sound is to use broader boosts and narrower cuts, but with drums and bass you don't necessarily want a natural sound, so adjust the Q by ear, and make this sort of change in the context of the other instruments, so that you can hear whether it works for the particular mix in question. You may also notice that this 'area of character' changes if you switch to a different bass-amp model (if you're DI'ing and then using plug‑ins to shape the sound, a many of us now do), as each amp has its own voicing, and each speaker cabinet has unique resonances.
While you're at it, apply some low‑cut filtering to the bass, just as I described for the kick drum. You might be surprised at the level of ultra‑low frequency content that was washing around due to the strings being moved over the pickups when being picked and hammered! Removing this will, again, free up headroom, stop the kick and bass competing, and help to clean and tighten up the sound. It's very difficult to hear what's going on down there, though, and particularly so in a small room, so a spectrum analyser plug‑in is a valuable tool in checking this, to see how much such EQ is needed and where.
The EQ technique I mentioned earlier for boosting the kick at around 80Hz and dipping at around 160 to 180Hz helps the kick and bass co-exist, as the top end of the dip overlaps the area where the bass has its characteristic coloration, but adding a second dip to the kick EQ at around 220Hz can further improve the separation between the sounds. As a rule, I find that massaging the kick to work with the bass is easier than trying to massage the bass sound to work with the kick.
Deep & Heavy Isn't Always Best
While we're on the subject of EQ, it's important to remember that although they're both bass instruments, not all musical styles need both the bass and kick to sound deep and heavy. Often a deep, solid bass-line works better with a slightly more constrained and less deep kick sound: taking out some low end from the kick allows it to be mixed higher in level, and gives it more definition, while the bass provides the necessary low-end fullness. Conversely, a track that is driven along by a solid kick‑drum part may work better with a more constrained bass part, so try rolling off more low end from the bass and listen to how the relationship between the two parts changes as you do so. Which way you roll on this is a purely artistic decision.
Kick & Bass Dynamics
 Distortion can increase the audibility of a bass part in most genres, as long as you don't overdo it. Using a bass‑amp simulation such as IK Multimedia's Ampeg SVX can be more subtle than using a dedicated distortion plug‑in.
Where the kick sound really needs beefing up, using a limiter can make it more assertive, trimming maybe 6dB off the peak level. If hard limiting isn't needed, you can stick with compression, using an attack time of 20ms or so, which is just enough to let the impact 'click' get through before the kick sound is brought under control. A release time of around 80ms usually works pretty well for me, but this may need tweaking to take account of the tempo of the song, the actual compressor you use, and the decay characteristics of the kick drum on your recording. In terms of ratios, something in the region of 3:1 or 4:1 will usually do the trick — though do use your ears when making that judgment.
For bass guitar, dynamics settings will depend very much on how the bass is played, as some performances can tend to be uneven throughout the track. Some compressors seem to work nicely on bass, and others less so. You'll have to use your ears to decide what works, but I often like to use the dbx 160 or 1176 plug‑in model, with an attack setting somewhere around 20ms, and with an auto release (program‑dependent release) setting. If the compressor has an adjustable ratio, I'll usually be looking for one somewhere between 3:1 and 6:1. The amount of gain reduction is very much a matter of taste, and is again down to how the part has been played, but think in terms of figures like ‑6dB for 'normal' pop/rock material, and as much as ‑10 or ‑12dB for a hard‑hitting rock song. If this isn't enough, a limiter can be used to catch any slaps and bangs that go over the top — you're not looking for lots of gain reduction, it's just there as a safety measure to prevent clipping.
I'm not a huge fan of using distortion on the bass myself, but a lot of people find that it can help the bass cut through a mix in a useful way. If I am using distortion on the bass, more often than not I'll opt to use a bass-amp model such as IK Multimedia's Ampeg SVX, and drive it hard enough to get the required sound. Where a more assertive distortion is required, you could always try placing the amp in the signal chain after a parallel compressor (of which more later).
Tape emulation is another process I sometimes use to add a pleasing fullness and roundness to low frequencies. Sometimes I'll use it on the kick or bass in isolation, and sometimes on the full drum kit, because I find that on many modern recordings the cymbals sound a little too forward and aggressive for my taste, and tape emulation seems to smooth them out without sounding noticeably dull. There are some lovely esoteric tape plug‑ins, such as Universal Audio's Studer emulation, but there are also some very usable freeware plug‑ins, such as Bootsie's Ferric, if you want to give this a try.
Transient Designing
SPL's Transient Designer and its imitators are really useful when it comes to sculpting your drum sounds, and it's potentially as useful on the kick as on any other piece of the kit. This processor — also available as a plug‑in — detects the transient of the drum signal and gives you separate control over the attack transient and the sustain portion of the sound. It's not only useful for drums, though: the Transient Designer is also worth trying on bass lines where the bass notes have been allowed to sustain too long, or where there's noticeable string rattle in the note decay. This won't fix rattle completely, but might improve it just enough to make a marginal bass recording usable. It can also help to take a little of the room sound out of a miked-up bass recording — though if you mic appropriately in the first place, that shouldn't be an issue you need to tackle, (and it won't remove the sound completely).
Ducking The Bass
The sense of separation between kick and bass can often be further improved by rigging a 'ducker' on the bass channel — that is, a compressor whose side‑chain is triggered from the kick‑drum track. Whenever the kick hits, the bass dips in level to make more space for it. A level drop of around 3dB still sounds pretty natural, but in harder rock styles and in many urban genres, the level of ducking is deliberately increased to give more obvious pumping effects, which create a sense of energy. In such cases, you'll need to adjust the ducker's release time, so that the pumping creates a rhythm that reinforces the song rhythm rather than pushing against it. The simplest way to do this is to set the ducking to maximum so that you hear far more pumping than you need, then use your ears as you adjust the release time. Once you feel you have it right, back off the amount of ducking to what you actually need.
Parallel Compression
 Compressors and limiters aren't the only dynamics processors you can use to shape your kick and bass sounds. Tape emulations can add a nice, warming roundness to the bottom end, and transient design plug‑ins give you control over the attack and sustain portions of the sounds.
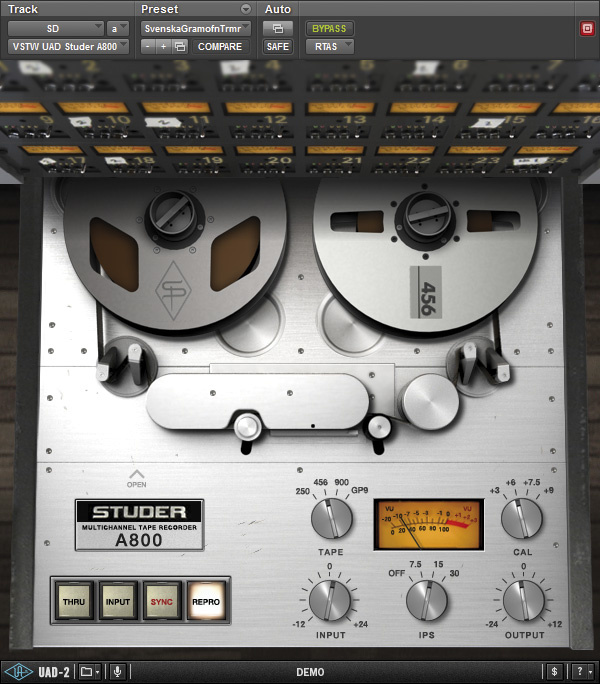


Another technique that I often resort to — both on the drum buss as a whole, and on the kick-drum and bass-guitar tracks themselves — is parallel compression, which is very easy to set up in a DAW, providing that it has full plug‑in delay compensation (and that this feature is turned on!). The idea is that rather than use a compressor in series via an insert point, as is commonly done, you set up aux sends from the tracks to be processed and then feed the send to the nastiest, most vicious compressor you have, set to squash and pump to the max. This means high ratios, typically 8:1 or higher, and a threshold setting so low that you see around 25dB or more of gain reduction on the peaks. A fast attack coupled with a fairly brisk release time will maximise the pumping effect but, again, you need to adjust the release time to get the pumping bouncing along with your track. I recently discovered that Logic's very basic Silver compressor works very well for this, but pretty much any assertive compressor will make a fair stab at the job. If your DAW doesn't have delay compensation and you want to try this out, look for compressor plug‑ins (such as Softube's excellent FET Compressor and DDMF's NY Compressor, for example) that include a wet/dry control, which enables you to do parallel compression without sending to aux tracks.
On its own, the heavily compressed signal will probably sound pretty disgusting — and if it doesn't, you're not compressing hard enough or you've picked an unsuitably polite compressor (which some people prefer with this technique, if they're only trying to lift low‑level detail)! The magic comes when you mix in around ‑15dB of this compressed sound with the original: it beefs things up to a serious extent without ruining the dynamics in the way that large amounts of conventional compression can. You can also EQ the output from the compressor if you want to confine its contribution to the low end of the spectrum (though personally I tend to leave it pretty flat, as I like the sound that way!).
The reason why parallel compression sounds the way it does is that conventional compression has most effect at high signal levels (for example, your drum hits), whereas with parallel compression, its contribution is more noticeable in the quieter moments between drum hits.
To make this work for you when creating a rhythm foundation, try feeding the same parallel compressor from just the kick drum and bass tracks. You can apply it to the other drums if they need to sound bigger and fatter, but start with just the kick and see how that sounds. I usually find it helps the rhythm section gel but, importantly, without blurring the kick and bass. If experimenting with parallel compression on the drum bus as a whole, try sending a little of the kick or bass to it for taste, as this will affect how the compressor operates. As always, it's a case of experimenting to get the effect you want.
Care With Compression
Finally, given all this talk of dynamics, I'll leave you with a more general word about compression. Remember that your mix elements may pass through several stages of compression before the end user hears your song: we all have techniques for using compression on tracks, compression on buses (such as a complete drum sub-group) and even on entire mixes; there's parallel compression, as just discussed, of course; compression is also routinely applied during mastering; and any tracks you hear on the radio will have been further compressed by the radio station's own multi‑band compressor prior to transmission...
For all of these reasons, it pays to make sure you don't overdo the amount of compression at any one stage. A little compression can add to the impression of power from your rhythm section and your vocals but, curiously, if you go too far with compression , the sound actually starts to become 'smaller' again! So when you have what you think is your final mix ready to bounce, it's a good idea to revisit the compressor settings on the various individual tracks and buses to see if reducing it slightly gives you a better sound. Very often, I find that it does.