Take the trouble to discover the ways of moving around your project quickly and efficiently: it saves time and improves workflow.
One of the things that can save you the most time when you're using a sequencer is effective navigation: can you move quickly from one place in a project to another, or do you have to do endless scrolling and zooming? Many people do the latter because they haven't taken the time to learn exactly how a program can be navigated. Sonar is very good at providing shortcuts and navigation options, so let's see how these can improve your workflow.
The Navigator Pane
In digital audio editors, this type of feature can be found as an 'overview' window, and it's just as applicable to a sequencer. Sonar 's Navigator pane was added in v4 and allows you to see the scope of the entire project in a strip above the track view and drag a resizeable rectangle over the area of interest. The Clips pane scrolls and zooms automatically to cover the area defined by the rectangle. You can also set the Now time from within this pane.
The Navigator pane can be shown or hidden if you click on the appropriate Track View button, as shown in the screen at the bottom of the previous page, or simply type 'D' while in the Track View. ('D' doesn't make much sense to me, so I came up with the memory aid of associating it with seeing the entire project's 'Domain'.) You can also open the pane from the View menu. Note that there's a splitter bar between the Navigator pane and the Track view, so that you can change the pane's height.
 You can enable or disable the Navigator pane by clicking on a button or typing a keyboard shortcut.The key to the Navigator is the resizeable rectangle, as it determines what will be seen in the Clips pane. Note the eight nodes on the rectangle's corners and sides; you click on these to change the rectangle's size and shape. As you do this, what's shown in the Clips pane follows. Shrinking or expanding the rectangle's height causes the Track view track heights to change as well, providing a convenient way to minimise all the track heights simultaneously.
Once you have the rectangle sized as desired, position the cursor inside the rectangle and the cursor turns into a cross-hair. You can now drag the rectangle wherever you want and the Clips pane will show what's inside the rectangle.
The Navigator Pop-up Menu
Right-click anywhere within the Navigator pane to see a pop-up menu. Its options allow you to customise the pane's display.
First, consider what happens if you click within the Navigator pane but outside the rectangle. If 'Left Click Positions Rectangle' is ticked, the upper-left corner of the rectangle jumps to wherever you click. If it's unticked, the rectangle stays at its current position, regardless of where you click. I don't see much point in leaving this unticked, as clicking in the pane doesn't then do anything. (Perhaps the option is there for the future?) If you Control-click, though, several things happen at once:
- The Now time jumps to where you clicked.
- The rectangle moves horizontally to where you clicked, but the left edge of the rectangle moves slightly left of the Now time rather than sitting right on it. This is good, as in the Clips pane the Now time is not slammed up against the left side of the pane, where it might be hard to see, but somewhat to the right.
- The rectangle doesn't care whether you click toward the top or bottom of the Navigator pane, it simply moves horizontally from its existing location. This is unlike what happens when you just click (not Control-click) with 'Left Click Positions Rectangle' ticked. In that case, the rectangle's upper-left corner jumps to where you clicked.
 You can think of the rectangle, outlined in green, as a magnifying glass that causes the Clips pane to expand or shrink to show what's inside the rectangle.The 'Show and Fit Selection' option can be scary if you don't know what's going on. If you've selected a region or group of clips in the Clips pane and you choose 'Show and Fit Selection' (or type Shift-S), the following things happen:
- The Clips pane and Navigator pane will show only the tracks containing the selected clips.
- The Clips pane will zoom to fit the selected clips.
- The Navigator pane rectangle will automatically resize to fit the selection.
What's scary is that it seems everything that wasn't selected has disappeared, but fear not: Type 'A', or right-click in the Navigator pane and select 'Show All Tracks and Buses' from the pop-up, and all tracks reappear. Here are the other pop-up menu functions:
- Fit Tracks and Busses to Window (shortcut F): Use this if you've dragged the rectangle so that not all tracks are visible in the Track view. Invoking this option will cause all the tracks to show up in the Track view, with their heights adjusted to take up all available space. Note that if you have so many tracks that they won't all fit, Sonar will do the best it can and you'll have to scroll vertically to see the other tracks.
- Fit Project to Window (shortcut Shift-F): This zooms horizontally so that all clips in the project fit in the Clips pane, and the rectangle resizes itself to encompass the entire project. Use this when you want to see your entire project at a glance.
 The Navigator pane pop-up menu provides several ways to alter the display of both the Navigator pane and the Clips pane, as the two are related.
- Show Only Selected Tracks (shortcut H): The Clips pane and Navigator pane show only tracks that have been selected, and the rectangle automatically resizes its height to fit the tracks that are shown.
- Hide Selected Tracks (shortcut Shift-H): Selected tracks disappear from the Clips pane and Navigator pane.
- Track Manager (shortcut M): This is the standard Sonar Track Manager function, allowing you to see a list of all tracks and busses and choose to show or hide particular types of tracks, or alternatively use check-boxes to show or hide individual tracks.
This may seem like way too many options, but since they're on a pop-up menu you needn't concern yourself with them if you don't want to. But to the advanced Sonar user, these facilities mean that the Navigator pane not only provides a quick way to focus in on part of a project, but also lets you go further and hide tracks that aren't of immediate interest. Yet by typing a single letter ('A' to show all tracks, 'F' to fit tracks and busses), you can go back to seeing the big picture.
Below these options in the pop-up menu are the choices for the Navigator pane's Horizontal Zoom level. Basically, choosing a higher number zooms further out, but what's cool here is the shortcut. Right-click to see the pop-up menu: rather than dragging down to the desired zoom level and clicking, just type the corresponding number (1-5), or 'Z' to make the Navigator pane zoom out to show the entire project.
The final group of pop-up menu options relates to the height of tracks shown in the Navigator pane. I'd recommend the following choices:
- Use Short if you have lots of tracks and don't want to have to scroll vertically in the Navigator pane.
- Choose Medium for most situations.
- Select Tall if you don't have a lot of tracks and don't mind allocating more space to the Navigator pane's height.
As with the Horizontal Zoom level options, there are keyboard shortcuts. After the pop-up menu appears, type R, D, or L for Short, Medium or Tall respectively.
Sonar News: v5.0.1 Arrives
This is quite a bug fix, but it also offers a few enhancements. You can see the list of major changes at www.cakewalk.com/Support/kb/kb2005295.asp; this is also where you can download the update.
Many of the fixes fall under the category of 'Under some circumstances, if you did 'A' and then 'B' but not 'C', the following problem might happen'. But a few important issues have been addressed as well, such as inconsistent envelope and mute-tool operation. I've downloaded the update and can report that it works very well.
Meet The Markers
I realise that sounds vaguely like the title of a '60s album from a Merseybeat group, but in the context of Sonar it relates to another method of navigation. In fact, using markers provided the only Sonar navigation option until version 4 came along, and this technique is still extremely useful. The subject of markers can be pretty complex, because they also relate to altering pitch for groove clips, and for locking locations to SMPTE time. There are numerous ways to go to markers, too, some of which are more complex than others. So for the purposes of this article, we'll do the 'executive summary' treatment on markers.
 Note the marker in the timeline labelled '1 Verse', and its associated Marker dialogue box.The key to placing a marker is the F11 function key. If you hit F11 when the transport is stopped, the marker will be placed wherever the Now time is sitting. Simultaneously, a Marker dialogue box will appear (see screen above), where you can enter a name and verify that the time is correct (optionally, this is also where you set the pitch for groove clips or tick the 'Lock to SMPTE' box). You can call up this dialogue box at any time, by holding the cursor over the marker until it turns into a downward-pointing arrow, then right-clicking.
It's also possible to place markers in real time, by hitting F11 as the project plays, but they won't be quantised. Also, the dialogue box will not appear, and an arbitrary name will be assigned (A1, A2, etc). As a result, after the marker is placed, you may want to go back and call up its dialogue box to name it, as well as moving the marker to exactly the right position.
Moving To Markers
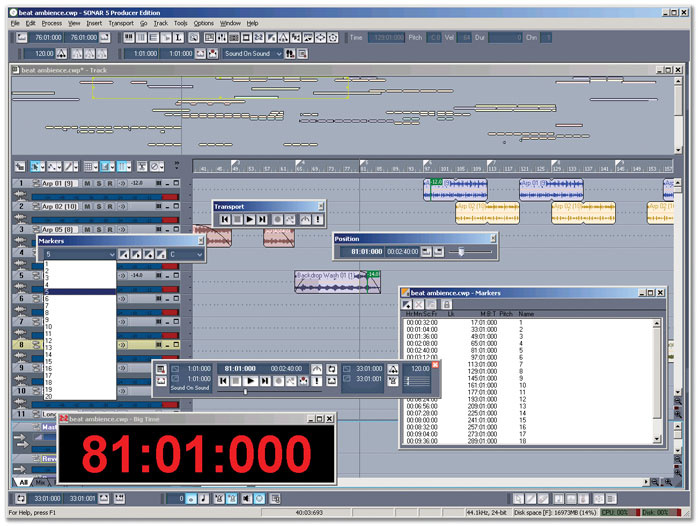
The Marker toolbar is where the action is when it comes to working with markers. Of course, like other toolbars, this can dock or float. There are only six components to the toolbar — from left to right: The Markers toolbar is located toward the centre right of this screen. Behind it is the Markers view, which shows all markers, plus their timings and names. The drop-down menu toward the toolbar's left is a stripped-down markers list that simplifies navigation.
- Current marker indicator and drop-down menu: This field shows the current marker (the most recently selected marker position). It also has a drop-down menu, and selecting a marker from this menu automatically adjusts the Clips pane so that the marker appears toward the left of the timeline and the Now time is placed at the marker. Incidentally, the rectangle in the Navigator pane follows what's showing in the Clips pane.
- Previous Marker button: Moves to the previous marker on the timeline.
- Next Marker button: Moves to the next marker on the timeline.
- Insert Marker button: Click on this to insert a marker. Its main value is for people who haven't figured out yet that hitting F11 is a lot easier.
- Markers View button: This brings up the Markers view, which we'll discuss a little later.
- Default Project Pitch field: This has nothing to do with navigation, but specifies the default project pitch for the benefit of groove clips.
Sonar cognoscenti know that the quickest way to jump from marker to marker is via keyboard shortcuts: Control + Shift + Page Up takes you to the previous marker, while Control + Shift + Page Down moves to the next one. Memorise these and you'll be really glad you did. What's even cooler is that the Markers toolbar displays the name of the marker to which you've moved.
Transport Navigation Options
In addition to the above-mentioned 'precision' ways to navigate through markers, there are also easy ways to move about a sequence on a more general level, by using the Large Transport toolbar or the Small Transport toolbar in conjunction with the Position toolbar. These options have associated keyboard shortcuts as well.
 The Transport and Position toolbars provide extra navigation functions.In the case of either the Large Transport or Position toolbar, you can grab the slider to move the Now time. This is best for large changes, as it's not a particularly precise way to set the Now time, especially with longer songs. However, you can still manage some fine movements with these toolbars. Clicking along the slider to the right of the handle moves the Now time to the next measure (the keyboard equivalent is Control + Page Down). Clicking along the slider to the left of the handle moves the Now time to the previous measure if the Now time is on a measure boundary, or to the beginning of the current measure if the Now time is located within a measure.
If you click and hold, or hold down the keyboard-shortcut keys, the Now time will continue stepping backwards or forwards, one measure at a time. But there's a nice little extra: holding the keyboard keys moves the Now time faster than if you click on the Transport or Position toolbar slider, effectively giving you two speed choices for moving through a project a measure at a time.
In either Transport toolbar, click on the button to the left of the Stop button to return to the beginning of the project, or the button to the right of the Play button to go to the project end. These also have keyboard shortcuts: Control + Home (beginning) and Control + End (er... end!). But two options that I find even more useful relate to the selected region on the timeline: hit F7 to go to the beginning of the selection and F8 to go to the end. There are equivalent buttons on the Position toolbar, but not on the Large Transport. The button to the immediate left of the position slider jumps to the end of the selected region, while the next button to the left jumps to the selection's beginning. If you like to type, you can also send the Now time to a precise location. Just hit F5, then type where you want to go in Bars:Beats:Clocks.
Managing Markers
Now we know how to place markers and move around from one marker to another. But what about managing and editing markers?
 There are a lot of options in the Global menu; the one we're interested in is circled for clarity.Clicking on the Markers toolbar's 'Markers View' button calls up a window that lets you manage markers in a fair amount of detail. If you click on one of the markers in the list, the Clips pane automatically jumps so that the marker appears toward the left of the timeline and the Now time is positioned at the marker. However, I feel that it's faster to do this from the drop-down menu toward the left of the Markers toolbar. There are also four buttons in the upper left of the Markers view (see screen at bottom of previous page). Here's what they do:
- Insert Marker: Click on this button, or type 'A' to insert a marker. As with the Markers toolbar 'Insert Marker' button, its main value is for people who haven't figured out how to place markers by hitting F11.
- Delete Marker: Click in the list on the marker you want to delete, then click on the big 'X' or type 'D' to delete it.
- Change Marker Properties: Click in the list on the marker whose properties you want to change, then click on this button or type 'C'. This brings up the Marker dialogue box, where you can change its name, time, and so on.
- Lock/Unlock Marker: This doesn't relate to navigation, but if you select a marker from the list you can lock it to SMPTE or unlock it without having to open the Marker dialogue box.
Changing 'Now Time' Characteristics
In the last stop on our tour through the world of Sonar navigation, let's look at the Now time itself. The Now-time marker looks like other markers, but it's the only one that's green. You place it anywhere you want simply by clicking in the Clips pane or on the timeline. However, the Now-time marker also indicates where playback will begin once the transport is stopped, and this characteristic can be changed (see screen, left).
Go Options / Global. If you tick 'On Stop, Rewind to Now Marker', during playback the Now-time marker remains where it was originally set and a cursor line moves along the timeline. If you untick this option, during playback the Now time still remains where you originally set it. However, when you stop the transport, the Now time jumps immediately to where you stopped.
While we're talking about the Global Options menu, there's one other item that involves the Now time — although it only really has relevance if you're synchronising Sonar with other devices. If you tick 'Set Now Time with Full Restart', whenever you change the Now time the transport stops before restarting playback. While this sort of defeats the purpose of Sonar 's engineers trying to make the audio engine as gapless as possible, it produces more robust synchronisation, because while the transport is stopped, Sonar can verify its position.

