Venture beyond Reaper's default Snap settings to discover a world of techniques to speed up your workflow.
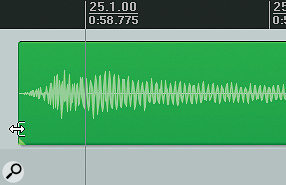
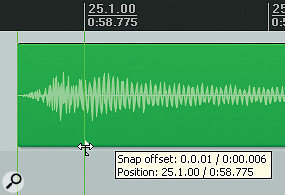
 A quick way to set an Item's Snap Offset is to hover the mouse over the tiny grey triangle at its bottom left-hand corner, so that the Item sizing cursor (screen 1) changes to the Snap Offset cursor (screen 2), and then drag the triangle to its new destination (screen 3), here the downbeat of bar 25.

Although Reaper has plenty of headline-grabbing features, one of the things I most like about it is that it gives you plenty of control over the less glamorous, but no less worthy, aspects of its operation, and it's one of these that I'd like to focus on in this month's column: the Snap facility. If you find yourself doing a lot of work with audio, it's worth getting familiar with some of the finer points of what's on offer here.
Grid Reaper
In simple terms, one of the main things the Snap function does is force various different editing functions to follow the project's bars/beats grid. You toggle Snap mode on and off by clicking the magnet button in the main toolbar, or by using its Alt-S keyboard shortcut, whereupon your editing options are constrained according to the configuration of the Snap/Grid Settings window. You can call this up by right-clicking on the button or typing Alt-L. The button to the left of the magnet (shortcut Alt-G) lets you toggle the visibility of the grid lines.
The first decision you need to make when snapping things to the grid is what grid resolution you choose from the Line Spacing drop-down menu of the Snap/Grid Settings. If you're just auditioning a bunch of 4/4 loops against each other while sketching out a song, then choosing '1' from this menu would make sense, so that you get just one grid line per bar, whereas for more detailed, note-level editing tasks it makes sense to use a grid spacing equivalent to the smallest note value in the music you're working on. You'll notice that some of the entries in the list have a 'T' suffix, which denotes a triplet. So, for example, a '1/8T' will produce three grid lines per quarter note, where '1/8' only gives the usual two. You don't need to restrict yourself only to entries in the list, either, if something else would be more suitable. When you're working in a 3/4 time signature, for instance, the '1' Line Spacing value doesn't give you a one-line-per-bar grid, you get one line every four beats. However, you only have to type 3/4 into the Line Spacing field to sort this out.  You don't have to stick to the standard entries in the Line Spacing field. You can enter your own, such as this one, which gives one grid line per bar in a 3/4 time signature.
Alongside the Line Spacing selector, there's another numeric field that sets the minimum distance in pixels between the onscreen grid lines. The practical benefit of putting something sensible in here (such as the default 20) is that you don't drown in grid lines when zooming out to view your whole project, even if you've been working at, say, a 16th-note grid resolution for the purposes of fine editing. All that happens is that the grid resolution automatically reduces while you're zoomed out. In Reaper's default state, the 'Grid Snap Settings Follow Grid Visibility' box is ticked in the Snap/Grid Settings, which means that edits snap only to grid lines you can see, and because this makes perfect sense 99 percent of the time, I wouldn't recommend tampering with it unless you really know what you're doing.
Snapping To Bars & Beats
Once you've set up the bars/beats grid, by default you should find that both the beginnings and ends of Media Items will snap to the grid lines, as will any cursor positions or selections you make by clicking or dragging in the project window or time ruler. You'll also find that the boundary of a Media Item will snap to the grid if you resize it, whether you're adjusting it with or without time-stretching. Another thing that's worth realising is that the way you grab a Media Item with the mouse pointer will have an effect on which bit of it snaps to the grid (assuming you're working with the default of 'Media Items Snap At Mouse-position Dependent' in the Snap/Grid Settings): grab it towards its start or end and only that boundary of the Item will snap, whereas grabbing it in the middle makes both boundaries snap.
What provides additional flexibility here is that every Item can also have its own Snap Offset. This is normally zero, which means that the Item's start point snaps to the grid, but if you set a Snap Offset of, say, 20ms, then the notional 'start' of the Item, as far as snapping is concerned, will move 20ms later. This is great for situations where a section of audio has an upbeat or a slow attack preceding a main section bar line, because you can still set it to snap to the bar line, such that it retains its position in relation to the downbeat when copied.
In this case, the most straightforward way to set the correct Snap Offset is to grab the minuscule grey triangle you can just see at the very bottom left-hand corner of the Item, and then drag it over to coincide with the following bar line. You have to be quite accurate to avoid trimming the Item's boundary by mistake, though, so I usually hover the cursor over the corner watching for the change in cursor icon before I click to head this off. Bear in mind, as well, that if you have snapping enabled, the Snap Offset marker will itself snap to the grid, which makes it easy to set accurately.
All that said, if you don't fancy fiddling with Snap Offset points, there's actually another way to skin that particular cat, which can be more convenient in many situations: the Snap Relative To Grid mode, enabled from another tick box in the Snap/Grid Settings. What this does, beyond changing the main toolbar Snap button's icon, is cause any Item with an unsnapped start point to respond as if it had its Snap Offset set to the following grid line. This won't work with Copy and Paste actions, though; it will only work when moving/copying via drag and drop. ![]() Selecting the 'Snap Relative To Grid' option (Screen 1) changes the Snap button's icon (Screen 2) and means that dragged Items always retain their timing relation to the grid lines (Screens 3-5).
Selecting the 'Snap Relative To Grid' option (Screen 1) changes the Snap button's icon (Screen 2) and means that dragged Items always retain their timing relation to the grid lines (Screens 3-5).


By default, the snapping action only occurs when you drag an Item within a certain range of a grid line, as set by the Snap Distance field in the Snap/Grid Settings, but if you work with loop-based construction kits a lot, it can actually speed things up if you tick the 'Snap To Grid At Any Distance' box, which means you can easily whisk regions here and there at super-speed using a bar-length Line Spacing. If this seems a bit restrictive at first, remember that you can momentarily defeat Item snapping at any time while you're working, by holding down the Shift key.
Off The Grid
While snapping to the grid is handy for a lot of metronomic current music styles, Reaper's snap functions are also a godsend if you're working with audio that doesn't line up neatly with a simple metric grid. The first thing to make sure of is that the Media Items box is ticked alongside the Snap To Selection/Markers/Cursor entry in the Snap/Grid Settings window. This makes it possible to line up the cursor with, say, a snare-drum hit in your live drums recording, and then snap a newly imported tambourine on another track to it. It also makes it easy to import any audio file to an exact time position in your production (using the Jump To Time window), or to fire off spot effects at specific hit points in a video file.
'Snap Media Items To Nearby Media Items' can, likewise, come in very handy on occasion, especially because of the accompanying Tracks Away field, which means that you can snap Media Items on one track to the boundary points of Media Items on neighbouring tracks. This is great where you're trying to tighten up the timing between two REX files, for example, because it lets you easily slide the slice positions on one track to perfectly match the other.
However, this is one snap option that it's as well to be a little wary of, because if you're not careful it can catch you out by confusing any grid-based edits you do. Let's say, for example, that you've done a 10ms crossfade between two audio Items just before a bar line: an extremely common occurrence in drum editing in particular. This means that the start of the latter Item will be fractionally before the beat, and if 'Snap Media Items To Nearby Media Items' is active, you can easily end up snapping something to the Item start point by mistake, rather than to the downbeat. For this reason, I often switch off 'Snap Media Items To Nearby Media Items' when I don't specifically need it.
Star In Alignment
As you can see, Reaper offers a lot of different ways of lining things up with each other in time. So grit your teeth and push beyond the default settings to make your workflow speedier and more productive.


