 Using the spectrum analyser within the channel equaliser in Emagic's Logic v6, the overemphasised low end of Alistair's mixes, and his bass sounds in particular, became very apparent.
The SOS rescue team set off for Bristol to help out readers Alistair Vickery and Jon Midwinter, who wanted help with their mixes — not only getting the bass sounding right, but also stopping it getting out of the house and annoying the neighbours!
Alistair Vickery and Jon Midwinter both started out as DJs, something they still find time to do, but they work together most of the time as a production duo in Bristol, specialising in drum & bass and recording under various guises, Distorted Minds being their primary tag. Alistair set up the studio six years ago and their first release 'Eventual', was rewarded with extensive club and radio play. Since then they have released material on various labels including New Identity Recordings, Formation, 5HQ Recordings, Renegade Hardware, Trouble On Vinyl and Breakbeat Culture. Today they run their own record label, D-Style Recordings.
The duo work from a large, single-room studio above a double garage at Alistair's parents' home. They called SOS because they felt their mixes were lacking clarity, and also to see if Technical Editor Hugh Robjohns and I could help with noise leakage problems. Like so many studios, their setup is a mix of hardware and software, with Emagic's Logic Audio v6 providing the main recording environment. Monitoring is via a pair of Dynaudio BM15s fed from a Hafler power amplifier, and most of the mixing is done manually using a Mackie analogue eight-buss console. John told us he wasn't convinced by most software instruments, as he found them too clean-sounding for drum & bass work, so many of the sounds come from a hardware Emu sampler and an Access Virus synth. There's also a rackmount Novation Bass Station and a couple of more conventional keyboard synths including a Roland JP8000 and XP50.
Drum & Bass Mixing
The mixer tends to get used as a sound-design tool for reshaping sounds before use, often by applying radical EQ to individual sounds and then resampling them. We listened as Alistair played us some of his mixes and then some commercial recordings in a similar genre for comparison. Both Hugh and I felt that the sound from the BM15s was a bit bass-light, mainly because the dry-wall structure of the room was acting as a bass trap. A significant amount of bass was also escaping to annoy the neighbours, but other than an overall bass lightness there were no obvious hot or dead frequency spots.
Given that drum & bass isn't the cleanest of musical art forms, some lack of clarity is to be expected, but Alistair told us that when their material was mastered, it usually had to be brightened up quite a lot. The listening tests revealed that the bass end on their mixes was very deep and powerful, but it seemed to lack focus when compared with the commercial mixes, so rather than try to use EQ to correct the problem I asked Alistair and John to show us how they normally recorded and mixed their bass parts. The desk was already set up for the mix they were currently working on and, sure enough, on the bass parts the Low control on the Mackie EQ was turned up full to give +15dB of boost. Because this is a simple shelving equaliser, the boost continues all the way down the audio spectrum, so as well as beefing up the part of the bass spectrum that needed it, it was also pushing up the level of subsonic frequencies that simply eat into the available headroom without contributing to the mix in any useful way. This was almost certainly the main culprit in producing the muddy LF that Alistair and John had noticed when their tracks were played on big club PAs. However, because of the limited LF reach of the BM15s in their room, this subsonic energy was not apparent at all in the studio!
To see what effect this was having, I suggested we use the frequency analyser facility in the new Logic v6 Channel EQ to compare the frequency spectrum of their mix with that of a commercial mix they liked the sound of. The analyser needs to be set to its highest resolution to produce anything meaningful, and even then it can only provide a rough guide at the lower end of the spectrum, but straight away it was evident that Alistair and John's mix contained way more subsonic energy for more of the time than the reference mix. Hugh and I suggested that to improve this situation, they use a parametric rather than a shelving EQ to add any required bass boost, as that would avoid adding too much boost below the area of interest. Because only the largest professional monitoring systems cover the entire audio frequency range accurately (and then only in a well-designed room), there will inevitably be things going on within a mix that you can't hear over a typical project-studio monitoring system. Furthermore, we pointed out that it's invariably better to create the right type of sound at source than to try to batter it into submission later using large amounts of EQ.
Sorting Out A Rattling Speaker
 When we started listening to the monitoring system to try to form an impression of the room acoustics, it quickly became apparent that something was amiss. There was a buzzy rattle that seemed to be triggered by certain bass frequencies. Tracking this kind of thing down can be difficult, as sometimes it's just as likely to be noises generated by other objects in the room, or even within the walls, as it is the speakers — especially if it only appears at high listening levels. So I had Paul play a few bass notes on a Roland JP8000 as test material to make finding the problem easier.
In this case we were able to establish that it was definitely a problem with one of the loudspeakers. Sometimes buzzy noises of this kind are caused by loose fixing screws, or even air leaks around the gaskets of the loudspeaker drivers, particularly if the speakers are routinely used at high levels and with bass/drum-heavy music. So the first and easiest thing to try is simply tightening up all the accessible fixing screws. In the case of the driver fixings, it is best to adopt a similar tightening procedure to a car wheel — tighten in small stages working around opposite pairs of screws. It's worth checking the fixings of the terminal connector panel on the back as well in the case of passive speakers, and the entire amplifier chassis in active ones.
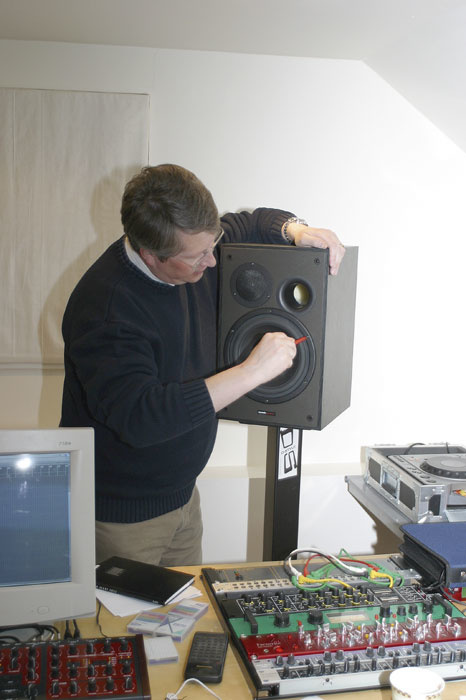
 Hugh's first step when attempting to eliminate a rattle in one of the BM5 speakers was to secure some loose fixing screws on the bass driver. When this didn't solve the problem, Paul used a Roland JP8000 to provide a consistent signal, allowing Hugh to troubleshoot further.In this case the driver fixing screws were, indeed, quite loose, but tightening them still failed to cure the problem. The next most likely scenario is that the internal connection wires, or even the lead wires running to the voice coil of the bass driver, are rubbing on something inside — other wires, sound absorption material, cabinet panels, or whatever. To solve this problem you usually have to carefully remove the bass driver and rearrange the internal wires as necessary — but if it is a lead-wire problem the bass driver will have to be replaced.
As we investigated, it turned out that the bass driver of the other speaker had already been replaced after exhibiting this very problem, and as it seemed likely that it was a similar lead-wire problem with this speaker, we didn't investigate any further, leaving it up to our hosts to organise a replacement as soon as possible. Hugh Robjohns
Solving Low-end Problems
Alistair asked whether we thought adding a subwoofer would solve the problem, but we both felt that it would be inappropriate in this case. Firstly, to deliver very low frequencies with any pretentions of accuracy you need to have a very well-designed (and usually large) listening room, and a misleading and inaccurate low end would be likely to cause more problems, not less. Also, more extreme LF energy would pass through walls very easily, exacerbating the problem of escaping noise annoying the neighbours! The safest option in this situation is only to EQ those elements of the bass end you can actually hear and leave everything below 60Hz or so as it is. At least this will give the mastering engineer a fair chance of adjusting the bass end adequately before the record or CD is pressed.
 Alistair had been using fairly extreme EQ settings for his bass sounds on his Mackie console — the low-frequency shelf was cranked all the way up, giving 15dB of boost! Paul flattened the bass channel's EQ and resolved to optimise the sound in other ways.We also ran a separate frequency analysis on the bass synth sound used in the track currently being worked on, as we all felt it lacked power and definition, even when extreme bass boost was being used. I suspected that the main reason was a lack of energy in the upper bass region where bass is heard rather than felt. This occupies roughly the 80Hz to 200Hz range, and it's mainly this part of a bass sound that you hear when a record is played on a small domestic hi-fi or on a portable radio. Sure enough, there was plenty of bass energy below 80Hz but a serious lack of activity for an octave or so above that, so trying to put the punch back with EQ wouldn't have helped the situation.
One of the production tricks used by the pair was to dirty up sounds using the SPL Charisma valve processor, and in some situations they would split a signal into two mixer channels, EQ one channel to be very bassy and the other to be bass-light and bright, then add different amounts of distortion to the two parts (or distort just one of the parts) before mixing them back together. This can be a useful trick, but in this instance distortion didn't help, because although it added harmonics right across the spectrum, it did little to fill the 'hole' in the frequency plot. The only real solution when faced with this kind of challenge is either to modify the synth sound at source or, alternatively, to layer in another sound that contributes in the frequency region where the original sound is lacking. One further recommendation we made was that Alistair and John should install a pair of small, domestic hi-fi speakers on which to try their mixes, as what sounds big on the Dynaudios can sound quite lacking in bass and punch on smaller speakers. Ideally, dance mixes of any type should be checked on studio monitors, small nearfields and a large club sound system to confirm that the bass end translates adequately.
Using Distortion On Bass Sounds
The conversation turned to methods of distorting sounds, and I asked if they had ever tried using plug-ins. They said they had and that they didn't like the results, which didn't surprise me as I've never really liked them either, other than some of the better guitar amp simulators. I explained that raw distortion usually sounds bad, because it needs to be filtered by something like a guitar speaker or emulation of a guitar speaker to round off the rough edges. As the studio Mac wasn't a particularly fast model, I didn't suggest using a guitar preamp plug-in, but instead felt that a hardware unit (such as the Digitech Genesis 3 or the Line 6 Pod XT) might be a good solution for warming/dirtying up synths and samples, and it would also make guitar recording easier on the occasions they needed it. John told us that they have a good relationship with their local music store, and that it might be possible to try one out before deciding, and they definitely felt the idea had promise.
Purely out of interest, I set up some bass synth sounds when I returned home and tried using Logic's little-understood Phase Distortion plug-in to give them more attitude. Providing you spend a while experimenting with the controls (not all of which do what you'd expect), this can yield some very worthwhile results. The sound is hard to describe, but it's not unlike increasing the modulation depth on an FM synth, where the harmonics become richer and more intense. Although there's little in-depth detail on what goes on inside this plug-in, it seems to work by changing the waveform shape in a similar way to the phase distortion synthesis used in the old Casio CZ synth range (which was itself a form of FM) and can save the day when other forms of distortion fail. It seems to work best on monophonic synth lines and drum loops.
Noise Reduction Measures
Before moving on to the noise leakage issue, Alistair told us that he had problems with the fan and drive noise from his Mac being picked up when recording vocals. It turned out that vocals were usually recorded to one side of the studio, but a few minutes of impromptu experimentation showed that a better place was towards the rear of the room, where the sloping ceiling/wall was covered in foam tiles. Working there only entailed buying a headphone extension cable, but setting up the mic facing the absorbent wall made the subjective level of the background noise at typical recording levels insignificant. The sound of the vocals was also more natural and uncoloured when recorded from this position. A further improvement could be made by improvising an absorbent screen (the ubiquitous duvet?) between the vocalist and the mixing desk.
 A few experiments with some heavy towels confirmed that the noise of Alistair's Mac G4 computer could be significantly reduced with very little effort.We also tried a trick I'd developed at home for making my own G4 quieter, which simply entails draping a heavy rug over it to form a tunnel, where the front and back of the computer 'look' out of either end of the tunnel. Keeping the back of the computer clear is essential, as this is where a G4 is ventilated. Providing the rug goes all the way to the floor on both sides of the machine, the drop in noise is significant, and can be further improved by having the back of the computer facing something absorbent, such as acoustic foam. We used a couple of heavy towels just to confirm the principle and everyone agreed the drop in noise levels was worthwhile.
Prior to us finding this way to record vocals, the pair were planning to build a vocal booth, but in my experience homemade vocal booths are responsible for some of the worst vocal recordings I've heard. Typically they are treated to absorb well in the upper frequencies and mid-ranges, but not at the low end, so what you end up with is a middly, honky room, with a woolly, dominant bass end. If you have built such a booth and are having these problems, try introducing some reflective surfaces back into the room, for example wooden slats or diffusor/reflectors made from plastic guttering with the convex side facing into the room.
Thoughts From Alistair & Jon
"The day Paul and Hugh spent with us certainly helped, and we're hoping we can try some of the sound isolation measures they described. I'm making more use of the EQ inside Logic now, especially with the analyser set to high resolution so that I can see the spectrum of the sound. I've also started to notice more about what we can actually hear on the BM15s (specifically at the low end) and I've tried out lots of different types of EQs to see what the differences are.
We're definitely looking at trying out a Pod XT, as some of our friends use one, and in general I think we had forgotten to experiment as much as we used to before the computer age really hit us. We bought the computer, got rid of almost everything else and then bought a lot of it back again! I think it's good to have both hardware and software tools and, although you can have a lot of fun messing around with either, at the end of the day you actually have to get on and write music. It also takes longer to realise what you can actually do with an application such as Logic, because there's an awful lot of stuff in there to explore."
Dealing With LF Leakage
 In an attempt to reduce the levels of bass leakage from the studio, Paul spent some time tapping various flat surfaces, such as underneath the stairs, to ascertain which ones were most likely to be resonating with the low frequencies.As expected, a lot of sound leakage was due to an ill-fitting outer door at the bottom of the stairwell leading up to the studio, and the single-glazed windows in the studio were leaking quite badly too, even though Alistair had made some Rockwool-filled shutters, which also excluded all daylight. In order to preserve the look of the building, we suggested fitting conventional double-glazed window units to the inside of the window spaces and leaving the existing leaded windows on the outside. One of the windows was right in front of the mixing desk, and would be reflective when the shutter was removed, but we felt the acoustics of the monitoring area could be maintained or even improved by fixing around one square metre of thick foam tiles to each side of the window opening, directly behind the monitors. As the side walls were quite a long way from the mixing position, there were no noticeable flutter echoes so it was decided not to treat these.
The outside door was showing light around its edges, and this gap was allowing a lot of sound to escape around it — it was also not particularly heavy. We explained that, to make it an effective sound isolator, it should be made more massive by adding a layer of 3/4-inch chipboard to the inside, ideally with a layer of barrier mat (heavy, flexible, mineral-loaded material) sandwiched in between to add more mass and to increase the damping. The frame should then be extended to include a threshold strip at the bottom, and proper neoprene sealing strip should be fitted all the way round (not domestic draught excluder). These specialist items are available from any studio acoustics materials supplier. Modifying the door in this way may not be enough, but there was space to build a small entrance lobby with a second door, which would be much more effective should the need arise. Although it would be possible to make the outer door even more massive, a special frame and hinges would have to be fitted to support the weight, so our DIY solution felt like a good compromise.
 "Can I borrow a cup of acoustic foam?"Another major source of leakage was a lightweight studding partition wall at the side of the stairwell, which adjoined the garage. This allowed sound to pass out through and around the garage doors. Building an internal brick or block wall would be the ideal solution, but as there might not be space for this, we came up with a compromise plan which involved uprating the existing wall by adding a series of multi-material layers comprising barrier matt, 3/4-inch chipboard, soft fibreboard and then one or two layers of thick plasterboard. Just applying this to the garage side of the wall should be adequate, but the same could also be applied inside the stairwell if needed. This is a relatively inexpensive solution, and within the scope of most people's DIY skills. The final plasterboard layer could then be skimmed with plaster to produce a professional finish. The reason for using this layered construction is to improve the damping of the wall, which in turn helps absorb sound energy rather than transmit it. The existing plasterboard wall could be felt to vibrate quite strongly when the monitors were playing at a moderate level.
Significant noise was also leaking from the underside of the stairs themselves and, again, a similar layered system could be used to damp this. As the stairs were close to a garage window overlooking a neighbour, fitting internal double glazing to this window might also be of benefit. Some leakage through the studio floor into the garage was also evident, but curing this would be much more complicated, and could involve fitting a floating floor to the studio. As the other areas of leakage seemed the most significant, it was felt that tackling these would probably bring about an adequate improvement.