Our tame mix engineer was asked to inject some dark, moody aggression into this month's track. Read on to find out how he did it...
 This month's Mix Rescuees are Toronto-based rock band The Guest Bedroom, whose latest album is A Year's Supply Of Rabbit's Feet.
After an extended period of writing, recording and editing, SOS reader James Toth was having difficulties nailing down a mix of his band's latest song, 'Fine Lines'. Despite some great performances, sparsely efficient instrumentation, and a clear (albeit unusual) song structure, he was struggling to come up with a decent balance of the band's core line-up: drums, bass, guitar, Hammond organ, synth and lead vocal. So he asked me whether I could lend a pair of fresh ears to the project, and help him achieve his goal of a well-balanced 'live off the floor' sound, with dark, moody aggression — something that could stand comparison with albums like Sonic Youth's The Eternal, for instance.
Listening to the original mix, there appeared to be two fundamental problems. On the one hand, a number of the instruments weren't sounding full enough in their own right; but on the other hand some of the tracks were overloading certain frequency ranges, to the detriment of overall mix clarity. In addition, I suspected that James had relied a little too heavily on reverb while mixing, and that other effects tactics might provide a less glossy presentation that would better suit the genre in general, and the vocal stylings in particular.
Defining The Drum Sound
What struck me about the multitrack audio files straight away was that the drum kit sounded rather dull, overall, so I immediately grouped the whole kit to a single bus channel and stuck Elysia's freeware Niveau Filter over it, setting a 3dB tilt of the entire spectrum around a 470Hz pivot point. I continued to brighten the kit further as I began constructing the balance for real, applying two boosts from Sonimus SonEQ to the overheads (a 4dB peak at 2.2kHz and a 5.5dB 6kHz shelf), while a sub-1kHz roll-off on the stereo room mics was implemented by the gentlest high-pass filter option in Reaper's built-in ReaEQ, and a further instance of ReaEQ provided 2dB of low shelving cut on the snare close mic. Only the toms bucked the trend, in that I decided to add a little more low end to those with SonEQ's 100Hz low shelving filter, albeit in conjunction with an 87Hz high-pass filter to avoid any rubbish at the LF extreme.
And that was about it as far as my initial drum EQ was concerned, which may come as a surprise if you routinely use several EQ bands per channel on a typical multitrack drum recording such as this. However, in this case I defined a significant proportion of the final sound simply by toggling channel-polarity switches — in the end, the kick, snare, room and tom channels were polarity-inverted relative to the overheads. In addition, following unsuccessful attempts to boost the punch of the kick drum by boosting its close mic's low frequencies, I layered in some weightier low end from the 'NeverKick Z3' sample in Slate Digital's Trigger.
As for dynamics processing, the live kick-drum channel became a touch more dependable with around 3dB of soft-knee limiting from Reaper's ReaComp, while further HF limiting from ReaXcomp deliberately blunted its upper-spectrum transient, to lend the tone a touch more gravitas. More assertive gain-reduction was applied to the close snare and tom tracks, with Antress Modern's Deathcore operating at a 10:1 ratio with fast attack and release to supercharge the drum sustain tails. I used the same settings for all three channels, but added a pinch more attack time to the snare processor to allow a bit more 'snap' through before the processing kicked in.
Refining The Drum-Bus Compression
 The drum sound required a good deal of general brightening to open out the sound: freeware from Sonimus, Cockos and Elysia boosted the high end of the overheads, cut the low end of the room mics and tilted the overall drum bus spectrum respectively.

With the kit balance roughly in place, I dropped Universal Audio's EL7 Fatso Sr plug-in over the drum group bus to give an obvious, rock-style, gain-pumping effect. This inevitably involves driving the compressor pretty hard, which tends to emphasise the complex non-linear characteristics of the modelled analogue circuitry, so I took some time to experiment with the EL7's various settings in search of the best trade-off between desirable and undesirable side-effects.
I started by choosing a preset that exhibited the basic pumping effect I wanted, give or take a twiddle of the Input Gain control, and around 6-7dB reduction with the fast Tracking Comp mode seemed about right. Next, I tried lowering the side-chain's high-pass filter from its default 240Hz setting, in order to get the compressor responding a bit more robustly to kick hits. I settled on the 120Hz cutoff, because settings of 60Hz or 'off' caused the kick's low end to falter — not an uncommon problem when compressing any bass instrument with fast time constants. Lengthening the default attack time to 10ms helped claw back some useful transient edge, while setting the release time to 0.1s seemed to emphasise the 'movement' of the pumped cymbal tails. Finally, I toyed with the distortion options, but in the event these seemed fine as they were. Increasing the Warmth setting just added superfluous woolliness, while the emulated transformer distortion somehow softened the kick drum's leading edge in a way that felt like a retrograde step here.
Whenever you use heavy channel and bus compression on a live drum performance, you'll almost always have to deal with some unwanted balance side-effects, no matter how long you spend tweaking your plug-in settings. In this remix, the Deathcore compressors pulled up so much hi-hat spill on the snare/tom close mics that the hi-hat occasionally leapt forward disconcertingly. My solution to this was twofold: firstly, I copied a spill-free hit onto the snare close-mic channel in a few places (being careful to match the underlying snare hit's waveform position as precisely as possible, to minimise phase problems) and, secondly, I used automation to dip the tom mics where further hi-hat reduction was required. One other concern I had was that the kick was ducking the stereo room mics too extremely during some sections of the song, but Reaper's flexible auxiliary-send routing system provided a simple solution to this, by allowing me to feed a little of the room sound past the drum-bus compressor at the relevant moments.
Bass & Guitar
 Getting a solid drum-kit timbre involved flipping the polarity of many of the mics.
The only EQ on the bass was a moderate 100Hz shelving boost from SonEQ, the sonic impact of which was minimal compared with the effects of massaging the phase relationship between the instrument's DI and miked-amp signals. Initially, these had phase-cancelled horribly, resulting in a flabby, hollow and abrasive sound. Inverting the polarity of the signals improved matters somewhat, but still left a 'suck-out' in exactly the 1-2kHz zone that's so handy for carrying bass lines to the listener through rock textures. To refine the combined tone further, I cancelled the polarity inversion temporarily, inserted a sample-resolution delay plug-in on the DI channel, and then progressively shifted it later, in search of the most heinous cancellation. Once I'd reached this tonal nadir, reactivating the polarity inversion rewarded me with a nice solid tone, and one which happened to gel pretty well with the kick, hence the minimal EQ.
I'm not afraid of high-pass filtering electric guitars quite savagely to avoid muddy low mid-range build-up in a multi-layered arrangements, but when there's just one guitar in the track there's a lot more room for manoeuvre. In fact, in this case I actually felt that the guitar would benefit from more mid-range body, so I boosted a couple of decibels at 850Hz with ReaEQ, adding further boosts of 6dB at 700Hz and 3.5dB below 100Hz using Leftover Lasagne's freeware Pushtec 5+1A plug-in. I'd squeezed the bass's dynamic range gently with 2-3dB of 4:1 compression from ReaComp, but I liked the guitar balance without any such processing at all.
Hammond Organ & Synths
 Mike layered a sample alongside the live kick-drum using Slate Digital's Trigger, and use this to supplement the kit's low end weight.
Despite the EQ work I'd done on the guitar, its 'signature' frequencies still remained the 2-5kHz region, to my ears, so I deliberately tried to funnel the Hammond organ more towards the couple of octaves below that. I tried Stillwell Audio's Vibe EQ first of all, adding a couple of decibels at 820Hz and subtracting a couple of decibels at 2.5kHz, but beyond this I didn't meet with a tremendous amount of success, simply because the 500Hz-2kHz region wasn't that densely populated with information in the raw track; you can only boost what's actually there!
In response, I decided to generate some new spectral content, using distortion from some freeware amp models I recently downloaded from Aradaz. Crunch Amp yielded a nice, shouty, mid-range drive which dovetailed with the clean sound beautifully, bringing the mixed Hammond sound forward in the mix and helping it to compete with the drums. That said, I did have to insert Audiocation's Phase plug-in on the distortion channel to minimise comb-filtering, because Crunch Amp (like many other amp simulators) introduces a degree of phase shift.
A final tweak related to the internal balance of the organ part, because it felt as if the instrument's held Eb notes were poking rather too far out, compared with the part's more interesting melodic riffing. Targeting the pitch's most prominent harmonic with a narrow ReaEQ peaking cut didn't seem to go far enough, so I dialled up more specialist processing from Voxengo's GlissEQ. This plug-in has a nifty filter type called 'Peaking 8', which comprises a series of peaking filters at harmonically related frequencies, all of which follow the gain and bandwidth settings of the lowest band. By training a narrow Peaking 8 filter on the Eb note's fundamental frequency, I was therefore able to attenuate not just that, but also its first seven harmonics, reducing the note's subjective level much more effectively.
The first of the synth parts (first heard at 0:51) easily projected past the guitar and organ, by virtue of its more extended high-frequency response, but I'd resolved to give it a front-seat role at this point for arrangement purposes (see 'Editing & Arrangement' box for details), so another Vibe EQ took out 7dB of its low end and applied boosts at 1.2kHz and 2.5kHz. I had similar designs on the big lead-synth riff that arrives at 1:25, but similar Vibe EQ abuse didn't make as much of statement, so I dug deeper into my bag of tricks and pulled out Schwa's Oligarc, which really came up trumps! The filtering and distortion modules of its 'Dirt Mover' preset delivered an attention-grabbing 'grind', which I then set about sculpting with additional ReaEQ tweaks, a dusting of peak control from Stillwell Audio's Rocket compressor, and a parallel instance of Mokafix's NoAmp distortion.
Har-Bal On Vocals?
 Heavy compression from Antress Modern's freeware Deathcore plug-in helped wring every last drop of sustain from the snare and tom close mics!
The vocals presented the biggest mixing hurdle, despite an admirably gutsy performance. I'm not sure how they did it, but somehow they'd managed to capture a sound that was both clouded and lacerating at the same time! In my experience, this tends to happen when the microphone (or, indeed, the singer's vocal apparatus) resonates sharply at certain specific frequencies, sprinkling the audio signal with super-hot upper-spectrum harmonics that uncomfortably needle the ear if you try to equalise for brightness. Zapping some of the more persistent spectral peaks with narrow ReaEQ peaking cuts yielded some improvement, but the phase-response damage those incurred brought me to the point of diminishing returns much more swiftly than I'd hoped. In the past, I've used distortion processing, with some success, to pack out the upper mid-range harmonic landscape, meaning that the momentary peaks don't poke out so astringently, but that also proved a blind alley on this occasion.
 Universal Audio's EL7 Fatso Sr modelled analogue compressor was driven hard to generate a rock-style gain-pumping effect, but care was also taken to get the best out of the processor's finer settings, given its critical role in the overall sound of the mix.Clutching at straws by this point, it occurred to me that the HarBal mastering software might lend a helping hand: its IntuitQ harmonic-balancing routine is pretty effective at smoothing harshness in mixed files, so maybe it could do something similar with a single instrument? It only took 30 seconds to try, and immediately I found myself much further towards a usable mix timbre — although I was by no means out of the woods yet! Tape saturation can often combat edginess, so I brought ToneBoosters Ferox tape emulator to bear next, adjusting the feedback and compression settings by ear. Close, but no cigar! Eventually, I resorted to the drastic measure of compressing the 1-8kHz region in three independent, octave-wide bands using Reapers' ReaXcomp, tackling the remaining upper mid-range frequency spikes dynamically. Not exactly elegant, I admit, but it did finally give me a vocal sound that could sit stably in the balance without sticking pins into my eardrums!
Dealing With Vocal Masking
 A variety of colourful distortions were added to the keyboard parts during this month's remix, including Schwa's menacing Oligarc multi-effects processor and the Aradaz Crunch Amp and Mokafix NoAmp plug-ins.


If you bring up the vocal fader late in the mix, you'll typically have a fight on your hands if you're wanting the singer to be heard. And so it was here, because the rest of the arrangement masked the vocals significantly, making them seem dull and recessed. While I felt no need to pull the singing way out front, because I wanted to keep a good illusion of size in the backing parts, I was nonetheless keen to retain a fairly clear vocal timbre and good transmission of the lyrics, which meant that the battleground was going to be the upper half of the audio spectrum. The strong temptation in this (quite common) eventuality is to boost the high-frequency vocal energy, but that path routinely leads to an overly harsh mix. A better approach, in my experience, is to apply judicious EQ cuts to those backing tracks that are responsible for the majority of the frequency masking instead.
A good sleuthing tactic here is to listen carefully to the vocal tone while toggling the mute buttons of different backing instruments. Where muting a track significantly improves the vocal translation, try sweeping a fairly narrow EQ band around on that track to see if you can dip out the offending frequency patch. Working through this mix in this way, I ended up applying a 7dB third-octave cut to the drum overheads at 7.7kHz; a similarly narrow 7dB cut at 6.5kHz on the full drumkit group channel; a wider 7dB cut at 5.7kHz on the toms group channel; and another narrow 2dB cut on the organ distortion channel at 2.7kHz. I did also brighten the vocal to a degree by cutting a broad region at 410Hz, but this was primarily to avoid the singing sounding subjectively 'bigger' than the drums and guitars, rather than for masking reduction.
Once these steps had been taken, balancing the vocal in the mix mostly became a question of some 8:1 compression from Stillwell Audio's The Rocket compressor (with a big 7kHz EQ boost in the side-chain to ward off sibilance) and some fader automation. However, I did need to give the vocal a touch more 3.5kHz for the more full-on sections of the arrangement, so I multed those bits onto a separate track, to that end. In addition, during the automation process, some variations in the vocal timbre seemed to be preventing it sitting at a consistent position in the mix on some listening systems, so a few EQ spot-fixes (applied via Reaper's region-specific effects facility) were required to properly wrap things up.
Effects For Width
 The specialised, harmonically-related 'Peaking 8' filter in Voxengo's Gliss EQ plug-in helped Mike rebalance a single, unduly dominant Eb pitch in the Hammond-organ part.
Once all the tracks were up and running, adding reverb seemed all but superfluous: the drums and organ already provided plenty of textural fullness and sustain; the space implied by the drum room also seemed quite appropriate to the music; and I was happy for the rest of the instrumentation to remain quite upfront-sounding. Single-tap delays on the vocals and guitar seemed more than enough to give their close-miked recordings a hint of 'liveness' and blend them sufficiently with the ensemble.
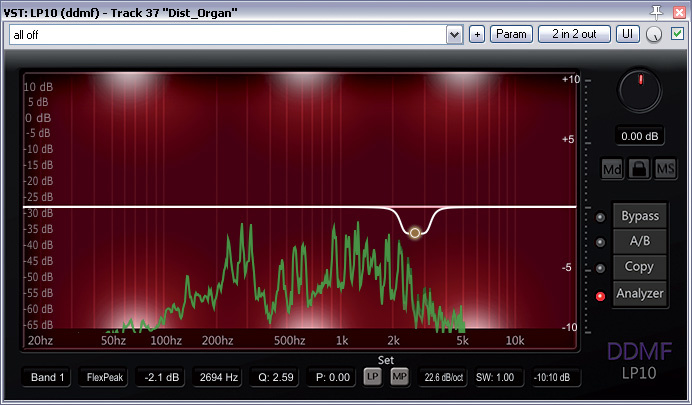
 Here you can see three of the EQ cuts that were applied to reduce frequency masking of the upper spectrum of the lead vocal part: the screens show peaking cuts on the overall drums bus, the overhead mics, and the Hammond organ's parallel distortion channel.
 Where I did take advantage of effects processing, though, was in relation to stereo width, because a sparsely-populated production like this can easily sound overly spartan if too many of the sounds are simple point sources, whatever you do with your panning. It was in this spirit that I used my only reverb, giving a bit of stereo 'splash' to the snare and tom hits, as they otherwise felt a bit skinny next to the cymbals. Panning the guitar's delay to the opposite side of the stereo picture followed a similar logic, as well as slightly counterbalancing the dry sound's off-centre panning, which I'd decided to retain from James's original mix. (I've often used double-tracking in a similar role for previous Mix Rescue remixes, but I rejected that idea, because the smoother 'mainstream' guitar tone it normally creates felt alien to this band's more angular vision.) Spreading the centrally-panned bass and vocal parts involved a small dose of my standard stereo pitch-shifted delay treatment, but I was careful to high-pass filter the effect's return so that the evenness of the low end wouldn't suffer from any phase-cancellation artifacts, given the short 11ms and 13ms delay times involved.
 Reducing a series of harsh-sounding narrow-band frequency spikes on the lead vocal recording involved a series of strong measures: IntuitQ processing from the offline HarBal mastering software; heavily driven tape-emulation from ToneBoosters's Ferox; and three octave-wide bands of frequency-selective compression from Reaper's multi-band ReaXcomp dynamics plug-in.
 The lead synth line at 1:25 received the most extrovert stereo effects processing, partly to compensate for the loss of the guitar from the texture there. The Oligarc processing mentioned above included a stereo chorus effect, and although I have to say I'm no fan of chorus most of the time, this one worked a treat, especially once I'd tamed its stereo reach by pulling out 4dB of Sides level with Voxengo's MSED. In addition, I added a short delay treatment to get the line to gel with the arrangement so far (as I'd done with the guitar and vocals), but in this instance I decided to use a 3/16th-note delay time so that the repeats would be more clearly audible, panning the two taps to opposite sides of the stereo image to enhance the sound's apparent internal detail. As with all the delay effects in this remix, though, I used no delay feedback at all, so that there would be no clutter from long delay tails — something that can easily have a detrimental effect on the immediacy of no-nonsense rock styles.
Custard Art
 The main guitar part was fattened with low mid-range boost from Leftover Lasagne's freeware Pushtec 5+1A plug-in, and then treated with a short, single-tap delay panned to the opposite side of the stereo field — the latter effect serving to both blend and widen the part in the mix.

If this month's column demonstrates one thing, it's that mix processing isn't something you drizzle evenly over your multitracks like salad oil — it's more like lumpy custard, in that some channels will usually receive far more mixing work than others! I had this month's bass tracks sorted in about five minutes, whereas the drums and vocals had me scratching my head for hours. Also, remember that EQ isn't your only tonal tool, because phase adjustments and distortion are no less potent, and try not to treat adding reverb as a forgone, conclusion when simple delay lines can be much more efficient with harder-edged genres.
Editing & Arrangement
 The second iteration of the post-verse instrumental riff felt lacking in body because the bass part shifted down an octave, but copying the first-iteration bass part alongside helped to cure that.
A lot of Mix Rescue submissions suffer from insufficient attention to vocal tuning, so my remixes usually entail some pitch-correction work. This month's multitrack was a welcome change, however, because although the lead vocal wasn't 100 percent 'in tune' from a technical standpoint, it nonetheless felt perfectly matched to the music. In fact, the vocal track that James originally sent me had been pre-processed with Melodyne to tighten the tuning, but that actually seemed to sanitise and soften the singer's attitude, so I reverted back to the raw recording — which he'd wisely kept on file!
On the timing front, though, I did feel that the ensemble could be a little more in agreement for such a powerfully rhythmic song. The kick-drum placement seemed particularly critical, so I carefully adjusted any hits that seemed to be fighting the forward flow of the groove, giving special attention to the sections with four-to-the-floor patterns, which are brutally revealing of unevenness. Once I felt the drums were secure, I rebuilt the arrangement around them, keeping the bass nice and tight to the drums, but allowing the guitar, organ, and vocal parts a little more freedom to drift over that solid foundation.
Not all my edits were corrective, though, because I made a few arrangement tweaks as well. For example, the post-verse riff sections at 0:40 and 3:10 seemed to lose body on account of the bass-guitar line shifting down an octave, so I mixed in a copy of the preceding octave-up version to counteract this. It also niggled me that the guitar feedback effects at 2:21 felt a bit 'stuck on', so I made a point of introducing them in a supporting role earlier on, from the lead-synth entry at 1:25, which made them feel a bit more logical, somehow.
The most important arrangement changes, however, were concerned with creating more of a build-up during the three inner sections of the song (0:51-2:23). The first two sections each had three repeated sub-sections, so I tried to differentiate these by clearly highlighting a new feature for each iteration: pad synth (0:51), lead vocal (1:02), and organ (1:14) tracks for the first section; and lead synth (1:25), lead vocal (1:37), and guitar (1:47) for the second section. For the final section (2:00-2:23), the tambourine overdub provided the main differentiation between the two iterations, although I also copied in a few notes of section one's synth timbre into the second half too.
Rescued This Month
This month's Mix Rescue candidates are The Guest Bedroom, a four-piece rock band from Toronto comprising Sandi Falconer (vocals, guitar), Rob Castle (keys, synths), Tim Smith (drums), and James Toth (bass). Following several self-released EPs since their formation in 2004, the band released their first full-length LP, A Year's Supply Of Rabbit's Feet, in 2010, now available as a free digital download from their site. They're currently writing and recording a new four-song EP for release in Summer 2012. Their web site is www.theguestbedroom.com
Remix Reactions

James Toth: "I think the remix is really great, as do the rest of the band — Mike's definitely brought a more energetic vibe! I was apprehensive to use such heavy compression and effects myself, but they've led to a more stable balance between the various instruments throughout the song. The vocal treatment complements the vocal performance really well and helps keep it focused in the dense areas of the mix. I also really like the additional bass tone before the final verses and the creative re-use of secondary elements from other sections of the song in areas that needed a little more beefing up. These techniques really help carry the song forward and deliver some interesting textures during moments that were quite sparse in my original mix. Bringing the more engaging synth elements to the foreground in certain spots is great too, and showcasing the huge, sweeping synth sound really built the drama and excitement in that tom-tom driven section. Thanks for doing this!”
Audio Examples Online
Mike has prepared a number of audio examples that better demonstrate the changes he made to the track in the course of this mix. You can download the high-quality audio files and audition and compare them in your DAW.