This month, we figure out how to pack some much-needed punch into an interesting instrumental track.
Most tracks submitted for Mix Rescue feature prominent vocals, but this month's is an abstract instrumental track called 'Ganymede'. SOS reader Igor Zinken had put the track together in Ableton Live, making extensive use of Native Instruments' Komplete 5 bundle for many of the different sounds, and had also overdubbed electric guitar, bass, and toy piano parts alongside. Although his mix was already very evocative and atmospheric, he was dissatisfied. On the one hand, he wanted to create a contrast between the mechanical and melodic elements of the sound, but on the other he was finding it difficult to create a stable and cohesive balance for the production. Furthermore, he couldn't get the electric guitar/bass entries, which formed the 'chorus' sections of his notional song structure, to deliver the kind of impact he was hoping for, or achieve enough of a sense of ebb and flow in the music.
 This month's Mix Rescuee is Igor Zinken, with his ominous instrumental track 'Ganymede'.
 I also felt that many of the tracks in his arrangement weren't taking full advantage of the mix space available, and that there might be considerable potential for increasing the overall impression of depth and detail by differentiating the sonics of individual parts more clearly. Indeed, Igor professed himself fairly satisfied with his chosen palette of sounds at the outset, so it seemed that the best approach would be to try to highlight existing strengths (rather than reinvent anything from scratch), and see whether I could build a more satisfactory remix in the process.
After importing Igor's multitracks into my Cockos Reaper-based mix system, I started work with the crux of the track: the under-performing 'chorus' section (first heard at 1:26). The first thing I decided to do was a bit of surgery on the main programmed drum part (created using one of the built-in kits in Ableton Live), snipping all the different sounds out and putting them onto different tracks so that they could be controlled separately. This didn't take too long with the help of Cockos Reaper's keyboard shortcuts, and allowed me to concentrate first on how the song's main electronic kick sample interacted with the bass-guitar part.
Voxengo LF Max Punch: Two Practical Applications
 Voxengo's specialist low-frequency processing plug-in was used both for the kick drum and the bass guitar, but in different capacities. For the former, it generated new subharmonics to widen the overall tonal spectrum, while for the latter it compressed and saturated the low end, to make its contribution to the lower octaves more consistent and more audible on smaller playback systems.
The main problem I had with both of these parts was simply that they didn't have a tremendous amount of useful low end. The kick's main LF energy was rather high up the spectrum, at around 70Hz, so it didn't have any real gravitas. On both the bass-guitar tracks (the raw DI and an extravagantly distorted/effected version of the same recording), the main contribution to the lower octaves was some hefty string-damping thuds, the actual note fundamentals being rather reticent by comparison. The consequences of this lack of low end were twofold: firstly, the mix felt somehow constricted in the frequency domain, preventing the kind of hi-fi expansiveness that I felt would suit this production's cinematic sound-design; and, secondly, the bass's timbral anaemia meant that the 'chorus' sections lacked weight, as Igor had already discovered.
My main solution to both these problems was Voxengo's LF Max Punch plug-in, which provides a powerful suite of LF-specific tools. The basic concept is that incoming audio is split at a user-selectable crossover frequency and the low frequencies are processed independently, before mixing them back in at the plug-in's outputs. For the kick, I engaged the plug-in's sub-harmonics generator to synthesize a new, powerful energy peak at around 35Hz, effectively expanding the low end of the mix downwards by an octave. This kind of processing can sometimes cause problems by making fast-moving kick patterns sound sluggish, or by cluttering arrangements with powerful low-end melodic parts, but because the 'verse' textures here were so sparse, the kick-drum kits were well-spaced, and the bass part didn't really trespass on the sub-40Hz region at all, I had the freedom to really go to town in beefing up the sub-harmonics like this.
 The less reliable low end of the distorted bass tracks was high-pass filtered at 231Hz using Variety Of Sound's PreFIX plug-in, and the plug-in's gate was also engaged to close down an unwanted reverb tail that had been printed with the track.For the bass part, I concentrated my low-end efforts on the slightly more controlled DI signal, high-pass filtering the distorted track at 230Hz with Variety Of Sound's well-specified new freeware PreFIX plug-in. (I also high-pass filtered the DI track to prevent any useless subsonics from feeding into the mix bus, but because I liked the way the string-damping thuds fitted in with the kick-drum part, I decided not to bring the cutoff point any higher than 20Hz.) Whereas the kick sound relied on LF Max Punch's sub-harmonics section, for the bass I bypassed that and turned to the low-frequency compression feature, to have a stab at rebalancing the note fundamentals more sensibly against the unpitched thuds. In the end, it required quite a lot of compressor drive (using the Mix Comp control) to even things out to my taste, and I combined that processing with some low-frequency saturation too, thickening the sound's mid-range to make it command more attention in the mix, even on headphones and smaller speaker systems.
Both parts benefited from some attention further up the spectrum, as I felt that the mid-range tone was rather soft and 'hollowed out'. The kick track was the main offender, so I turned to my normal hardening agent of choice, Stillwell Audio's Vibe EQ, to supply a couple of assertive peaks in the mid-range: 6dB at 640Hz and 12dB at 820Hz. The bass DI was closer to the mark already, especially with the distortion track balanced alongside, but I still boosted 4dB at 925Hz with Sonimus SonEQ's mid-peak and added another 2dB from 6kHz with the high shelf. A side-effect of this latter processing was that it made the bass too abrasive at the high end, so I also activated SonEQ's low-pass filter at 2kHz to keep things friendly and leave lots of room at the high end for all the other instruments and percussion that were still to be added in.
A final touch before adding further parts was to gate the bass distortion track to kill a fairly long reverb tail that didn't really add anything useful, but took up space that I felt other instruments could use. For this, I switched in the Gate section of the PreFIX plug-in I'd already inserted, set a fast attack and release for setup purposes, adjusted the Threshold slider to get the gate triggering sensibly, and then lengthened the release time to keep a reasonably natural note decay and avoid any gate 'chattering' problems.
Guitars & Piano
 To give the main guitar part a more aggressive sound and bring it forward in the mix, one of Acme Bar Gig's freeware amp modelling plug-ins was applied, with an instance of Christian Budde's freeware Lightweight Limiter before it in the plug-in chain to make the degree of added crunch more consistent.
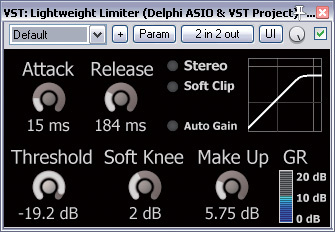
Igor had provided the main 'chorus' guitar part in four different versions: a straight DI recording, a clean amp-model track, a heavily distorted track with heavy reverb, and a printed effect return from some kind of reverse-envelope panning delay. When I get lots of options provided like this, my instinct is to try just balancing them together to start with, because sometimes just finding the right relative level for each component will give you what you need with very little processing. Indeed, because I knew that Igor had already chosen sounds he liked, the only processing I applied to the latter pair of tracks was a steep high-pass filter on the delay effect, to remove its overlong low-end decay, which was cluttering the mix below about 250Hz.
However, the 'direct' guitar tone left a lot to be desired from a mix perspective. That was nothing to do with its slightly lo-fi attitude, which was actually a big part of its appeal! The problem was, as with the kick and bass parts, a soft and spongey sound, lacking in mid-range definition — something which the homogenous fizziness of the distortion/reverb track proved powerless to remedy unless I completely swamped out everything else in the soundfield. I tried EQ'ing the clean amped track around 1-2kHz to give it a bit more forwardness, but that made the composite sound feel a bit too clean, because of the nature of the dry track, so I changed tack and plugged the clean track through another amp model instead.
I've recently been acquainting myself with Acme Bar Gig's freeware collection of amp models, so I decided to trawl through that collection in search of something suitably crunchy and aggressive. My search ended with the titillatingly titled Dick Head plug-in, which immediately gave the overall tone an attention-grabbing violence. The distortion was excessive at first, so I brought the gain control back to nine o'clock to make the effect more usable, and inserted an instance of Christian Budde's freeware Lightweight Limiter before the amp modeller, to even out the distortion contribution across the part, as well as to improve the note sustain.
Next up was a piano part, recorded with Native Instruments' Akoustik Piano virtual instrument. Although this was quite a full-range part, it didn't seem entirely in keeping with the overall atmosphere of the track, so I bracketed it quite severely with high-pass and low-pass filtering to provide a more middly and lo-fi sound. The ancillary advantage of doing this was that such a timbre proved more efficient from a mix perspective, because I could fade it up to cut through the rest of the texture in its allotted 500Hz-5kHz frequency range without clouding the low end or obscuring delicate details of any other parts in the top two octaves of the spectrum. I compressed the part fairly severely with Platinumears' freeware FL4TT3RY 2 compressor into the bargain, and although this made the sound rather unnatural from a purist perspective, again this gave it some nice trip-hop credentials, subjectively speaking, and focused the ear on the details of its sustain.
A Plague Of Digital Locusts!
 The piano sound, from Native Instruments Akoustik virtual instrument, was natural and full-sounding in its raw form, but actually seemd to fit much better into this particular mix when heavily processed with Cockos ReaEQ and Platinumears FL4TT3RY2 to give it rather a lo-fi trip-hop timbre.
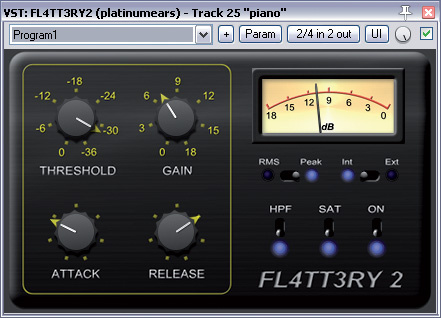
Now that I had some idea of how the more 'heavyweight' elements of the arrangement were starting to fit together, I felt I could start to find a balance for all the glitchy, percussive components that comprised the majority of the remaining rhythm programming. With sounds like these, which are pretty much all attack and little else, here shouldn't really be any difficulty mixing them, because their short duration means that they don't really mask other instruments or affect the overall tonality of the mix — just fade them up until you can hear them! However, in this case I decided to spend some time differentiating them from each other, not only to highlight the ever-shifting undulations of Igor's careful programming, but also to restrain the usage of the high-frequency region, so that the listener would be encouraged to appreciate more of the HF components of the other, less transient-rich parts.
Having already multed the different species of robotic cicada to their own tracks, I first used high-pass and low-pass filters from Tone Boosters' TB_Equalizer and Audiocation's AC-Q to focus two of them into more restricted spectral ranges, and that already helped give each a more distinct character. Of the other two virtual crickets, one had a kind of flutter-echo-style sustain that I felt could be emphasised to contrast with the two shorter one-shot click/pop sounds, so I applied some super-fast 10:1 compression from Tone Boosters TB_Compressor to this end. In any normal music-engineering setting, the time values I used (zero attack and 8ms release) could easily have resulted in unwanted distortion, but any such artifacts were irrelevant in this context, given the already glitchy source sound.
The last element of the main programmed rhythm part was just a tiny click sound, but because I liked the way the previous flutter-echo-style sound fitted into the texture, I decided to transform the click into something similar, but within a different frequency range. Cockos ReaDelay provided me with a simple high-feedback, 18ms, 'tunnel-echo' delay, which I then diffused right across the stereo field using a fast auto-panning patch from Tone Boosters' TB_Module plug-in, before taming the spread with Tone Boosters' TB_XYTool, so that it was more in line with the other flutter-echo-style track.
 By chopping the main drum loop up into slices, Mike was able to apply independent processing and effects to each sound, thereby differentiating them better from each other in the mix.In addition to the main rhythm programming, there was an extra hi-hat layer that Igor had struggled to find a good place for in his mix. In the new environment of the remix, though, the greater contrast between the different parts already in the balance meant that it didn't present me with any huge problems. The main things I did were cut some high end to push the hi-hat slightly away from the front of the mix, and spread it a little in the stereo image so that it wasn't so clearly pinpointed at the centre of the soundstage. I decided to use a Haas delay effect to implement the widening, putting the dry signal in the left channel and then delaying the signal in the right channel by 9ms. This is a pretty simple way to achieve stereo widening, but it pays to check mono compatibility when using it, because the delayed signal will comb-filter to some extent when summed with the dry signal, which can result in a good deal of tonal change if you're unlucky. In this situation, though, it wasn't an enormous concern, because I decided to narrow the stereo effect with Voxengo's MSED anyway, as it otherwise felt overblown.
During the later stages of the mix, I came back to these tracks and spent a while refining exactly how spiky some of the transients were, using plug-ins such as SPL's Transient Designer, Christian Budde's Lightweight Limiter, and Reaper's own Jesusonic Transient Controller. This was very much a subjective process, so there's not a great deal to say about it, other than that I tweaked things until they sounded right to me! However, one thing that is worth mentioning is that with percussion sounds of any type, the sharpness of the transient directly affects the subjective mix level, so you need to keep one hand on the channel faders the whole time you're processing to compensate for this.
Filling The Gaps
 One way in which Mike achieved separation between the different electronic percussion sounds was by bracketing their frequency ranges using high-pass and low-pass filtering, as you can see in these two screenshots.
With the foreground elements of the 'chorus' in the bag, I turned my attention to the uneasy calm of the 'verse' sections. The cornerstones here were a track of mechanical-sounding atmospheric synth swells, and a contrasting, sonorous synth-string melody, both sounds courtesy of Native Instruments' Reaktor. Some creative EQ gave me a first opportunity to set these sounds apart from each other. For the synth swells, I deliberately emphasised a couple of the sound's existing frequency-domain peaks, using narrow 6dB boosts at 190Hz and 1.1kHz, as well as lifting the high end above 10kHz by a couple of decibels. The result of this was a thinner, more needling sound that could make its presence felt in the mix without needing to be at a high level where it would obscure the finer points of other parts.
In addition, though, I used the Mid/Sides encode and decode facilities of Voxengo's MSED to insert a further wide-band, 1kHz, 8dB trough (from Cockos ReaEQ) into just the Middle component of the stereo signal. (Although I implemented this from first principles, I could just as well have used one of the many recent plug-ins that provide 'one-stop' M/S processing — things like Brainworx' bx_digital_V2 or DDMF's LP10.) This effectively cut a mid-range hole at the centre of the soundstage for the other synth and, indeed, the rest of the instruments, during the 'chorus' sections, where it also continued sounding in a background role. I automated this EQ cut, so the mid-range filled in a bit whenever the swells were more exposed — such as at the first entry of the drums and just after the first chorus.
The warmer sound of the string synth already provided a good contrast to the swells without any processing, but in its raw form it also included a lot of low end, which I decided to cut away with high-pass filtering. Not only was I concerned, as I frequently am, that the kick-drum's LF definition would suffer, but it also seemed as if the low frequencies of the synth were connecting it on some psychological level with those of the kick drum, and I felt that the long, sustained, melodic lines would ultimately be more effective if they floated over the top. As with the swells, this synth part continued into the 'chorus' sections, functioning effectively as a supporting pad, and I automated the fader level accordingly.
Wot, No Global Sends?!
 A miniscule mono 'tick' sound was expanded in both the time domain and the stereo field, using a chain of three effects: a high-feedback 'tunnel echo' delay of 18ms from Cockos ReaDelay, a fast autopanning patch from Tone Boosters TB_Module, and some stereo control from Tone Boosters TB_XYTool.

With most mixes, some effects are usually fed from several tracks at once, usually with the aim of connecting those tracks in some way, perhaps blending them so that they sound like they were recorded all at once, or transporting them all into some kind of shared acoustic space. In this respect, this month's remix was rather unusual, because it incorporated no such effects at all — everything I used was applied only to single tracks. Although in more acoustic styles of music this could easily result in a disjointed sound, that's a lot less of an issue with heavily electronic styles, where there's no need to create any illusion of a live performance going on. This means you're freer to use your effects treatments to frame and distinguish different sounds, so that each makes more of an individual statement.
There are lots of examples of this approach in this mix. Take the ride cymbal sample, which first appears at around 2:52. At this point in the arrangement, the main synth part sounds quite claustrophobic and dry, so by adding a wide, long, and not particularly natural-sounding reverb to the ride cymbals, I've separated them psychologically from the synth, as far as the listener is concerned. The rapid ping-pong delay on the piano line at 1:50 serves a similar function, and also contrasts this part against the compact, lo-fi sound of the 'chorus' sections, but without duplicating any of the other effects in the production. And although I can't take any credit for it (because the effect was printed by Igor) the impact of the new rhythm guitar part at 2:36 is considerably increased by the use of a strong chorus effect, because it's a type of modulation sound that we've not heard at all thus far in the timeline.
Spot Effects
 so that it remained audible at a lower overall level, thereby clearing space for more detail from other instruments in the mix.") This EQ plot was used to thin out the main atmospheric ambience track (courtesy of Native Instruments Reaktor) so that it remained audible at a lower overall level, thereby clearing space for more detail from other instruments in the mix.
This EQ plot was used to thin out the main atmospheric ambience track (courtesy of Native Instruments Reaktor) so that it remained audible at a lower overall level, thereby clearing space for more detail from other instruments in the mix.
Over the main layers in the arrangement, Igor had included a few sporadic sound effects to tickle the ear. However, it struck me that he'd pulled his punches a bit in this regard, on two counts. Not only had he supplied only a few such pieces of ear-candy, but he'd also mixed the ones he had rather low in the mix. Therefore, I tried in the first instance to make as much of a feature out of each of the existing effects as I could get away with. In many cases, that involved emphasising the 2-6kHz region of their frequency spectrum, an area that's very effective at bringing sounds closer to the listener. But that wasn't the end of it, because I also decided at this point to get some additional third-party samples involved — and there was barely a doubt in my mind which library I was going to reach for: Sample Lab's Spatial Awareness.
I reviewed this title for SOS six years ago, and although its ethereal soundscapes only suit very specific types of productions, in this case it seemed to fit Igor's music like a glove, so I was quickly able to lift a dozen of its more abstract loops straight into the arrangement to add some welcome extra background complexity. This was especially handy during the outro sections following the second chorus, where the heavily mangled primary synth line, while very ear-catching in the short-term, didn't really seem to provide quite enough variation to sustain the interest all the way to the production's final looped fade-out.
The only processing I did for any of these added samples was some very broad-brush EQ (no more than a single band on any channel) and some careful fade-ins and fade-outs on the individual regions, to get each sound to surface just briefly at the right moment. It's very tempting to just leave background textures like these playing for long periods, but that's a sure-fire recipe for clutter. If you fade things in and out, you get the best of both worlds — lots of interesting details popping up all the time, but an essentially clear-sounding mix notwithstanding.
Subjective Merits
 Additional other-worldly ambient sounds were provided by Sample Lab's Spatial Awareness sample library. From the region envelopes in the screenshot, you can see how Mike adjusted the level and fade-in/out of each file to slide it subtly into the mix at an appropriate moment.
This remix is one of those ones that's tricky to write about, simply because so many of the decisions that went into it were so subjective. Indeed, I was up-front with Igor at the outset that I'd have to rely on my musical instincts a good deal, and that if those didn't tally with his, I might completely crash and burn! This is where an artist's rough mix (or Igor's original mix here) can really lend a hand, because it's probably your best clue to their underlying intentions for the music. Although you may feel that the sonics need to change a great deal to bring that vision to reality, it's nonetheless worth coming back to the original version from time to time during the mixing process, to keep you in touch with the artist's initial creative impulses.
No matter what kind of music you're working on, though, some things rarely change. In particular, I find that if someone records something at all, then they usually want to be able to hear it clearly! Much of the trick to achieving this is, of course, careful use of EQ, compression, and automation, to prevent frequency masking and to manage the level balance from moment to moment. However, the other fact that's important to remember is that modulation, delay, and reverb effects can also play a big part in making your sounds really jump out at the listener, and that this tactic is especially powerful when you have carte blanche to stray outside the bounds of acoustic 'realism'.
Rescued This Month
This month's Mix Rescue track is called 'Ganymede' and was submitted by Igor Zinken (aka Igorski) a composer for media based in Amsterdam.
Remix Reaction

Igor: "I'm well pleased! It's frightening to hear a lot of sounds I'd chosen to push back in the mix so loud and upfront. The improvement in the clarity and presentation of all the parts is amazing, and the chorus is monstrous — there's so much energy! The weight of the bass guitar in the mix is great, and it tackles the lack of punch that I desperately wanted to improve, but couldn't. Where previously the hats and cymbals were too 'in your face', they now sit comfortably in the bed of sounds, rather than sounding like an unwelcome afterthought.
"Mike's work on the build-up of the track pushes it towards the dynamic change of the chorus, while retaining the shock factor of the bass guitar crashing in, as I'd always wanted it to. I also absolutely love the sounds that have been added to the outro sequence, which makes it even more ominous. I cannot thank Mike enough for his efforts and insights, and for showing the benefits of paying attention to the subtleties, and knowing when to show restraint.”
To download audio examples illustrating the changes made by Mike in this remix, go to the SOS web site at /sos/dec11/articles/mixrescuemedia.htm