The sound designer may use many of the same basic skills and tools as the recording musician, but the role requires you to think rather differently...

Sound design — the craft of creating sound effects, editing music and finessing dialogue for film, TV and radio, computer games and even theatre — has been my main profession for over 11 years now, but I also lecture in the subject, and it is my work with students that inspired me to put pen to paper and write a practical workshop on this subject. These workshops will focus largely on the essential tools and techniques that novice sound designers need to learn, but there should also be plenty in here that more experienced 'soundies' can brush up on too. Before we get into any nuts-and-bolts examples, though, let's take a moment to think about what sound design sets out to achieve.
The Role Of Sound Design
Whenever we watch a movie or a TV show, play a video game, listen to a radio play or attend a theatre production, it's easy for us to take for granted each component of the soundtrack we hear, and simply not think too deeply about how each element came to be. Behind the scenes, though, a team of sound designers, sound recordists, dialogue editors, mixers, composers and others will all have worked tirelessly to collect, edit, create, record, compose and manipulate the sound effects, dialogue and music needed to create that final soundtrack.
This group of talented individuals considers each and every element of sound they create; nothing that is heard in the final mix will have been placed or left there by accident. The work they produce is crucial in enhancing the quality of the experience, and in creating convincing worlds and characters whose stories will capture our imagination. Music will provide much of the emotive undertone; sound effects and Foley will provide a sense of realism and cement characters into their surroundings. Atmospheric sounds will give us a sense of place and period in time, and dialogue will give voice and expression to characters as they engage with one another or directly with the viewer.
Powerful and memorable sound design can be complex and difficult to produce, so the sound designer must possess an array of skills to create effective content consistently. Although it's beyond the scope of this article to identify each and every skill and method required, I will focus on some of the key techniques that sound designers use on a daily basis.
The Basics
One useful exercise I use to encourage my students to really use their imagination and think creatively is to give them short pieces of video footage (which could be anything from a short animation to a television advertisement) and ask them to completely redesign the sound. Any type of footage will do, but TV advertisements or film trailers usually have interesting visual dynamics that are fun to put sound against.
My students will typically load up the video in their DAW software — usually Avid's Pro Tools, but many DAWs are equally capable of being used for audio-for-picture work — and begin to import suitable audio clips to flesh out the atmospheres, the Foley and the sound effects. This is a useful enough exercise for anyone who wishes to polish his or her skills, but the end results usually lack something, so the next thing I'll do is to demonstrate the benefits of layering sounds together to create detailed textures of sound.
Layering For Depth & Detail
Rather than rely on individual sounds to convey an event or movement in your movie footage, you can usually create more effective sounds by combining multiple elements. For example, we rarely question the sound of someone reloading their gun on an action film, say, but do guns really sound like that? Nope! The sound designers are taking advantage of the fact that the human brain is easily fooled into hearing various sonic elements as a single sound, and into linking that sound with the moving image.
Sounds you have recorded yourself, sounds from your sound effects library, or even sounds you have created using synthesis software can all be used as individual elements of the overall texture. To illustrate, let's look at an example of simple sound design where only one element of sound is used, versus another example where a texture is built up using multiple elements:
Car Explosion 1: In the first screenshot here, an explosion sample has been used to accompany the on-screen picture of an explosion. Yet, while this is successful in making the viewer think that the sound and image are one, it's missing a huge opportunity to enhance the event with more complex layers of sound, as shown in the second screenshot.
 In this example (which can be seen in the screenshots) I am lining up the sound of a car exploding against on-screen footage in my DAW. The result is satisfactory because it does the job: you see an explosion and you hear an explosion. But I've also missed an opportunity to create a richer sound, and consequently tell a more interesting story about the dramatic event — which is what sound design is all about. Contrast this with the second example and you'll understand what I mean.
Car Explosion 2: In this case, instead of using an individual explosion sound, I created a texture of sound using layers of different elements, making the result fuller and more stimulating. If we look at the breakdown of sounds I used in this second example, we can see there's a bass element (sometimes called a 'sweetener'), which gives the explosion some 'ooomph' at the low end. There are also elements relating to the explosion sound itself: I used the beginning of a car explosion that has an immediate impact, but the sustain and release parts came from a second explosion. I spliced all the elements together to create a new sound that worked with the picture. In addition, I added some metal rip/tear sounds at the beginning, to convey a greater sense of materials being destroyed. At the end of the explosion I used some debris sounds to give a sense of aftermath; you can hear bits of debris raining down as the explosion sound itself tails out.
In total this explosion sound now comprises five separate elements and has the benefit of being richer, more vibrant and more sonically interesting when compared to the original example that uses only one element. You can also control the levels of each of those separate components in the mix since they are all separate audio files. This is handy if you need to repeat the sound later in the work — the same assets can be used but the mix of levels can be adjusted to add or subtract attention from particular elements. For example, a distant-sounding explosion would have less of the close-up detail provided by the metallic sounds and the debris raining down.
You could take things further if you wish. For example, you could use a delay to have your explosion sound reflect off nearby buildings, if the environment calls for it. (Experiment with the length of the delay, varying the length of those reflections until you find a setting that sounds natural.) To add yet more detail, you could perhaps add a distant-sounding car alarm a couple of seconds after the explosion to give a sense of the environment beyond what we can actually see on screen.
Making An Impact
Let's look at another example. This time, we're designing some 'impact sounds', in this case combat sounds for a video game character. The screen shot shows some punch- and kick-type sounds layered in the DAW. Again, the sounds comprise multiple elements.
One way to make impact sounds more dramatic is to embellish the movement of the object preceding the impact itself. Whether it's an arrow flying through the air, a cricket ball, or a clenched fist, a 'whoosh' sound just prior to the impact will add greater movement and dynamic. You can also experiment with leaving a beat of silence just before the impact as this will accentuate the impact sound itself, since your ears have had a moment to collect themselves before the sound hits. We'll look more closely at using this sort of contrast later in this workshop.
When it comes to the impact sounds themselves, there's usually more to them than meets the eye or the ear. For example, a punch impact-type sound could be embellished with the addition of a subtle bone-break element, or the sound of the surface as it is being struck when creaking or breaking. If we need it to sound heavier, as with the explosion example earlier, we can add a bass sweetener component to add weight, giving more of a deep thud quality to the sound.
Punch & Kick Sounds:  Getting to the point: it might seem obvious to use a 'woody' impact sound to accompany an arrow hitting a tree on screen, but try to think what might happen before the impact itself. How might you imply the sound of the arrow flying through the air or past the ear, for example? And does the camera perspective or editing suggest that the sound of an archer drawing their bow and releasing an arrow might usefully enhance things?
  This screenshot shows how the author constructed two different impact sounds — one a punch, the other a kick — that might be used in a computer game.By way of example, let's consider a projectile-type sound: an arrow flying through the air, then hitting a tree. In the real world, other than the sound of the bow string being released, you might hear little other than the arrow hitting its target. Your first thought may be, then, that you require an impact sound as the arrow hits, perhaps a 'wood splitting' effect.
Again, though, there's scope to create a more interesting texture using multiple elements. We'll use a 'whoosh' sound to convey the velocity of the arrow just prior to the impact, but for the impact itself we'll add to the 'wood split' sound a second component that conveys the flex of the arrow as it hits the target, perhaps a ruler being sprung and released against the side of a table, or something similar. This gives us a sense of the arrow hitting hard, with the flexible shaft resonating for a moment until it comes to a stop. If the impact itself needs bolstering we could add additional components — perhaps a knife stabbing wood, or a pencil being snapped — to give a further sense of wood being pierced. Small details like this may not be realistic, but they can really add to the weight, drama and effectiveness of the sound design, and can really raise the quality of the visual media you're designing for.
I'm speaking in general terms, of course; the designs you produce will relate to the specific needs of the visuals, how the scenes are framed and how they link together. But layering sound effects like this, to create a richer soundscape, is a method that you can use across most types of sound design, and it usually results in more detailed and more memorable sound.
The Power Of Contrast
Now, let's consider how we can get the most out of our carefully layered sounds by looking at three techniques, each of which I've already touched on in passing: the use of contrast, the power of silence and good editing practices.
Contrast — that is, something being strikingly different from something else, typically something in juxtaposition or close association — is a powerful tool to use in your sound design. Using it effectively is all about emphasising the shift between different perspectives or scenes for dramatic effect. This applies equally, whether the sound design is set against a visual medium, such as film, TV or video games, or an audio-only medium, for example a radio play. To illustrate the concept, let's look at a specific example.
 The movie Pitch Black provides a good example of the use of contrast in sound design, with different perspectives being enhanced by radically different soundscapes.The sci-fi movie Pitch Black (2000), which stars Vin Diesel, uses contrasting sound design to great effect in the opening scenes. A space freighter suffers various technical malfunctions, which results in it losing power and tumbling out of its shipping lane, down to the surface of a nearby inhospitable planet. During the scene we see two main visual perspectives as the drama unfolds: the first is of elegant external shots of the ship gracefully descending and revolving in zero gravity. The second is the tense close-up shots of the cockpit, as the captain struggles to maintain control of a ship that is breaking up around her.
The sound treatment on the external shots as the ship descends is underplayed. We get a sense of the silence of space and the imminent fate of the ship, as it gracefully glides through the upper atmosphere, with only a sombre, synthetic tone underscoring the shot. As the camera sharply switches to the cockpit the sound design shifts and we hear the groans of a ship in distress, with warning alarms playing, seemingly, from every one of the flight controls. In the middle of all this, we see the captain desperately operating mechanical levers and dials to regain control of the ship as it slips into the upper atmosphere of the planet. No music is played through the scene; the sound effects themselves provide enough of an emotive soundscape to convey the action.
Eventually, the ship crashes into the surface and, again, contrasting sound-design ideas are used to emphasise the visual perspective shifts, this time between the near-silence on the shots of the captain's face as she stares into the abyss, and the cacophony of sound on shots showing the vessel rip apart as it skims the surface.
So what can we take from this? Well, in this example the sound designers have elevated the thrills and spills of the scene by emphasising the contrasting visuals, reinforcing them with tightly edited and well-considered audio. This results in a dramatic, adrenalin-charged sequence with punchy and memorable sound design; it's an impressive opening to the picture as a whole.
Pro Tips: Using Contrast In Your Own Sound Design
As we've seen with the Pitch Black example, contrast can be an effective tool to use in your own sound-design pieces, especially if you want to create tension and drama. Here are some tips for effective use:
1. Hard Cuts: When you're editing sound to match different camera shots, or scene and event changes in audio-only mediums, use hard cuts to emphasise the sudden change. You want the energy or style of your sound to pop from one context to another to be effective. Make sure that your audio material is edited neatly, so that you don't introduce pops or clicks. Tiny fades at the edit points can help to ensure a smooth transition. If you have multiple tracks playing in your mix, it helps to design your changes so that most, if not all, of your content changes on the cut. Letting things overlap, some atmosphere or a piece of dialogue, say, may be a useful technique in its own right sometimes, but when aiming for contrast this will take energy away from the sharp cut and result in a weaker transition.
2. Level Changes: When working on sound for visual media, you can experiment with volume changes to accentuate camera perspective changes. For example, if you're looking at a wide angle of a character near a waterfall, the sound of the waterfall can be designed from the perspective of the distant camera. When you switch to the close-up, you can design the waterfall to be louder, even if you don't intend to run the sound at that level for the full duration of the remaining part of the scene. The contrast between the two volume levels makes for a dramatic shift and grabs the audience's attention.
3. Break The Monotony: You can use contrast as a means of breaking up longer sections of sound to avoid things becoming monotonous. This is obviously useful in film sound, but here's an example using video games. One of the problems the video-game sound designer faces is how to keep the sound engaging over very long periods of playing time. Movies and TV shows are linear, with usually fairly frequent changes of location, perspective or emotional theme, all of which can be used as points by the sound designer and music composer, to change the intensity and style of the sound and the music. Video games, on the other hand, are interactive and run for longer periods of time; a player may spend tens or even hundreds of hours in the same game world, as they complete objectives and engage with characters. In these situations contrast is very useful in keeping the sound fresh and engaging. Again, changes in camera perspective, or even subtle environmental changes can be used as catalysts to trigger transitions in sound. These range from the subtle (for example, footstep sounds that change on different surfaces as the player traverses through the world) to the prominent (changes in music, atmosphere or volume that are triggered by contextual changes in the gameplay). These methods are crucial in ensuring that the players are not listening to repeating sound assets for long periods, which can hinder the sense of realism or immersion in the game.
Enjoy The Silence!
What simpler way can there be to create contrast than to use silence? Creative use of silence can help us accentuate drama in our work by providing a space in which the usual emotive music and sound effects are removed, or at least reduced. The viewer is engaged with the silent or near-silent imagery, since the established convention of having audio present has been broken, even if only for a few seconds.
.") Sound may not propagate in space, but the days of silent films are long gone. Thankfully, the job of the sound designer is not to create a realistic sonic interpretation! For a great example, check out the spacewalk scene in 2001: A Space Odyssey (1968).Photo: NASA
Sound may not propagate in space, but the days of silent films are long gone. Thankfully, the job of the sound designer is not to create a realistic sonic interpretation! For a great example, check out the spacewalk scene in 2001: A Space Odyssey (1968).Photo: NASA and Saving Private Ryan (1998).") Two classic films that provide good, but very different, examples of the use of silence and contrast in their sound design: Lord Of The Rings: The Two Towers (2002) and Saving Private Ryan (1998).
Two classic films that provide good, but very different, examples of the use of silence and contrast in their sound design: Lord Of The Rings: The Two Towers (2002) and Saving Private Ryan (1998). A good and familiar example of this is the spacewalk scene in Stanley Kubrick's 1968 movie, 2001: A Space Odyssey. This film is famed for its use of sound, including the famous orchestral music sequences, but this particular scene features one of the principle characters venturing out of the spacecraft to repair a malfunction. We hear only his breathing and the sound of air being pumped through his helmet. As with the arrow sound earlier, it may be scientifically inaccurate (sound does not propagate in space!) but the tension it provides is not there by accident. The sound design of this scene is carefully engineered to focus the viewer's attention as the events slowly unfold. The sound, or rather the lack of sound, adds a layer of mystery that may not have been improved upon by the addition of sound effects or music. As the saying goes, less is more!
We can also use moments of silence to give our ears a chance to 'breathe' after prolonged exposure to loud or continuous sounds. This technique can break up the fatigue of listening to long and loud sequences and so is often used in battle scenes such as those in the 1998 film Saving Private Ryan, the lengthy opening scene of which contains a couple of great examples.
The underwater shots of soldiers shot by enemy fire slowly sinking to the ocean floor are treated with sound that has most of the above water sounds filtered out and played low in the mix. For a brief moment we hear only the movement of water and the dull sounds of the battle above before we are thrust back into the cacophony of the beach invasion. Moments later, Tom Hanks' character, Captain Miller, is deafened by a nearby explosion, and again the use of silence or near-silence is used to express this — a moment of calm in a storm of battle and noise.
We can also use silence to emphasise the volume of a loud sound without necessarily playing the content louder in the mix. This technique is useful when you're short of headroom and don't have the capacity to raise the levels. A brief moment of silence or near-silence just prior to your loud sound will create the effect of loud volume and impact. Again, we're essentially using contrast as a means to create a dramatic effect.
Another great example of this technique can be found in Lord Of The Rings: The Two Towers (2002). In the Helm's Deep siege scenes, Saruman's invading dark forces use a bomb to bring down the thick fortress walls. A couple of the powerful explosives are planted in a recess in the structure and, as a single Uruk-Hai torch bearer runs in to ignite the devices, the full sound mix is pulled back just prior to the detonation. The explosion, complete with full-on sound, then rips out the wall, raining masonry on the troops. The moment of silence gave gravitas to the explosion, creating a punchy sound in an already busy mix of sound and music.
Pro Tips: Using Silence
1. Experiment: Don't be afraid to pull back elements in your mix to remove all sounds, or even just some of them, in moments where a sparse soundscape might actually add more drama than one full of sounds. You can always undo it, so you've nothing to lose by experimenting!
2. Claw Back Some Headroom: Use silence or near-silence to accentuate loud sounds without actually playing them too loud in your mix and creating level issues. Dropping other content in volume or even removing it for a split second before a loud sound will give the impression of larger headroom and a louder sound, whereas, in fact, you have made a space for the loud sound by creating a hole in the mix so that the ears of the listener can briefly rest. What's more, your loud sound doesn't have to use up all the available headroom — leaving you more room to play with next time!
3. Don't Wear It Out: Contrast and silence are devices that can be deployed to great effect, but overuse will limit their effect and weaken the audience response. It's akin to using reverb in your music: it's often more effective when used in small doses and you don't usually want your work swimming in it for long periods!
4. Listen To The Movies: Obviously, it's important to play with ideas yourself to see what works and to experiment, but it's a good idea to pay attention while watching movies and to look up good examples such as those I've mentioned. The more you see and hear good examples, the more ideas you'll generate for yourself, and the better idea you'll have of what's likely or unlikely to work well.
Editing
Digital editing within DAW software is a convenient and powerful means of processing your audio content, but whether you're cutting and splicing music, chopping and comping dialogue or fine-editing sound effects, you'll find yourself working faster and more efficiently if you sharpen up your basic editing skills. Most of the advice from Sam Inglis's two articles on editing back in SOS February 2011 (/sos/feb11/articles/editing-1.htm and /sos/feb11/articles/editing-2.htm) applies as much to sound designers as to music producers, and it's well worth reading them. But here are a few more pro tips...
1. Listen Up! Listen intently to what you are doing. It sounds obvious, I know, but the visual distractions of working in front of a monitor can easily hinder you from your objective, which is to produce great audio. Don't get hung up or mired down in software, plug-in settings, emails or myriad other distractions. Keep your focus on the sound coming out of the speakers. Obviously you need to see the screen when sync'ing sound with moving pictures, but that doesn't stop you turning off your display on occasion, to ensure that you focus only on the audio — a technique that I find really helpful.
2. Learn Keyboard Shortcuts: Regardless of which DAW you use, learning the basic keyboard commands for editing content will speed up your work. You don't need to master all of them, but having a few to hand will enhance your workflow. Zooming in and out, switching between editing modes and basic transport controls like playback and record will suffice for most tasks, but don't stop there. Most DAWs have keyboard commands for many more in-depth features as well. Work out which features you tend to use most often and make an effort to learn the assigned commands — or, if your DAW supports it, create your own more memorable keyboard shortcuts.
3. Dedicated Edit Track: Keep one audio track assigned just for editing Sound design usually requires some pretty intensive editing work, and it can help to have a 'scratch track' on which to make your edits before placing the comped sound in its own place within the soundscape.. Once you've completed the edit, you can drag the content to its more permanent destination track. This way all your edited residual content exists on just one track that can be easily selected and deleted, the content on other tracks being largely already edited. You can delete your edit track once you get to the mixing stage and you know that no further editing will take place.
4. Smooth Edits: Use fades whenever you make a cut in between audio segments to avoid a click on playback. Tiny fades just a few milliseconds long will suffice and they will also make your transitions smoother. Use this tip, in particular, whenever you edit dialogue, which can be especially 'clicky' if not edited with a high enough level of detail.
5. Accuracy: Make your cuts and transitions frame accurate if they're required to match a picture transition. Zoom in and make sure you are editing exactly on the correct frame. Audio that is two or three frames adrift of the visual edit will look and sound sloppy.
6. Off The Grid: Use slip mode (Pro Tools), or your DAW's equivalent, making sure that things aren't set to snap to any grid! Slip mode lets you move content around in the timeline without being assigned to beats and bars or frames and feet which quantise the sound asset to the nearest correct value. You don't want to be constrained by a grid mode or a similar feature, as it may prevent you from positioning sounds exactly as you'd like.
7. Multi-tool: If you're using Pro Tools, as I do, the multi-tool can save you time. It allows you to access various editing tools contextually, based on where you position the cursor on the sound clip. Once you get used to it your editing will become so much faster as it removes the need to switch tools using keyboard commands. Several DAWs offer a similar feature, so make sure you understand what tools your software has on offer.
8. One Sound, Two Tracks: Some sounds you might be tempted to place on a single track are better off placed on two or more. For example, placing footsteps on alternate tracks allow for overlaps when there's a tail to the sound, perhaps caused by natural reverb. You need the space for one footstep to die out after the next one has begun.
Final Thoughts
Hopefully, reading this article has given you pause to think about how the sounds that we so often take for granted in films, TV programmes, games and other media, are laboured over by sound designers who aim to emphasise drama and add excitement by creating a rich and dynamic soundtrack. If you're an aspiring sound designer yourself then have a go at creating some great sounds using the techniques I've mentioned.
Of course, no exploration of sound design would be complete without considering its relation to the music that's often vying for position with it — but that's a topic for another day...
Sourcing Sounds
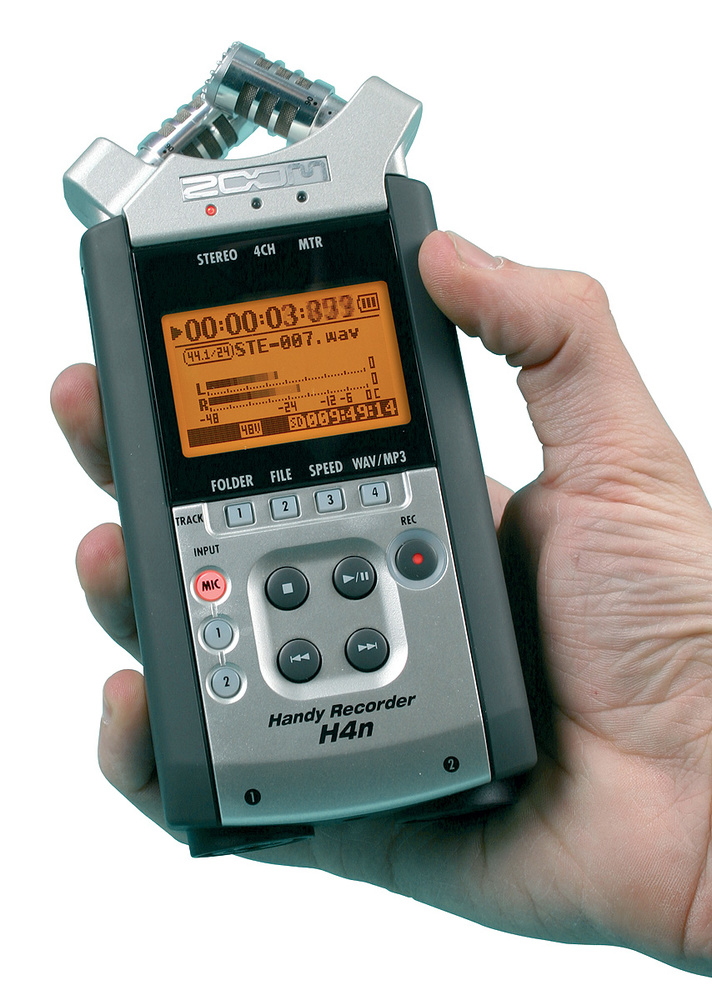 Where possible, most sound designers usually choose to record original sounds for their projects, either in the studio or outside in the field. There's a wide range of recording equipment available, including affordable, good-quality portable recorders, such as the Zoom H4N (pictured) and Olympus LS14. With built-in mics of reasonable — if not quite 'professional' — quality, these are great to carry around so you can capture any inspirational sounds you come across.
Most sound designers, though, will also have a few good-quality sound-effect libraries, and if you're short on time, and need immediate access to useful sound assets, then these are a necessity. I've collected several library sets over my career, which range in content and value. When working on a piece, I find that I can usually draft out most of the key elements using library sounds and then replace at least some of those elements later, with sounds I've recorded myself, to give the piece a fresher sound.
Good sound libraries cost money though. Thankfully, at the other end of the spectrum, there are several web resources where free sound effects are available. These can be invaluable to the novice who perhaps doesn't have access to a purchased library. Freesound (www.freesound.org), whose content is user generated, is one such resource. While the quality of content can vary, this is a particularly rich seam of good sound-design material.