 Photo: Original Mark Ewing
Although the Ion is already well-respected for its sound quality, its synthesis architecture is also surprisingly flexible. We show you how to get the best from this little beast in your studio.
Despite its low cost, the Ion is well endowed with features, and it's remarkably well built: for example, the rubbery knobs are mounted to the front panel with nuts, so you can lean on them without fear of stressing the underlying circuit board. Plus this synth has the advantage that the filter cutoff and other controls have an analogue 'feel' because of how they divide their rotation into thousands, rather than hundreds, of steps — the encoders have about 8000 steps of resolution.
However, what immediately strikes most musicians is the sound — it certainly impressed reviewer Paul Nagle back in SOS September 2003. While few would say it's a clone of classic analogue synths, the Ion stands on its own thanks to a full bass and brash, but not arrogant, high end — apologies if I'm sounding like I'm doing a wine-tasting! Although the factory presets do a good job of showing off the synth, there's a lot that's hidden 'under the hood', so I'm going to show you some ways to squeeze additional options and sounds out of what is already a very capable synthesizer.
Hard Sync & FM Synthesis
 The Ion's three different FM algorithms give a lot of scope for experimentation, but if you're new to the concept of synthesis by frequency modulation then it's probably best to choose the simplest to start with.The traditional sync sound results from using the modulation matrix to feed an envelope with a moderate decay into the Osc 2 Pitch Full modulation matrix destination (and into Osc 3 Pitch Full if you're using both as sync oscillators). You also need to turn down the Osc 1 Level parameter from the appropriate Pre Filter Mix screen. Then enable oscillator sync using the dedicated Osc Sync button.
However, I must admit to being somewhat disappointed with this sound; it didn't immediately have the smoothness I wanted. The way around this was to turn up the Ring Mod Level parameter to the same value as Osc 1 Level, again in the Pre Filter Mix screens. This was the aural equivalent of 'filling in the cracks', and resulted in a smooth, yet defined, hard or soft sync sound.
Although the Ion won't replace a Yamaha TX802 or Native Instruments' FM7, it can do simple FM (frequency modulation) effects where one or more oscillators serve as modulators for another oscillator. There are three basic FM algorithms: Oscillator 3 modulates Oscillator 2 which modulates Oscillator 1; Oscillator 3 and Oscillator 2 modulate Oscillator 1; and Oscillator 2 modulates Oscillator 1. You select the algorithm under the Oscillator 1 Edit button. We'll choose the last of the three algorithms for a very simple example of how you can use FM on the Ion. In Pre Filter Mix, make sure that all audio sources are turned down except for Oscillator 1.
One classic FM sound is a marimba/thumb-piano percussive attack. For this, set both Oscillator 1 and Oscillator 2 to sine waves, and transpose Oscillator 2 up one or two octaves compared to Oscillator 1. Now set the pitch/mod envelope for a fast decay (for example: Attack Time 0.56, Decay Time 15.78, Sustain Level zero percent) and, in the modulation matrix, assign it as a modulation source with FM Level as its destination. The Pitch/mod Env Level parameter should be around 30 percent, with zero percent Offset. This injects the Oscillator 2 signal into Oscillator 1 for a brief transient, adding the complex, interesting attack associated with FM synthesis.
Ever Heard A 48dB/octave Filter?
If you want a really fat low-pass filter, you can gang two 24dB/octave filters in series and have them track each other. It was extremely difficult to get this kind of response with analogue circuitry, but using the Ion's Moog-emulation filters gives a good combination of vintage sound and digital accuracy. To do this, hit the Pre Filter Mix button and set parameters as follows. The object is to send all audio into Filter 1 only, and not into Filter 2, and then to route the Filter 1 output to Filter 2 so they're in series. Routing the output of the pre-filter mixer through the Ion's filters in series is the key to creating the steepest response slopes.
- Osc 1 Level and Osc 2 Level: 100 percent.
- All four other levels: zero percent. (I'm just doing a two-oscillator patch for now.)
- Osc 1 Balance and Osc 2 Balance: zero percent to Oscillator 2 and 100 percent to Oscillator 1.
- F1 -> F2 Level: 100 percent. (This effectively puts the filters in series.
The other Pre Filter Mix parameters don't matter. Now hit the Post Filter Mix button and make the following adjustments:
- Filter 1 Level: zero percent.
- Filter 2 Level: 100 percent.
- Pre Filter Level: zero percent.
- Filter 2 Pan: centre.
- Filter 2 Polarity: positive.
 If you latch all the arpeggiators in a four-part multi-timbral setup, it's possible to create a complete rhythm groove. Once this is on the go, you can easily drop the parts in and out using the Part Enable buttons.Photo: Mark EwingThe other parameters aren't crucial; the point is to listen only to the output of Filter 2, not Filter 1.
Assign the response for both filters to MG4 LP, a 24dB/octave analogue-emulation response. You probably want the two filters to track; the quickest way to evaluate this patch is to assign one of the mod wheels to the cutoff frequency of both Filter 1 and Filter 2, setting identical Level and Offset amounts (start with 100 percent and zero percent respectively).
And now, the payoff. Play some notes and move the mod wheel — you'll hear a mondo low-pass filter. To compare it to a 24dB/octave response, hit the Pre Filter Mix button, then change the Osc 1 Balance and Osc 2 Balance parameters so that 100 percent of both signals goes into Filter 2.
All of this helps illustrate the flexibility of filter mixing within the Ion. You can send audio sources (oscillator, external input, ring modulator, and so forth) to either or both filters in any percentage, pan the filter outputs in the stereo field, include pre-filtered sound, and more. It's worth spending some time in the Pre Filter Mix and Post Filter Mix screens to become acquainted with the possible routing options.
Drive Effects
Some people have complained that the effects selection in the Ion isn't extensive enough ("dude, where's my reverb?"). Hey, who cares? You can always patch the Ion into a multi-effects box! Still, let's not overlook the effects that are built in, particularly the Drive effects. Available distortion devices are Tube Overdrive, Tube Amp, Distortion, and Fuzz Pedal, all of which are related, but which have somewhat different overall sounds. Distortion can add an 'oomph' to kick and bass sounds that goes somewhere beyond macho, as well as making polyphonic pads more gritty.
The Drive Level parameter is a crucial adjustment for the drive effects. As this will change the overall output, trim it with the Program Level value to match other patches. The RMS Limiter is excellent for holding down resonant peaks from filters, while the Compressor can really 'harden' a sound if you feed the effect with high drive levels.
Tracking Generator
The Tracking Generator feature recalls the glory days of the Oberheim Xpander, and allows considerable flexibility in altering controls. Basically, it re-maps a control input (shown on the 'X' axis of the on-screen graph) to create a different output (the 'Y' axis).
The Tracking Generator appears as a modulation source within the modulation matrix. Each column represents a point on the Tracking Generator curve; the point's value is adjustable. The Tracking Point parameter selects a particular column, while Level chooses the value. Another parameter chooses the control signal that appears at the Tracking Generator input (for example, mod wheel, note velocity, or keyboard tracking).
One situation where I've used the Tracking Generator is where I want to mimic the way guitarists will often bend a note up and, at the highest pitch, add vibrato. The Tracking Generator uses pitch-bend as an input, and applies that signal to the LFO depth. For most of the pitch-bend input value, the output equals zero. But with the highest input values, the pitch-bend wheel produces an output, thus increasing LFO depth.
I've also used the Tracking Generator to alter the 'feel' of an expression pedal and, oddly enough, to program a stepped modulation response. This was because I wanted to demonstrate a quantised control response during a seminar, but quantisation is not obvious with the Ion. So, I had to create a quantised control curve so people could hear what I was talking about!
The process of programming the Tracking Generator can be tedious, but there are a couple of shortcuts. A fourth Tracking Generator parameter determines how many columns there are, so if you don't need too much resolution go for fewer; furthermore, if you double-click the Level parameter, it goes back to the default value for that column.
Are You Up To Date?
 Here's how to check the boot code revision (v1.00 at time of writing) and operating system code. With the synthesizer's power off, hold down the Panel Active A and D buttons together, and then turn on the power. If the OS code is earlier than v1.05, then go to the support pages at www.alesis.com and select Software Updates from the drop-down menu. Click on Ion Software and download the 1.05 firmware. After unzipping, you'll have a SysEx MIDI file you can load into a sequencer.
After connecting the Ion's MIDI In to the sequencer's MIDI Out, play back the sequence to send the SysEx file. After a minute or two, all the data will have been transferred, and the Ion will reboot. If the transfer isn't successful, don't panic — redo the procedure, but slow down the MIDI transmission rate. You can also download the factory patch banks from the web site. If you want to transfer these to the Ion, first go to the Ion's fifth page of Global parameters, and turn off Program Protect.
Using The Ion As A Beat Box
The fact that you can split and layer the keyboard may seem pretty useless, given that there are only eight voices — at least, that's what I thought at first. But actually, the multitimbral Setup patches can do some great beat-box effects (particularly because there are a lot of cool percussive/analogue drum sounds programmed into the Ion — look towards the top of the factory default Red bank). To get acquainted with this feature, hit the Recall Setup button and, assuming you have the factory Setup patches loaded, select Setup 08: Groove Soccer. Make sure there's no master transposition on the keyboard (both Octave button LEDs should be off).
Select the Panel Active A button, play the lowest 'C' key, and you'll hear a nifty little techno groove with a tough kick sound (part A) and a percussive pattern (part B). These both result from arpeggiation. While you hold the low 'C', go to the Arp section in the upper left-hand corner and hit the Latch button. Now release your finger from the key; you'll hear just the techno kick, because it's been latched on.
Next, select the Panel Active B button. The panel controls now affect the sound in Part B, which is the percussive rhythm. Play low 'C' again; latch this pattern, and you'll hear them both play together. Release your finger from the key. Select the Panel Active C button and play the next higher C key. You'll add a bass pattern to the mix. Latch it, and now try playing with Filter 1's cutoff control for some expressive variations. Tasty! Note that Mod Wheel 1 affects the percussive sound, while Mod Wheel 2 affects the bass.
Now that a groove is going, play a melody line in the top two octaves. Go wild with the pitch bend, and if you want to modify the melody sound in real time hit the Panel Active D button. For the coup de grâce, how about a little breakbeat action? Use the Enable buttons to bring the latched patterns in and out, effectively adding solo and mute capabilities.
By now you should be getting the point that an Ion setup can be a great groove generator. But there's even more beneath the surface; each part can have its own program, respond to its own MIDI channel, and respond to different MIDI note ranges. The pitch-bender, both mod wheels, the sustain pedal, and the expression pedal can be enabled individually for each part, and each part has adjustable output, balance (between main and aux outs), pan, and effects buss send. Parts can also be transposed in semitones and octaves.
Quick Tips
- The Ion's Held pitch-bend mode is great for patches like sitar, where you have notes with long release times that overlap other notes. When the P Wheel Mode parameter is set to Held, the pitch-bend wheel will only affect any notes actually being held down — any slow-release notes still sounding retain their pitch. You can find the P Wheel Mode parameter by hitting the Voice Edit button; it's on page one.
- Several envelope parameters have adjustable curves: +Exp (convex shape), -Exp (concave shape), or Linear. Having these three choices lets you model a variety of different envelope types. A +Exp attack and -Exp decay mimics the type of curve that happens when you charge a capacitor, the basis of analogue envelope generators. A -Exp attack produces a more dramatic rise, such as is often associated with backwards tape. A Linear slope, on the other hand, is more characteristic of early digital synths that had rate/level envelopes.
- The Ion's keyboard doesn't respond to channel pressure, which is an unfortunate by-product of trying to hit a price point. But all is not lost. Not only will the Ion respond to channel pressure data coming in from an external keyboard, it will respond to polyphonic aftertouch. If you're one of the lucky few with a keyboard that generates polyphonic aftertouch, try it with the Ion. Just go to the modulation matrix, and select Poly Aftertouch as a modulation source for the parameters you want to control.
- In the modulation matrix you can control the same parameter with two instances of the same modulator to increase its effect. This technique can also change the control law curve into more of a switching action. Take velocity, for example: assigning velocity control twice to the same synthesis parameter causes the whole parameter range to be mapped over the lower velocities — anything above a mid-range value will kick the parameter up to its full value.
- One of the elements that give analogue synths their character is imprecision — component values drift over time, thus causing small tuning changes that fatten the sound. The Ion lets you add an adjustable amount of drift, and the effect ranges from digitally drift-free to sounding like you just brought an analogue synth in from a cold car to a hot club! To access the drift percentage, hit the Voice Edit button and go to the third screen of parameters. This effect is not global, so different patches can have different amounts of drift.
The Ion As Signal Processor
I doubt anyone bought their Ion to be a signal processor, but the fact that it can process external inputs is quite cool. You can plug a mic or electric guitar directly into the external inputs, but I'd recommend adding a preamp, as the input impedance is sufficiently low to load down pickups.
, any note you press will continue to sound indefinitely — very useful if you want to use the Ion as a processor for external audio. However, if you then wish to mute the envelope, you have to double-click the Home button (above).") If you set the Sustain Time and Release Time of the Ion's amplifier envelope to Hold (left), any note you press will continue to sound indefinitely — very useful if you want to use the Ion as a processor for external audio. However, if you then wish to mute the envelope, you have to double-click the Home button (above).One of my favourite effects is using the vocoder with guitar, triggered by a drum machine. To do this, first plug the guitar into the left-hand external input, and drums into the right-hand one. Now hit the Ext In button, go to page two, and set the External Input Level parameter to 100 percent.
If you set the Sustain Time and Release Time of the Ion's amplifier envelope to Hold (left), any note you press will continue to sound indefinitely — very useful if you want to use the Ion as a processor for external audio. However, if you then wish to mute the envelope, you have to double-click the Home button (above).One of my favourite effects is using the vocoder with guitar, triggered by a drum machine. To do this, first plug the guitar into the left-hand external input, and drums into the right-hand one. Now hit the Ext In button, go to page two, and set the External Input Level parameter to 100 percent.
Next, push the Effect Edit button, select the 40-band vocoder effect type, and set the following parameter values:
- Effect Mix: 100 percent wet.
- Analysis Sensitivity: 100 percent.
- Sibilance, Decay, and Band Shift: adjust to taste once you get the patch working.
- Synthesis Signal: Ext In Left.
- Analysis Signal: Ext In Right.
- Analysis Mix: zero percent.
Finally, start the drum machine and play the guitar to get a rhythmic chopping effect. For more options, try assigning Decay and Band Shift control to your expression pedal.
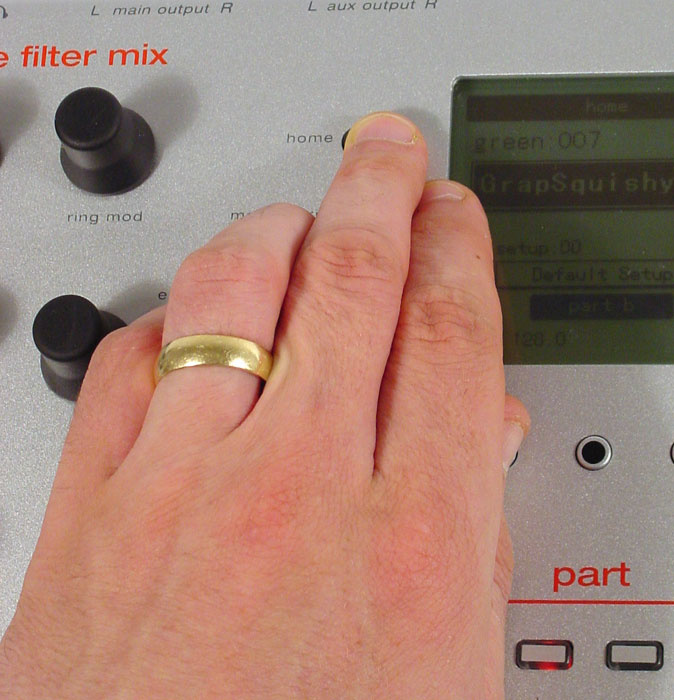 Photo: Mark EwingAnother reason to use the Ion as a processor is that its Phaser effect is outstanding; I prefer it to any other phase-shifter effect in my studio, and use it a lot with guitar. However, you need to keep the Amp envelope open or you won't hear any sound. Although you could set sustain to its maximum value and put a weight on a key, there's actually a better way: hit the Env Edit button, and set the parameters as follows:
- Sustain Level: 100 percent.
- Sustain Time: Hold.
- Release Time: Hold.
- Keyboard Velocity Track: zero percent.
Now if you hit any key, the amplitude envelope will open and stay open. Because the velocity tracking is set at zero percent, the level will be at maximum regardless of how hard you hit the key. If you want to control level with velocity, then increase this parameter to 100 percent. Each time you hit another key it adds another 'voice' with the effected sound, so be careful to hit the key once and leave it at that, because hitting more keys will add level, which could lead to distortion. To mute the envelope, double-click on the Home button. If you call up a new preset that uses effects with the external inputs, double-click Home as well to 'clear' the sound, then hit a keyboard key.
A final trick is that you can use the Ion to create tempo-synced tremolo effects with guitar and voice. In the modulation matrix, assign an LFO to Program Level. Select the LFO you want to edit, hit its Edit button, then set its Sync parameter to Tempo, adjusting the rate as desired. Either feed in MIDI Clock messages to control the LFO frequency, or use the Ion's Tap button to set a tempo. (You may also need to edit the Global MIDI Sync parameter to Ext Sync.)
Recording Performances Into A Sequencer
One of the great things about the Ion is that you can tweak controls in real time for more expressive playing. But what's even better is that you can record all these motions (not just those from continuous controllers) into a sequencer, which then controls the Ion on playback. Because the Ion sends out MIDI NRPN messages for recording, the resolution is better than what you would get if you were controlling the Ion solely with MIDI controller messages. Just remember that you need to enable the 'live front panel' mode to transmit NRPNs. To do this, hit the Global button and scroll over to page four, where you can set the Panel MIDI parameter to On. Also note that this also lets you control a second Ion from the front panel of a 'master' Ion.
The Most Important Tip Of All
One of the most significant aspects of the Ion is that it was made to be played. It's not a sample playback synth where you program a sound and just hit keys; those rubbery knobs beg to be tweaked. A few people have found it illogical that the Filter 2 controls are higher on the panel than the Filter 1 knobs, but the Filter 1 knobs are therefore closer to the keyboard and easier to grab in the heat of performance. Similarly, having the envelope controls right above the keyboard is great — many times I've played the decay parameter in real time to change a bass line into something more or less staccato.
Those two mod wheels are also there for a reason, and so is the expression pedal input. In fact, if you have an Ion and don't have an expression pedal, you're doing yourself a disservice. Almost all the patches I've programmed have the pedal doing something, from changing envelope times to editing waveform symmetry. And, of course, when using the Ion as an effects device with guitar, the expression pedal makes a fine wah-wah controller for all those wonderful filter types.
The Ion does great things straight out of the box, but I hope these tips will help you get more out of this cost-effective piece of gear. For me, the Ion is one of those rare machines which has enough depth to keep you interested, but also a simple enough interface to let you access that depth without frying your brain. Now go twist some knobs!