Technically speaking, working with a single‑track recording may not be 'mixing', but a surprising amount of useful mixing‑style finessing can still be performed.
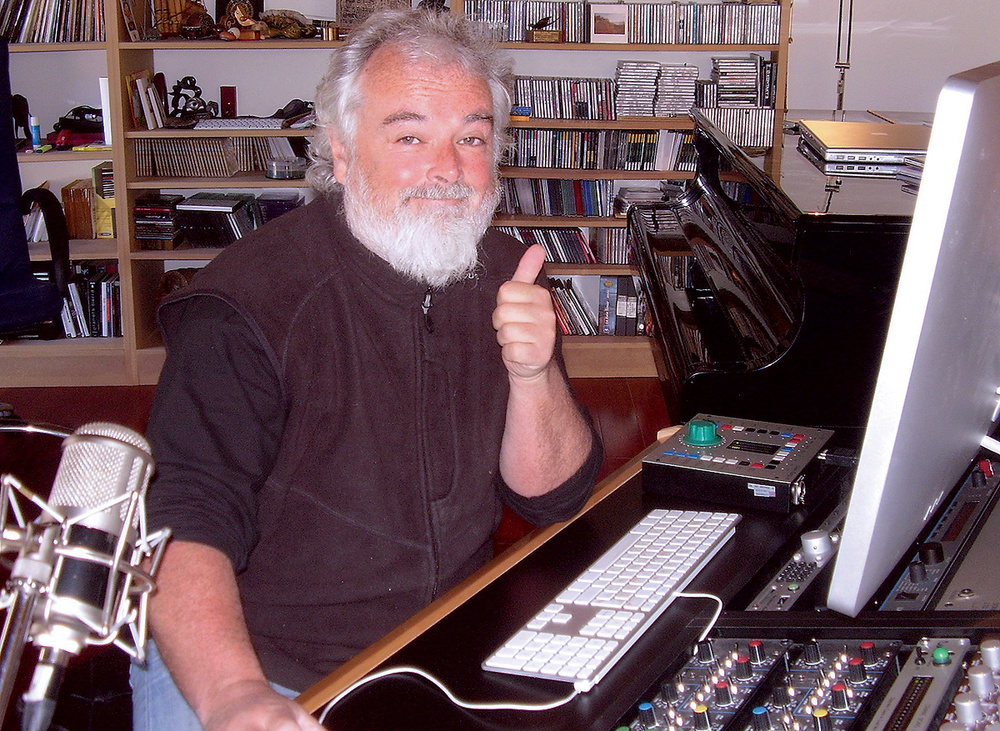
 Santi Vega, whose solo acoustic guitar recording we remix this month, in his studio.
Many Mix Rescue submissions are positively groaning under the weight of dozens of different recorded tracks, so there's a nice change this month: a mix based on a single track! I imagine some of you are already asking yourselves why a single track needs 'mixing' at all, if there are no other tracks to mix it with, but (terminological quibbles aside) the fundamental purpose of mixdown actually remains the same, whether you've got one track or 100: you want to transform raw recordings into something sounding like a finished record.
One Instrument, One Track, One Take
The track in question is an acoustic guitar recording, expertly played by SOS reader Santi Vega in his own home studio and captured in a single take via a Charter Oak SA538 large‑diaphragm valve mic, placed a couple of feet from the instrument. When Santi first emailed me expressing his reservations about the sound, I was prepared for the worst — I've had some real shockers in past Mix Rescue remixes! To my surprise, though, the raw sound had remarkably few vices to speak of, and the winning combination of lovingly‑crafted instrument, excellent musicianship, and high‑quality microphone technology had delivered the goods as well as you could reasonably hope for in a home‑studio environment. Consequently, the sum total of my EQ was three bands from Cockos Reaper's unassuming ReaEQ plug‑in. First, I added a 3.5dB low‑shelving boost at 120Hz to lend the slightly larger‑than‑life LF warmth that characterises many of the solo guitar albums I've heard. Without a separate bass instrument in the mix, there was no real technical drawback in doing this, but I did then switch in a 20Hz high‑pass filter as my second EQ band, in order to stop any subsonics being emphasised. The final tweak was a broad 2dB peaking cut centred at 235Hz, operating over a two‑octave bandwidth, just to clear a hint of woolliness.
Balancing Mechanical Noises
 Santi's intricate guitar playing was recorded with a single Charter Oak SA538 large‑diaphragm valve microphone, positioned a couple of feet away from the instrument.
As with almost any close‑miked guitar recording, picking noises and fret squeaks from the instrument felt rather aggressively over‑prominent on a number of occasions — an almost unavoidable drawback of miking this close. So my main troubleshooting task was to rebalance those mechanical noises to a more appropriate level. The biggest thing working in my favour in this endeavour is that such noises operate primarily at the high end of the audio frequency spectrum — or, to put it another way, it's a rare picking transient that still feels overbearing when you apply 12dB of high shelving cut at 2kHz! The main challenge is to devise a processing scheme that will allow you to apply that kind of EQ only for the fleeting moments when it's required, thereby leaving the instrument's remaining HF content unscathed.
There are many ways to skin that particular cat. In less sophisticated mixing environments, I've often resorted to a completely manual processing approach, via automation or off‑line region processing. However, that's pretty laborious, so these days I prefer to use a hybrid 'semi‑automatic' method, relying on fast, frequency‑selective dynamics processing to manage the individual high‑speed EQ adjustments, but making sure to automate the sensitivity of the processing manually.
In this scenario, I based my implementation around Reaper's built‑in Jesusonic crossover plug‑ins, 3BandSplitter and 3BandJoiner. As their names imply, these plug‑ins split an audio signal into three frequency bands, and then recombine those bands to reconstitute the original full‑frequency audio. What makes them one of Reaper's secret weapons is that you can apply other plug‑ins to any of the individual frequency bands before they're recombined, so you can build any number of weird and wonderful multi‑band effects. (For more details, check out SOS August 2010's inaugural Reaper Notes column.) On this occasion, my requirements were very modest, so I only split the spectrum into two bands, crossing over at 2kHz, and then inserted an instance of Stillwell Audio's The Rocket compressor to address only the upper band.
Why that compressor? Because I know from experience that it can act extremely quickly, just like the classic Urei 1176 from which it draws its inspiration. There aren't that many compressors that calibrate their attack time readout in microseconds, after all! The setting I used was one that you'd never dream of applying to a recording under normal circumstances, but in this case a 20:1 ratio with five microseconds of attack and 9ms of release allowed me to target the spiky transients with negligible effect on the sustained tone of the instrument as a whole — when gain‑reduction happens that quickly, it's very difficult for the ear to follow what's going on behind the scenes.
The danger with such a ridiculously aggressive setting, however, is that it can easily cause distortion if it begins reacting to the individual wave crests of an instrument's pitched components, which is one reason why I usually choose to automate the compressor's threshold control in this setup, bringing the gain reduction into play only when it's required and finessing exactly how much high‑frequency softening is applied to each noise instance. While this automation probably took an hour or so to program in for a seven‑minute track like this, it was still a whole lot quicker than trying to draw in lots of minuscule corrective cuts with an automated shelving EQ, and it's just as effective, to my ears, on both picking noises and fret squeaks.
Parallel Processing: Compression & EQ
 The quality of Santi's instrument and performance had been captured via a high‑quality recording chain, so the only real EQ Mike applied was to increase the low‑end weight and tackle a touch of woolliness in the low midrange.
With that technical consideration out of the way, it was time to try a few well‑worn tricks for enhancing the richness of the guitar's sustain. Although normal insert compression would be an obvious choice in a lot of music styles, Santi had already discovered that the exposed performance dynamics in this recording tend to resist that kind of approach — by the time you've dialled in enough 'bloom', the signal peaks start sounding unattractively squished. Although you can faff around with a compressor's settings all day to work around these difficulties, it's usually much easier to get good results using a parallel processing approach: in other words, by treating the compressor as a send effect.
Here's how I went about it. Given that I wanted to emphasise the instrument's sustain, I deliberately set up a parallel compression channel to reduce the levels of signal peaks, the idea being to mix this 'more sustain' signal in with the uncompressed guitar part. What makes parallel processing schemes so great on sensitive acoustic performances is that the peak dynamics of the original recording make it through to the mix unscathed via the unprocessed channel, especially during the more powerful moments of the performance, when the parallel compressor is hitting its maximum gain reduction and is therefore contributing least to the overall mix.
Another instance of The Rocket would doubtless have done me proud in this role (as it frequently has in the past), but I decided to go for bonus points and try out a few alternative compressor emulations in my plug‑in collection, just to see if they had any further analogue‑style 'magic' to offer. After a couple of experiments, I opted for IK Multimedia's modelled Fairchild 670, from the T‑Racks 3 bundle. I initially chose it on account of its fast attack and release — in fact, it was operating more as a limiter than as a compressor, especially when I'd set its Time Constant switch to its leftmost setting (the speediest). But in practice this plug‑in did some other rather nice things to the sound overall, thickening the harmonics slightly and supplying that welcome hint of stereo diffusion that you get when processing a mono source through both sides of a real stereo valve outboard unit.
That wasn't quite the end of the story, though, because it seemed to me that the higher guitar strings benefited slightly more from the parallel processing than the low strings. This is quite a common characteristic of plucked/struck melodic instruments in general — guitar, piano, harp, dulcimer, marimba, and many others. Skillful arrangement makes a virtue of things like this, but in solo situations (and a lot of more complex mixes, too), I do find that evening out the sustain across the frequency spectrum normally seems to be a beneficial step. To do this, I inserted a basic low-shelving EQ band to cut 2.6dB at 280Hz from the parallel channel. I chose to use DDMF's linear‑phase LP10 plug‑in for this purpose, so that I wouldn't cause any potentially damaging phase‑related interactions between the processed and parallel channels. I also placed the equaliser before the compressor, so that it would desensitise the compressor to the lower frequencies a little, encouraging it to track the level excursions of the upper spectrum more closely and, therefore, pull out more high‑frequency detail. As a final touch, I chucked in an additional instance of SPL's Transient Designer to round off the edges of the parallel channel just a smidgen more.
Width & Resonance Via Send Effects
 was handled via a DIY multiband processing setup. Reaper's 3BandSplitter divided the frequency range into two bands at 2kHz, and then Stillwell Audio's The Rocket plug‑in applied super‑fast limiting only to the upper band.") Toning down some occasionally excessive mechanical noises (such as picking spikes and fret squeaks) was handled via a DIY multiband processing setup. Reaper's 3BandSplitter divided the frequency range into two bands at 2kHz, and then Stillwell Audio's The Rocket plug‑in applied super‑fast limiting only to the upper band.
Toning down some occasionally excessive mechanical noises (such as picking spikes and fret squeaks) was handled via a DIY multiband processing setup. Reaper's 3BandSplitter divided the frequency range into two bands at 2kHz, and then Stillwell Audio's The Rocket plug‑in applied super‑fast limiting only to the upper band.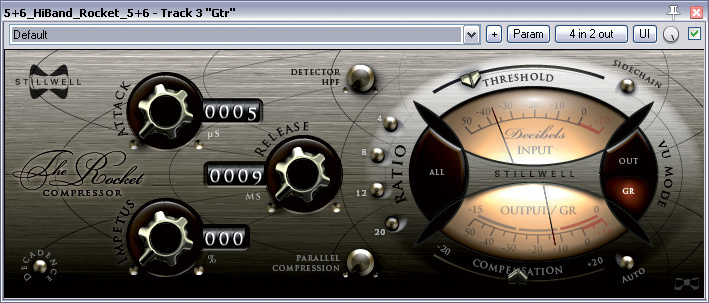
Already the guitar was sounding fuller and more consistent, even though the parallel Fairchild wasn't going beyond about 7dB of gain reduction. But the soundstage still sounded rather narrow, so next I tried to expand the panorama, for a more involving stereo listening experience.
As regular readers of this column will know, my first call for stereo widening tasks is a dual pitch‑shifted delay send effect, of a type that first came to prominence with the introduction of digital delays back in the early '80s. This comprises two short delays (in this case, 11ms and 13ms) hard‑panned to opposite extremes, with the shorter one pitch‑shifted slightly downwards and the longer one shifted the same distance upwards (both five cents in this remix). As a result, the effect return sounds super‑wide on its own, and the idea is that you sneak it in underneath your mono tracks to achieve a subtle increase in their stereo spread. A little goes a long way, though: even though I used more on this project than I normally do, the return level was still 15dB down compared to the main guitar signal.
That classic stereo widener is, however, essentially a dry‑sounding effect, and it was clear from Santi's own mix that a sumptuous cloak of reverb was very much part of his vision for the final sound. The aim of this was partly to imply a larger space around the close‑miked recording, but mostly I reckoned it was the tonal enrichment and decay extension of the reverb that he found appealing, so I first set about creating a treatment for that purpose. My instinctive choice for smooth, rich sustain is a great plate reverb, and I've had great success with Universal Audio's EMT 140 emulation on many past projects. But I do try to vary some of my plug‑in choices with every new project, just to try to avoid getting too stuck in a rut, so this time I decided to try out Universal Audio's new Lexicon 224 emulation instead.
And I'm very glad I did! This is not a unit I've ever clapped ears on in outboard form (my exposure to Lexicon hardware came courtesy of their later 480, 960, and PCM models), so I had no idea what to expect, but as I browsed through the eight available algorithms, I was quickly smitten with its beautifully warm and understated tone — not spectacularly realistic, in terms of room simulation, but a perfect match for the task in hand. The 'Small Hall A' program seemed to match the dry guitar sound best, albeit with some adjustment of the algorithm's decay time and a few decibels of low cut below 350Hz to avoid flooding the speakers with low‑end echoes. After more extended auditioning, I also felt the high frequencies were a little overcooked once the reverb had been balanced at the (comparatively high) level I wanted, so I also tweaked the algorithm's Treble Decay control down a little to polish things off.
 A parallel compression channel based around IK Multimedia's T-Racks 3 Fairchild 670 emulation brought a welcome dose of additional sustain and harmonic richness. A little tonal adjustment of this channel from DDMF's LP10 linear‑phase equaliser helped to direct its effect more towards the upper spectrum.
 It's tempting, when facing any unfamiliar reverb device for the first time, to feel a bit intimidated by abstrusely named parameters, especially on emulations of reverbs that pre-date some of the comparatively standardised terminology we tend to see today. To be honest, though, as long as you can find a way to adjust the reverb's decay time and frequency balance, for the most part you can safely ignore most of the finer points — if you've made some effort to start from a promising‑sounding preset in the first place. Indeed, I was able to get a perfectly acceptable result in this remix without being any the wiser about the operation of the Lexicon 224's Mode Enhancement or Decay Optimisation functions. (That'll be another manual on hand to soothe my next bout of insomnia...)
The Pros & Cons Of Impulse Responses
I now had the broad and resonant presentation I was hoping for, but I still had one fundamental reservation about the sound: the mix had width and sustain, but little sense of height or depth, in a spatial sense. To remedy this, I turned to a second reverb plug‑in, this time an instance of Christian Knufinke's SIR2. One of my nerdier hobbies is scouring the web for freeware impulse responses, and I've built up quite a collection over the years. This does have its practical uses, though, because on occasion I encounter mix situations where an appropriate reverb sound proves elusive. Under those circumstances, it can be a godsend having swathes of different impulses to flick through — as long as you stay focused on what you're looking for and don't stop auditioning things until you get something that really feels like it belongs.
This remix was a case in point, because my usual first‑call impulses yielded little of value, so I ended up trawling through several large collections sampled from various different outboard processors before I was able to track down a file that came close to fitting the bill — a rather unpromisingly titled 'Piano Hall 1st Row' impulse response taken from the TC Electronic System 6000. All in all, I probably went through 50 or 60 different impulse responses before hitting paydirt, and it's by no means the first time that's happened. Although convolution processing is a great way to access a variety of quality reverb sounds on a budget, the down side of this technology's inherent lack of tweakability is that you do sometimes need to spend some serious time digging to unearth the right one — and most home studio users I've met give up the hunt way too early.
So what, precisely, was I looking for? A combination of characteristics that I don't often require: short, bright, wide, early reflections, giving the sense of a reasonably large and airy acoustic space; and, in addition, a fairly long, smooth, and understated decay tail to suggest an overall sense of 'size', both for the instrument itself and for the virtual room. Even when I did locate a promising impulse response, though, I still felt it required a little additional processing to tailor it more exactly to its new context, namely some transient softening of the send with another SPL Transient Designer, and 6dB of low shelving cut from Reaper's ReaEQ. These measures both helped tuck the reverb a little better behind the guitar's direct sound, so that the intricacies of the tone remained a fraction clearer.
Automation: Phrasing & Harmonic Balance
 Universal Audio's Lexicon 224 did a star turn in this particular remix, supplying a wonderful sense of warmth, and also increasing the expansiveness of the stereo picture. However, a little low‑end EQ was necessary to prevent it from submerging the low end of the production in reverb tail.
The crucial final stage in this remix was some careful automation. On the simplest level, this entailed a lane of fader rides designed to refine some of the performance phrasing and catch the odd note that had either been mis‑picked slightly or struck over-enthusiastically — even the best players inadvertently misplace the odd accent when playing complicated melodic flourishes. It never ceases to surprise me quite how much you can dicker with fader rides before what's going on behind the scenes begins to get too obvious. A range of +/‑3dB is usually fair game, for example, especially if you use step changes rather than gradual ramps — as with fast dynamics gain‑reduction, it seems to be very difficult for the ear to follow such abrupt volume alterations.
That wasn't the only automation, though, because further action was also required to handle something that I've found with most solo acoustic guitar recordings I've mixed: if you deliberately try to enhance their sustain with compression and reverb processing (as I had done), you almost always find that a few isolated pitched harmonics start poking you in the ear uncomfortably, especially at higher playback volumes. These usually crop up during more chordal sections, rather than sparser melodic work, and sound almost like someone's fading a sine-wave synth patch in and out of the recording. Although it's a natural reaction to suspect the mix processing of introducing these overbearing resonances as side‑effects, the truth of the matter is that they are actually present in the raw recording if you listen hard enough; it's just that they don't irritate in nearly the same way when the sustain elements assume their more natural back‑seat role.
 In this screenshot, you can see the automation used during the climactic strumming section towards the end of the remix. Over the guitar's waveform there's a lane of normal fader automation, while below it is the lane that controls the sensitivity of the split‑band mechanical noise-reduction processing via the Threshold setting of an instance of Stillwell Audio's The Rocket compressor plug‑in. At the top are the six lanes governing the gain controls of the narrow peaking EQ bands that Mike used to control some over‑prominent individual pitched harmonics.In this mix, the critical sections were the finger‑picking and strumming at 3:05‑4:47 and 5:12‑6:16, containing harmonics at 498Hz, 1062Hz, 1188Hz, 1337Hz, 1600Hz, and 4002Hz which all stuck their heads rather too far over the parapet for my liking (and indeed Santi's) at different moments. Fortunately, close examination of suspect frequency areas on a spectrum analyser (allied with a bit of trial‑and‑error EQ sweeping) makes it pretty quick to identify the offending frequencies once your ear has tuned into them, and you can subsequently attack them very effectively with narrow‑bandwidth peaking EQ cuts.
However, this isn't the kind of EQ that you should just set up and leave, which is why automation needs to be involved. To start with, sticking six narrow notches into the mid-range of any instrument is pretty much guaranteed to degrade the sound by virtue of phase‑shift and/or resonance side‑effects, no matter what EQ plug‑in you use — the timbre will typically appear to lose focus and solidity, while interaction between the closely‑spaced bands often seems to undermine their rebalancing action somehow. Also, a harmonic that is over-prominent in one section of the timeline may be fulfilling an important timbral role elsewhere (perhaps in another chord), so dipping it throughout becomes a double‑edged sword. In a similar vein, a harmonic might only be slightly over‑egged during some moments, but leap out excruciatingly at others, in which case static settings just won't wash. What all this means is that it pays to ride the gain controls of each of the little peaking cuts, removing them whenever they're not required, and dialling in only as much cut as you need at any given moment.
Details, Details...
 Six narrow EQ notches in Reaper's ReaEQ were used to rebalance a few individual harmonics throughout the recording. However, because they were running under automation control, there were never more than two or three of them active at once.
This month's remix offers a fairly extreme illustration of a pretty good rule of thumb for mixdown: the more of the listener's attention is taken up by any given instrument, the more detailed your mixing treatments will probably need to be. It's important to realise, though, that, under other circumstances, a similar guitar part in a super‑busy mix might only need to be faded in, without any processing at all, so it's important to resist a cookie‑cutter approach to processing, even for familiar instruments such as acoustic guitar.
Rescued This Month
Santi Vega is a Madrid-based composer and multi‑instrumentalist who has been working mainly in film scoring for more than 20 years. More recently, he has become interested in engineering, to complement his performing and composing skills. This month's instrumental track is called 'Ying Yang', and was written, performed (in a single take!) and recorded by Santi himself for a dance performance.
Audio Examples & Project Files
On the SOS web site you'll find lots of audio files relating to this month's remix, including the original and remixed tracks; numerous 'before and after' processing demonstrations with detailed captions; the full Cockos Reaper project file of the remix, so you investigate my settings in more detail; and the song's raw acoustic‑guitar recording, in case you fancy having a go at remixing it yourself!
Remix Reactions
Santi Vega: "This track has a huge dynamic range, and while I wanted more presence in general, I didn't want to sacrifice those dynamics. I tried compression, but gave up in the end, because I was unable to achieve anything much without compromising the original sound. I also had some mid-range problems, but, again, flirting with some EQ always seemed to degrading the original sound, and sometimes subtle, ghostly harmonics appeared, but I couldn't work out where they were coming from. I also had some fret noises which seemed to be coming through too strongly, but when I tried to tweak it a bit, it also started eating into the overall guitar sound. And so on and on...
"From the beginning, Mike's approach was outstanding, even though we hadn't talked about any reference tracks. He seemed able to correct all the problems easily and without altering the original sound, somehow enhancing the guitar and getting a more even track without sacrifying the dynamic range. Thank you, Mike, for your great help, knowledge, kindness, and generosity!”