We explore some of the advanced parallel compression techniques used by top mix engineer Michael Brauer — and how you can recreate them using Cubase.
 One of the secrets behind the vocal sounds of world‑famous mix engineer Michael Brauer is his unusual parallel compression technique. Here you can see a configuration in Cubase that simulates his setup. Five Group channels are fed via post‑fade sends from the 'LV Source' audio track containing the original vocal recording, and each of the Group channels contains a compressor with its own unique sound. The outputs of all these compressors are then mixed to the LV Master Group channel for any further communal insert processing or send effects.
Back in SOS November 2008's 'Inside Track' feature, we interviewed Michael Brauer, a mix engineer who has mixed records for established megastars such as the Rolling Stones, Paul McCartney, Aerosmith and Bob Dylan, and seems equally in demand today by the likes of KT Tunstall, James Morrison and Coldplay. From a personal viewpoint, I was interested to read about his vocal processing techniques, because I'd been very impressed with the vocal sounds he'd achieved for James Morrison's first album, Undiscovered.
The article didn't disappoint! It turns out that Brauer uses a very unusual compression approach for vocals, whereby he feeds the vocal in parallel to five different compressors at once, mixing their outputs to create the final sound. But what's the point of doing that when it'd be a lot easier just to insert a compressor directly into the vocal channel? The first reason, as Brauer explains, is that if you use five different models of compressor, each will, by virtue of its compression character and processing side‑effects, alter the timbre of the vocal. Mixing these compressors together therefore gives you access to a range of tonal enhancements that can be matched to what the specific vocal needs. When using this multi‑compressor tactic for my Mix Rescue of 'Big Dummy Shake' in SOS March 2009, I realised that Brauer hadn't mentioned a second reason why the technique works so well: it's because the compressors are connected in parallel, a technique that tends to be very good at bringing about serious dynamic‑range reduction without stamping on level peaks as heavily. So in this month's Cubase column, I'm going to look at how you might take advantage of this advanced compression technique in Cubase.
Advanced Vocal Compression
 Here are the five compressors you can see in use in the first screenshot. They have been chosen and set up to achieve sonic contrast between them, something that's a crucial element of this compression technique.
There are a few different ways you could set up the multiple parallel compressors in Cubase. In some ways, the simplest method is just to duplicate your audio track and insert different compressors on each duplicate, but this can get tedious if you need to edit the audio at a later date. A better approach is to have your audio on one track and send from that to a selection of different compressors, much as you would send to effects such as delays and reverbs. You may, therefore, like to use Cubase's dedicated FX Channels to host your different compressors, so that you keep all your send effects tidily together in one area of the screen. However, the restricted routing to and from FX Channels until recently may stop those with versions of Cubase prior to v4.5 from creating the necessary routing, so instead I'd recommend setting up separate Group Channels for each compressor.
In this case, we'll follow Michael Brauer's example and create enough for five different models running simultaneously. Right‑click the Project Window's track list and select Add Group Channel Track from the Add Track submenu, increasing the number in the subsequent dialogue box's Count field to five to save time. The new Group Channels should then show up as available destinations if you select the lead vocal's audio track in the Project window and click in any spare Sends slot within the Inspector. Set up separate sends here for each of the Group Channels you've created, and then make sure they're all switched on and faded up to the same level. This might as well be the 0dB mark, as it's quick to set just by holding the Control key while clicking the little horizontal send‑level control. It's also best to leave these set to post‑fader operation, for reasons I'll come back to later...
The lead vocal should now feed all the new Group Channels at the same level when you play back, and if you reassign the Audio Track's output in the top Inspector pane to Stereo Out to No Bus, then that will stop any uncompressed vocal reaching the mix. The final stage is to create one more Group Channel labelled something like 'LV Master', and reassign the outputs of all five Group Channels to it from their default Stereo Out setting.
Choosing The Compressors
That completes the basic audio routing; now you need to choose your compressors. The problem, though, is that all of Cubase's built‑in compressors sound quite similar, so sticking just to those would defeat the object of the exercise. The point is that you want the compressors to have contrasting characters, to increase your tonal options. Many recording musicians have a variety of additional commercial third‑party plug‑ins on their systems, and there are also many good freeware 'character' compressors available, so there shouldn't be any shortage of alternatives for you to try — and all you really need to do is compare the sounds of different ones side by side and choose a subset that provide a good variety of timbres.
The differences between the sounds of compressors can initially be difficult to latch onto as a listener, so when auditioning different contenders, it's worth driving them moderately hard so that their side‑effects become more apparent. Whatever it is that seems to make a specific compressor interesting, experiment with the different compression controls to try to heighten this character, without thinking too much about whether it's actually what you want for the vocal in question. In my experience, even if one type of compressor doesn't seem to give a particularly appealing sound on its own, it can actually end up working magic once it's mixed in with the sound from another model.
 So what kinds of things should you be listening for? Well, in the first instance consider how the specific gain‑reduction style affects the feel of the performance. Some compressors will make the sound seem more animated, while others will smooth it out and make it feel more restrained. Tonal changes are inherent in some compressors, and distortion side‑effects of different flavours are probably even more important, in my opinion, although I suppose that depends on what kind of music you're mixing and how hot you plan on running the compressors.
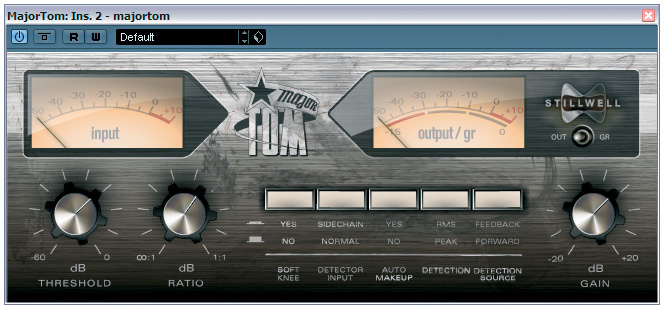
For the purposes of this column, I'm going to use five plug‑ins that Cubase users can download and try out without parting with any money, so that it'll be pretty easy for you to replicate my setup if you want a ready‑made starting point for your own experimentation and reference. The first two compressors give a comparatively clean sound, with Cubase's Vintage Compressor offering a brighter and more natural sound next to the rounder and more obviously compressed effect from Stillwell Audio's Dbx 160‑inspired Major Tom. The other three all offer different distortion sounds: Bootsy's Density has a nice, breathy, high‑frequency enhancement, Buzzroom's Grancomp contrasts this with a slightly telephony presence bite, and Antress Modern's VHME (an obvious homage to the Empirical Labs Distressor) gives a stodgier tone. If you prefer, you could select alternative compressor plug-ins — but make sure you use a similar array of 'flavours'.
 Now you've got all the compressors set up, you can try mixing and matching them to get a tone you like. There are no real rules here, as you can afford to be fairly intuitive when it comes to vocal tone, and the compressed signals don't always seem to combine in the way you think they might. A little trick I find useful, though, is using the 'M' key on the keyboard to toggle the mute status of different compressor channels. For example, let's say I have one compressor I really like, but two others that I am thinking of mixing in, and I can't quite decide between them. If I mute one of the channels in question, and then select both of them, pressing 'M' then toggles between them instantaneously.
One thing to bear in mind is that the overall vocal level will affect your tonal judgements, so you may need to adjust the 'LV Master' channel's level to compensate for any increases in level you get when combining different compressors. However, if you have a hardware fader controller you should be able to do this compensation very quickly and instinctively from the compressor-channel faders while the track is playing, as long as you can get your hands on all these faders at once.
Some Refinements

If you've tried the idea out this far and like the results you're getting, there are a couple of further refinements to the scheme which you might also consider experimenting with. The first thing you can do is create another Group Channel, as if for a sixth compressor, but then not actually insert a compressor into it. You can then use this Group Channel to feed the uncompressed vocal into the mix alongside the compressor outputs. This can really help to maintain a little liveliness in the sound even if you need to compress quite heavily to maintain your mix balance.
Speaking of compressing heavily, if you discover, after finding your preferred vocal tone, that your compressor's gain‑reduction is a bit too gung-ho, or alternatively doesn't control the singer's level peaks enough, there's no need to go through all the compressors tweaking them individually. All you have to do is adjust the fader level on the original lead vocal audio track, which affects all the post‑fader sends to the compressors, and hence alters the amount of compression across the board. You'll need to juggle this fader with the 'LV Master' fader to keep the overall mix level the same, but that's not tricky to do.
Any other processing you carry out on the vocal can be inserted on the source audio track if you're happy with any effects that may have on the action of the compressors, but in practice I usually only high‑pass filter at this point, to remove rumbles and excessive plosives, leaving any other processing for the 'LV Master' channel's insert slots.
The most no‑nonsense way to feed any send effects such as delay or reverb from the lead vocal in the mix is to set up post‑fader sends on the 'LV Master' channel. However, don't completely disregard the possibility of feeding some effects from the original lead‑vocal audio track instead. What this will do is cause less effect to appear on quieter vocal phrases and more to appear on louder ones, something that can often work well in concert with the common 'drier verse/wetter chorus' mix dynamics of many commercial tracks.
A final issue to consider is level automation, without which it's tough to get a commercial‑sounding vocal mix, no matter what you do with compressors. The first interesting consideration here is which channel to automate for overall level control. Again, if you automate the lead vocal's audio track, you'll affect how hard the vocal hits the compressors, whereas the fader on the 'LV Master' channel will affect only the post‑compression signal. Although you might think that it would therefore be better to avoid tampering with the compression, in reality I've discovered that it often sounds more musical if you automate into the compressors for most of your fader rides, and only turn to the 'LV Master' channel if the compression suffers as a result of a specific pre‑compressor fader move.
The second automation issue is that you can, of course, adjust the relative levels of the different compressors to suit different sections of your song, something that Michael Brauer refers to specifically in the interview I mentioned. This is particularly relevant if you have any of the uncompressed signal passing through to the 'LV Master' channel, as this will often suit sparser sections of your arrangement better.
Beyond Compressors
 Any of the processors in the plug‑in menu's Distortion submenu can be used in place of a compressor in this article's parallel vocal processing setup, but in addition to those you can also get some useful tonal colours out of the Grungelizer plug‑in if you turn the Crackle, Noise and AC controls down to get rid of the background noise.
Although this column focuses on the idea of combining compressors, that's not the end of the story. A couple of other processes also affect both the tone and the dynamic range of a signal simultaneously: limiting and clipping. Mixing in a limiter working at full tilt can be really useful for bringing up the levels of half‑swallowed syllables. You could try Cubase's Limiter plug‑in if you like, but the mastering‑style Maximiser felt like it did a smoother job of levelling out the peaks when I tried it out.
When it comes to clipping, you're spoilt for choice in Cubase, so there's little need to venture out in search of third‑party plug‑ins if you don't want to. Amp Simulator, DaTube, Distortion and Soft Clipper are all options (although I'd probably be wary of the last's harsh‑sounding and rather unpredictable third harmonics), as long as you don't drive them too hard and you mix them in low. You might also feel the need to pop an EQ after the distortion to shape it more, or a compressor before the distortion to make its tone more consistent. Grungelizer is another quirky option that you might look at (shown in the screenshot), but there's nothing useful to be gained from Bitcrusher, as its digital distortion artifacts aren't musically related.
Judge For Yourself!
If you want to hear how this compression technique sounds in practice, you'll be pleased to know that the Cubase 4 setup you can see in the screenshots can be downloaded from the SOS web site. It includes a short section of vocal recording in case you don't have anything to hand. If you don't already have the plug‑ins on your system, you can download them from the links given below.
- Stillwell Audio's Major Tom (fully functional evaluation version): www.stillwellaudio.com
- Bootsy's Density (freeware): http://varietyofsound.wordpress.com
- Buzzroom's Buzcomp Free Grancomp (freeware): www.x‑buz.com
- Antress Modern VHME (freeware): http://antress.webng.com