This month, our mix engineer develops a reader's track and shows that the difference between an average mix and a good one is less about the quality of the gear than about what you do with it!
 This month's Mix Rescue song comes from the south-London band Jokers, Jacks & Kings.
Given the title of this column, it's little surprise that we end up dealing with a lot of productions that have made various fundamental recording, arrangement, and/or mixing misjudgements. As a result, I regularly find myself making broad-brush changes to all of these during the remix process, as well as resorting to some fairly drastic remedial measures on occasion.
Not so with this month's project, though, because the MP3 that SOS reader Alex Hunt sent in had already cleared the most important hurdles. The writing and arrangement were strong; the band had performed with conviction; the recordings had been approached sensibly; the timing and tuning were solid; and the mix was doing a very creditable job of supporting and enhancing the end result. Despite all these good things, however, the mix sonics didn't quite hold their own when lined up against relevant commercial releases from bands like Interpol and The Vaccines, and Alex had struggled to achieve meaty guitar sounds without losing the presence of the vocals or the power of the drums. So he asked me to cast an eye over his mix settings to see if I could help him cover the final furlong.
Passing The Baton
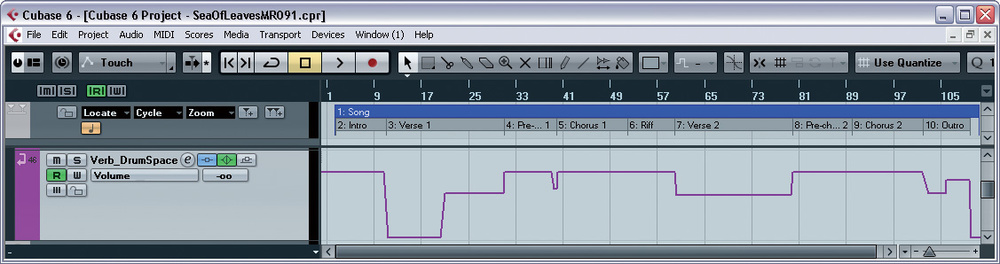
 Here's what Alex's project file looked like when he sent it in to SOS — a paragon of virtue as far as Mix Rescue is concerned, with tracks thoughtfully grouped, multed, labelled, and coloured, and with careful editing and automation where necessary.
Clearly, it made no sense for me to start work afresh from the raw multitracks, given that so many aspects of the mix were on target, so instead I loaded Alex's Steinberg Cubase project onto my own computer system so that I could start work from where he'd left off. Opening the file, there was ample evidence of a commendably disciplined mixing approach. All tracks were succinctly named, colour-coded, and collected into sensible folder and audio-group heirarchies, while the structure of the timeline was neatly indicated in Cubase's dedicated Marker track. Many of the recordings had been carefully edited for arrangement, comping, and correction purposes, as well as being multed across different tracks where appropriate, to allow easy section-to-section settings changes. At the bottom of the track list, a few commercial releases had already been imported and assigned to an alternate output bus for referencing purposes. In short, enough for me to be able to hit the ground running!
The mixer settings provided further indications of common sense. Built-in Cubase channel EQ and Studio EQ processing had been used for most of the basic frequency-balancing work, and featured lots of filter bracketing, along with a sprinkling of restrained peaking filters, mainly focusing on cuts. That left plenty of CPU for more characterful third-party alternatives such as Universal Audio's Neve and Pultec emulations to be targeted at a few of the individual channels which had called for more assertive tonal shaping. Dynamics and distortion processing had been used confidently, without falling into the trap of overcooking everything or overloading the master bus, and effect-return channels were laid out thoughtfully — alongside the feeder track when fed from a single source, or in a dedicated folder if used more globally. There were a number of advanced triggered ducking techniques in action behind the scenes too, as well as a good deal of detailed automation, especially on the lead vocals.
Overall, then, there was nothing I could reasonably find fault with at first glance, so I began to dissect things channel by channel. I did this by first muting everything, and then reintroducing tracks one at a time, so that I could more easily isolate small factors that might be hindering progress.
Drums Dissection
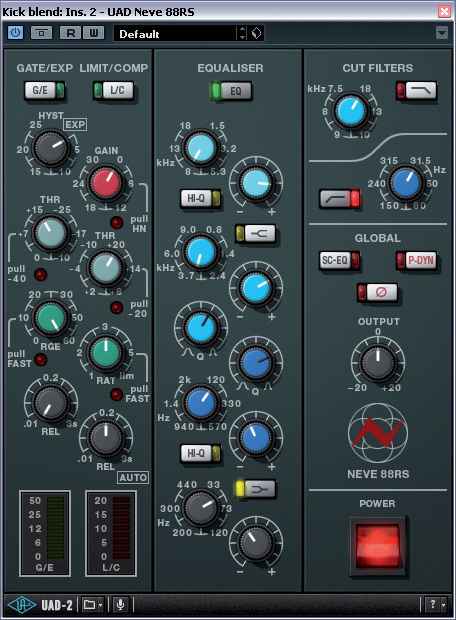
 only where more extensive subjective tonal sculpting was required.") Alex had also taken a sensible approach to EQ as far as small-studio, in-the-box mixing is concerned, conserving processing resources by using Cubase's built-in EQ for everyday clutter-removal and frequency-balancing purposes, and then breaking out higher quality, DSP-hungry plug-ins (such as Universal Audio's UAD2 Pultec and Neve analogue models) only where more extensive subjective tonal sculpting was required.
Alex had also taken a sensible approach to EQ as far as small-studio, in-the-box mixing is concerned, conserving processing resources by using Cubase's built-in EQ for everyday clutter-removal and frequency-balancing purposes, and then breaking out higher quality, DSP-hungry plug-ins (such as Universal Audio's UAD2 Pultec and Neve analogue models) only where more extensive subjective tonal sculpting was required.
I brought the drums back in first, comparing each individual channel to the full drum mix by toggling individual Solo and Listen buttons. The first thing that drew my attention was the overheads bus, to which Alex had applied Empirical Labs' Fatso compressor. While this is well-regarded as a drum compressor, what it was doing here was pushing down the snare-drum peaks coming through these mics, so that the snare sound in the mix was heavily reliant on the inevitably unnatural-sounding close mic. Ditching the compressor and rebalancing the cymbals back to roughly their former balance rendered the snare slightly fuller and more believable, as well as gluing the close mic better into the full kit.
Some of the difficulty in achieving vocal presence during the choruses seemed, to me, to stem from a harshness around 4kHz in the drum overheads, so I dipped out 5dB with a medium-narrow (Q=1.4) peaking filter, just during those sections, to combat this. The outside kick mic was also contributing a bit too much thrashy HF cymbal spill, so a few decibels of that bit the dust too. In addition, though, Alex's wide low-mid peaking cut on the overhead mics at around 140Hz was removing a bit too much warmth from the kit's timbre, while insufficiently tackling both lower-end flabbiness and a woolliness to the snare in particular. Moving the existing high-pass filter up from 100Hz to 170Hz and then narrowing the peaking cut to centre it on 270Hz seemed to improve matters on both counts, and enabled me to mix the overheads a little higher in the balance, binding the whole drum kit together more effectively.
 Although the two vintage reverberators that these UAD plug-ins were modelled on are rightly revered as studio classics, in this mix they had been applied to the drums for the wrong reasons, such that their over-warm, unnatural-sounding sustain characteristics were cluttering the low midrange unhelpfully.
 A couple of warm-sounding send effects felt as if they were surplus to requirements: a short patch from Universal Audio's EMT 140 Plate on the snare, and a rather incongruously long, rumbling reverb from their EMT 250 on the toms. Neither of these made much audible impact on the full mix, in terms of blending or sustaining the close-mic signals, and neither was realistic-sounding enough to give any lifelike illusion of a surrounding acoustic, so removing the sends completely felt like no great tragedy, and clarified the low-mid range to a small but perceptible degree. In addition, Alex had applied a thick-toned hall patch (from Cubase's Reverence convolution processor) to the snare alone, and although I liked the way this filled out the body of this sound, the reverb tail was rolling around between hits unnecessarily, so I gated it to tighten things up again.
In place of these excisions, I added a brighter, 'stone room'-style reverb patch with a high-pass filtered instance of Cubase's own Reverence convolution processor, as this did a much better job of bonding the different signals into a single, coherent kit sound, as well as adding a nice hint of space. However, listening in mono revealed that the Middle component of the stereo effect return was contributing a rather woolly tone to the drums, so I shelved 4dB out of it using the M/S mode of DDMF's great little LP10 equaliser plug-in. Finally, I applied some automation to the effect-return channel to support the song's long-term dynamics, opening up the drum room more for the pre-chorus and chorus sections.
Transient Tweaks
 Having muted Alex's two EMT reverb emulations, I replaced them with a brighter and more natural-sounding drum-room ambience from Cubase's built-in Reverence convolution plug-in, following it up with some MS equalisation from DDMF's LP10 to aid with mono compatibility. The level of this reverb was then automated to support the ebb and flow of the musical structure.
My only significant remaining concerns with the drums related to their transients. In the first instance, the snare's 'bite' didn't quite seem to balance that of the kick drum, where I felt both were equally important to the groove. Fortunately, the compression settings on the snare group channel (both over-snare and under-snare mics had been recorded) showed that Alex had used quite short 1ms attack times, so it was easy to reinstate a bit of leading edge by just inching those up to 6ms.
In general, though, the transients as a whole were rather 'needling', something that's by no means atypical of small-scale all-digital productions — transients aren't rounded off as much as when you're recording to an analogue medium. In this particular instance, a heavy drum-bus parallel compression effect was exacerbating the situation, because of the preset attack characteristics of the modelled analogue compressor in question (Universal Audio's Neve 33609). My initial thought was to switch in this plug-in's additional limiter facility to try to tame the spikes bypassing the compression, but was unable to smooth things off even with the attack switch in its Fast position and the Threshold control at minimum. So I abandoned that idea and fired up Cubase's built-in Envelope Shaper instead, piling on the maximum 20dB of Attack reduction with a 24ms processing period to bring things more under control.
Even after this, the overall drum sound still felt a touch spindly, so I decided to try some analogue-style 'warming' as an additional step, in this case using Tone Booster's great TB_Ferox tape emulation. I ended up driving this quite hard, and although that did change the sound quite a bit, what I was hearing seemed to suit the band's overall vibe, as well as rounding the spikes and thickening the snare's sustain in a nice way.
Adjusting Bass & Guitar Balance
 Simply setting too fast a compressor attack time on the snare channel robbed the drum of too much of its 'bite' in the original mix, so this was increased for the remix, allowing more of the drum's leading edge through.
The bass guitar was already pretty adeptly mixed. Separate mic and DI tracks had been mixed to a common buss, and then treated with EQ, compression (both full-band and multi-band) and parallel distortion processes, to create a sound that really worked in context. That said, I did make a couple of small EQ adjustments. Firstly, because the low-mid range of the drum parts had now been tightened up, I figured that the bass could afford to make more use of this region, so I eased up a decibel or so on the buss channel's broad 214Hz peaking-filter cut. My second change was a 1-3kHz peaking boost from Blue Cat's freeware Triple EQ plug-in. Although I added 10dB, the audible effect of this was nowhere near as dramatic as you might expect from that figure, partly because the information in that spectral region was so low-level to start with, and partly because I inserted the EQ before the channel dynamics, which inevitably fought against the tonal change to some extent.
The various guitar parts were also very respectable, on the whole, and had been adapted to their mix context very well, by virtue of careful multing, balancing and group processing. However, there was a sense that the chorus sections were getting rather crowded by the available parts (hence the heavy masking of the drum and vocal sounds), despite the missing weight and expansiveness that Alex and the band had been hoping for.
My tactic was simply to turn up the guitars a few decibels and see where that left me. Immediately, I found myself reaching for the EQ to tame the 4kHz region of the main double-tracked rhythm part with a 4dB cut, as well as removing a 1kHz boost Alex had applied to the chiming higher harmony part and limiting that track to round off some over-zealous picking transients. The additional tremolo part added for the second chorus also felt over-bright to me, so I reversed its 2dB 5kHz EQ boost into a 5dB cut, while the low-mid range seemed over-egged in the light of the other guitar and bass parts too, so I raised its high-pass filter by an octave or so, to 500Hz, to stave off woolliness. Again, those EQ alterations might seem quite assertive, but in reality their effect on the mix was quite subtle because of the subsidiary nature of the part.
Vocal EQ & Effects
 The attack characteristic of the Universal Audio Neve 33609 emulation Alex had used for a parallel compression effect on his drum sound was unpleasantly sharpening the drum and cymbal transients, so Mike followed this up with a firm transient-reduction patch from Cubase's Envelope Shaper plug-in.
Already, the EQ changes were providing me with better vocal cut-through, despite the increased guitar power, but I was nonetheless keen to massage the chorus-section vocal tone to improve the projection further, if possible. Shaving out 1dB at 265Hz and 2dB at 760Hz (where the bass and guitars were dominating the texture), adding a couple of decibels of boost in the critical 1-4Hz presence zone, and applying a light sheen of high shelving boost from the Universal Audio's UAD Harrison 32C equaliser emulation all seemed to be steps in the right direction, but the down side was that these changes undesirably emphasised the vocal sibilance into the bargain. Alex had already taken the wise precaution of inserting a Cubase De-esser into the channel, but whatever I did with it seemed to knock the singer's teeth out (somehow I've never got on with Cubase's de-essing plug-ins) so I replaced it with Tone Boosters' TB_DeEsser operating in split-band mode, and that seemed to give a much more useful outcome.
 Further rounding and warming of the drum sound came courtesy of Tone Boosters TB-Ferox analogue tape emulation plug-in.Up to this point, I'd deliberately bypassed all of the vocal send effects, to gain an unbiased impression of how the singer's raw tone interlocked with the rest of the arrangement. Upon reintroducing the effects, I quickly realised that the dark-sounding EMT 250 emulation I'd already jettisoned from the drums was no more beneficial here, but that when it was removed, the vocal clearly still demanded more density to compete with the guitars. Conjuring up a low-level double-track part by editing between the two choruses (as I've frequently done in past Mix Rescues) helped a little in this respect, as did increasing the level of the Cubase Cloner send effect that Alex had set up for vocal widening purposes, although I tried not to push either of these methods too far, for fear that the singer would sound too overtly 'chorused'.
For sustaining the part and giving an impression of larger space, but without pushing the singer too far back into the mix, a tempo-sync'ed delay seemed the obvious choice to me, and Alex had come to a similar conclusion on his own. However, the patch he'd set up didn't seem to function that well in practice, largely on account of the short 16th-note delay time, which made the singer sound rather like he was trapped in a double garage! A lengthier, quarter-note patch came across as more effective within the final remix, especially when a small amount was sent on to the drum room effect I'd already set up earlier.
Balancing the backing vocals alongside the leads was mostly a question of refining some of the timing/tuning edits, dipping out some mid-range at 2.5kHz, and then applying dynamics processing to the individual channels. The problem with compressing just on the BV-group bus, as Alex had done, is that it doesn't tackle imbalances between the individual vocals, so even though you'll level out the volume of the group as a whole in that way, individual voices will still tend to stick out unduly from time to time. By processing on a per-channel basis as well, it's easier to anchor each of these parts reliably.
Automation & Bus-processing Refinements
 Here you can compare the EQ settings for the main chorus rhythm guitar part. The main alteration is the new cut around 4kHz, which was crucial in unmasking that important region of the vocals during this busy section of the arrangement.
The remainder of my mix-enhancement work was primarily concerned with automation. It wasn't that Alex hadn't done any automation — he had, in fact, done a lot more in this regard than I usually see in Mix Rescue projects! However, my alterations to the overall balance had made an impact on the solidity of the vocal in the mix, so I made a point of supplementing his lead-vocal rides with an additional layer of level automation from an instance of GVST's GGain plug-in, to adapt the vocal to its new context. Likewise, the double-track had to remain carefully tucked in beneath the lead vocal, which required a similar degree of data detail on that channel.
Bass rides were also quite important in this instance, in order to keep the bass level consistent. In a track like this, where the bass occupies an important melodic and tonal role, small changes in perceived bass level can have a big impact on the musical dynamics. Some more interesting corners of the rhythm/solo guitars and flute-synth part were also pushed up into gaps in the vocal phrasing during the verses, because it felt like a waste not to give them a few moments in the sun.
Comparing a draft of the remix with the band's stated commercial references revealed that the overall mix tonality could benefit, on the whole, from a touch more 100Hz, a little less 300Hz, and a general boost above 2kHz or so, but this was easily managed with an instance of DDMF's latest-generation LP10 plug-in inserted over the Cubase master channel. While I was there, I also looked over the settings Alex had used for his master-buss compressor (Cytomic's The Glue), and decided to go for a faster-attack, lower-threshold setting for a slightly more obvious gain-pumping attitude. The down side of this was that the overall average level of the choruses was causing the compressor to react a little too strongly to them, undermining the longer-term mix dynamics, so I used another little bit of automation to ride the compressor's input level up at those points to counteract that.
In Search Of Euphoria
 The prominent bass part in this arrangement required some careful level automation at mixdown to maintain a consistently full low end.
Having sent a draft of my 'mix in progress' off to Alex, he and the band sent me a number of revision requests, most of which were easily dealt with using minor EQ and automation tweaks. However, one main concern remained: that the choruses weren't yet expansive or euphoric enough on an emotional level, despite the smoothing of the overall guitar tone so far.
I figured that one way to get closer to the desired sound was to further exploit the width of the stereo picture, so I widened out the rhythm-guitar panning, rode up the bass chorus-effect level, and added some of the Cloner widening and stereo drum reverb to the more sonorous higher guitar line, all of which yielded valuable (if fairly subtle) advances. Some additional hall-style sustain from Kjaerhus Audio's venerable freeware Classic Reverb plug-in was a welcome ingredient, too, although it did require the application of some assertive low-cut EQ and a little M/S-based widening (courtesy of Voxengo's MSED plug-in) to maximise its clutter-to-usefulness ratio, given the limited mix real-estate that was remaining.
The final touch was some basic block chords from the Cubase v4-era synth Embracer, which I've deliberately retained in my Cubase v6 install because it's so simple and quick to use for background pads. Using the synth's own width controls, in tandem with another instance of Voxengo MSED, I deliberately made this pad slightly mono-incompatible, to emphasise the mix's overall stereo width during the choruses without having very much impact on the mono balance. Then, just as I'd done with the guitar parts before, I deliberately pushed the pad a little too high in the balance and used EQ to cut away any frequency regions that came across too prominently — although, of course, here the aim was to produce something that would be smoothly supportive of the overall harmonies without being ostensibly audible. Job done!
Spit & Polish
 Achieving a more euphoric sound during the song's choruses primarily involved adding more in the way of larger hall-style reverb, but a surreptitious background contribution from Cubase's 'legacy' pad synth Embracer also had a critical role to play.
The difficulty of bridging the sonic gap between your mix in progress and the ones you aspire to is a regular topic of debate on the SOS forums, and this is frequently attributed by posters to the lack of an analogue summing amp, high-end master-bus compressor, or some esoteric mastering process. If tackling dozens of Mix Rescue remixes over the years has taught me anything, though, it's that most (if not all) the desired extra goodness is attainable without any further equipment investment at all, simply by making comparatively small tweaks to run-of-the-mill mix settings across the board.
This month's remix is a case in point, because my mixing system is almost identical to Alex's, so any improvements you hear in the audio files have nothing to do with differences in gear. Accordingly, this column should hopefully provide some useful tips if you find your production values stuck frustratingly at 95 percent — not least the trick of turning sounds up a little too loud and then EQ'ing them back into the balance, which is something that has applications in almost any style, and can also pay off when EQ'ing effect returns for better mix clarity. Speaking of effects, this is where Alex, like many readers, probably went furthest astray in his mix, partly by selecting some unsuitable raw algorithms, and partly by failing to process them into their most efficient form. In a lot of cases, though, it only takes soloing of the wet-only effect return (or parallel compression/distortion channel) to throw problems into sharp relief, at which point they become much easier to get a handle on.
Audio Examples
It's much easier to learn about the techniques Mike used in this remix if you go to the SOS web site and download the original and remixed tracks, along with some before and after versions of individual elements in the mix. All the files are annotated with detailed captions.
Rescued This Month
This month's song, 'Sea Of Leaves', is by Jokers, Jacks & Kings, a band comprising Lewis Daly (vocals), Frank Clarke (guitar), Alex Hunt (keyboards, guitar), James Barton (bass), and Lucas Atkin (drums). Formed in south London in 2010, they played their first gig at the Hope & Anchor in December that year and have since been gaining increasing recognition on the London indie circuit, while continuing to write and record original material. This particular track was recorded at Ascape studios in Bromley in May 2011.
www.facebook.com/pages/Jokers-Jacks-Kings/173806715976860
Remix Reactions
 Alex Hunt: "This track was recorded in about half a day, which left little time for experimentation with guitar sounds in particular, and that meant that achieving a proper balance in the mix was difficult — I just ended up going round in circles towards the end of the mix process. I wanted a bright, punchy sound but with plenty of weight in the guitars, and an up-front vocal that nonetheless gelled with the rest of the texture.
"Referencing with commercial tracks was instructive, but led me into bad habits, like applying too much bus EQ and not spending enough time spreading out the frequencies of individual tracks. In the end, I settled on a mix that was close-ish to the sound in my head, but there was a nagging suspicion that it could be that little bit better.
"Well, at least I was right about one thing: it could be better, and by more than a little! Mike has not only addressed the specific points I was bothered by, adding meat to the guitar parts and decongesting the 2-6kHz area; he has also managed somehow to make the mix sound wider and more focused at the same time. There's more "boom” in the toms, more precision in the kick drum, and the melodic bass part in the verse now really sings. This now sounds like a great mix of a suitably raucous performance, rather than a rough-and-ready mix of a merely solid performance — the band feel it's much closer to our live sound, and Mike has done a brilliant job of capturing that. I'll have my work cut out following on from this...”