Last month, I explained how I recorded a relatively large school band called Jig, opting to record them 'as live' straight to stereo, rather than using conventional multitrack techniques. Although more challenging for the recording engineer, the advantages of this technique happened to suit this particular project — not least because it was the most practical way of capturing eleven songs in just five hours of recording time! This was a tough challenge, but since this recording was of a school band and we were heading into summer term exam madness, it was important that the project had a minimal impact on the musicians' time. It was also important to minimise 'out time', to keep the production costs low. Had we adopted a multitrack approach there would have been a greater temptation to replace and overdub less-than-perfect parts, and to spend a lot of time remixing and polishing.
By recording straight to stereo, we knew that what we recorded on the day was all there was — there was no chance to 'fix it in the mix.' So the onus was on recording either a completely perfect rendition of each song, or sufficient good sections to edit 'perfect' songs together. Any fixes would be done in the editing and mastering stages, with no further involvement from the performers, who could be left alone to concentrate exclusively on their forthcoming 'A'- and 'AS'-level exams.
Setting Up For Editing
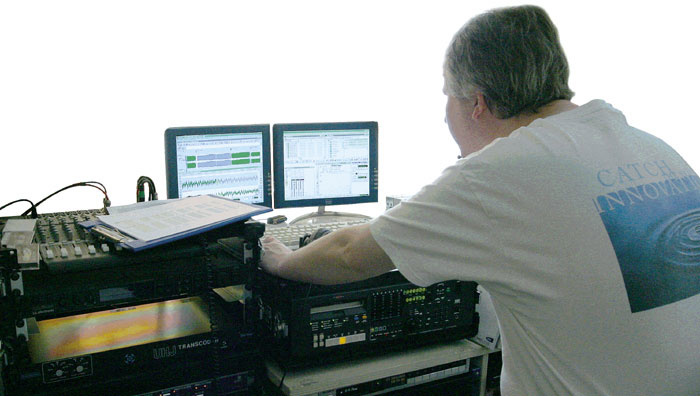
The next stage of the project was the editing, which I carried out using my SADiE Radia system — a professional stand-alone DAW using SCSI drives connected to a bespoke DSP card in a PC. SADiE is commonly used in top-flight mastering rooms and broadcast production studios. The original 24-bit, 44.1kHz recordings were transferred from the Genex GX8500 recorder to SADiE, and allocated to separate EDLs (edit decision lists) for each song. This housekeeping made it quicker to sort through the source recordings to find the appropriate takes, and it was much easier to keep track of the different edit versions as the work progressed.
The amount of editing required for each song varied enormously. Some were created from a single master take with just one insert to repair a short section, while others involved rather more editing between two or occasionally three main takes, plus inserts from retakes varying from an eight bar section down to single notes! To help the editing process along, I had marked the log sheets during the initial recordings to indicate which take we considered to be the best to use as the master, as well as noting down any mistakes and which retakes to use to cover them.
 A typical edit point can be seen here — the loud drum hit immediately following the edit does a good job of disguising it.I started the editing by placing each complete take and retake on adjacent stereo-paired tracks, in roughly the correct time alignment with each other and with the designated 'master take' on the first track pair. I then played through this master take, placing edits to mark the approximate locations where repairs were necessary. Returning to the first edit point, I then played through the alternative takes and retakes to identify the most suitable replacement section.
SADiE offers several different ways to perform edits and I use different techniques for different kinds of edit, but most of this 'insert' editing was performed in the Trim Editor. This is a separate editing window which shows the 'outgoing' audio waveform on one pair of tracks (ie. the master take, in this case) and the 'incoming' audio (ie. the start of the inserted replacement section) on another pair of tracks — the two audio sections time-aligned appropriately one above the other. Using the mouse and the various software tools provided, it is then possible to move the edit point forwards or backwards in time, move the incoming (or outgoing) track relative to the edit point, change the duration and shape of the cross-fade, or change the levels of the incoming or outgoing audio.
The machine also provides several audition modes, allowing you to hear just the outgoing section (to check that it ends cleanly) or incoming section (to see that it starts cleanly), as well as the crossfade itself, and even the removed material. Auditions can be performed as a single pass (of variable durations — some edits need to be heard in the context of a larger portion of material than others), or as a repeating loop section.
Editing For The Perfect Take
This may sound obvious, but audio editing is about sound — it requires good listening skills. I learned to edit using quarter-inch tape and a razor blade, where the edit point had to be found by scrubbing the tape back and forth across the replay head — a skill that takes time and practice to develop. However, the ubiquitous DAW waveform display now allows the eyes to do some of the work in selecting and fine-tuning edits and, although this has some useful advantages, it is very easy to become fooled into thinking an edit is fine because it looks right, when in fact it sounds wrong. Consequently, I think it is important to audition each completed edit with a good run up to it — at least ten seconds, to get a good feel for the rhythm of the music or speech — and to look away from the waveform display (or close your eyes) so that your ears are the only arbiters of the success of the edit.
When editing tape you have to get the cut right first time, but when editing with a system like SADiE it is faster and easier to start with only roughly placed cuts, and then fine-tune their position afterwards. I usually start with roughly placed cuts in the master track before and after the section that needs to be replaced, and roughly similar edits at the start and end of the replacement material. The replacement section can then be dropped into the gap in the master track, and the first edit loaded into the Trim Editor (in the case of SADiE), so we have the 'outgoing' audio from the master track, and the 'incoming' audio of the replacement section meeting at the edit point.
The next step is to optimise the edit point in the outgoing audio. This is a case of playing the audio and moving the edit point to the position where it is most likely to be inaudible. The human ear is a complex thing, with many foibles, some of which make editing a lot easier than it otherwise might have been! As well as its frequency masking characteristics (for example, you can't hear the hum from a bass guitar amp while the bass is playing, because the louder instrument sounds mask the quieter hum in a similar part of the spectrum) the ear also suffers from 'temporal masking'. A quiet sound, which is perfectly audible in isolation, tends to become inaudible if followed by a louder sound within a short time period. So one of the golden rules of editing is to edit immediately prior to a loud sound — just before a drum beat, for example — so that any imperfection in the edit will be masked by the louder sound immediately following the edit.
So, with the optimum outgoing edit point located, it is a simple matter to find the corresponding point of the incoming replacement track, and then the complete edit can be auditioned. If it doesn't work perfectly, it can be helpful to check the outgoing and incoming sections separately to see if some unwanted sound has been caught. Again, don't rely entirely on the waveform display; use your ears. When editing was performed on tape with a razor blade the choice of crossfade was limited to the 89, 60, or 45 degree cut angles provided on the edit block — the fade duration being the product of cut angle and tape speed. Fortunately, modern DAWs allow a lot more creativity than that, with the ability to change both the shape and duration of the outgoing and incoming fades independently, which will often enable an 'impossible edit' to be performed seamlessly. With most material most of the time, a simple linear crossfade over the edit, of between 10ms and 20ms, will be fine, but sometimes an edit can be made to work better if the duration is changed. Beware using very short crossfades though, as they are more prone to 'bump' or click. There are no rules here; the best solution is found through experience, familiarity with the capability of the editing machine, and a fair bit of trial and error.
Having optimised the edit into the replacement section, the next task is to sort out the edit back into the master take. It is quite likely that the replacement insert will be a slightly different duration to the original — although hopefully by only a few milliseconds — so it will be necessary to adjust the position of the remainder of the master track (the 'incoming' side of this edit) to match edit points between retake and master. It is also possible that the retake might also be at a slightly different level, although, as I explained in the first part of this article, hopefully the rhythm section level and balance is consistent across all the takes and retakes. Even so, a small level change — often just 0.25dB or so — can sometimes help to make the join seamless!
So, that's the basic editing process — and it's simply a case of working through all the edits until the best possible compilation has been achieved. Having reached the end of the track, I play through the entire song to check that all the edits work properly, and that I haven't inadvertently missed anything or made any mistakes. With the basic editing of all the tracks completed, the next stage is to copy each one from its own EDL to a new compilation EDL, forming a provisional CD playlist. I then copy this to CD-R and send it to the Musical Director to approve the edits.
Adding Sound Effects
While I waited for approval of the edits, I started work on adding sound effects. Yes, you read that right — one of the tracks was the Starsky and Hutch instrumental theme, as performed by the James Taylor Quartet, and this required American police siren effects at the start and in a middle section. I sourced a royalty-free sound effects CD of New York city 'atmospheres' and loaded a couple of tracks into SADiE of various emergency vehicles driving through the streets with sirens blaring. I then edited and mixed the various elements together to produce two composite effects tracks to fit in the appropriate places in the song. However, because the recordings were of general street atmospheres there was a lot of background noise — including a lot of squealing brakes. While these squeals were acceptable in the context of the original effects recordings, they sounded out of place and rather discordant when mixed in with the music, and so they had to be removed.
My first approach was to use the narrow-band parametric equaliser plug-ins within SADiE to try to remove the worst of the offending noises, but after an hour trying to optimise the settings I came to the conclusion that this 'cure' was far worse than the disease. The problem was that the squeals inherently changed in pitch as the vehicles slowed down, so the filters had to be quite broad and thus removed a lot of the wanted sound in addition to the squeals.
Fortunately, the noise-removal specialists CEDAR produce a stunning plug-in for SADiE called Retouch. After grovelling to my friends at SADiE I was able to arrange a short demo license to install Retouch in my SADiE system — a unique password is required to activate the software for use on a specific hardware card and for a specific number of days.
Retouch is very easy to use, and not dissimilar to photo retouch software (hence the name). The process starts by marking the portion of the track containing the unwanted noise (up to 10 seconds in duration). This is then loaded into the Retouch window where the display shows time on the horizontal axis, frequency on the vertical axis, and signal amplitude with colour. The unwanted squeals were immediately obvious as long, high-frequency streaks across the screen, and the wanted sirens as almost sinusoidal curves below them.
To remove the squeals I just had to highlight each one by dragging a marquee box around it, and instruct the system to replace the marked signal with background noise synthesized from the surrounding area of relative silence. If done carefully the results are completely undetectable — natural background effects without squeals! There were actually quite a lot of separate squeals to deal with, but, although a little fiddly because I had to process several short sections at a time, the whole procedure took only about a quarter of an hour from start to finish! Although Retouch is quite expensive, it is clearly well worth it if you find yourself having to remove unwanted noises that would be impossible to deal with using conventional techniques.
Overdubbing
While checking the edited masters, the Musical Director noticed that there was no piano accompaniment at the end of one of the songs. On checking the original recordings we found that this was the same on all of the takes and retakes of that song — the piano disappeared after a key change. On this particular song the piano was played live by the vocalist, and it turned out that he had difficulty playing the piano part after the key change, so concentrated on just singing instead! From a performance point of view it was a sensible decision, but it had to be fixed for the recording.
 'S'-shaped curves are usually the best option for long fade-outs, where linear fades sound unnatural and should be avoided.The solution was pretty straight forward. I copied the edited song from the SADiE onto two tracks of the Genex recorder and, equipped with two Sennheiser MKH40s, a couple of mic stands, some cables, a two-channel preamp and some headphones I set off for Cheltenham College again. The piano had been moved from the theatre to the college chapel, but the change in acoustic was irrelevant as I was close-miking the piano. I had the equipment set up and ready to go in time for the morning break, at which time the Musical Director and the performer arrived to overdub the piano part. It was simply a case of playing the edited track from the Genex over headphones to cue the performer, while recording the replacement piano part back into the Genex on a second pair of tracks. After a couple of rehearsals we recorded just the key change and end section, and the task was completed within half an hour.
Back at base I copied the new piano part back into SADiE, slipped it into the right time alignment with the edited master track, set the appropriate mix level and bounced the compilation down to a final composite. Job done.
Mastering
With all the edits approved, piano part fixed, sound effects in place, and a final CD running order decided, the next stage of the project was to master the album. The first step was to rearrange the edited songs into the required running order, but with notional four-second gaps to space each track at this stage. The original recordings were made with a fairly generous headroom, so the next task was to bring the peak levels up towards 0dBFS. SADiE doesn't have an automatic normalising facility, but it is very easy to adjust levels manually.
 These EDL printouts are generated by the SADiE workstation, and allow the Musical Director to approve the edits for each song using a preliminary CD-R.I use the Drawmer DC2476 Mastering Processor to provide a little polish to my recordings — this is a multi-function digital mastering tool equipped with a full-band compressor, dynamic equaliser and parametric equaliser, as well as a multi-band compressor, limiter, expander, stereo width controller, and valve emulator. It is an extremely powerful tool which has to be used with care, but it sounds surprisingly 'analogue' and is capable of very fine results. I connected the DC2476 to process a stereo AES output from the SADiE, recording back into a stereo input pair, with 24 bit signals and using the Drawmer's internal word clock as the system reference. The processed tracks were recorded alongside the originals, and were routed to another stereo pair of SADiE outputs for monitoring.
The Drawmer processor was set to hold the maximum peak output level to -0.5dBFS, with standard dither at the 24-bit level (see PQ coding below) — and these were the only settings which remained constant for each song. Again, different people work in different ways, but I start the mastering process by just listening to a track to decide what, if anything, is required. Most of the songs needed some gentle compression to restrict the dynamics a little and to help make everything gel together, so I used the multi-band compressor section. I started with the smallest possible ratio of 1.1:1 on all three bands, with the threshold set somewhere between -30 and -40dBFS. On most tracks, the gain reduction display showed nothing for the high band, the occasional flash of the 2dB gain-reduction light on the mid band, and between 2dB and 4dB of gain reduction on the low band.
Where a stronger degree of dynamic control was required for the bass instruments (kick drum and bass guitar) I sometimes changed the ratio of the low section to 1.2:1, or set a lower threshold. The attack and release times remained fairly consistent for all the songs, with progressively shorter times from low to high bands. The compressor section uses a 'bootstrap' design which means that quiet signals are pulled up automatically without needing to use make-up gain — although this facility is also provided if required. Since I had already tamed the worst transient peaks through editing (see 'Manual Compression?' box), I didn't need to use the limiter at all, and the expander was also bypassed throughout.
Manual Compression?
After the main editing process is complete, but before beginning the mastering, I often include another editing stage, this time with the aim of manually compressing the larger transient peaks. I find this to be a far more transparent technique than using a limiter, even though it is a little time consuming. By looking at the waveform display of each complete song it is easy to see any particularly dominant transients, and I simply reduce each of these by 3-4dB by editing immediately before and after the transient and winding the level down as necessary. If done carefully, the modifications are completely inaudible, but the peak-to-average ratio can be improved dramatically, making it possible to raise the overall level of the track by another 4dB or so. Again, it is a case of using the ears to judge how much manual compression is needed and acceptable, but the waveform display is a helpful guide.
Dynamic Equalisation & Stereo Width Control
On a couple of tracks I made use of the dynamic equaliser to help lift the kick drum slightly, and I used the parametric equaliser to help lift the piano in one song and tame the organ in another. The valve emulation in the DC2476 is an amazingly useful alternative to the equaliser, and I used the bass section to add some weight and density to the bottom end of the mix on some songs. This has the advantage that, unlike the equaliser, it doesn't increase the peak level of the signal — the harmonic distortion just thickens the sound up without making it boomy or muddy. Likewise, the high section can be used to add some sparkle and air, in a similar way to an aural exciter. I tend not to use the mid-band section, though, as this usually adds clutter to the mix and can make the sound fatiguing.
On some tracks I also narrowed the stereo width at the bass end to help clean the bottom up slightly, and tended to juggle the balance of the three compressor bands to match the tonality between each song. The mastering process is iterative — it's a case of listening to the original track to decide what needs polishing; then applying the processing; then working on the next track; then comparing the two together and fine-tuning as necessary to ensure they match each other properly. To make this iteration easier, I store the processor settings for each track into separate user memories so that I can easily recall the configuration for each track and readjust as necessary as the mastering progresses.
At this stage I'm still working with notional gaps between tracks, and without any fades, but when all the tracks have been mastered its time to listen to the whole album in sequence to check that everything works properly together and forms a cohesive whole. After auditioning the whole album in context I might decide that one track is too loud or quiet in the context of the tracks that come before and after, or that the overall EQ of a song isn't quite right, but it's easy to recall the Drawmer settings for the song, make the necessary adjustments and then rerecord the track back into SADiE.
When I'm happy with everything, I edit the fades onto the tracks that require them and adjust the inter-track gaps so that everything flows nicely from one song to the next. I generally use 'S'-shaped fade curves for tracks that need a long fade out, or sometimes a gentle exponential curve, but linear fades never sound right and should be avoided if possible.
PQ Coding
The next step in the process was to sort out the PQ coding for the track IDs on the CD. SADiE has sophisticated facilities for this, adding the default index flags automatically, based on the edited starts and ends of each song. Provided each song has been 'topped and tailed' accurately this works extremely well, and the software can be configured with any desired offset between the actual track start and the relative position of the ID (I generally use a 12 frame offset, for example), as well as minimum track lengths and gap lengths. It also has facilities for the ISRC codes if required, and the index 0 and index 1 flags can be manipulated independently making it easy to add hidden tracks, for example.
The audio material was still at 24-bit resolution at this point, and needed to be reduced to 16 bits for the CD master. This dithering has to be the very last process, after all the mastering, fades and level adjustments, so I generally use the basic TPDF dither facility built into SADiE once everything else has been done. The dither processor is presented as a 'set and forget' plug-in for the mixer section.
 Using CEDAR's Retouch to remove unwanted skidding noises from a sound effects compilation track.There are a lot of dither algorithms around, each with impressive claims for their sonic qualities. POWR is a popular one, as is the Apogee UV22HR, and with really good-quality recordings it is possible to detect some subtle quality differences between the various algorithms. However, I have found that the basic TPDF (triangular probability dither function) works just fine 99 percent of the time, and has the advantage that it requires a very small headroom margin. A lot of the more sophisticated dither algorithms place considerable amounts of energy at the high end of the spectrum where it is less audible, but this then requires a lot more peak headroom.
I have found that the simple TPDF dither increases the peak signal level (through the addition of the dither noise) by about 0.3dB, which is why I set the maximum output from the mastering processor to -0.5dBFS — to leave enough headroom for the subsequent dithering. The combination provides peak levels in the 16-bit master which never exceed -0.1dBFS. I never allow signals to reach 0dBFS (which is why I don't like automatic normalising functions) for two reasons. First, the oversampling reconstruction filters in a lot of CD players can be overloaded by 0dBFS transients and, secondly, some replication plants will reject masters with 0dBFS peaks as having overloads!
With the songs fully mastered, sequenced and dithered, the album was burned to a SCSI CD-R attached to the SADiE and dispatched to Cheltenham College for final approval. Incidentally, with the various audition CD-Rs kicking around with different versions of material on — Session Masters, Edit Approvals, Production Masters — it is vital to label everything clearly. To that end I have a set of templates in the computer with company logo, contact details and the 'type' of disc, which I print directly on ink-jet compatible CD-Rs using an Epson Photo 950 printer. I just have to type in the project, date, and version number to produce a professional-looking audition disc. Not only does this create a good impression, but it also prevents confusion between multiple versions of work in progress, and costs only pennies to do.