With the number of high-quality sample libraries around these days, recording a real piano can feel like a lost art. For those times when only the real thing will suffice, here's how to do it justice.
 Recording an acoustic piano presents enormous challenges for many home recordists. The instrument's size and sonic complexity are contributing factors, making great technical demands on mics and other recording equipment, but that's only part of the problem. For a start, few of us are lucky enough to have access to a decent piano for a long enough period to develop any significant experience of recording it. There's also the fact that the number of 'correct' mic techniques is enormous, yet any given one of these might be completely inappropriate for the sound you're after.
The aim of this article is to take some of the guesswork out of getting a great piano sound, bringing together a wide range of recording techniques suggested by various different authorities and then illustrating them with audio examples. Surf to endpoint29cc8e70.chios.panth.io/sos/ jan08/articles/pianorecordingaudio.htm, and judge for yourself whether these techniques are the dog's danglies or a dog's dinner.
What Type Of Mic Should I Use?
Because of the nature of the piano as an instrument, certain types of microphone lend themselves better to recording it than others. It should be pretty obvious that the piano generates a very wide frequency range, starting at around 26Hz (the fundamental frequency of the lowest note) and extending well beyond the 20kHz upper limit of the audible spectrum. This makes most dynamic mics a questionable choice, as their comparatively heavy diaphragms simply can't track the delicate, fast air movements of the highest frequencies as well as can lighter ribbon- or condenser-mic diaphragms. For the same reason, dynamic mics tend to blunt the edges of the piano's percussive transients, so unless you're after a special effect, leave your SM57s in the cupboard (that said, engineer Geoff Emerick has said that his favourite piano-miking technique for Beatles sessions comprised a pair of AKG D19 dynamics — there's always one...)
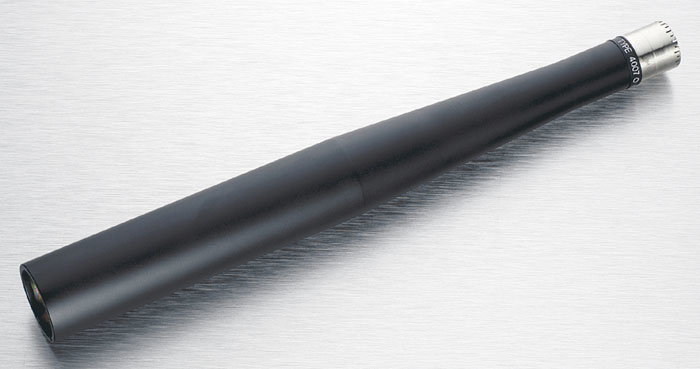
 Boundary microphones, such as the Beyerdynamic Opus 51 pictured here, are often used in piano-recording applications because of their well-behaved hemispherical polar patterns, slim design, and comparative affordability.The extended range of the piano's low frequencies is also relevant to the choice of polar pattern. The frequency-response charts of many directional mics tend to dive much more rapidly at the low end than those of omnidirectional designs, and this is one reason why omnis are often chosen. Directional mics also exhibit proximity effect, and this bass boost can make it difficult to get an even sound when close-miking the inside of the piano.
The sheer dimensions of the instrument are another reason why many engineers choose omni mics for close-miking. Even directional mics that have a fairly wide forward-facing lobe on their polar plot have a tendency to 'spotlight' the section of the instrument they're pointing directly at when close-miking, thus exaggerating the level of one aspect of the sound at the expense of others. A lot of engineers address this potential problem by using a coincident pair of directional mics, thereby expanding the effective pick-up width of the rig as a whole.
The off-axis response of the microphones is of particular importance with piano recording, regardless of your mic technique, because very little of the sound you're hoping to catch is likely to arrive directly on axis when you're dealing with such a large instrument. This is especially relevant to crossed-pair stereo techniques, as the sound arriving from directly in front of the setup will usually be at least 45 degrees off-axis to both mics, yet that frontal sound will typically be coming from the important mid-range strings when you're close-miking inside the piano, or from the centre of the soundstage when you're using more classical-style ambient stereo miking techniques.
Budget large-diaphragm cardioids are usually the worst offenders when it comes to this aspect of performance, particularly at high frequencies. It is easier to design small-diaphragm models with good off-axis characteristics, and omni and figure-of-eight polar patterns also tend to be better behaved in this regard as well. Another option here would be to try a boundary mic or PZM (pressure zone microphone), as these are constructed in a way which allows exceptionally even tonality across their characteristic hemispherical polar pattern. (The majority of PZMs are immune to proximity effect too, but they do need to be mounted on a large, solid, flat surface to deliver their best bass response.)
Irrespective of the model of mic used, if you're going to close-mic, check that the mic you are using can cope with high SPLs, because pianos can get very loud and create lots of powerful percussive transients which can easily distort the internal electronics of mics and preamps. Engaging the mic's pad switch is also a sensible precaution if there's one available.
Some Pro Selections

, which demonstrate how the frequency response of even a top-flight microphone changes depending on the angle a sound arrives at the mic's diaphragm. Note that the omni polar pattern (above) narrows fairly progressively towards a figure-of-eight pattern at high frequencies, whereas the cardioid pattern varies in a much more complex manner — this is one of the reasons why many engineers prefer to use omni mics rather than cardioids for critical tasks such as piano recording.") Here are two of the published polar-response diagrams for Neumann's M149 multi-pattern tube mic (a favourite of Al Schmitt, as discussed in the main article), which demonstrate how the frequency response of even a top-flight microphone changes depending on the angle a sound arrives at the mic's diaphragm. Note that the omni polar pattern (above) narrows fairly progressively towards a figure-of-eight pattern at high frequencies, whereas the cardioid pattern varies in a much more complex manner — this is one of the reasons why many engineers prefer to use omni mics rather than cardioids for critical tasks such as piano recording.With all the above factors in mind, lets look at some real examples of mics top engineers have name-checked, to see how they stack up against the theory. Perhaps surprisingly, given what I've said about off-axis response, large-diaphragm condensers are quite a common choice. Al Schmitt (the multi-Grammy-winning engineer responsible for, amongst many others, several Diana Krall records) is a great fan of the Neumann M149 for close-miking inside the piano. Jon Kelly, while discussing his work with Kate Bush in SOS June 2004, professed himself a big fan of the Neumann U87. Elliot Scheiner also mentioned using this, during the recording of Van Morrison's 'Domino' (SOS February 1996), and waxed lyrical about the AKG C12 when discussing his work on Steely Dan's album Everything Must Go in SOS August 2003. That other studio stalwart, the AKG C414, also crops up in a number of SOS interviews: Chris Kimsey used a couple for the piano on the Rolling Stones' 'Start Me Up' (SOS April 2004); Jay Graydon mentioned using a vintage C414EB for his album Bebop (SOS December 2001); and Nashville engineer Brian Tankersley opted for a spaced pair for his work on Lonestar's chart-topping track 'Amazed' (SOS October 2002).
Here are two of the published polar-response diagrams for Neumann's M149 multi-pattern tube mic (a favourite of Al Schmitt, as discussed in the main article), which demonstrate how the frequency response of even a top-flight microphone changes depending on the angle a sound arrives at the mic's diaphragm. Note that the omni polar pattern (above) narrows fairly progressively towards a figure-of-eight pattern at high frequencies, whereas the cardioid pattern varies in a much more complex manner — this is one of the reasons why many engineers prefer to use omni mics rather than cardioids for critical tasks such as piano recording.With all the above factors in mind, lets look at some real examples of mics top engineers have name-checked, to see how they stack up against the theory. Perhaps surprisingly, given what I've said about off-axis response, large-diaphragm condensers are quite a common choice. Al Schmitt (the multi-Grammy-winning engineer responsible for, amongst many others, several Diana Krall records) is a great fan of the Neumann M149 for close-miking inside the piano. Jon Kelly, while discussing his work with Kate Bush in SOS June 2004, professed himself a big fan of the Neumann U87. Elliot Scheiner also mentioned using this, during the recording of Van Morrison's 'Domino' (SOS February 1996), and waxed lyrical about the AKG C12 when discussing his work on Steely Dan's album Everything Must Go in SOS August 2003. That other studio stalwart, the AKG C414, also crops up in a number of SOS interviews: Chris Kimsey used a couple for the piano on the Rolling Stones' 'Start Me Up' (SOS April 2004); Jay Graydon mentioned using a vintage C414EB for his album Bebop (SOS December 2001); and Nashville engineer Brian Tankersley opted for a spaced pair for his work on Lonestar's chart-topping track 'Amazed' (SOS October 2002).
 are some of the most well-respected models for recording piano. The cardioid 4007 and 4011 models are particular favourites for crossed-pair stereo techniques, both inside and outside the piano.") DPA's 4000-series small-diaphragm mics (formerly available under the B&K moniker) are some of the most well-respected models for recording piano. The cardioid 4007 and 4011 models are particular favourites for crossed-pair stereo techniques, both inside and outside the piano.These mics have a couple of important things in common. Firstly, they are all multi-pattern, and on the few occasions where a polar pattern is mentioned, it's usually the omni. Secondly, they are all fairly wallet-melting purchases and, as you would have every right to expect, they offer excellent low-frequency extension and about as benign an off-axis sound as you'll find from a large-diaphragm design, particularly where omni mode is used.
DPA's 4000-series small-diaphragm mics (formerly available under the B&K moniker) are some of the most well-respected models for recording piano. The cardioid 4007 and 4011 models are particular favourites for crossed-pair stereo techniques, both inside and outside the piano.These mics have a couple of important things in common. Firstly, they are all multi-pattern, and on the few occasions where a polar pattern is mentioned, it's usually the omni. Secondly, they are all fairly wallet-melting purchases and, as you would have every right to expect, they offer excellent low-frequency extension and about as benign an off-axis sound as you'll find from a large-diaphragm design, particularly where omni mode is used.
Small-diaphragm condensers are also common, and Ed Cherney (who's worked with high-profile piano players such as Billy Joel and Elton John) is one amongst many who single out the Brüel & Kjaer 4000-series microphones for their recordings — the mics came under the DPA (Danish Pro Audio) brand in 1992, but are still very much current products. Originally, B&K primarily manufactured measurement microphones, and they meticulously designed these small-diaphragm mics for ruler-flat frequency response both on and off axis. Ed Cherney and Jay Newland (most famously associated with the Norah Jones records) have mentioned selecting the cardioid 4011s and 4007s respectively for XY coincident miking inside the piano, while Richard King, one of Sony's senior classical recording engineers, stated a preference for a spaced pair of omnidirectional 4009s for his ambient stereo recordings. Naturally, B&K aren't the only game in town: the Neumann KM84 is another recurring favourite, numbering David Bowie's producer Tony Visconti amongst its aficionados (according to Howard Massey's book Behind The Glass), and Mike Hedges remarked in SOS July 1998 that he often goes for a pair of Sennheiser MKH40s.
Clearly, there are no easy answers when it comes to choosing a mic for recording piano, especially because certain mics are suitable only for certain techniques — so I'll be returning to this issue as we now start looking at some of the different miking approaches.
Recording The Audio Examples
For the sake of drawing comparisons for this article, I wanted to use several identical small-diaphragm mics for the sessions, with a choice of omni and cardioid polar patterns for each — Source Distribution kindly loaned me six of their new Rode NT55 mics (reviewed in SOS September 2007), which fitted the bill perfectly. These mics enabled me to record the same performance with several different mic techniques simultaneously, and I've tried to be clear in the main text of the article which example files were recorded together. The main advantage of having done it like this is that it means that you can import the files into your own DAW, line them up so that they start together, and then mix them together for yourself — the files are still worth listening to one at a time, but A/B'ing and processing them together is much more revealing.
The recording sessions for this article took place in the Colin Hill Recital Room at Hills Road Sixth Form College, making use of their 7-foot Yamaha grand and Yamaha upright pianos, as well as the Music Technology department's adjoining control room — thanks to the Director of Music, Jonathan Sanders, for making this possible. Heartfelt thanks are also due to Jon Whitten, our heroic pianist for the sessions, who played his piano riff for two days solid, an ordeal which even now probably still has him waking up in the middle of the night screaming! Dan Jeffries and Tom Adams were also a great help, fighting their way through torrential downpours (you can even hear the rain in the background of a few of the example files) to assist with all the setting up and moving of mics.
Ambient Techniques
One way to record a piano is to attempt to capture its sound within a suitable room acoustic, as naturally as possible using ambient microphone techniques. These days this approach is primarily used for classical music recordings, where the intent is effectively to recreate a 'best seat in the auditorium' sound for the listener at home. This type of recording is normally too reverberant for any other music style, and because you can't really change or reduce the room sound after the recording has taken place, it limits your options during a multitrack mixdown.
The alternative is to go for something a bit more like what the pianist is hearing, close-miking the instrument's inner workings. This reduces the levels of ambience, not only allowing usable recordings to be achieved in less-than-stellar recording spaces, but also making it much easier to place the piano sound within a mix, using processing and effects. Both approaches are valid in their own right, so I'll deal with them each in turn.
For classical-style recordings, the basic recording approach in most instances is to select your favoured stereo microphone technique and then to search for the best location for that rig within the room — a position which balances the different registers of the instrument, gives a suitable level of room ambience, creates a sensible stereo image, and represents the instrument's tone in a pleasing manner.
The main difficulty with achieving this aim is that the different frequencies emanating from the piano's strings and the resonant wooden soundboard beneath them are affected by the piano's casing and lid in different ways, which means that the tonality captured by the mics changes in extremely complex ways as you reposition them. This can make mic placement seem like that lucky dip at the end of the school fete, where you hunted around for ages and then only came up with a pack of 'My Little Pony' Top Trumps.
Which Piano Should I Use?
Although this article focuses primarily on recording techniques, it's also the role of the recording engineer to select the appropriate instrument for the style of music. With grand pianos, the instruments that tend to be associated with classical styles have a mellower tone, with Steinway and Bösendorfer being well-known brands associated with this kind of sound. For pop styles, brighter instruments tend to appeal more, because this helps the sound compete better with other instruments in a busy commercial mix, and names I associate with this kind of timbre are Kawai and Yamaha.
The size of the piano is also a factor you have to consider, particularly at the bass end, where a 10-foot Bösendorfer can produce the most incredibly deep and powerful notes. As instruments get smaller, their low notes lose the low-end power that comes from stronger lower harmonics, and the notes become richer in much higher harmonics, not all related to the frequency of the fundamental — this can make it quite difficult to discern the tuning of the low notes on a small instrument such as a baby grand. The sustain of the higher-register notes also suffers on shorter instruments.
Horizontal Dispersion
Fortunately, there are some basic rules of thumb which help you home in more reliably on a suitable mic position for the sound you're after. The first thing to realise is that high frequencies tend to travel in straight lines, whereas low frequencies find it easier to diffract around obstructions. The first ramification of this is that the sound behind a piano (even with the lid fully open) is almost always unusably dull-sounding. On top of this, the thunking of the pedal mechanism is often more prominent out back as well, so that position's likely to be a duffer most of the time.
 The mic positions shown here were recorded for the 'HorizDispLidOpen' audio examples to demonstrate the complex horizontal frequency-dispersion characteristics of the grand piano.
On the other side of the piano, the lid affects the dispersion of high frequencies in a different way, bouncing them out towards the audience. Roughly speaking, it does this most effectively along the line of the instrument's hammers, so a mic placed on that line will capture pretty much the brightest sound. As the miking position moves towards the foot of the piano, the lid gets less effective at reflecting the highest frequencies, and the sound loses some of its airiness. A similar effect occurs for mic positions on the keyboard side of the instrument, behind the player.
At this point it's time to turn to my first set of audio examples. You can access these in both WAV and MP3 formats on the SOS web site at endpoint29cc8e70.chios.panth.io/sos/jan08/ articles/pianorecordingaudio.htm. (Further information about the recording sessions can be found in the 'Recording The Audio Examples' box.)
To illustrate the range of tonal variation I've been talking about, I recorded six identical omni mics around the piano, all angled towards the instrument about 1.5m from its centre and 1.7m off the ground, as you can see in the photo on the previous page. The recordings can be heard in the following audio files:
- HorizDispLidOpenMic1: The first mic was on the keyboard side of the piano, behind and slightly to the right of the player to try to avoid high-frequency shadowing of the upper strings by his body.
- HorizDispLidOpenMic2-5: Mic two was in front of the piano, directly on the line of the hammers; mics three and four were positioned progressively around towards the foot of the piano; and mic five captured the sound directly at the foot of the piano.
- HorizDispLidOpenMic6: The final mic was positioned behind the piano.
Although it's possible to hear general trends in the dispersion of the very high frequencies, it's also plain that the sound around the piano changes in a lot of other less predictable ways, especially at the low end. Mic one is particularly boomy, for example. This is because each mic sees different phase cancellations between the reflected sound from the lid and floor, and each is also affected by the room's resonance modes in a different way. Some theoretical knowledge will help you get into the right ballpark as regards mic position, but there's simply no substitute for a bit of trial and error if you're going to get your mics into a truly star-spangled position.
Miking An Upright Piano
 A more natural and open sound can be achieved with upright piano by removing the casework panels to expose the instrument's strings and soundboard. Spaced stereo techniques tend to be prevalent here, and the three different pairs seen here were compared for the 'UprightPanelsOff50cm' set of audio examples. I've focused in mainly on recording grand pianos, and for reasons of space haven't gone into detail on recording uprights. However, many of the considerations are the same for both types: you still need to think about the distance and height of your mic placement. There are some differences, though. For example, unless you can take some of the panels off the instrument, the only way to get access to the strings is to open the lid at the top and mic from above.
If you're using a spaced stereo technique, extremely close miking is likely to risk a hole in the middle of the stereo image, even if you're using good omni mics, so it would also make sense to space the mics more closely than you might when close-miking a grand.
One other thing to bear in mind is that the very characteristic which helps spaced stereo techniques to give grand pianos a more diffuse and blended sound also tends, in my experience, to emphasise the 'honky-tonk' element of an upright's sound, so you might prefer to go for a coincident technique if you hoping for your upright to make the best of a grand's job.
What About The Lid?
Now I've been assuming for the moment that the piano lid is fully open, but what if it's not? Well, closing the lid completely is rarely a good idea, because the closed box attenuates high frequencies more than low frequencies, so you get quite a muffled sound that's rarely of much practical use. If you're lucky, some high frequencies from the strings might still escape from the narrow aperture behind the music stand, where they could be picked up by a mic on the keyboard side of the instrument but, frankly, it's pretty meagre pickings. You can hear the effect of closing the piano's lid in my 'HorizDispLidClosed' set of audio examples, which were recorded with mics in exactly the same positions as for the 'HorizDispLidOpen' set above.
For chamber music, the balance of the instruments is sometimes improved by using the shorter support stick to open the lid only part-way. As you can hear from the 'HorizDispLidHalfOpen' audio examples, this more subtly mellows the tonality as a whole, but the relations between the tonal characters of each mic position remain broadly similar, and the frontal positions still capture the most high frequencies.
Although removing the lid completely can be worthwhile when close-miking, this is unlikely to give you a suitable sound with ambient mic techniques. Without the lid, the high-frequencies direct themselves primarily upwards, rather than being focused outwards towards any of the mics, which dulls the sound out at the front of the instrument. Furthermore, the removal of the lid also changes the resonant qualities of the instrument and often results in a reduction in the sound's low-end weight. Overall, the timbre becomes more uniform around the piano, as you can hear in the 'HorizDispLidOff' audio examples (recorded with the same mic setup).
Getting An Even Sound
One final useful little trick to keep in mind when setting up a close-miked sound is to get the pianist to play a simple full-range scale, as this reveals level unevenness between different registers much more quickly than normal playing. If you find a problem with this test when using a spaced pair, then you can try changing the distance between the mics or raising them higher over the strings. With crossed coincident pairs, the mutual angle can be used to balance the mid-range levels with those of the outer registers — increasing the mutual angle will increase the relative level of the outer registers.
Vertical Dispersion
Clearly, the piano doesn't just radiate its sound in two dimensions (who'd want a flat sound anyway?), so the height at which you set your mics also needs consideration. As in the horizontal plane, the sonic changes resulting from mic movements are complex, but there are some principles which can help guide you. Again, the high frequencies from the strings like to travel in straight lines, so putting your mic high enough for it to 'see' the strings over the edge of the piano's case will help get you the brightest sound. However, if you're miking at the front of the piano and go too high, then the open lid will start to shadow the high frequencies as well — you'll find you get the clearest high-frequency reproduction somewhere underneath the line of the open lid. The other thing to bear in mind is that the reflections from the piano's soundboard to the floor will become more prominent in the recording if your mic is lower to the ground, giving what I'd characterise as a more strident timbre.
My next set of audio examples (filenames beginning 'VertDisp') gives some idea of how these changes in miking height affect the recorded sound. I set up six identical omni mics in front of the piano (in the same place as mic two from the 'HorizDisp' files), all of them 1.5m from the centre of the instrument, but at different heights above the floor: to be precise, at 280cm, 235cm, 195cm, 155cm, 115cm and 85cm high for mics one to six respectively. Mic one was just below the line of the piano lid, and both mics one and two deliver a bright, clear sound, whereas mics three and four begin to sound a bit mellower. Mics five and six were below the point at which they could 'see' the upper strings and demonstrate a greater contribution from the soundboard.
Again, the general principles I've mentioned are only one set of factors involved — there's a considerable low-end tonality difference between mics one and two, for instance — but the other changes in the sound are a lot less easy to predict. That said, I've found that vertical repositioning doesn't seem to have quite as drastic an effect as moving the mics around the piano, so I'd recommend first finding a rough position for your mics in the horizontal plane before faffing about too much with their heights.
Direct Versus Ambient Sound
The other major decision you need to make is how far away from the instrument you place the mics, the primary issue being that you get a more reverberant sound as you move the mics further away. To illustrate this, I set up my six identical omni mics along an imaginary line reaching from the centre of the piano through the first mic in the 'VertDisp' setup, as shown in the photo. The mics were distanced from the centre of the piano by 325cm, 285cm, 250cm, 220cm, 185cm and 140cm respectively, with mic one furthest away and mic six closest in. The recordings from these mics can be heard in the 'Distance' set of audio files.
 When creating an ambient recording of a piano, the distance of the microphone dictates to a great extent the ratio between the direct and reverberant sound levels captured. You can hear this in action in the 'Distance' audio examples, where six identical omni mics were set up at different distances from the centre of the piano, as shown in the picture.If you're recording a live classical concert, remember that the ambience levels you get while setting up before the gig may not hold for the final performance if the auditorium is empty. When the hall is later packed with the great and good of the parish, their besuited persons will absorb more room ambience, and may leave your recording sounding too dry.
Once more, it's apparent that the change in miking distance affects not just the amount of room ambience, but also the piano's tone, so there's little use in sweating over fine position tweaks to get the tonality perfect if the level of ambience you're getting isn't yet suitable. It makes more sense to get the ratio of direct to ambient sound pretty much right before finessing the recorded piano tone with small changes in mic position.
How small does a change in mic position have to be to make a difference? Well the simple answer is that even minutely different mic placements sound a bit different, but the real issue is whether movements of a few inches make a big enough difference that they're worth sweating over when you're short of session time. This is obviously a very subjective thing, so I created the next set of audio examples to help you decide for yourself. I left mic four set up from the 'Distance' file recordings, and then set the other mics around it within a few inches of each other (as shown in the photo) to create the 'TightPattern' examples. (Of course, I might just have copied the same file six times to mess with everyone's minds...)