We didn't have to fight through competing walls of sound in this month's Mix Rescue, but a sparse arrangement offers challenges of its own...
 The hi‑hat part supplied was thin and unappealing in a way that processing seemed unable to improve, so I first layered it with a couple of TR909 closed‑hat samples from Loopmasters' Marshall Jefferson House Generation sample library, to give it more punch. I then applied some very short reverb from Christian Knufinke's SIR2, to widen and lengthen the original sound, as well as changing its tone.
A track like Punkdisco's 'Oral Hygiene' doesn't come along every day, so when the band sent it to Mix Rescue asking for mix advice, I jumped at the opportunity. Many Mix Rescue submissions have so many tracks that you have to fight to make things audible, but here I was faced with the less common situation of a smaller‑scale arrangement where the tracks weren't really filling out the mix, both in terms of frequency spectrum and stereo image. In addition, the drums and vocals, both of which were really important to the tune's impact, didn't seem to grab you by the throat in the way that I'd have hoped for. So in this month's article I'm going to look at how I addressed these two main concerns while remixing the track.
Kick Tricks
The kick drum was pivotal to driving the rhythm in this mix, so I was sure to give it some careful attention. The attack phase of the raw sample was already fairly good, but I wanted to give it a bit of edge, so I experimented to see if I could sharpen it a little more with some compression. I have been recently getting to know Stillwell Audio's Major Tom compressor, and have found it quite good for envelope‑shaping percussive sounds, so I thought I'd give it a go here. If I were trying to enhance the drum transient with most compressors, I'd look to set a fairly long attack time, but Major Tom doesn't have time‑constant settings, so instead I set a high 9:1 compression ratio, slapped on a pile of gain reduction by turning down the Threshold control, and then flicked through the compressor's other settings in search of a sound I liked.
A lot of the time when you're compressing, you're just trying to remedy general dynamic range problems, but in cases like this, where you're trying to bring about a change in the actual character of the processed sound, there's no sense in being shy with the gain‑reduction to start with. Many of the timbral effects of compression can be quite subtle, but if the compressor's really working hard they become easier to hear. Once you've worked out which settings are giving you the kind of changes you want, you can always rein in the gain‑reduction to more appropriate levels. In this case, I selected Major Tom's soft‑knee and peak‑detection modes and used the feed‑forward algorithm, but it wasn't any kind of reasoned decision — I just listened to what the compressor was doing to the attack and stopped tweaking when it sounded harder and cut through the mix better. Later on in the mix process, the kick also benefited from a 6dB EQ boost at 10kHz, using the Waves API 550A plug‑in, so that it could compete with the large number of clangorous synth sounds, but in many other mixes this probably wouldn't have been necessary.
 Without much in the way of a bass line going on, I felt that the kick drum could also afford to have more in the way of low end. Seeing that I had the API EQ running already, I turned to that for some low‑end boost in the first instance, adding 6dB at 100Hz with the low shelf and compensating with a couple of decibels of low‑mid cut at 400Hz to pull out a bit of muddiness that had started to creep in. This setting certainly made what low end was already in the sample more powerful, but it soon became clear to me that there wasn't really anything much I could usefully boost at the very low end. In order to generate this extra sub-bass, I loaded up the Jesusonic 50Hz Kicker plug‑in that's bundled with Reaper. This plug‑in is really simple: all it does is release a pulse of low‑frequency sub‑bass tone whenever it detects a kick‑drum transient. You get three controls: level for the kick drum and sine wave, and a frequency selector for the sine wave. Manipulating the sine wave's level and frequency controls makes a huge impact on how tight and/or weighty the final sound is, so this rewards diligent effort. In this case I felt that a 45Hz setting suited the track best, and then gradually homed in on the final sine‑wave level value as the mix evolved into its final form.
As with another recent Mix Rescue, Chris Durban's 'Celebrate', back in SOS May 2009, I not only processed the kick itself, but also used triggered gating to duck various other parts in the mix in response to the kick drum. In this case, I actually used two different gated sends, rather than just the one. The reason for this was that Punkdisco's Paul had already mentioned that he'd been looking for a pumping sound, but I also wanted to use less audible (ie. faster) ducking on other parts. By setting up two ducking sends triggered from the kick, I could configure one with a slower release of around 300ms for the obvious pumping, while the other had a release time of 81ms for more covert operation.
Backbeat & Hi‑hat
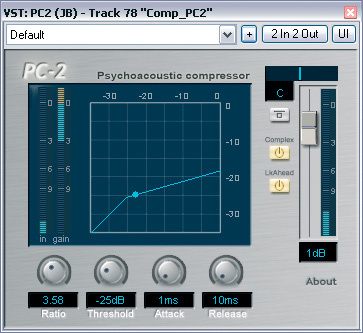
, Stillwell Audio's The Rocket, Jeroen Breebart's PC2, and Bootsy's Density.") A combination of four compressors was used in parallel to try to bring out the aggression and attitude in the lead vocal delivery: URS Console Strip Pro (running a Teletronix LA2A emulation), Stillwell Audio's The Rocket, Jeroen Breebart's PC2, and Bootsy's Density.
A combination of four compressors was used in parallel to try to bring out the aggression and attitude in the lead vocal delivery: URS Console Strip Pro (running a Teletronix LA2A emulation), Stillwell Audio's The Rocket, Jeroen Breebart's PC2, and Bootsy's Density.


I used the kick drum to trigger gating on the backbeat snare/clap sounds too, but with a limited gating range, just to subtly increase the agreement between their volume envelopes, and thereby tighten the groove a fraction. Otherwise, these sounds had been well chosen and were pretty easy to fit into the mix, especially because the three component sample layers had been provided on separate tracks. A couple of modest HF EQ boosts with Stillwell Audio's Vibe EQ and another instance of Waves' API 550A were the full extent of the processing.
The hi‑hats, on the other hand, were a bit of a let‑down: very two‑dimensional and with no decent attack. I tried a few of my usual processing remedies, but met with such meagre success that I quickly went hunting for new samples to assist. Judging by the other sounds Paul had chosen, I figured that I wouldn't go too far wrong with classic Roland TR808 or TR909 samples. These sounds are frequently used to pack out sample libraries, but in this instance I took them from a Loopmasters sample library I recently reviewed: Marshall Jefferson's House Generation. I imported both of these kits for auditioning, and then whittled them down to a couple of TR909 closed hi‑hat samples which I layered together under each of the existing hi‑hat hits.
Having the choice of two different samples made the task of finding a good attack much easier to deal with and, as with the snare samples, I mainly needed just moderate and broad‑brush HF frequency sculpting (this time with Reaper's ReaEQ) to create a more solid impression. In fact, the attack ended up being a little too spiky in the end, so I used GVST's GClip as a soft‑clipper to hold back the peaks a fraction. The original hi‑hat track was processed a little more creatively, though, to try to increase the width and add a sense of space. Reducing its attack with Reaper's Jesusonic Transient Controller allowed me to extract mostly its sustain characteristics, whereupon I applied a fairly lo‑fi gated stereo reverb patch from Yamaha's veteran SPX90 multi‑effects unit. This reverb was running as an impulse response in Christian Knufinke's SIR2, and I did quite a bit of tweaking of it there, shortening it to around 80ms in length, adding a few milliseconds of pre-delay, widening the stereo spread, and sculpting the tone with EQ. The aim wasn't to create something that was in any way 'realistic' (after all, who's after realism in a track like this?), but rather to find a reverb effect that would merge to some extent with the dry signal, bulking it out in a complementary way without distancing it too much.
Vocal Treatments
The main double‑tracked lead vocals were a hard nut to crack, partly for technical and partly for more aesthetic reasons. On a technical level, the tone of the vocals was quite dull, and dynamic range was wide, so they needed a lot of dynamic control and several layers of EQ on that count. Initially I pulled up Jeroen Breebart's PC2, which, in its Complex mode, can be really good at smoothing out short‑term level unevenness, and supplemented that with another instance of the Waves API 550A EQ for the high‑end lift. After much faffing about with the compression and EQ parameters, though, I just didn't feel that the vocals were coming across with the requisite punk sneer. I substituted the compressor for some less well‑behaved models, and while that got me a bit closer, I still wasn't completely happy.
After butting up against this problem for a while, I decided that I was on the wrong track, so stripped out all the processing and started again from scratch. There's a lot to be said for taking things right back to the drawing board on occasion, and all was not lost in any case, because what had become clear was that I wasn't just trying to deal with technical issues of mix balance and audibility here — I needed to actually support the performance itself. It's quite difficult to deliver spoken lines with real conviction and emphasis, and it's a lot harder to track gutsy speech than gutsy singing, in my experience.
The first thing I did was whip out the audio editing tools and line up the double‑track more closely. Although I quite liked the slightly ragged feel of the raw tracks, the disagreements between them weren't helping the performance to sound any more committed. I then balanced the double track at a lower level, to make the lead feel closer and more emotionally direct. Double‑tracking is good for lots of things, but it inevitably smooths out some of the individual character of any sound and makes it more 'bland'. (When we interviewed producer Pascal Gabriel, back in SOS April 2001, he mentioned steering clear of double‑tracking on lead vocals for this reason.)
Another change of tactic was that I returned to the kind of multi‑compression setup I used on SOS March 2009's Mix Rescue (Moosmusic's 'Big Dummy Shake'). I'd been impressed at its ability to manage dynamic range and I thought that I might be able to find a balance of different compressor sounds that would imbue the raw tracks with extra attitude. I decided to spend some time trying a couple of dozen different compressors, and eventually settled on a combination of four: a Urei LA3A emulation in URS Console Strip Pro for fullness; Stillwell Audio's Urei 1176‑inspired The Rocket at a similar level for bite; Jeroen Breebart's PC2 at a lower level, but working at high speed to pull up small details and add sustain; and a small amount of Bootsy's Density, with lots of drive, to add thickening harmonics.
Distortion & Pitch Processing
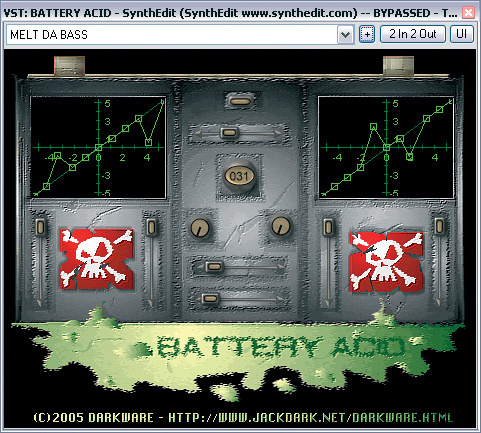
; Darkware's Glitch Girl (left); and Silverspike's Ruby Tube (above).") These are just a few of the distortion plug‑ins that Mike used to differentiate the synth sounds for his Punkdisco remix: Voxengo's Boogex and Darkware's El Fuego and Battery Acid (above); Darkware's Glitch Girl (left); and Silverspike's Ruby Tube (above).
These are just a few of the distortion plug‑ins that Mike used to differentiate the synth sounds for his Punkdisco remix: Voxengo's Boogex and Darkware's El Fuego and Battery Acid (above); Darkware's Glitch Girl (left); and Silverspike's Ruby Tube (above). 


While the drums and vocals clearly needed to dominate this song, I still felt that the rest of the arrangement needed to provide a much richer and more cohesive sound than was apparent in the original mix. Much of the rest of the mixing process was about enhancing the synths, backing vocals, and effects to this end.
Where some of the synths sounded a bit anaemic or needling, I turned to distortion to bulk up their harmonic content. For example, the main bass sound (first heard at 0:27 in the remix) needed thickening in the mid-range, so I sent to a distortion effect using MDA's Combo plug‑in in its Radio mode. I pushed the hard saturation up to maximum to get lots of extra harmonics, and then high‑pass filtered before the distortion using ReaEQ, just to adjust the tone of the effect, before balancing it back in with the original sound.
For the SID‑chip lead-synth sound first heard at 0:11, I used a similar setup with Helium's Cortex amp simulator instead (an old freeware VST that seems to be getting tricky to find these days), whereas for the single‑note SID‑chip riff starting at 1:27 I went for Jack Dark's mad little Battery Acid dual‑channel non-linear amplifier, in both cases sculpting the sound heavily with EQ to leave only those areas of the distortion that I felt complemented the raw track. Another contrasting distortion timbre crops up at around 1:41 on the vocal delay effect, another Jack Dark plug‑in, this time a combination of Silverspike's Ruby Tube and the extreme El Fuego bit-crusher — not something you'd use every day, perhaps, but it introduced a nice new flavour in keeping with the generally lo‑fi synth sounds.
Distortion found another application for the vocal lyrics 'Just the same as the last time'. Here I wanted to create a sonic contrast with the main hook lines, so I applied Voxengo's Boogex amp simulator to the echo effect that surfaces during the gaps in the phrases. MDA's Combo also made another appearance on the vocal itself, when that same line is sung starting at around 2:34 — it's the Radio mode again, but with less drive.
Another place where I might have chosen to use distortion was on the high synth riff that starts at 2:17, which didn't feel as though it had enough HF energy to cut through the mix at that point. However, after trying a couple of different distortions, I decided that these recessed the basic notes of the riff too much, so I opted for a more unusual approach of shifting the line up an octave using Reaper's pitch‑shifting plug‑in, ReaPitch, and then mixing that version in with the original sound. This worked much better and immediately made it audible against the other sounds, even at a lower mix level.
Modulation Treatments For Stereo Width
 The delay treatments Mike used were given unique characters in a variety of ways. Some of them were created using emulations of vintage tape delay units such as The Interruptor's Bionic Delay, while others were radically EQ'd or further processed with old‑style effects such as The Interruptor's Wow N Flutter or Voxengo's Old Skool Verb.
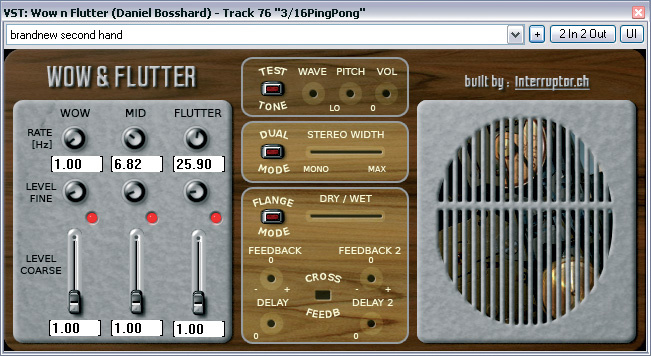

Although most of the files I received from Paul were stereo WAVs, the audio within many of them was actually mono. In these cases, I bounced the audio to a mono file straight away within Reaper, to cut down on disk activity during playback, and then looked for ways to give more of a sense of stereo through processing. (If you're not sure if there is stereo information in a particular audio file, try looking at it using a vectorscope phase display, such as the one in Soundhack's freeware Phasescope plug‑in: a vertical line indicates mono audio, irrespective of whether that is coming from a stereo WAV file.)
Modulation effects were a large part of the recipe for the stereo widening in this track, and I called on a number of different plug‑ins for this. Phasing from Helium's Crazyator enlivened the main SID‑chip lead synth, and a different patch from Schwa's Oligarc Phaser provided similar service for the main string synth, which first enters at 0:27 and can be heard in more sustained form at 2:18.
A more varied palette of wide‑stereo modulation effects came courtesy of the Waves Mondo Mod and Enigma plug‑ins. The most prominent examples of this processing are the bass fills at 1:07 and 1:58 and the bass outro riff starting at 3:02, but there are a lot of others too, such as the chirping SID‑chip synth riffs at 0.01, 0:43, and 2:34, the high sustained synth notes at 0:54 and 1:26, and some of the vocal special effects during the 1:26‑2:02 middle section.
One of the simplest ways to introduce stereo interest is via auto‑panning, and while I've used this on the odd mix, I find it a bit too heavy‑handed most of the time. Much more successful, in my experience, is any type of rotary speaker simulator, as even the simplest ones create a kind of auto‑panning, but allow you to set different speeds for low and high frequencies, and this makes the effect much less ostentatious. As regular readers may know, MDA's tiny Leslie plug‑in is a favourite of mine for this reason, and in this mix it cropped up a couple of times: on the high SID‑chip riff at 2:17 and on the extra vocal interjections during the last hook section ("Oh come on, that's not fair, I trusted you...” and so on). The key thing with this plug‑in is to set the crossover point for the two virtual speakers, so that each has a suitable amount of material to work on, and in both these cases I increased this point from its 450Hz default setting, because of the comparatively high register of the sounds I was feeding in.
Delays & Reverbs
Modulation effects weren't my only method for widening sources out, because some of the delays and reverbs I used were also created with this aim in mind. With synth sounds, in particular, some very short reverb can really help to make them seem less two‑dimensional, even when the reverb is designed to blend with the dry sound in such a way as to be scarely audible in its own right. This approach had already paid dividends in filling out the hi‑hat sound, but I also went on to apply it to a number of other tracks using Christian Knufinke's SIR2 and Waves' IR1.
In the case of the main string synth, this amounted to a stereo spring reverb impulse response hacked down to just 70ms in length and then widened with SIR2's built‑in M/S processing, while a different spring from IR1 provided another tonality for the SID‑chip synth siren sound that appears first at 0.02 and occurs frequently thereafter. The main SID‑chip synth's lead sound used another M/S‑widened impulse in SIR2, this time the first 30ms of a 'small wood room' impulse taken from Lexicon's veteran 480L flagship hardware reverb. In all these situations, extensive EQ was used on the reverb signal in the convolution plug‑in, to tailor it to the sound, usually rolling off low and high end around a specific 'zone' that fitted well with the dry sound and in the mix as a whole.
There were no longer reverbs in the track beyond those included within the Waves Enigma special effects, because it seemed to me that the short reverbs were already doing a fairly good job of blending the mix together, and I didn't think long‑reverb special effects would be in keeping with the spirit of the track as a whole. Obvious delays, on the other hand, turned out to be much more useful, and I went out of my way to try to create varied sounds for each one. The GVST DuckDelay echo you can hear on the SID‑chip siren synth, for example, I passed to Jack Dark's shy and retiring Glitch Girl plug‑in to 'stereoise' and leave sounding digitally unstable. By contrast, the stereo slapback patch I used on the main lead‑vocal hook was created by The Interruptor's multi‑head tape‑delay emulation, Echomania. It was then sent on to Voxengo's Old Skool Verb to give a down‑at‑heel, vintage timbre.
Those two delays both provided stereo interest, but the most obvious stereo delay was a 3/16th‑note tempo‑sync'ed ping‑pong patch I often use to help add a bit of rhythmic complexity to parts. The panning of the four delay taps already gave this effect a separate character, but I decided to push further and inserted The Interruptor's Wow N Flutter plug‑in to make things a little less predictable. This plug‑in simulates the play‑speed variations of analogue playback machines, thereby introducing random time and pitch variations. Fortunately, you can decide exactly how much variation you want, so I could set it subtly enough that it didn't unduly affect overall tuning.
The Spice Of Life
There are times when your effects use is primarily about blending the mix together, in which case a few common send effects applied across most of your tracks can be the order of the day. In many less natural‑sounding mix styles, however, there is no benchmark of a 'natural' blend, and your processing and effects can take a more front‑seat role, freely enhancing and intensifying the colours of the raw sound sources. This month, I've tried to show how, when adopting this latter approach, it's a good idea to choose and mould your processing and effects so that each has a distinct sound of its own. Not only does this tend to make the mix as a whole fuller and more varied, but it also helps each individual track to stand out in the mix better, by virtue of the fact that its contrasting timbre effectively reduces the amount of psychoacoustic masking from competing sounds.
Rescued This Month

Punkdisco are a London‑based writing team comprising singer Leah and producer Paul. The track 'Oral Hygiene' was born of a snatch of conversation Paul overheard between Leah and a friend at a party. Taking this single line back to the studio a few hours later, a main hook was laid down with HardSID's 4U SID‑based synth, after which Leah quickly came up with the other few lines and the rest of the track was built around that. You can check out some of Punkdisco's other work, including their controversial video version of the Subhumans' 'Mickey Mouse Is Dead' via their web site and MySpace profile.
Remix Reactions

Paul & Leah: "Our first mix was a complete dud, with no bass, and way too many mids clashing with the vocals. So for our final version we added an MKS80 sine-wave bass line and automated an EQ to duck the 2.2kHz region whenever the vocals came in, but the arrangement still sounded too repetitive, the vocals weren't very 'pro', and the string sound was sloppy.”
"Overall we are both very impressed with Mike's remix and pleased with the direction he's taken — he's really presented the track in a more structured and flowing manner. We love all the new little reverse bits and variations, which give a progression that our track lacks, and it just sounds 'better' in general. The strings sound tighter and more determined, and the vocals manage to be just as loud, subjectively, as in our version, while somehow taking up less space in the mix. This makes them belong to the track rather than sitting 'on top', as in our version. We are definitely looking forward to reading what has been done with the vocals! The bit that really made us smile was the little flanger on the outro. Flangers make us think of The Cure and not electro‑pop, but we guarantee that if you visit our web site in a few months time our next track will have a flanger! Great stuff — huge thanks!”
Mix Rescue On-line
We've placed a number of before and after audio files on-line at /sos/jul09/articles/mixrescueaudio.htm, so you can download and audition them in your DAW and hear the impact of Mike's mixing techniques.