 Connecting the two Macs together for MIDI networking.
Unlike Logic, DP doesn't have any sort of distributed processing scheme, but by using additional Macs in your DP setup, with a network connection between them, you can achieve a similar result. Here's how it's done.
The advent of Intel-powered Macs has really upped the stakes on affordable processing power, but there can't be many of us who don't hanker after even more grunt. You only have to build up an arrangement using a few heavyweight soft synths and a convolution reverb or two to start pushing the limits of even the very latest Mac Pro, especially if you like to work with very low latency.
Of course, there are plenty of strategies to help control processor use with DP, and you can check out my September 2005 workshop article (www.soundonsound.com/sos/ sep05/articles/performertech.htm) for a discussion of some of them. But these techniques don't suit everyone, and in many instances being able to keep all your virtual instruments and plug-ins running in real time is hugely useful, and can allow you to work more quickly. So sometimes there's nothing for it but to use additional Macs to run your soft samplers, synths, and even audio effects. Turning a once top-of-the-range G4 Power Mac into a dedicated software-based sampler, for example, can be a fantastic way of keeping a worthy machine in service rather than banishing it to a hell of word-processing and email. And the latest Intel-based Macs have a tremendous price/performance ratio and make stonking 'slave' machines. This month, I'll look at the most elegant and practical ways in which you can incorporate additional Macs into your Digital Performer rig, and also how DP can be used as a host application on those slave Macs.
Differing Approaches
As soon as you add additional Macs or PCs to your 'main' Mac, you face choices about how to integrate them. For starters, you're almost certainly going to need to get mouse and keyboard commands to them, and to be able to view the operating system and applications they run. Then they'll need to receive MIDI information, and the audio they generate as a response will have to be monitored somehow, and maybe recorded too. If you want to run a separate machine as a host for something like an Altiverb convolution reverb, that's going to need an audio input too. There are so many possible combinations and solutions here that it's impractical to look at them all, so instead let's start with a fairly simple, typical setup that uses a Network MIDI connection.
Digital Performer News
- Binary Lizard: It's been rather a long wait, but Applied Acoustics' Lounge Lizard 3 electric piano modelling instrument is now available in a Universal Binary format suitable for both Power PC and Intel Macs. The update, version 3.1, also fixes some DP-specific bugs that affected Power PC Macs, and can now deal with MIDI patch change data correctly. More information from www.applied-acoustics.com.
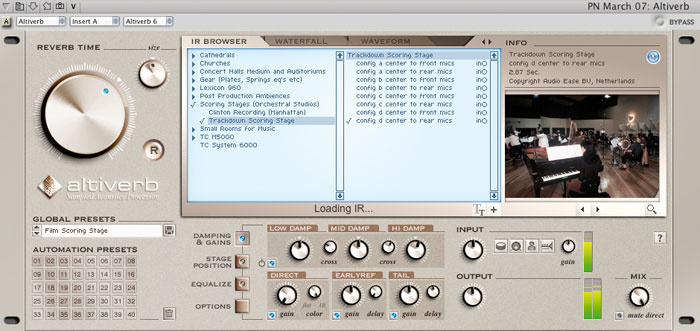
- Altiverb XLs: Just when you thought it couldn't get much better, Audioease have released Altiverb 6. The good news is that the sound quality remains as superb as ever, it's still a dedicated MAS plug-in, and the user interface has had a redesign and now offers a really nice impulse response browser. However, Altiverb 6 is offered in two versions, Regular and the significantly more expensive XL; only XL offers surround reverb and support for sample rates above 96kHz. Hmm. Nonetheless, if you're a registered user of version 5, an upgrade to version 6 Regular is free. More information from www.audioease.com.
Desktop & Laptop
I'm sure I'm not alone in owning both a desktop and laptop Mac, as this combo works wonderfully well. In my case, a Macbook makes a great portable location recorder and gigging machine, while a G5 Power Mac sits in the studio shackled to all manner of external hard drives, USB devices and the like. But the Macbook also makes a superb soft-synth host that frees up the Power Mac for audio work in really big projects. Laptops are, in many ways, ideal machines with which to supplement a desktop Mac, as their compact size and low noise makes them easy to live with, and their built-in keyboards, trackpads and displays negate the need for any more complicated system of control.
 has just been connected to a Session on my Macbook (Slave MIDI A) and the network MIDI link is established.") After you've created Sessions on each Mac, the MIDI Network Setup window allows you to connect them together. Here, a Session on my G5 (MIDI A) has just been connected to a Session on my Macbook (Slave MIDI A) and the network MIDI link is established.
After you've created Sessions on each Mac, the MIDI Network Setup window allows you to connect them together. Here, a Session on my G5 (MIDI A) has just been connected to a Session on my Macbook (Slave MIDI A) and the network MIDI link is established.
Here's my preferred way of making my Macbook a virtual instrument slave, which has DP hosting four instances of MOTU's excellent software synth, MX4. Basically, I send MIDI data to the Macbook via Ethernet, using OS X's Network MIDI capabilities, as this allows me to do away with any kind of hardware MIDI interface for the Macbook. I then use the Macbook's built-in stereo audio output to feed audio into the MOTU Ultralite audio interface that's connected to the G5, my monitors, and the rest of my gear (see image, bottom left). Of course, you don't necessarily need exactly my complement of a G5 and a Macbook to try this out: any two Ethernet-equipped Macs will work just as well.
So, to make this particular setup work, the Macs first need to be connected together with an Ethernet cable (or via an Ethernet hub or switch), and Built-in Ethernet enabled on both of them, via the Network Preferences pane, in System Preferences. Then you're in a position to follow the steps below, to configure Network MIDI on both Macs and create a 16-channel 'bundle' of MIDI connections (which Apple call a Session) on each. After linking the Sessions across the network, it just remains to configure DP, again on both Macs, to utilise the network MIDI connection. Phew! But it's quite straightforward in practice, as we'll see:
1. First, let's set up network MIDI on the main Mac. Open Audio MIDI Setup, from Applications/Utilities, select the MIDI Devices tab and double-click on the Network icon. A window called MIDI Network Setup appears (see screen above).
2. In the window, click the '+' button under the My Sessions field at the top left. A Session called Session 1 appears in the list. Click its tick box to enable it, and settings for it appear in the right hand part of the window.
3. In both the Local Name and Bonjour Name fields, rename Session 1 as 'MIDI A' or something similar.
4. In the lower left of the window, set the 'Who may connect to me' pop-up menu to 'Anyone.'
You've just created a Network MIDI 'port' for your main Mac. It's not connected to anything yet — we'll do that in a moment — but if you have DP running at this point you'll see that a new item has appeared in its MIDI track output pop-up menus: 'Network'. Now we'll go on to set up the slave Mac.
5. On your slave Mac, open Audio MIDI Setup and double-click the Network icon. In the same way as before, create and enable a Network MIDI Session, but this time call it 'Slave MIDI A' (or some other descriptive name that denotes that it's specifically associated with your slave Mac).
6. Once more, choose 'Anyone' from the 'Who may connect to me' pop-up.
At this point, if the magic is working (ie. your Ethernet link is active!), you should see your main Mac's Network MIDI port ('MIDI A') listed in the Directory field in the lower left part of the window. And if you were to check the MIDI Network Setup window on your main Mac, you should see the slave Mac's port ('Slave MIDI A') listed. All that remains, then, is to establish the link between the the two Sessions, so that the main Mac can 'play' the slave Mac.
7. On your main Mac, in the MIDI Network Setup window, select the Session called 'MIDI A'. In the Directory field choose 'Slave MIDI A' and click the Connect button.
You've now established a 16-channel MIDI connection between your Macs, with not a MIDI cable or interface in sight — nice! All that remains now, in my example configuration, is to set up DP on the Macbook to host four MX4 s and then start to drive them from DP MIDI tracks running on the G5.
 Here's the outcome of steps 8 to 11: a bank of MX4s hosted in Digital Performer, each with a MIDI track driving it from the network MIDI connection.8. On the slave Mac, start DP and create a new project. Now instantiate four MX4 s on four Virtual Instrument tracks, select the desired patches and make sure they're all outputting to the Macbook's main audio output.
9. So that you can get MIDI data to these soft synths, each MX4 needs a MIDI track of its own. You can create them in one fell swoop by hitting Shift-Alt-Apple-M and typing '4' into the tiny dialogue box that appears, before clicking OK.
10. Now choose Multi Record from the Studio menu. This allows DP to listen to multiple MIDI channels at one time, which is what we need.
11. Then go through the four MIDI tracks, assigning a Network MIDI input and virtual instrument output for each. For example, in MIDI Track 1, choose 'Network-1' as MIDI input and 'MX4-1-in' as MIDI output. For MIDI Track 2, choose 'Network-2' as MIDI input and 'MX4-2-in' as MIDI output, and so on. Finally, record-enable all four MIDI tracks (see screen below).
 Meanwhile, on the main Mac, the MX4s are driven via the same network connection, just as if they were separate parts of a multitimbral hardware synth.12. Nearly there! Back on your main Mac, create or open a project in DP. Configure four MIDI tracks to drive the outputs Network-1 through to Network-4. Record-enabling one (or more) of these will then cause MIDI messages (from your master keyboard or other controller, or the track) to be sent across the Network MIDI connection and arrive at the corresponding instantiation of MX4 on your slave machine (see screen above)
That, in essence, is it! To recap, Audio MIDI Setup is used to create a Network MIDI 'Session' on each Mac and then to connect those Sessions together. The slave Mac uses DP as a virtual instrument host, with a MIDI track for every MIDI channel that's needed to drive the instruments it's hosting. The main Mac then drives the slave Mac as if it were a multitimbral hardware synth or sampler, on as many Network MIDI channels as are needed. Useful Virtual Instrument setups on the slave Mac can then be saved and subsequently opened like any DP project.
That's Just Showing Off...
I find network MIDI really liberating — multi-channel MIDI communication between two or more Macs, with not a five-pin DIN plug in sight. But wouldn't it be cool to control both my laptop and my main Mac from the main Mac's keyboard and mouse? This is easily possible, and requires no extra hardware, thanks to a freeware utility called Teleport. This allows key strokes and mouse movements to be shared over a network, so in my case I don't have to touch my Macbook — I can just stick it up on a shelf next to my main monitor. More details from www.abyssoft.com/software/teleport/.
Dealing With The Audio
An essential requirement of a setup like this is some means of monitoring the audio output of the slave Mac. As I mentioned before, I route the audio from my slave Macbook into a couple of inputs on a MOTU Ultralite interface connected to the main Mac. This gives me the option of monitoring the slave Mac with zero latency while I develop my sequence, courtesy of the interface's Cuemix capabilities. And it's also then easy to actually record the slave Mac tracks to the main Mac's sequence when I've finished it — I just disable Cuemix and record enable a stereo audio track with the same two channels as its inputs, before hitting record.
If you don't have an audio interface capable of zero-latency monitoring, bringing the slave Mac audio to a hardware mixer works equally well. Either way, you just regard the slave Mac as if it were a hardware synth and deal with its audio output(s) in the same way. Of course, if you used a multi-channel audio interface connected to the slave Mac, it would even be possible to choose separate outputs for each Virtual Instrument.
The Total Solution
DP plays very well with OS X's Network MIDI. But Ethernet and other network connections can do more than carry MIDI messages — they can also carry low-latency audio and even graphics data. This is the key to really clever setups, where you can use one or several 'headless' (ie. without a display) Macs as slaves, and have their audio outputs delivered directly into DP audio tracks on your main Mac. I'll be covering this, and more, in next month's DP workshop.
Taking It Further
Network MIDI is the key to using 'slave' Macs as virtual instrument hosts, and for many sequencing tasks setting it up as described above will be more than sufficient. However, for more ambitious setups there are some different approaches that might prove more suitable or make life easier.
- ALTERNATIVE HOSTS
First off, there are pros and cons to using DP as a virtual instrument host on the slave Mac. The main advantage is having access to all your normal MAS and Audio Unit effects to treat the outputs of any Virtual Instruments. You also get to use DP 5 's bundled MAS-only instruments, such as Modulo. But the downside is that DP was clearly never designed as this kind of instrument host. Having to configure lots of MIDI tracks in addition to Virtual Instrument tracks is a faff, and not something you really want to be doing if you're using a lot of MIDI channels.
 Here's plasq.com's Rax, hosting a bank of MOTU MX4s and some insert and send/return effects plug-ins. Rax is handy to have on your slave Macs, as it can be simpler to deal with than DP as a virtual instrument host. Much better, then, to use a dedicated instrument host application, such as the excellent Rax from www.plasq.com. Rax can host as many Audio Unit instruments as your Mac will allow and has a really good mix architecture, with Audio Unit plug-ins being available as inserts and from multiple send/return loops. Complex setups are easy to save and recall, and the application is a model of clarity and ease of use. It'll also host VST instruments and plug-ins, if you 'wrap' them first with FXpansion's VST to Audio Unit Adapter.
Many software instruments, though, are provided as dedicated stand-alone applications as well as plug-ins. This is true of MOTU's Symphonic Instrument and Ethno, and 'workstation' instruments like Ultimate Sound Bank's Plugsound Pro. These application-type instruments are much easier to set up on a slave Mac, often have their own effects architecture and are able to address multiple hardware outputs. Given the choice, I'd always use one of these on a slave Mac rather than go with a 'hosted' approach for the same instrument in plug-in form any day.
- MORE THAN 16 CHANNELS?
A single OS X Network MIDI Session provides 16 MIDI channels across a network. What if you need more, though? For example, a stand-alone MOTU Symphonic Instrument running on a slave Mac can be driven by up to 64 MIDI channels. And, of course, you might want to use multiple slave Macs, too.
 The MIDI Network Setup window can get pretty busy when you're using multiple Sessions, but naming Sessions clearly ensures that it's all easy to keep track of. The answer is very easy if you have the computers available: you just create as many 16-channel Sessions as you need on each of your Macs. For example, if you needed to sequence a 64-part orchestral score, you might do it by running MOTU's Symphonic Instrument on one slave Mac and Garritan Personal Orchestra on another, each handling 32 parts. To set up the Network MIDI, you'd create four Sessions on your main Mac and two each on the slave Macs. Then you just connect the Sessions appropriately, simply repeating the process for connecting Sessions between Macs, as described in the main body of this article.
Main Mac Slave Mac 1 Slave Mac 2
Session 1 Session 1
Session 2 Session 2
Session 3 Session 1
Session 4 Session 2
 The advantage of using descriptive Local names for your network MIDI sessions is that DP uses them in its MIDI output pop-ups. With bigger Network MIDI rigs, too, you can utilise the fact that a Session effectively has two names: the Local name, which is what applications running on the same Mac use, and the Bonjour name, which is how other Macs on your MIDI network identify the Session. OS X's default naming of Sessions is along the lines of 'Session 1' for the Local name, plus your computer's name (as set within the System Preference's Sharing preference pane), and this can get confusing when you're setting up multiple sessions between two or more Macs. For that reason, I'd always advise giving unique Bonjour names to each of your sessions (such as MIDI A, Slave MIDI A and so on). However, if you work extensively with just one Network MIDI setup — like the orchestral setup described above — you might want to give your main Mac's Sessions more descriptive Local names, like 'Symphonic Instrument A' through to 'Garritan B' (see screens, left). The reason for this is that when it sees multiple Sessions, DP no longer uses the generic 'Network' name in its MIDI track output pop-ups, but instead uses specific Local Session names. This makes setting up tracks far easier on the main Mac.
- CABLE & WIRELESS
There's nothing to say that OS X's Network MIDI has to use an Ethernet connection between Macs: OS X can network across Firewire and Airport as well. This opens the door to the remarkable reality of actual wireless MIDI communication between two Macs. You'd have to have a correctly functioning wireless network in place, or initiate a computer-to-computer network between two Airport-enabled Macs, but then setting up the Network MIDI link in Audio MIDI Setup is done in the normal way.