Extreme metal music demands, and expects, extreme skills from producers and engineers. In this in‑depth masterclass we explain the techniques that go into crafting modern metal sounds.
Modern extreme metal is anything but a passing fad. With countless clubs, fan/webzines and mainstream magazines and radio stations nurturing and sustaining the scene, it comes as no surprise that an act as extreme as Slipknot gained the number one position in the US Billboard 200 with their last album, All Hope Is Gone. Slipknot have sold over 10 million albums without toning down their extreme metal sound. Over their career, the band have sold more than 10 million albums worldwide.
However, extreme metal remains one of the most challenging styles to produce. The combination of down‑tuned instruments, dense and distorted tones, and intense performances presents the engineer with serious challenges when it comes to achieving the required clarity and definition. In this article and next month's follow‑up, I will explain the specific production, engineering and mixing techniques that represent the state of the art in metal recording, with contributions from a number of top producers, engineers and musicians.
This month will focus on the often misunderstood and undervalued area of pre‑production, as well as the engineering and recording part of the process, with the next month's article covering mixing.
Pre‑Production
For obvious reasons, a record producer's natural habitat is assumed to be the recording studio. But it is usual that there is another element to the process of a successful production, and its importance is too often overlooked. Before the band and producer enter the studio, there is likely to be a period of time spent working out the ideas, direction and fine details of the ensuing production. In essence, pre‑production can be viewed as designing the project's blueprint, and along with many other producers, I believe that this is the cornerstone of a successful album or project.
A successful producer needs the ability to look beyond the technical aspects of microphone type, placement and processing. A producer's personal talents and his ability to motivate, inspire and organise cannot be underestimated. As well as being technician, musician and engineer, a record producer may have to be part psychologist, career advisor, songwriter, close friend, lyricist, drill sergeant and therapist. Essential elements to nearly all of these roles are respect, understanding and trust. In turn, this facilitates a fundamental goal of pre‑production: settling on a collective vision of what the band are about stylistically and musically, how the album is going to sound and how this is going to be achieved. Having this vision for the final product allows the producer to control and guide the project in such a way as to realise something that will please everyone. Clearly, the vision can be fine‑tuned along the way, but clarity during pre‑production should ensure that the elusive but essential 'vibe' of the project is right.
In pop and rock music, pre‑production time is often used mainly for song development, working out structures and arrangement changes that will mould the songs into an acceptable format and length for commercial radio airplay. Due to the nature of extreme metal, however, it is unusual that any significant time is needed in these areas. Instead, record producers from the genre will concentrate on the numerous challenges and issues that arise from the intense, down‑tuned, rhythmically intricate and often heavily syncopated nature of the music.
The Rehearsal Studio
The initial meeting will more than likely take place in the band's rehearsal room. Here, I would want to hear the whole band play through the songs for the project in a relaxed scenario without the expense and pressure of being in a recording studio. As well as assessing whether the band can perform the songs competently and comfortably and that the arrangements work, the relative strengths and weaknesses of the individual performances and musicianship will be evaluated, and comments fed back accordingly. Remember that a producer's job is not only to maximise a band's strengths but also minimise their weaknesses, and pre‑production is the right time to pull back in a musician who is trying to play parts that are outside his or her comfort zone. At this stage, I will be particularly focused on the drummer, whose performance will provide the foundation of the entire production.  The rehearsal studio is where some of the metal producer's most important work is done.
Musicians often won't notice possible issues whilst they are playing, especially if they have never recorded the material before, so it's a good idea to make rough recordings of these rehearsal sessions, as any potential concerns will often become apparent to the band on playback. It is not a given that just because the songs work well in a gig scenario, the same will apply in the studio. (It is obviously preferable to be in the same room as the band for pre‑production, but when this is not possible, a certain amount of work can nevertheless be done with rehearsal recordings over email.)
This is also the right time for the producer to speak with the band members about properly fine‑tuning their parts, by experimenting with any ideas that either of them may have: different drum fills, guitar overdubs, vocal harmonies and so on. Obviously, if new ideas come up in the studio, that's fine, but rehearsal time is usually a fraction of the price of studio time, so working things out at this stage enables the studio time to be used much more effectively.
The Project's Budget
It is hardly news that many independent labels are struggling to stay in business, and album budgets have been in decline for many years. This financial pressure directly affects the record producer, whose responsibility it is to manage the budget. Whether producing a project for Roadrunner Records or simply a three‑track demo to put up on MySpace, pre‑production is the time to save money. It pre‑empts any problems that may appear when the studio clock is ticking, saving time, and therefore money, in the process.
Right Clicks
One of the issues that is usually right at the top of my pre‑production priority list is the subject of click tracks, for the drums to be tracked to and for the project generally. In my experience of extreme metal, the use of click tracks is one of the overriding factors that separates a convincing album production from a demo. As producer Russ Russell says, "The threshold of accuracy and tightness that people expect from extreme metal is extremely high.”
Although there are many styles of music where the use of a metronome is not desirable, and where tempos are allowed to breathe slightly, this is predominantly not the case for modern metal. The kick drum work, beats, patterns, subdivisions and syncopation involved in extreme and modern metal demand the very highest standard of precision and accuracy to facilitate the tightest possible production. As Meshuggah's drummer Tomas Haake explained in May 2008's Modern Drummer, "I do feel we need a click… a lot of the stuff is really hard to play on guitar, which means that if I strayed over the course of a song and by the end I played 10bpm more than at the beginning, it would be impossible to play on guitar. So I have to use a click track to maintain a steady pace.”
Even extreme metal bands with less common time signatures and challenging tempo changes, such as The Dillinger Escape Plan, take advantage of the benefits here, often spending considerable time fine‑tuning the tempo‑mapping to perfection. The use of a click track provides an essential central reference point in forcing a drummer to tighten up his beats and parts and allows the producer to accurately assess his or her performances.
Additionally, due to the fast kick-drum patterns involved (double kick-drums or pedals are a prerequisite) and the intricate nature of the drum parts, it is normal that the drum tracks heard on a finished production are not entirely as performed. Often, a variety of invaluable kick‑pattern building and drum editing/quantisation methods will have been employed to produce incredibly tight, almost superhuman‑sounding drum performances. Creating these is one of the particular production challenges of the genre, and ultimately, the use of clicks when recording the drums facilitates this process. There are also wider production benefits: instrumental parts can be copied and pasted within the arrangement, which is not possible if the tempo varies even marginally, and loops and programmed elements can easily be added. The subject of click tracks is thus usually discussed from the very first contact I have with the band directly.
Ideally, a producer should aim to have the drummer practising along to exactly what he will hear when tracking the drums in the studio (see box, left). A minority of drummers are able to practise and record to a click without any guide tracks whatsoever, but most are more comfortable having a guide guitar and/or bass and vocal present. Sometimes, if a band is well experienced with pre‑production, I will leave them to record the guide tracks themselves; otherwise, I will get together with the whole band to record these parts to the click. This is both the perfect time to ensure that they are in complete agreement about the song arrangements and parts, and a great opportunity for the producer to get familiar with the songs and spend further general pre‑production time with the band.
From here, the band should have the perfect template for the drummer to practise to, either with the rest of the band or without. The click alone can be solo'ed in rehearsal with the whole band (either with everyone hearing the click, or just the drummer), while the guide tracks can be used as well if the drummer is rehearsing alone. Once the mapping and guides have been completed, the drummer should find that playing to the click track is relatively easy, and many find that once they have settled in, the presence of the click is reassuring. Generally speaking, if a drummer has the song arrangements properly down, he or she can now concentrate on getting their performance tight and hitting consistently, and can forget about rushing ahead or dragging behind the perceived correct tempo.
Equipment
The production ethos of extreme metal has an overbearing emphasis on the clarity and definition of the drums, bass and guitar sounds. Well before tracking commences, it should be the producer's responsibility to make sure that the right equipment, providing the right tones, will be used for the recording of the project. This is critical to a high‑quality extreme metal production and the band should be made aware of this.
It is not the remit of this article to provide detailed and subjective evaluations of the relative merits of different pieces of gear, but we can list some general principles and concepts relating to equipment used in metal music, all of which are important considerations for pre‑production.
Skinning A Kit
I've lost count of the number of times a drummer has told me something along the lines of "But those heads were new three weeks ago and I've only done eight gigs with them on!” If the batter heads have this level of use, they will usually be pitted, won't let the drums respond properly, and will inevitably hinder your ability to get the right clarity and tone during the mix. The cost of new drum heads will be incidental compared to wasted time in the studio and a sub‑standard kit sound. Therefore, for a project of any significance whatsoever, new drum heads are a must. It's a good idea to get the drummer to change his heads, stretch them in and use them for just one rehearsal to properly bed them in.
If the budget is available, change not only the batter heads, but also the resonator heads. Many drummers make the mistake of thinking that because the resonator heads never get dented, that they last forever. In reality, they lose their resilience and bounce due to the polyester film drying out, and this will have an impact on drum tone. If the band or the album is on a really tight budget, the area to save money on when re‑heading is the bass drum; in extreme metal, this is the part of the kit where the least dynamics are required, and therefore the easiest and most effective place to employ samples.
Drum Tuning
 Drum tuning is a skill that can defeat novices, and devices such as the Drum Dial can provide valuable help.
Following the priority of re‑heading and bedding in, it is fortunate that drum heads, and their tuning, are at the core of the sound we endeavour to capture, because they are the one over which we have most control. Drum tuning is an art in itself and its importance cannot be overlooked, as even the best‑quality drum kit on the market is still going to sound poor unless properly tuned. Usually I'll take the opportunity to get a kit tuned before getting into the studio, as this can be a lengthy process.
My own experience has led me to keeping the tuning of both kick‑drum heads really low — often so low that the wrinkles of the drum head are only just about taken out, and certainly within a couple of turns of the lugs from the loose position. Obviously, the way the kick drum 'feels' to the drummer needs consideration, but I have never had any success with trying to tune a bass drum's batter or resonator head tighter to gain click or attack. When using a kit with double kick drums, tune one slightly differently from the other to provide better differentiation.
To maximise the click and attack from the bass drum(s), plastic or wooden beaters are far better than felt ones. Adhesive 'click' pads should also be used on the area of the kick where the beater hits the batter head. Danmar pads are probably the most well known and widely used, and will often come included with a new bass‑drum head. Avoid supergluing things like coins or credit cards to the kick‑drum batter head as a substitute: these are far less effective at providing click and attack than purpose‑made products.
A lot of metal drummers will make the mistake of trying to get their toms to resonate and sustain as much as possible with maximum volume. Although this is relatively easily achieved by tuning the batter and resonator heads to very similar tension levels, a highly resonant kit can cause huge problems for producers, particularly in this style of music, where keeping tones tight and well defined is essential. By tuning a tom's batter head tighter than the resonator head, a tonally pleasing pitch‑bend with a deeper, rounder sound is achieved; alternatively, by tuning a tom's resonator head tighter than the batter head, an equally pleasing pitch‑bend is achieved, but with a tighter sound and with better attack. Generally, I can recommend keeping the toms tuned quite low overall, to give a more powerful tone with increased low end.
While on the subject of tuning, for anyone who needs help in this area, I will take the opportunity to recommend the Drum Dial (www.drumdial.com) which I find excellent for quickly and accurately tuning toms. This gives a reading of the tension of the skin approximately an inch from each drum lug. You get a rough guide chart with the Drum Dial as to what tensions your batter and resonator head should be tuned to for different tom sizes, and from here you can use your ears to fine‑tune the toms to perfection.
If at all possible, I will attempt to tune out any unwanted rings in the snare or toms, as an undamped drum will have the best resonance and tone. However, in many cases this just isn't possible. Avoid using gaffer tape to damp drums, as it is prone to vibrating and buzzing, which can easily be picked up by spot mics in the studio. I've always found 'Moon Gel', made by the RTOM Company, to be the best product on the market for damping. The pads can be repositioned until exactly the right degree of damping is provided, and can be cut into smaller segments if need be. Use WD40 or similar lubricant to eliminate any squeaks from the kit (particularly from the kick pedals) and consider packing the lugs with purpose‑made plastic retainers if you are having problems with lugs not holding their tension.
To maximise cymbal separation from the rest of the kit when tracking the drums, it is beneficial to get the drummer to lift his cymbals up as high as is possible without cymbal hits becoming uncomfortable. The further the cymbals are placed away from the shells, the easier it will be to make the rest of the kit sound good. Clearly, the sooner the drummer can start practising like this during pre‑production, the better. Make sure that the cymbals are properly cleaned before recording begins.
Bass & Guitar
Apart from the actual playing, the most important aspect of any bass or guitar recording for modern metal is choosing the right equipment for the task. Good bass and guitar sounds in an extreme metal production depend on at least six factors:
- The quality of the wood, hardware and construction of the instrument itself, as well as the action of its strings and the way it is intonated and set up. Be aware that some modern guitars, such as the lower‑end Ibanez models, have a rhythm sound that leaves a lot to be desired, usually due to the inferior wood used for the body, leading to a bottom end that is nowhere near tight enough. Invariably, guitars in the genre are tuned down by a minimum of two tones, and obviously this affects the action and intonation. It's surprising how many musicians do not have their instruments specifically set up to compensate for this or the thicker string gauges used, and failure to do so will often result in tuning issues, fret buzz and an inferior overall tone. Needless to say, this should ideally be taken care of prior to getting into the studio.
- The age, quality and gauge of the strings are important, as is the degree to which they are down‑tuned. It is amazing how quickly strings can go dead with constant heavy use in the studio, and once the clarity of the high‑end note definition and presence from the strings has gone, this is not something that can be 'fixed in the mix' with EQ. I usually have bassists and guitarists replace a set (or, if appropriate, a half‑set consisting of the thickest two strings for bass or three for guitar) every three to four hours of constant use.
- Using strings that are too light usually leaves the guitar with a thin, poor rhythm tone, and affects its ability to retain its tuning, due to the insufficient string tension and the resulting 'bow' in pitch. As a general reference, when a guitar is tuned down to 'C', 52 (guitar) or 120 (bass) is the thinnest gauge that should be used for the lowest string, with all the other strings stepped up in gauge accordingly, depending on whether a 'dropped' or 'straight' tuning is used. The lower a string is tuned, the thicker the strings should be.
- The choice of pickups has a considerable impact. Many metal producers prefer EMG 81 pickups for guitar, although I have always had admirable results when guitarists have used a Les Paul with the original passive pickups. For bass, I personally favour active pickups.
- If the amp used in tracking is not the right choice, with poor note definition/tone or a loose low end, even the most skilful EQ will not completely solve the problem. Obviously, it is preferable to get these sounds recorded correctly in the first place and avoid having to re-amp. The Ampeg Classic is my bass amp of choice, having a particularly warm but aggressive tone when driven. For guitar, I was a Marshall user for many years, but I have found that they are not always well suited to down‑tuning, unless modified. More modern tube amps — for example, the Peavey 5150, the Mesa Rectifier and the Krank Krankenstein — often have a much better voicing for the genre. If you are putting new tubes in your head before recording, make sure the amp has been properly biased.
- The speaker cabinet is an often overlooked but vital part of the equation, and the size, type and density of wood has a considerable impact on the resulting sound. I once recorded an Ampeg Classic bass head through a cab which, although loaded with high‑spec speakers, was a cheap box made of chipboard. The old adage of 'Your sound will only be as good as your equipment's weakest link' was never more relevant, as the mic on this bass cab was left with numerous nasty resonant frequencies, requiring a lot of corrective EQ in the mix. For bass I usually opt for either an Ampeg or Mesa cab. For guitar, modern cab designs such as the Mesa Rectifier have a higher wood density than the standard Marshall 4 x 12, usually resulting in a better tone, with a tighter bottom end.
- Speakers matter too. Many guitarists and producers have a preference for Celestion 'greenback' 25s, as used for Machine Head's classic debut album Burn My Eyes. I also favour Celestion Vintage 30s, which have a really tight low end, are harmonically rich and are ideal for modern tube amps.
 Choice of loudspeakers makes a big difference to guitar sound. Shown here are two popular choices from Celestion: G12M 'greenbacks' and Vintage 30s.


Vocal Pre‑production
The highly aggressive and powerful nature of extreme metal vocals requires great stamina and strength and, invariably, there is a finite number of hours each day that the vocalist can spend fully committing to these parts. Clearly, if you leave, say, two or three days at the end of tracking to get all the vocals done, this puts pressure on the vocalist to continue tracking even if their performance isn't happening. As far as vocals are concerned, therefore, the first pre‑production consideration should be to schedule the recording sessions over as many days as possible.
Quite often, as soon as the drums have been completed I will intersperse tracking the bass and guitars with recording the vocals. In order to do this, you may need to start tracking vocals to a guide guitar. If doing so, be completely sure that this guitar was correctly intonated, to avoid potential vocal tuning issues with the final rhythm guitar tracks. Make sure the lyrics are completed and that multiple copies are printed out prior to the first session. I can also recommend separating out recording sessions for different vocal styles onto different days, concentrating on getting any cleaner, melodic parts recorded first; aggressive hardcore styles can often have a negative impact on vocal range.
Engineering & Recording
The engineering and recording side of music production is an art in itself. It requires technical knowledge and understanding of the equipment, but, just as importantly — if not more so when considering the very specific sound of the genre — finely tuned critical listening skills and musical understanding.
Before starting a discussion about engineering and recording for the genre, it is worth highlighting the fact that due to the consistent dynamics, power and attack required, drum samples are very frequently employed to augment or replace the basic recordings. I'll explain the consequences of this for the initial drum recordings presently, but even when you do plan to use samples, the starting point of any serious drum recording session should always be the same: you should be hearing the sound you want from the kit before miking up begins.
The kick drum is likely to be the part of the kit which, in the final mix, will bear least resemblance to this drum's natural acoustic properties. When recording, it is essential to capture the two frequency elements that will usually be the focus of the heavy EQ settings used on the kick in the mix: the weight and the attack. (Personally, I never use EQ for any instrument when tracking, as I feel it is a mistake to colour the audio without the option of removing these settings later.) My method of choice is to double‑mic the kick(s), with one mic placed to capture the weight and the other for the attack.
The weight would be captured with a large‑diaphragm dynamic mic such as AKG D112, Shure Beta 52 or Electro‑Voice RE20, half in and half out of the resonator head's sound‑hole or, alternatively, a few inches in front of the resonator head, away from the sound‑hole (avoid the centre of the resonator head, which will often sound overly boomy). The attack will be captured by close‑miking the batter‑head beater contact area from three or four inches away, inside the kick drum. In this position, access for the boom arm of the mic stand can often be a problem, as the sound‑hole will often be restricted by the other mic. To address this issue, I usually use a Sennheiser MD421, which is lighter and less bulky than D112s and so on, and hence more easily manoeuvred into position; a 421's frequency response is also well suited to capturing a kick's attack. Once again, avoid having the mic dead central within the drum: instead, point it at the beater area from off‑centre (so that it is also off‑axis to the batter head itself).  This photo shows a fairly typical setup for recording a metal drummer. In other styles of music one might use a pair of overheads as the main foundation of the drum sound, but here, the mics above the kit are serving primarily as spot mics for individual cymbals. Note also the D‑Drum triggers, used to provide spill‑free signals for triggering samples at the mix.
Alternatively, I have also had a lot of success capturing a kick's attack with a Shure Beta 91, which is a low‑profile or 'cartridge' design that doesn't need a mic stand. Either secure the mic on top of the kick's dampening blanket further towards the batter head, or if you have time to remove the resonator head, secure some strong corrugated card horizontally across the kick drum, so the middle is around a third of the drum's height, and gaffer the Beta 91 in place in the centre, three or four inches away from the batter head.
Finally, consideration needs to be given as to whether, and to what extent, any editing or kick 'building' will have to be carried out to produce the incredibly fast and accurate bass‑drum performances that are such a strong feature of the genre. If it becomes clear from the initial drum performances that a lot of work will need to be done in this area, it is worth doing as much as possible to minimise kick‑drum bleed on the other mics when tracking your drums. This is because flams and phase problems will be introduced if either your kick samples and/or or kick mics vary in alignment from the kick spill on the overheads and other mics, as will be the case if a lot of kick‑building with samples, or quantisation to the kick track(s), has to be carried out. Bleed can be minimised by securing a large, thick duvet over the resonator side and body of the kick; alternatively, you can ask the drummer not to play any footwork in problematic parts of a song. If it becomes clear that the majority of the drum performance will need kick‑building work done, it will often be pointless to record the kick drums at all. In this instance I will minimise the kick drums' volume by fully packing them with blankets: this prevents them resonating and bleeding onto the overheads, while still allowing the drummer to play his kick parts.
Snare, Hats, Toms & Cymbals
There is nothing specific to extreme metal when it comes to microphone selection and placement for the snare, and the standard techniques have been covered many times in Sound On Sound. The only suggestion I would make here is to always record a snare bottom mic. To me, the spit and rattle of a snare bottom is a vital ingredient of a great snare sound, and on numerous occasions I have been amazed at receiving albums to mix where this has been left out.
Likewise, there are no specific 'metal' mic choices for hi‑hats, ride cymbals and toms; any of the usual close‑miking options are possible. As a general rule, I don't use tom samples and will therefore make sure that the spot mics will provide everything needed. If you want more body to your toms, it is worth miking the tom resonators in addition to the batter heads, and using a large‑diaphragm dynamic mic such as a D112 or RE20 on the floor tom, rather than the ubiquitous 421.
Moving onto the overheads, my mic technique here will always be dictated by the number of cymbals being used, which, within the extreme metal genre, can be quite high. Much of the energy and driving edge of the production style is provided by the cymbals, and it is imperative that the dynamics between them are as evenly balanced as possible.  Where there are too many cymbals or too few mics, you can often get away with using one mic per pair of cymbals.
 When miking cymbals, it's a good idea to minimise hi‑hat bleed by positioning the mic so that the cymbal shields it from the hi‑hat.
 kick drum enables you to capture both the attack of the beater on the head — the job of the Sennheiser MD421 in this photo — and the low‑end 'thump' of the drum. In this instance, the second mic is a Shure Beta 91, mounted on a sheet of cardboard suspended across the interior of the drum.") Using two mics for (each) kick drum enables you to capture both the attack of the beater on the head — the job of the Sennheiser MD421 in this photo — and the low‑end 'thump' of the drum. In this instance, the second mic is a Shure Beta 91, mounted on a sheet of cardboard suspended across the interior of the drum.
Using two mics for (each) kick drum enables you to capture both the attack of the beater on the head — the job of the Sennheiser MD421 in this photo — and the low‑end 'thump' of the drum. In this instance, the second mic is a Shure Beta 91, mounted on a sheet of cardboard suspended across the interior of the drum.
In cases where a kit has a relatively small number of cymbals, I will usually individually mic every cymbal from around 18 to 30 inches away, with the mic aimed at the edge furthest away from the snare. When there are a lot of cymbals, I will opt for an overhead mic per pair of cymbals, again placed between 18 and 30 inches away, with a view to getting the volume between each as closely matched as possible. For anyone who has used the method of minimising snare bleed onto a hi‑hat mic by which the mic is placed so that the hat is blocking sound waves coming directly from the snare, a similar approach should be used when individually, or in pairs, miking cymbals that are close to the hi‑hats. In other words, place the microphone so that the cymbal itself is blocking sound waves coming directly into the mic from the hats. This will minimise bleed‑over from the hi‑hats on this microphone. Watch out for 'china' crash cymbals, which are invariably really loud and will usually overpower the other cymbals. It is worth designating a separate microphone for the china, and keeping the others as far away as possible.
If separate cymbal miking is not possible, due to microphone or mic‑pre limitations, opt for a carefully placed spaced pair, between two and three feet above the cymbals. Keep both microphones the same distance from the snare in order to retain its phase coherence in the overheads (use string to measure the distance if need be) and to prevent the stereo image from pulling to one side. Also, observe the 3:1 rule, meaning that you should separate the microphones by at least three times the mic‑to‑source distance (the source in this case being the cymbals), to reduce the audibility of any phase issues.
Many producers and engineers consider ambient room mics to be inappropriate for metal drums, as they are not obviously in keeping with the tight, well‑defined sound they are seeking. However, in recent years I have used ambient mics to great effect for my mixes, by processing and gating them in a certain way after time‑aligning them with the spot mics. A great deal can be added to the snare, kick, and overall sound, and these processing techniques will be covered in next month's mixing article. Therefore, if you are able to, I can definitely recommend tracking a spaced pair of good‑quality condensers such as Neumann U87s or AKG C414s, about 10 to 15 feet away from the kit. Spend time listening to different areas of the room; it can be worth placing them at knee height to capture low‑end punch.
Triggers, Samples & Edits
If there's a possibility you may be using samples, and you are able to do so, it's well worth recording the audio output of D‑Drum or other brand triggers on the kick(s), snare, and even possibly the toms. Triggers suffer much less spill than close mics, so their audio output provides a really clean signal for triggering drum samples; as we'll see next month, they also offer a highly accurate source to feed to the side‑chain inputs of kick and snare gates, which can save a lot of time when it comes to mixing.
At this point, it is worth clarifying the difference between drum replacements and drum reinforcements. In drum replacement, the spot microphone(s) for a particular drum are not used at all in the mix. This would usually be in an instance where the tone of the spot mic is not at all in keeping with the desired sound, and you want to replace it completely with a sample.
However, my own preference, and that of many producers in the genre, is to use the spot mics as the predominant sources for indvidual drums, but to reinforce or augment them by adding samples on top. It may be that the drum sample provides weight or attack, or perhaps simply a thicker kick tone, and this element is fed into the spot mics to sit behind it at an appropriate level.
The advantage here is that the live feel of the acoustic hits is retained. This is particularly crucial with the snare, where complete replacement can often lead to rolls sounding programmed, with a lack of convincing dynamics or feel — an effect often referred to as 'machine‑gunning'. Additionally, the manner in which the overhead mics interact and reinforce the spot-mic drum tones, particularly the snare, is usually an essential element of a great‑sounding kit. Clearly, this interaction is lost when completely replacing the spot mic with a sample.
Finally, without wishing to state the obvious, don't leave any drum edits or kick‑pattern building until the mix, as you need to get the foundation right before overdubs are recorded. If you wish to retain a slightly more human feel, duplicate well‑played sections where possible, rather than editing weaker ones, and avoid editing strictly to the grid.
Bass Guitar
Most metal producers would agree that combining the miked sound of a bass cab with the DI will provide you with the right frequency coverage, and a bass that won't disappear when your recordings are played back at lower speaker volumes.
The DI sound will provide a lot of note definition in the form of 'wiry' mids, and will additionally allow for re-amping if required. A good DI'd signal should be a prerequisite of any metal bass recording.
The amped signal, meanwhile, will provide the body and weight for the bass tone. I recommend investing time in finding out which of the speakers in your bass cab sounds best before starting to mic up. Simply get your head right up to each of the cab's separate speakers at an acceptable volume and trust your ears! Or, if you can, A/B the way your mic sounds on each speaker. In a 4 x 10 cab, for example, the two speakers further away from the floor will usually sound noticeably different from each other, and very different from the bottom two speakers. Avoid miking only a 15‑inch speaker, which will lack solidity in the bottom end compared to a 10‑ or 12‑inch driver. Some producers like to mic a 10‑inch speaker close to the horn to maximise the brightness and attack of the bass. With the bass being down‑tuned, there is the possibility that the low end captured by the mic will be 'flabby' and lack the required solidity and definition.
If you are happy with how your bass tone has been set up on the amp and that the tone coming from the cab is the sound you want, first make sure that proximity effect isn't contributing to the problem. Start backing your microphone away from the speaker an inch at a time (although distances further than nine inches or so are likely to prove too ambient), and monitor the effect these changes are having in the control room. If the tone is still not tight enough and there is still too much low end, consider using a dynamic mic with a smaller diaphragm or a low‑end roll‑off, such as the Sennheiser 421, or even a Shure Beta 57.
Over the past few years, my techniques for achieving the right bass tone have altered hugely. In the early days when I simply combined a bass DI and a bass mic, the results often fell short of the huge‑sounding, punchy bass sounds I was hearing on albums. Recording a channel of bass amp/cab modelling simulation is an excellent way of getting an alternative tone to complement and strengthen the sound, and will often help to provide definition and clarity of tone that the DI and mic combination may be missing. I have had excellent results over the years with the Sansamp PSA1 rackmount unit, as well as the Sansamp Bass Driver, although I've no doubt that similar products from other companies will do the job just as well.
Bass Distortion
For extreme metal, the bass and guitars are invariably down‑tuned, and one of the challenges presented by this genre is to get the bass and guitar to properly 'sit together', frequency‑wise, particularly when the bass will often be doubling the guitar riff's root note an octave below. Where the bass is concerned, the key is to capture an aggressive sound with an element of drive or distortion, while still retaining note clarity and definition. When only using a DI and mic on my earlier productions, I would be left with limited options when I wanted to distort or drive the bass sound or an element of the bass sound.
With a cleaner bass sound you will find that you can't get as much level for the bass guitar in the mix without it sounding inappropriate, as it will have a tendency to stand out and overpower the guitars, regardless of aggressive compression. As my productions have progressed, I have found that using distortion is an essential technique to get the bass to 'sit' properly with the guitars and in the mix generally. This in turn allows for the bass to be given more level in the mix, thereby providing a thicker, heavier overall tone to the production.
The best way of adding an element of drive to the bass guitar is recording a separate channel of heavily distorted bass when tracking. You can re‑amp a bass DI for this purpose, but I usually record this element at the same time as tracking my DI, amp and emulator, so I will use an active splitter to provide a signal for this distorted track. During the mix you can then feed this in and combine it with the other sources.  It's well worth recording a separate channel of distorted bass guitar, which can be blended with the original amp sound and a DI'd clean signal at the mix. The Sansamp PSA1 amp simulator and a smallish guitar amp such as the Peavey Bandit 112 are both good options for bass distortion.
The method just explained means that you have complete control over the heavily driven aspect of the bass. Many engineers and producers have got this wrong, by distorting the main miked‑up amp sound, and have ended up with a bass tone that is too distorted or not driven enough.
On the earlier albums I produced, like the French extreme metal act Kaizen's second album Sink Or Swim, I obtained good results from using a guitar amp/cab simulator, such as the Sansamp PSA1 again, or the Sansamp GT2, for this channel of heavily distorted bass. Alternatively, I have used guitar pedals such as the Boss Metal Zone, as on the debut Head On album, XXL, on a split feed from the DI signal.
More recently, however, for instance on the latest Godsized EP, I have had great success using a guitar amp for the overdriven element of the bass sound, usually favouring a hybrid valve combo such as the Peavey Bandit 112. The amp is miked up as for a rhythm guitar track, with the amplifier's EQ settings focused on providing a lot of mid‑range, with relatively minimal high or low end. If you are to be recording this driven amp tone at the same time as your clean bass mic, make sure that there isn't any bleed-over between the two — keep the amps in separate rooms while recording, if possible.
You can be relatively heavy‑handed with distortion on this overdriven signal, ignoring note definition and low‑end tightness, as this channel will not be used for the main body of the sound. Low end and clarity will be provided by the DI, amp and amp simulator. If you follow this method in full, you will have four different bass sounds to balance, process and manipulate during the mix.
Recording Metal Guitar
When it comes to guitar tracks, all producers will agree that the right sound and tone must be coming from the source before you start. Many guitarists have the attitude of just wanting to plug in and play, often through a rig that leaves a lot to be desired, tonally, and then expecting the producer to deliver an amazing sound; unfortunately, it just doesn't work like that.
Surprisingly, given the importance of guitar tones for extreme metal, once you have got the correct equipment and dialled in the right tone, actually recording the rhythm guitar tracks is usually one of the most straightforward elements of the production. There is no complex engineering technique or hidden secret to getting a great guitar sound, and some of the best metal guitar tones ever recorded were a simple combination of a great player, with the right equipment, miked up with a single SM57. The best advice I can give here is, therefore, to keep your approach to mic selection and placement simple. (Rob Flynn from Machine Head explained their microphone approach for guitar to me as follows: "We use an SM57 and a 421 on the cab, and actually use more of the 421 in the mix.”)
As a rule, you won't want to put your amp in a big‑sounding room and mic it up from a distance; to achieve the tightness and focus required for heavy rhythm guitar tracks, stick to close‑miking your cab, usually no further than seven or eight inches from the grille cloth. Once you have got your source sounding great, it should also sound right with the correct microphone placed in the right position. If it doesn't, move the mic around until it does. As with the bass, it is well worth experimenting to find the best‑sounding speaker in the cab.
A recommended starting point when it comes to mic placement on a guitar cab is with the mic half‑on and half‑off the speaker's dust cap, at around half an inch from the grille cloth. From here, listen to the sound in the control room and check for two issues. Is the tone too bright and fizzy (particularly compared with how it sounds in the live room)? If so, move the microphone away from the dust cap towards the edge of the speaker in small increments — maybe up to an inch at a time — until it sounds right. Secondly, and very importantly, is the guitar sound 'boomy' and 'loose' in the low end? You can focus in on this issue by damping the sixth string while chugging, or playing fast picking patterns on this open string. If there is a problem, start backing the microphone away from the speaker, thereby diminishing the proximity effect. Again, small movements will have a profound effect on how tight the bottom end of the guitar tone is, and this is an essential aspect of getting the sound right, particularly when you consider the amount of open sixth‑string picking and fast riffing going on. On albums where the guitars have been tuned down to 'B', or even 'A', I have sometimes had the microphone backed off from the grille cloth by as much as six to eight inches in order to get the low end right. The importance of the distance from the mic to the source when recording down‑tuned rhythm guitars cannot be overstated.
If you are double‑miking your guitar cab, it's worth experimenting with placing one of the mics off‑axis. This will help vary the tone between the two mics (off‑axis tones tend to be duller), helping them track up better when these two sources are used together. My own method of choice is to double‑mic the best speaker in a cab with either a pair of 57s or a 57 and a 421. For metal guitars, good results can be had from a single Shure SM57, but the addition of a second mic such as a Sennheiser MD421 provides more tonal options. In both cases, placement and distance from the cone are critical. I place the first mic half‑on/half‑off the dust cap and the second just off the dust cap, with its diaphragm as close as possible to the first, but slightly off‑axis and pointing in towards the centre of the dust cap. With the two diaphragms being right next to each other, there shouldn't be any noticeable issues with phase cancellation. From this starting point I would adjust the mics as explained earlier. The different tones from the off‑axis placement of the second mic, possibly combined with this being a different make/model of mic, will yield numerous options when it comes to mixing. For more on phase correlation when double‑miking guitar cabs, see Sound On Sound January 2009.
A common mistake that many guitarists, engineers and producers make when recording guitar parts for extreme metal is to choose an overly 'scooped' sound with very little mid‑range. A lack of mid‑range will usually lead to a very thin sound with a lack of body, weight and size. It is usually a better option to dial in slightly too much mid‑range when recording and, if appropriate, tone it down with EQ at the mixing stage.
Avoid using the overdrive from cheap and nasty multi‑effect processors as the basis for your tone. If you are working with a valve amp, use the amp's natural overdrive as the foundation of your sound. However, a great trick for tightening up the bottom end of a down‑tuned rhythm‑guitar tone is to use an Ibanez Tube Screamer pedal set up so that it isn't actually adding any drive, level or tone in any way. Simply running your signal through the pedal will noticeably tighten up the low end.
It is usual for productions in the metal genre to have a minimum of two rhythm guitar tracks per side (ie. two rhythm guitars hard left and two tracks hard right). Occasionally, however, bands record just one guitar each side where their riffs are too fast and rhythmically challenging to track up accurately.
Another common mistake is to use too much overdrive or distortion when layering guitars, leading to a loss of note definition. If you get the chance, experiment by backing off the gain, tracking up four guitars and analysing the resulting tone, focusing on low‑end definition and clarity.
When layering guitars, experiment with varying the sounds between takes, as this can provide better frequency coverage and a stronger guitar tone. Two great‑sounding guitar tracks with varying tone will be likely to sound bigger than the exact same sound tracked up. This can be achieved in various ways: using a totally different guitar rig, the same guitar and amp but a different cab, or perhaps the same amp and cab but a different guitar. Alternatively, a different placement and/or mic can sometimes be enough to vary the tone for this purpose. If the band has a twin‑guitar line‑up, care needs to be taken to retain the tonal identity of the two separate players.
Vocals
A high‑quality condenser mic is the most obvious choice to capture and translate the powerful growls and throaty low‑end of an aggressive voice. However, there is not one microphone that works for everyone: some extreme metal vocalists will require a warm, full‑sounding microphone, while others may suit an edgier, brighter mic, so it is well worth recording the same vocal take through a number of different mics and comparing the results. You can also maximise the variation of tones between aggressive and clean parts and styles by using different mics for each, and varying the mic used when tracking up or harmonising vocal lines will help to 'thicken' up the overall vocal tone.  Metal vocalists often operate over a huge dynamic range, and it can be beneficial to record two microphones: a close mic for the intimate, quiet moments and a distant mic for full‑on screaming.
In metal singing styles, popping as a result of breath blasts from 'p' and 'b' sounds striking the mic diaphragm can seriously compromise vocal recordings. Using a pop shield placed at least three inches away from the vocal mic will help make sure that these breath blasts are diffused properly, as well as keeping the vocalist the right distance from the mic.
There are some vocalists who are just never going to give their best performances standing still in front of a pop shield. If the vocalist feels that this ruins his or her ability to perform, it is always preferable to have a great vocal performance with a slightly inferior sound than a poor vocal performance with a great sound. In this case, use a hand‑held microphone such as a Shure Beta 58 and get the vocalist to concentrate on maintaining good microphone technique whilst committing to his or her performance.
Parting Shots
As a general principle, even in extreme metal genres where the use of samples and editing is commonplace, a production that has a relatively faithful and honest reproduction of the original tones and performances will usually sound a lot more impressive than one that has been heavily manipulated and processed. The closer the sounds you capture are to the tones you'll eventually be seeking in the mix, the more natural the results will sound.
Also, although the technical aspects of engineering are, of course, important, the ultimate quality of a production has much more to do with the band's musicianship and attitude and the commitment of the performances involved than, for example, the type and position of the microphones used to capture this. Again, a producer's personal talents and his ability to motivate and inspire the musicians and their performances cannot be underestimated.
In next month's article, we'll look at the approach you need to take at the mix to complete a professional‑sounding extreme metal production.
About The Author

Mark Mynett is a record producer specialising in the metal genre, and is a Senior Lecturer in Music Technology and Production at Huddersfield University. As former guitarist with English metal band Kill II This, he has toured with the likes of Slipknot, Megadeth, Machine Head, Anthrax and Fear Factory. He is currently completing a PhD on extreme and modern metal production.
Politics & Production
Pre‑production provides the perfect opportunity for the producer to work out the band politics. Is there a single 'alpha' member or partnership that is the creative and driving force, or is it a democracy? Working out the various personalities, abilities and levels of dedication within the band will help you to keep each member happy as the project progresses.
Comfortable Clicks For Nervous Drummers
It is the producer's responsibility to take whatever steps he or she feels are necessary to get the right performance and recording. So, if the producer feels that a click track is essential to a project, it is sometimes the case that he or she will have to talk a reluctant drummer round to the idea of tracking to a click. Once drummers get used to them, click tracks are not really that big a deal, but drummers with no experience of a click are often surprised at how difficult it is to play consistently with one. Obviously, the recording session itself is not the time or place for a drummer to be getting comfortable playing to a click, so this needs to be sorted out at the pre‑production stage.
My own observation is that it is simply through lack of experience that the term 'click track' strikes fear into some drummers, who struggle with the concept of having to follow one. However, in the initial stages the exact opposite should be the case: in other words, the click should be made to follow the drummer. There is always a perfect groove for every part of every song, and obviously, the key to finding the correct tempo for a click track is to work this out. If a drummer can be in a rehearsal room playing a song with a bassist and guitarist at a perfect steady groove and tempo, there should be no reason why he can't do the same with a click track and guide guitar.
One method of working tempos out is to get a recording from a rehearsal where there was a great performance of the song, at least in terms of tempo. It is a reasonably simple process to calculate the tempos of all the song sections and to program a DAW or drum machine accordingly. Another method is to use a product such as Tama's Rhythm Watch or Yamaha's Clickstation to provide a click track and work out the correct tempos during rehearsal, simply moving the bpm setting up or down until the perfect pace is found for each part.  Tama's Rhythm Watch and Yamaha's Clickstation are useful portable devices for calculating click tempos.
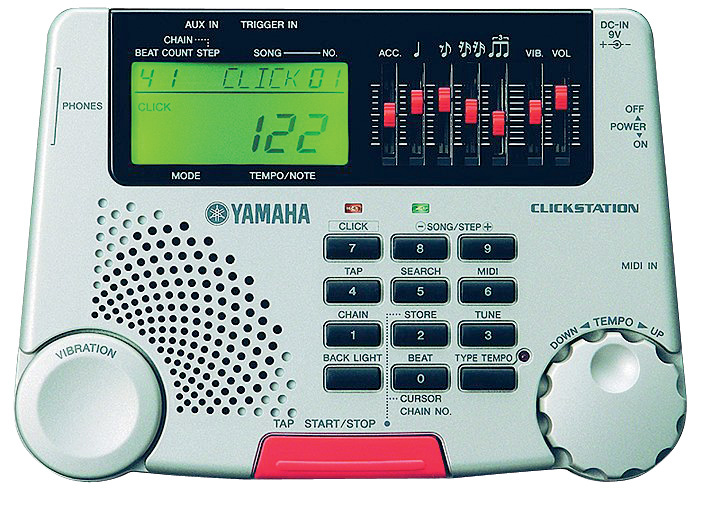
A cowbell, woodblock, or similarly piercing sound with plenty of 'body' is a perfect click sound, as it is easily distinguishable from the sounds of the drum kit itself. Some drummers prefer to have the first beat of the bar differentiated, for instance with a higher cowbell or woodblock. In a situation where a drummer is having problems locking with the groove of the song, it's worth experimenting with a sound for the off-beats. For example, in a standard four‑beats‑to‑the‑bar rhythm, place clicks with a different sound from the down-beats on the eighth notes in between. Also consider moving from quarter notes to eighth notes for slower tempos, as the more space there is between each pulse, the harder it is to keep tight.
In a situation where a band has neither the experience nor equipment required to take care of the tempo mapping on their own, I will go into the rehearsal room with the band and go through this with them. I would then aim at having the drummer practise with the click to get his beats and parts as tight as he can. This is a vital element of pre‑production for the drummer and its importance cannot be overstated.
Creating Your Own Drum Samples
Kick and snare samples created from the same kit used for tracking are an excellent source for drum reinforcements during the mix, even if they are used in combination with other samples. As you'd expect, they will sit with recorded drum performances, particularly the overheads, in a really natural way. During the drum tracking sessions, then, find the time to record a number of really hard individual hits of your kick and snare, as well as a couple of rimshots, which can provide interesting results. Producer Andy Sneap told me: "I always get multisamples of the kit after I've put new skins on.”
I can recommend recording the overheads and also some ambient mics for these hits, as this will give you room to create different samples to experiment with when starting to mix. Here's producer Russ Russell's approach: "To create a snare sample, I'll mix top and bottom mics and the overheads into a good sound, and then export the right hit.” Some producers, such as the legendary Andy Wallace, favour ambient mics to prepare drum samples, whereas others, such as John Cuniberti, take the opposite approach, even to the extent of recording snare hits outdoors in order to minimise ambience.
One Vocalist, Two Mics
Properly capturing the wide dynamic range of a metal vocalist can be a problem. Corey Taylor from Slipknot, for example, sometimes goes from a whisper to a full‑on scream within a single line. This can make it challenging to get a sufficiently intimate vocal sound and full recording level on the quieter sections. I will often compress vocals when tracking, but even this won't necessarily capture the subtleties of the performance correctly. To deal with this, and to allow for continuity of vocal performance, set up two microphones at different distances from the vocalist and record them on separate tracks. The closer of the two will be used for the quieter, breathier sections, with the mic gain set accordingly. Chances are that on the louder sections, the recording from this close mic will clip as a consequence, but the other recording should have a perfect level for the louder section. This option of moving between the two mics allows for a lot of flexibility during the mix.
Video Interviews
 and Russ Russell on the SOS web site.") You can watch video interviews with leading metal producers Andy Sneap (left) and Russ Russell on the SOS web site.
You can watch video interviews with leading metal producers Andy Sneap (left) and Russ Russell on the SOS web site.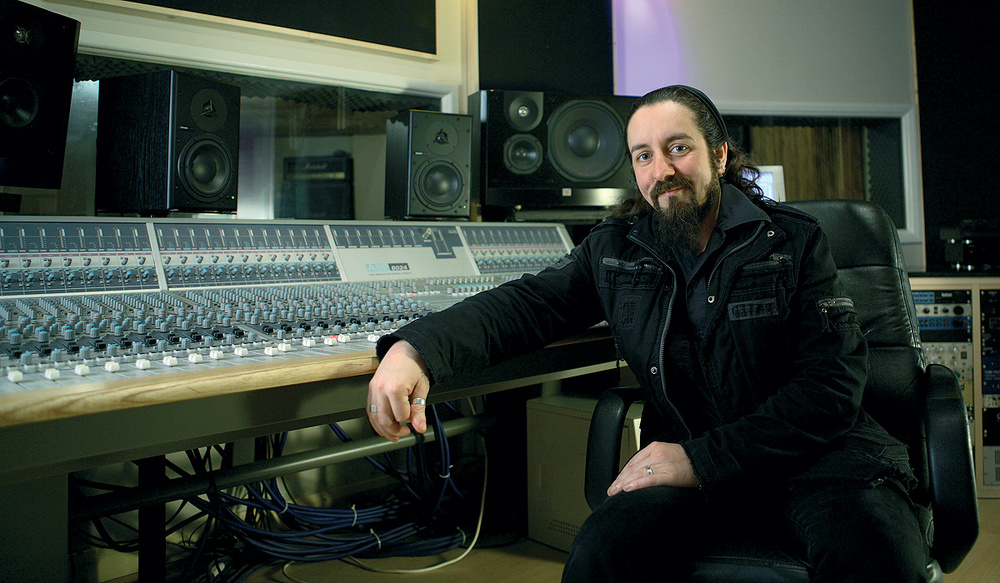
To accompany this feature, I've tracked down two of the leading producers and engineers working in the extreme metal field and pumped them for details of their working methods and technical secrets. The quotes in this article are taken from video interviews with Russ Russell (Napalm Death, Dimmu Borgir, Evile) and Andy Sneap (Megadeth, Testament, Exodus, Arch Enemy, Killswitch Engage, Machine Head), which you can watch at /sos/nov09/articles/metalvideos.htm.