This month we overhaul rock band No Logo's mix in pursuit of a bigger and more commercial sound.
If you can imagine Rage Against The Machine applying their hobnails to Muse's collective arse, then you'll have some idea of the happy world in which this month's Mix Rescue candidates, Stoke-on-Trent three-piece No Logo, reside. Comfortably into black-belt status on their respective instruments, and with a first-rate singer, they also appear to have traded in their fourth band-member at the Crossroads Eternal Pawnbroker in return for dark secrets of mosh-friendly arrangement. The devil always has the last laugh, though, and when I heard the band's mix of their song 'Evian/Naive' it just wasn't doing justice to their material — lots of mud at 80-100Hz, rather muffled vocals, and guitars buzzing around nutlessly at 3-4kHz. So I asked the guys to send me their raw multitrack recordings to see whether it was possible to achieve the more commercial-sounding result that they said they were after.

For the original recordings the drums had been copiously multi-miked: Shure SM57s above and below the snare drum, AKG D112 in the kick drum, AKG clip-on mics on the toms, and AKG C1000s for the overheads and hi-hat. There was a separate DI track for the bass in addition to recordings from two amps: a 15-inch bass combo through an AKG D112, and a separate 2x12 guitar combo through a Shure SM57. Two different guitar parts had both been double-tracked, each pass recorded via two different mics, covering a total of eight tracks. Rounding out the track count were lead and backing vocal takes, all recorded through a Rode NT2 large-diaphragm condenser mic.
Assessing The Raw Tracks
The first thing that was apparent from the raw tracks was that the band had comprehensively chopped them about for their original mix, and they had also sped them up. At the outset, therefore, I edited the raw tracks into something like the same structure (although I went for a slightly shorter intro and longer outro) and sped them up roughly the same amount.
Knowing the kind of thrashy drum performance I was dealing with, I was pleased to find the overhead mics to be surprisingly usable in terms of balance, if a bit clouded by the limited high-frequency response of the C1000s used. The D112 kick-drum close mic added in a typically dependable low end.
The first real problem was that the main snare-drum close mic, although blessed with a decent attack, was fairly dull sounding — often a problem when using an SM57 close up. If the snare sound had been bright in the overheads it would have been fine, but here the overheads were delivering a fairly warm sound.
Of the other drum close mics, I decided to use only the one on the hi-hat, partly because I didn't feel that the others added a great deal, and partly because I was concerned that the creaky old Apple iMac and Logic v6.1.1 system on which I happened to be mixing would otherwise max out before I'd finished the mix!
The low bass-cab track was tonally quite muddy, with some notes booming out erratically (perhaps a problem caused by the hilly response of the AKG D112), and I'd have rather used the DI as the basis of the sound. However, the DI track sounded plain broken, and wasn't going to be any help — it had been taken after the player's heavily overdriven effects chain, rather than straight from the guitar. The smaller cab mainly provided lots of mid-range aggression.
One of the mics used to record the guitar parts sounded like it was inside a plastic cup, so I ditched those four tracks straight away, again reducing the burden on the computer. Both double-tracked parts, the main rhythm and the chorus/solo overdub, were pretty piercing, without a great deal of weight.
 The kick-drum sound was given extra definition using slow-attack compression, and the hits were then limited to make their level in the mix more consistent.
The muffled vocal sounds on the band's mix could be traced back to the original recording, which had a very accentuated boxy mid-range. I'd guess that the blame for this lay with a combination of the recording acoustics and the singer working too close to the mic — the latter probably had something to do with the sporadic clipping distortion too.
Building The Drum Sound: Overheads & Kick
In approaching a mix, I try to work on the tracks I think are most important first, fitting the other tracks around them. In this case, I wanted to emphasise the power and aggression of the track, so I decided to focus on the drums first, followed by the bass and guitars. I resolved to have the athletic bass part, an obvious feature of the track, fairly prominent, which would hopefully also compensate for some of the lack of gravitas in the guitars. All I needed from the vocals was that they have attitude and be fairly audible, so I was happy to squeeze them in wherever I could find space once the backing track was working.

 The original tracks were recorded using an Allen & Heath console and Alesis HD24 multitrack recorder, and the band's mix was then carried out on their home Cubase system.
The first faders to come up were the overheads, which I boosted by 3.5dB with a gentle high shelving filter to re-balance the tonality. Listening to the result more closely, I found myself hankering for a bit more mid-range density in the cymbals, so I reached for Logic' s Clip Distortion. This plug-in benefits from a Mix control, allowing you to adjust how much of the distorted sound you use. In this case, I drove the clipping circuit hard, but filtered it at 650Hz and then mixed it in at 25 percent, so the effect was quite subtle.
Adding in the kick-drum mic gave a nice solid sound without any phase problems. If I'd been mixing another track, I could have easily left this track alone, but here I knew that the bass would be commanding the low end of the mix, so I decided to try a slightly more aggressive sound to help the kick cut through in the mid-range. A more pronounced attack was achieved using about 6dB of compression, with 20ms attack and 49ms release times, and the clickiness of this was emphasised by a broad 8.5dB EQ peak at 3.5kHz.
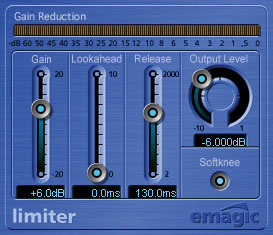
The kick-drum track had a fair amount of natural dynamics, which in another situation I'd have been happy to leave in place. However, I felt that a solid and consistent kick would give the band more of the commercial sound they were after, so I reined in the louder hits with a limiter, dialling in 130ms of release time to avoid undoing the peaky drum envelope I'd already created with the compression.
Snare, Hi-hat, Compression & Effects
The gloves came off for the snare-drum sound, because I wanted to transform a dull 'donk' into something brighter and with more sustain. After experimenting fruitlessly with EQ, I decided on some psychoacoustic enhancement above 1.5kHz to boost the high end, while another instance of Clip Distortion helped to increase the sustain — this time I found that I got the best result with the mix control set to 100 percent effect. The resultant sound on its own wasn't pretty, by any stretch of the imagination, but it combined with the sound in the overheads in the way I was after and was able to cut through the massed guitar sound later on.

 A combination of distortion and psychoacoustic enhancement, courtesy of Apple Logic's Clip Distortion and Exciter plug-ins, was used to transform the dull snare close-mic track into something brighter and more aggressive.A side-effect of the snare close-mic processing was that the hi-hat spill was also given a lot more edge, so I only needed to add a little more body with the close mic. I high-pass filtered the track first to avoid any impact on the low end, and then compressed it with a fast attack to emphasise the sustain of the sound — the important bit as far as I was concerned, given that it was being used much like a ride cymbal through most of the song.
Balancing these tracks together left me with a pretty usable kit sound, so now was the time to set up some mix compression. This song was crying out for a pumping compression sound, and I wanted to start working in this context as soon as possible. Normally we recommend leaving all mix processing to the mastering stage, but when it comes to this kind of compression, the dramatic heaving of the gain-control element becomes part of the mix sound (rather than just a method of loudness maximisation), so it needs to be taken into account while you're making your mixing decisions.
First of all I set the compressor's ratio to 2:1 and dropped the threshold to get about 6dB of gain reduction on the drum peaks. Then I set the attack time by ear to avoid stamping on the attack transients, ending up with a fairly slow time of 35ms, and next set the release time by ear to achieve the required pumping sound, settling on a value of about 100ms. Once the time constants were set up, I went back to the Ratio control and increased it slightly to make the pumping more obvious, but backed off the threshold to decrease the amount of gain reduction to around 3dB. As you start adding in more instruments, you naturally drive the mix compressor harder, so I played things a bit safe while only the drums were going in, and kept tweaking the threshold throughout the mixdown process to keep the amount of pumping right. When it comes to mix compression, you can't really just set and forget.
Before leaving the drums I felt that a little surreptitious reverb would help increase the perceived dimensions of the kit sound. Had I been recording the kit myself, I'd certainly have recorded some distant ambience mics for this purpose, but that wasn't really an option here, so my only recourse was to reach for Logic' s slightly ropey built-in Platinumverb plug-in instead.
 A bright, wide reverb patch helped make the drums nice and splashy, although I did need to notch an annoying resonance out of the reverb return using EQ.
I wanted something which would 'paint out to the edges' of the stereo field, but I didn't really want to overlay a different room sound on the kit, so I biased the plug-in away from its early reflections, and added in mostly just a 2s reverb tail, adjusting the controls to achieve a nice wide spread. With a good dose of pre-delay (96ms), the effect was of the reverb blooming out slightly from each hit, something which interacted quite nicely with the mix compression pumping.
In terms of tonality, I let things splash about a bit by raising the reverb's built-in low-pass filtering to 12kHz, but I also reduced the length and level of reverb below 260Hz to keep the kick sound clean. There remained an annoying resonance which was making the snare seem rather honky, but after some searching with a narrow high-gain peaking filter, I found the frequency I was looking for in the reverb return (580Hz) and notched it out.
It's worth pointing out that I used no gating on any of the drum mics, which is a bit unusual for me, but I was happy that the spill was forming a useful part of the overall sound. However, had I added in the tom mics to highlight the few tom fills, I'd probably have wanted to gate those to avoid things getting washed out.
Bass Salvage: Third Time Lucky!
The bass proved to be the most challenging part of the mix, because the wide-ranging part really suffered from the unevenness of the main cab's response. My first step was to see if I could salvage a comparatively even sound. First of all I tried nailing it to the ground with a limiter set about as fast as possible without generating distortion. This only got me some of the way there, so I also squeezed the sub-70Hz and 70-500Hz regions fairly robustly with 2.5:1 ratios using multi-band compression. The band above 500Hz was boosted by about 12dB to give better support for the guitars, but this revealed a fair bit of rubbish in the upper frequencies, so I gently low-pass filtered at 3kHz to tidy this up.
Initially I pretty much left the sound at that, but when the band heard my first rough mix, they commented that the bass needed more mid-range 'string sound', especially in the solo section where the lead guitar was very thin and skeletal. Revisiting the mix, the guitar-cab track had this kind of sound in it, but behind layers of fuzz which just made everything sound messy. First I high-pass filtered it at 315Hz, to avoid conflict with the other bass track, and checked it for phase, before trying to EQ out the worst of the high-end hash.
Low-pass filtering the sound killed it completely well before it made enough of a difference to the harshness of the distortion, so instead I used a serious high shelving cut at about 6kHz, combined with two deep notches at 3.7kHz and 5kHz. These EQ settings were pretty extreme, and to start with I bottled it and backed them off a little bit, mixing the harsher sound in at a lower level, but this began making the guitars sound too abrasive, and listening to a test mix using my 'v2' bass on a few different systems convinced me to stand my ground.
The other thing which I added on coming back to the bass sound for the third time was some subtle chorusing on the main bass cab to spread it out a little across the stereo image — this is a trick from Andy Wallace, a famous rock mix engineer associated with Nirvana, Rage Against The Machine, and Linkin Park, amongst many others. I was also concerned that the sound was a bit light on the very low bass frequencies, and initially tried to tackle this with EQ, but found that the processing fell foul of the wide range of the bass part — if I got the boost frequency right for a few notes, it was too low or too high for the rest.
The solution was to reach for another less common mix tool, the subharmonic synthesizer, in the form of Logic' s Sub Bass plug-in. This analyses the low-frequency content of your bass line and then lets you add frequencies one or two octaves below it to beef it up. Here, though, I wasn't after anything below the bass guitar's fundamental, so I set the synthesizer simply to generate more fundamental instead. It didn't take too much of this to do the job, and I erred on the side of caution because it's very easy to overdo things like this.
Need Help With Your Mix?
If you're having trouble with a mix, then you can submit your track for the Mix Rescue treatment. Contact us via the email address below. Please include a daytime contact telephone number, some information about how you recorded and mixed your version of the track, and your views about what aspects of your mix are causing you most concern.
Electric Guitars
In order to deal with the vagaries of the rhythm guitar sound. I turned again to multi-band compression, although it was used more to re-balance the tonality than to do much in the way of dynamic range reduction. I set crossovers to 100Hz, 2kHz, and 12kHz, and set up 2.5:1 compression ratios in the two middle bands, catching only the hottest of signal peaks. Using the make-up gain controls, I put the low mid-band about 12dB above the two upper bands, and pretty much filtered off the low end, where nothing useful was happening.
The resulting tracks were now much gutsier, but one of them did still need a couple of decibels of shelving cut at 5kHz to balance it more closely with its partner before I panned them mid-left and mid-right for a typical double-tracked rock sound. The advantage of this panning is that you get the guitars out of the way of the lead vocal, but without skewing the stereo balance significantly one way or the other.
I was happy with the lead guitar part sounding closer to the original recording, so that it would cut through more, although I did feel that it still needed a bit more body, so I gave the two tracks a healthy 4-5dB boost at 200Hz and 600Hz respectively, again bringing the sounds a little closer together in tone. One of the tracks remained quite a lot fizzier than the other, which prompted me to switch in a 12dB/octave low-pass filter on that track just to round it out a bit.
To get an increase in the 'size' of the guitar sound whenever the lead guitars were playing, I improvised something like a 'room mic' sound using two instances of Logic' s distinctly lo-fi Silververb plug-in. With each of the guitars feeding its own short, thin-sounding Silververb, I panned the dry tracks left and right, but not as wide as the rhythm guitars, and then panned the reverb returns hard to the opposite sides of the stereo image — in other words, the reverb from the left-hand guitar was panned hard right, and vice versa. The idea was that the dry tracks would fill out the sound stage between the rhythm guitars, while the reverb would occupy the extremes.
Rescued This Month
 Stoke three-piece No Logo formed in 2003 and comprise Steve Hollyman (vocals, guitar), Tom Carter (bass), and Matt McGuiness (drums). The band have been featured on BBC Radio Stoke and have won a number of local band competitions.
Their recordings so far include three EPs (Scalpel & Heart, Mescaline/Mezzanine, and Signs), with a fourth on the way, and they're all available for free download from their web site.
Fitting In The Lead Vocal
At this point I was getting a fairly reasonable backing balance, so it was time to start slotting in the vocals. I didn't have access to the comped lead vocal used in the band's remix, so I just chose one of the takes for the purposes of getting the mix sound together. First of all, I immediately filtered off everything below 340Hz to remove the worst of the chestiness. A little psychoacoustic enhancement from about 1kHz upwards gave a bit more presence, and about 8dB of limiting levelled out the performance to help the softer syllables survive the general guitar onslaught. I could have left things here, but the haphazard clipping distortion in the vocal part bugged me — it was neither clean enough for a hi-fi sound, nor dirty enough to provide much attitude — so I opted to increase the levels of distortion and go for something a bit more aggressive.
 Here is my improvised de-esser patch using Apple Logic's built-in Multipressor multi-band compressor.Wielding my trusty Clip Distortion plug-in once more, I added in about 15 percent of fairly full-range distortion to give things a shoutier feel, but this also over-emphasised the upper range of the sibilants. Logic v6 has no dedicated de-esser, so instead I used the upper band of a multi-band compressor to deal with the problem, catching any sibilant peaks above 5.6kHz — around 4-5dB gain reduction made a useful difference.
With the lead vocal in the mix, the masking effects of the guitars changed the perceived vocal tonality, so I ended up applying 3dB cut at 270Hz, as well as 2.5dB presence boost at 3.3kHz. I also began to work with send effects to diffuse the vocal across the stereo picture a little, first using a smidgen of the same chorus effect I used on the bass, and then setting up a separate send to a modulated slapback delay.
 When we interviewed top mixing engineer Spike Stent back in SOS January 1999, he recommended making your delays sound different from your dry sounds -- an approach which I followed in this remix.Spike Stent, another high-profile mix engineer, advises keeping the sounds of your delays and reverbs quite distinct from the dry sounds in order to keep your vocals and instruments as upfront as possible, and I followed this approach here: the delay time was modulated quite deeply, resulting in an audible pitch wobble when the effect was soloed; a bit of feedback and some flanging made the sound a bit more characterful; I knocked the phase of the left-channel and right-channel delay lines out a bit to spread the effect; and I high-pass filtered the return to avoid adding in any muddiness.
Experimenting with the nominal delay time, a setting of around 80ms gave a nice kind of 'recorded in a garage' quality, but I also wanted to have the suggestion of a much larger space, so dialled in a second, longer stereo delay. A delay time of around 500ms avoided any tempo relation — tempo-sync'ed delays tend to disappear in a busy mix — but the delay still needed to be quite high in level to make any impression against the guitars. Again, I made this effect very different from the direct sound by filtering it below 1.3kHz and above 7.3kHz, and by pushing the delays out of the centre of the stereo image using slightly different delay times in the right and left channels.
Vocal Double-tracks & Backing Vocals
Because there were alternate lead-vocal takes available, I thought I'd use a couple of them as double-tracks to provide a bigger sound in the choruses. Fading these up showed that this idea worked really well — the loose timing between the different takes gave a nice messy 'mob' feel, and I decided to try to push this kind of sound even further by mixing in a pitch-shifted version of each of the double-tracks as well. I tried pitch-shifts of thirds, fourths, and fifths, but a semitone shift gave the funkiest result. It took a little time to decide on the mix level, as too much effect just made the whole thing sound out of tune, but I kept it as prominent as I could. If you listened to the backing vocals on their own, you could clearly hear the pitch-shift effect, but with the lead vocals and the rest of the track going, it just changed the flavour of the massed vocal sound as a whole. A bit of Logic' s Distortion II plug-in, set to Growl, grunged the double-tracks some more too...
All the backing vocals, including the single harmony, were filtered below 400Hz and boosted at around 3.5kHz to focus on the presence region. They were then treated to the same delay effects that were on the lead vocal, but with slightly more emphasis on the long delay to push them just behind the lead in the mix.
Remix Reactions
No Logo: "When we sent in our track, we were unhappy with the mix of Evian/Naive. Because the quality of the recordings was poor compared to the other songs we had recorded, we found it the most difficult to mix. This was a shame, because we consider this song to be the most 'radio friendly' of our potential singles, and we wanted to see whether a producer with more experience could create a bigger, more commercial sound, to emphasise this.
"The remix is what we had expected, really, with a loud, pumping, guitar-heavy sound, thick vocals in the chorus, and a fat bass. It's less about sounding like a three-piece, and more focused on sounding big! The bass has more low-frequency content now, which was always lacking on our version, and the drums are really punchy, especially the snare. We had loads of trouble trying to get a snare sound like that. The shorter intro on the rescued mix is very cool, and we have started to play this live. Our only concern is the layering of the different lead vocal takes. We recorded them so that we could pick out individual favourite parts and edit them together, so inevitably there are bits of the take used for the lead vocal in the remix that we don't like.
"Thanks SOS for giving us this opportunity — we've learned a lot from the experience!"
Finishing Touches & Automation
With all the tracks now up and running, some small EQ tweaks were still needed. I felt the bass had to be toned down in a couple of areas now that there was more low mid-range in the rhythm guitars, so I pulled down a few decibels at around 100Hz and 250Hz using fairly narrow peaking filters. It was also apparent that there was too much harshness in the 3.5kHz area of the guitars, which was masking out these frequencies in the vocals and drums, making them sound a bit woolly. A few decibels cut on the four guitar channels (using fairly narrow peaking filters) mostly sorted this out, but the entry of the lead guitar and backing vocals in the choruses was still making the lead vocal sound muddier than I wanted. To deal with this I programmed Logic' s automation to raise the frequency of the lead vocal's high-pass filter by 50Hz just at those points.
Now that the lid had come off the tin of automation, I set about introducing some subtle changes in the subjective dynamics, firstly riding the overhead mics and drum reverb return up a decibel during the choruses. Listening back, I experimented with a little of the guitar reverb on the snare and overheads as well, and liked it enough to introduce it during the choruses and guitar solo — whether you like the echo-like effect of this during the solo is a matter of taste, but I think it's quite cool! The kick drum seemed over-prominent in the solo, so I faded it down a whisker there, but I also automated the high-frequency EQ to increase its audibility in the choruses.
While automating the overhead tracks, I made the first of three adjustments in response to the action of the mix compressor, boosting some cymbal hits which were being ducked too ferociously by the kick drum. The entry of the bass at the start of the track was also sounding rather awkward, due to the compression action, so I used some fader automation just at that point to introduce the sound more smoothly.
The final area where the compressor was causing a problem was during some of the rhythm guitar parts, where the occasional chord hadn't been muted cleanly by the player, resulting in a boomy low mid-range resonance sound. Because the chords were being damped on off-beats, the compressor pumping was accentuating them, so I spent a little time automating fader drops to pull them right back out of the way. While I was at it, I also rode the rhythm guitars a fraction down during the choruses to increase the impact of the lead guitars, and sneaked a little of the lead vocal's modulated delay onto them to fatten them up a bit more.
 Here you can see the fader automation for the drum overheads track during the song's chorus -- the fader is pushed up a decibel during the whole chorus, and there are also four fader rides to help the cymbal hits survive the pumping of the mix compressor.The lead vocals were already pretty nailed down in terms of level, and I was happy with where they were sitting in the mix most of the time — loud enough to be heard, but not loud enough to reduce the size of the guitars. However, the lyric 'Show me the story' was having trouble coming through. I initially experimented with automating the fader level, but this didn't drive the limiting or distortion processes any harder, so it didn't sound particularly convincing. Riding the level into the limiter, on the other hand, worked much better. As a final touch, the levels of the backing vocals were increased a little with every chorus.
After tweaking the mix compressor threshold for the final time, I burned a CD and compared the mix with some reference tracks across a few different speaker systems, before coming back and finalising the overall tonal balance. In the end I decided to just brush the sound with a three-band Multipressor in typical super-low-ratio mode to bring out a bit more detail, adjusting the band levels to give a little more of a 'smile curve' tone. I also added 1.5dB more air above 15kHz with shelving EQ, and cut away just a half a decibel of the low mid-range with a wide peaking filter centred at 450Hz.
To achieve something like a commercial loudness, I opted for using just straight digital clipping. Increasing loudness is always a trade-off, and when using digital clipping the main side effect is peak distortion. I tried achieving the same kind of loudness with limiting, but the three mastering limiters I tried all reduced the impact of the drums, so I plumped for the clipped version instead. Before the AES send their ninja death squad round to my house, I feel I should point out that mix clipping is a very common tactic on commercial rock releases, and that I've kept well shy of the levels on records like Red Hot Chili Peppers' Californication. It's important to keep an unclipped backup if you're considering doing this on your own mix, though, in case you want to remaster it at a later date. (That way you can clip it even harder on SACD, naturally...)
A Stitch In Time
My main objective with this remix was to give it more of a sense of power and size compared with the band's original version — my version is still pretty aggressive, but without sounding quite so much like it's trapped in a jam jar! However, despite being pretty happy with the way the mix turned out, I did find the experience quite frustrating. There's only so far you can go at the mix when there are this many problems in the source recordings, especially without high-end processing (as on this occasion). Maybe if I had had a clean bass DI, I wouldn't have had to Moulinex the dynamics out of the cabinet tracks to get a consistent line. Possibly I could have got a clearer guitar sound if I hadn't had to tame the excess fizz first. Perhaps I could have kept the lead vocal glossier if more care had been taken with the acoustics and recording levels during tracking.
In short, if I were in the producer's chair, I'd suggest that No Logo go back into the studio and re-record at least the guitars and vocals, turning down the distortion and experimenting with microphone selection and positioning to get much closer to the final sound at source. That said, real-world mixing does often involve a degree of salvage work, and hopefully this article has suggested some tactics worth trying on those occasions when your own recordings haven't quite gone to plan.
Hear The Differences For Yourself!
I used fairly drastic processing to get from No Logo's original recordings to my remix, and you can hear these changes in isolation by checking out the following audio examples available for download at www.soundonsound.com/sos/oct06/:
- /audio/mixrescue/
 OverheadsOriginal-1006.mp3
The original drum overhead tracks, which suffered from the limited high-end response of the AKG C1000 mics used for the recording.
- /audio/mixrescue/ OverheadsProcessed-1006.mp3
My processed version of the overheads, with a bit of high-frequency EQ boost adding brightness and some filtered distortion giving a bit more body to the cymbals.
- /audio/mixrescue/ kickoriginal-1006.mp3
The raw kick track from an AKG D112 mic.
- /audio/mixrescue/ kickprocessed-1006.mp3
Compression and EQ gave the sound a bit more attack and definition in the mid-range, while medium-release limiting made the levels more consistent.
- /audio/mixrescue/ snareoriginal-1006.mp3
The recording from the snare close mic was too dull to add any presence to the warm snare sound captured by the overhead mics.
- /audio/mixrescue/ snareprocessed-1006.mp3
A dollop of psychoacoustic enhancement and some distortion gave a completely different sound which, although a bit messy on its own, complemented the overheads much better.
- /audio/mixrescue/ hihatoriginal-1006.mp3
The hi-hat track as recorded by its AKG C1000 close mic.
- /audio/mixrescue/ hihatprocessed-1006.mp3
I filtered the hi-hat track to avoid adding low-frequency clutter and compressed with fast attack to emphasise the cymbal's sustain.
- /audio/mixrescue/ DrumsMix-1006.mp3
My final mix balance of the overheads with the kick, snare, and hi-hat close mics, dry and without any compression. Automation is increasing the level of the overheads during the choruses, and is also riding up some of the cymbal crashes.
- /audio/mixrescue/ DrumsMixFXReturn-1006.mp3
Here you can hear the main reverb return without any EQ, showing the annoying boxy resonance.
- /audio/mixrescue/ DrumsMixFXReturnEQ-1006.mp3
The same reverb return, with the resonance notched out using a narrow-band peaking filter at 580Hz.
- /audio/mixrescue/ DrumsMixFXComp-1006.mp3
The complete mixed drum sound, complete with reverb and mix compression. In addition to the overheads' level automation, there's also some of the lead guitar's delay effect mixed in during the chorus.
- /audio/mixrescue/ BassDIOriginal-1006.mp3
The bass DI had been taken from the end of the player's effects chain, and ended up being no real use in building a sound for my remix.
- /audio/mixrescue/ BassBigCabOriginal-1006.mp3
- /audio/mixrescue/ BassSmallCabOriginal-1006.mp3
The bass player was recorded through a 15-inch bass combo using an AKG D112 mic, as well as through a 2x12 guitar combo using a Shure SM57 mic.
- /audio/mixrescue/ BassBigCabProcessed-1006.mp3
- /audio/mixrescue/ BassSmallCabProcessed-1006.mp3
I threw limiting, multi-band compression, EQ, and sub-harmonic synthesis at the bass combo track to try to even out the lumpiness, remove high-frequency hash, and give a bit more audibility in the mid-range. The guitar combo was compressed and filtered to prevent conflicts with the bass combo at the low end and the guitars at the high end.
- /audio/mixrescue/ BassChorusReturn-1006.mp3
The soloed chorus effect which I added fairly subtly to the bass combo in the mix.
- /audio/mixrescue/ BassMixProcessedFX-1006.mp3
The final mixed bass sound, combining processed bass and guitar combo tracks with a small amount of chorus effect.
- /audio/mixrescue/ RhythmGtrsOriginal-1006.mp3
The fizzily distorted double-tracked rhythm guitars as recorded.
- /audio/mixrescue/ RhythmGtrsProcessed-1006.mp3
I used multi-band compression and EQ to try to give these guitars more weight in the mix.
- /audio/mixrescue/ LeadGtrsOriginal-1006.mp3
The double-tracked lead guitars as recorded.
- /audio/mixrescue/ LeadGtrsProcessed-1006.mp3
Although I was happy with the lead guitars being brighter than the rhythm guitars, I did still add in some weight with EQ and filter off some high-frequency hissiness. A bit of fairly subtle reverb processing, with tons of pre-delay, increased the perceived 'size' of the sound a bit.
- /audio/mixrescue/ lvoriginal-1006.mp3
The original lead vocal recording was rather muffled, and included quite a lot of unnecessary clipping distortion.
- /audio/mixrescue/ lvprocessed-1006.mp3
The final dry remixed vocal. Filtering, limiting, psychoacoustic enhancement, extra distortion, and de-essing have all been combined to give a very tightly controlled sound with lots of attitude.
- /audio/mixrescue/ LVProcessedFX-1006.mp3
The remixed vocal with its send effects, including some light chorus and two different delay effects.
- /audio/mixrescue/ BVsProcessedFX-1006.mp3
The combined backing vocals with their remix processing and effects. You can clearly hear the pitch-shift effect.
- /audio/mixrescue/ LVBVsMix-1006.mp3
The complete remixed vocal sound — the pitch-shift effect is already masked a great deal by the lead vocal.
- /audio/mixrescue/ originalmix-1006.mp3
The mix which the band originally sent through to SOS.
- /audio/mixrescue/ remix-1006.mp3
My remix from their original recordings.