 Here you can see the EQ applied to the upright bass to troubleshoot two different low-frequency problems: two notches to target unwanted acoustic resonances; and a combination of 50Hz shelving boost and 30Hz high-pass filtering to selectively support the root of the song’s key chord.
Disappointed with the commercial mix of his band’s track, Barnabas Koch sought the help of our tame engineer...
Given my long association with this column, I end up hearing from a lot of people who are unsatisfied with their own mixes. More recently, though, I’m increasingly receiving emails from readers who’ve invested cash in third-party mixing services, but have nonetheless been left with niggling doubts about whether the outcome really does their music justice. One of these was Barnabas Koch, drummer with one of Europe’s hottest traditional boogie-woogie bands. This trio had recorded their latest album in a local commercial studio, and had been excited to hear how well the tracking-session rough mixes had sounded. When the ‘proper’ mixes started arriving, though, the band felt somewhat underwhelmed with the results, and despite the engineer conscientiously making considerable extra efforts to address their concerns, Barnabas in particular felt that the mixes never quite captured the energy, clarity, and dynamics he’d heard in the roughs.
Comparing those two mix versions of one of the songs, ‘Own Way To Boogie’, I could immediately appreciate the difference in character between them, because the rough mix featured more prominent drums, a fuller bass tone, and generally a more direct sound, given the lack of mixdown effects. However, I could also hear some plus points of what the mix engineer had come up with, as the more polished version had better cohesion of the ensemble, a clearer and more defined piano sound, and generally an increased sense of space and sustain overall. Both versions, however, suffered from some low-end inconsistency in the upright bass, and the vocal presentation felt as if it might be improved as well. So I suggested to Barnabas that I try to address all these issues for him by remixing the song from scratch on my own system.
Now, anyone familiar with my usual mixing advice will know that I normally recommend starting work with the most sonically important instrument, which for my money were the drums here, given the kind of the rhythmic momentum I felt the band were looking for. On this occasion, though, that little rule of thumb went right out the window, because I didn’t feel able to judge the drum balance without having a clear idea of the upright bass’s role in the mix... and I realised I’d never work that out until I’d investigated the source of that instrument’s low-frequency inconsistencies.
A Slap In The Bass
 The on-axis HF boost from the mics had overemphasised occasional string slaps, so Mike applied some fast high-frequency compression to counter this.Once I’d settled the spectral balance of the upright bass, one other thing bothered me about its sound, namely that occasional string slaps were overpowering by virtue of the condenser mics’ inherent on-axis high-frequency boost.
 I tackled this via a two-layer approach, first targeting the upper mic with some aggressive, super-fast compression above 3kHz (using Reaper’s built-in multiband dynamics plug-in), and then mopping up any stray instances that managed to break through that line of defence by manually automating an 800Hz high-frequency shelving cut on the bass subgroup channel.
But why didn’t I just low-pass filter the bass? Well, although that would have achieved similar results as far as reducing the string-slap noises, it would also have unacceptably dulled the spill from the other band instruments, robbing the mix as a whole of some mid-range complexity.
Low-end Troubleshooting
As is quite common on studio sessions, the mic setup for the bass involved a pair of large-diaphragm condenser mics, one set up close to the instrument’s F-hole, and the other a foot or two higher, pointing towards the fingerboard. Between these two options, there was a good combination of low-end power and mid-range character on offer, which meant that I was able to get a basic sound I liked just by mixing them together. A DI signal had also been recorded, but I didn’t think that would sit well with the other acoustic instruments, so I left it on the cutting-room floor.
Upright bass is often one of the harder instruments to record within a band setting, because it’s not as loud as adjacent sound sources and becomes overwhelmed by spill. Had that happened here, the (spill-free) DI signal would have been a godsend, but fortunately the use of an isolation booth at the studio had brought spill down to very manageable levels. However, I suspect this tactic had also exacerbated the second common problem I encounter with small-studio bass recordings: low-frequency acoustic resonances that overblow the fundamentals of certain notes, making musical lines uneven. Once in a while, this can play into your hands, for example if the musical part has a very restricted pitch range and/or the resonances just happen to lend weight to important musical notes. Here, however, the restless walking bass line ruthlessly exposed how the resonances were awkwardly stressing the seventh and ninth tones above the tune’s home-chord root, so something had to be done.
Because these kinds of resonances tend to manifest themselves as an unevenness in the musical line, many people try to tackle the problem with dynamics processing, but this is rarely effective. Even if you iron out all the overall level inconsistencies in this way, the inconsistencies in the bass’s spectral balance remain — in other words the low frequencies of resonant bass notes dominate over the mid-range and therefore sound duller, which is an even thornier mix problem! The good news is that simple EQ actually provides quite an effective fix if you carefully cut just the offending frequencies, and it’s normally pretty quick to find the culprits using a high-resolution spectrum analyser. In this instance, cuts at 72 and 110 Hz really helped level things out, although it took a little experimentation with the amount and bandwidth of each cut to arrive at a suitably smooth musical line.
One other difficulty with capturing upright bass for modern productions is that the instrument naturally tends to put out less power for fundamental frequencies which reach below the 60-70 Hz resonance of the air cavity in the instrument’s body. On account of this, the fundamental of this tune’s key-chord root note (44Hz) was coming through quite weakly when compared with the roots of the IV and V chords (59Hz and 65Hz respectively). As much as this reflects acoustic reality, I figured it made sense musically to try to mitigate this imbalance using a low-shelf boost at 50Hz, combined with a 30Hz high-pass filter to avoid unearthing any unwanted subsonics.
 Mike applied Melda’s MDrumLeveler with a 60 percent Strength setting to gently control the snare-drum levels from hit to hit.These two moves combined gave me a boost of around 5dB for those low fundamentals, which was about as far as I felt I could push this enhancement without ending up with an overly hyped-sounding result. (Had I wanted to push the low end even further, I’d probably have mixed in a low-pass filtered feed from the DI, as this had ample sub-60Hz heft.)
Drum Refinements
I could now bring in the drum mics with greater confidence, knowing that a solid bass timbre was in the bag. For the most part, the drum sound came together with very little effort once I’d found a good-sounding polarity relationship between the mics. For the snare mics, I chose to pull down a dissonant pitched resonance at 545Hz, as well as slightly evening up the hits using a 60 percent Strength setting in Melda’s MDrumLeveler — a plug-in that’s rapidly becoming a favourite of mine for drum balance control. Mixing this with the overheads and room mics, however, I felt that the snare drum became too diffuse once the cymbals were at an appropriate level, so I ducked the snare hits on both those channels to reduce their influence in that regard.
 Three built-in Cockos Reaper plug-ins were used to tighten up a soft, woolly-sounding kick-drum track so that it fit better within the upbeat rhythmic context of the arrangement as a whole. ReaEQ was used to add upper-spectrum bite.For the room mics, all I needed was a compressor, as the snare peaks were well proud of the rest of the signal, but with the overheads I had to feed a ducker’s side-chain from the snare close mic to get adequately dependable results.
A bigger concern was the kick-drum close mic, which was very woolly and slow-moving sonically. With the upright bass now generating enough low-end warmth, what the kick needed was the very thing it didn’t have: rhythmic definition. And it wasn’t just a question of frequency balance (even though a stiff dose of upper-spectrum EQ boost proved to be an important part of the required transformation), because the sound’s envelope needed remedial measures.
 A limited-range ReaGate setting helped to emphasise the drum’s own onset.
 A dose of Transient Controller added further attack to the kick and reduced sustain.Initially, I tried some limited-range gating with fast time-constants (and a few milliseconds of lookahead) to boost each hit’s existing onset impulse relative to its sustain tail, but it needed a further stage of dedicated transient processing before the kick began to sound like it really belonged in such a lively arrangement.
Piano & Bass Clarity
Arriving at a nice, crisp piano timbre also primarily involved deciding how to combine the available microphones, which numbered six in total: four large-diaphragm condensers across the front of the instrument, about a foot inward from the front edge of the case, and a pair of Shure SM58s pointing downwards at the soundboard through a couple of the holes in the metal frame. Although rather an unorthodox miking methodology, it did give a broad range of different timbres to choose from amongst the condenser mics, and the ‘woodier’ sound of the dynamic pair usefully complemented those.
 The secret to achieving a clear, crisp piano sound in this mix was choosing the most appropriate blend and polarity relationship for the six microphones that had been used on the tracking session.
 The setup involved four large-diaphragm condensers pointing at the strings and two dynamics pointing downwards at the soundboard, but Mike ended up jettisoning two of the condensers during his mix.
In the end I chose two of the four condensers to combine with the dynamic pair, and it bears mentioning that I did this before panning anything, to ensure I didn’t get any nasty surprises with mono compatibility later on — spaced-pair piano recordings can be devils for giving you a honky-sounding mono mix if you’re not wary. Furthermore, when I did position the mics in stereo, I didn’t pan them to the extremes either, because (as is also common with spaced-pair close-miked piano recordings) that would have squished the piano almost totally to the edges of the mix, rather than creating an intuitive spread of sound from left to right.
Mixing the piano with the drums and bass revealed that the bass sound I’d developed was being heavily masked by the piano’s mid-range, and was going to need serious extra projection in that zone if we wanted to hear its line with any clarity. For this I turned to Stillwell Audio’s muscular Vibe EQ, cranking its 2.5kHz boost almost 8dB until the character of the bass was coming through more distinctly. Of course, that made it sound rather wiry in isolation, but it only took a few moments to lessen the boost with automation for the song’s single, fleeting bass solo.
In-depth Vocal Balancing
 A layered dynamics approach was used to improve and draw out the details from the singer’s performance and improve her apparent diction. First a slower ReaComp setting evened out the medium-term level differences.The heaviest lifting in terms of plug-in processing was on the lead vocal track. Following some preliminary tuning and timing edits (of the type I’ve often discussed in this column), first up was some EQ, reining in a slightly hard-sounding upper spectrum with a 3dB peaking cut at 3.9kHz and another 2.5dB shelving cut above 6kHz. (Bear in mind that I’d already added general brightness to the band sound with a 12kHz shelving boost from Sonimus SonEQ Pro, so the singer still sounded more than bright enough in that context.) Then I rebalanced the mid-range timbre a touch with a 2dB boost at 800Hz and a 1dB cut at 320Hz, before turning to the dynamics processing.
Although part of the problem with lyric intelligibility in this song was due to the singer’s slight Hungarian accent, the main difficulty was that she’d not sufficiently enunciated the swung off-beat eighth notes of her high-speed rhythmic melody line. Knowing that I’d need to do some serious gain reduction to make significant headway on that, I decided to use several stages of moderate dynamics processing, as that tends to give more natural results than trying to work a single compressor flat out. Then shorter-term dynamics were addressed with fast top-down ReaComp compression and bottom-up processing using heavy parallel compression from Stillwell Audio’s Major Tom plug-in.
To start with, I did some preliminary gain rides to match the most obviously divergent levels between different vocal phrases, and then dialled in some fairly slow-acting soft-knee compression with RMS level detection to conform the overall levels further. With the vocal now within a more closely controlled ‘level window’, I began to target the syllable-to-syllable level differences with a second compressor, using faster time constants, a harder knee, and more peak-sensitive level detection to contain the louder vocal accents that were most overshadowing weaker swallowed syllables.
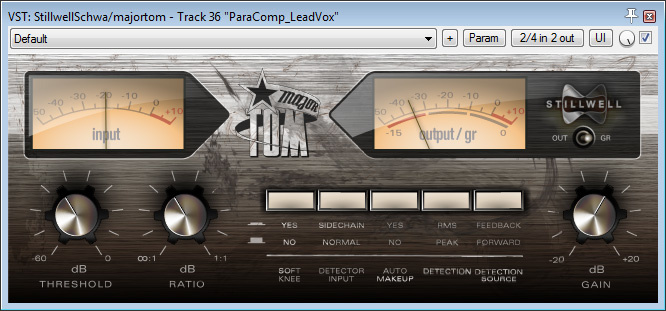 To draw up the lower-level details, I turned to parallel compression, which is particularly well-suited to such applications. I implemented this, as I normally do, by sending some of the vocal signal to a separate channel for compression (in this case with an obscenely fast and aggressive 12:1 compression from the peak-sensitive feed-forward mode of Stillwell Audio’s Major Tom plug-in) and then mixing that back in with the main vocal signal to taste — in this case I had the parallel-compressed signal about 6dB down compared with the main vocal signal. All that compression had, inevitably, emphasised sibilants, but my current de-esser of choice (Toneboosters TB Sibalance) made short work of that, once I’d pre-emphasised the 12kHz zone of its detector circuit to focus it towards the edgiest of the consonants.
While auditioning these compression settings, a couple of other small issues became progressively more apparent: an undesirably piercing vocal resonance on some of the singer’s more open vowel sounds; and a certain variability in the amount of proximity-effect bass boost from moment to moment. My preferred way of dealing with both of these is using a dynamic EQ to compress the offending frequency range independently, which in this instance meant using a narrow peaking band at 1.5kHz and a low shelf at 300Hz, the former carving out up to 10dB while the latter maxed out at a much more modest 3dB cut...
 Fine automation work also played a role, especially in riding up the transitions between syllables.Not that any of this obviated the need to automate the vocal fader extensively! In fact, this vocal needed more automation than I’d usually expect, because I frequently found myself fading up the split-second transitions between syllables in order to clarify the diction, as well as adding attack to occasional words that didn’t sound punchy enough compared with those nearby. Although this probably cost me three hours’ work, the pay-off was that I could subsequently balance the vocal at a subjectively lower level without losing intelligibility, so the singer didn’t have to be so loud in the mix that she made the rest of the band sound small, and the band also remained strong during those parts of the arrangement when she wasn’t singing.
Movement & Interaction
 Cytomic's The Glue was used for master-bus compression.So far I’ve described what I’d call the ‘basic balance processing’ that was involved in this mix: in other words the things I did to hear all the parts clearly and in sensible proportion. It seemed clear to me, though, that the band were hoping for a more assertive enhancement of the performance excitement, and this required more creative processing. In particular, I had a hunch that they’d appreciate a mix with more audible ‘movement’ and interaction between the instruments, so I pulled in a few extra dynamics plug-ins to serve this end.
My first port of call was master-bus compression, driving the 4:1 ratio in Cytomic’s The Glue plug-in harder than I’d normally countenance for acoustic music (a healthy 3-5dB of gain-reduction) and setting a 200ms release time to get a nice gain ‘bounce’ in response to mix peaks. Although I liked the subjective impact of this in general, it did unduly soften the attack of my kick and snare hits, even with a comparatively slow 10ms attack time. The quickest way to work around this is to feed some signal from the kick and snare past the master-bus compressor to the master output. This is a trick I call on often enough that its routing scheme is now built into my standard mix template, so it didn’t take long to get things sounding as I wanted.
 and the master bus (with Cytomic’s The Glue), with medium release times in order to emphasise the energy of the performance by introducing interactive gain-movement effects.") Although the mix balanced fine without it, Mike added additional assertive compression to the upright bass (with ReaComp) and the master bus (with Cytomic’s The Glue), with medium release times in order to emphasise the energy of the performance by introducing interactive gain-movement effects.Although the upright bass levels had been pretty stable in the mix without compression, I nevertheless gave that a good squash using a medium-release patch that introduced some audible modulation of that instrument’s drum and piano spill as well. In a similar vein, I put a gate on the piano tracks to duck them in response to the kick drum, and both those treatments helped intensify the ‘party mood’. Now, I was far from stingey with any of these dynamics processes, because experience has taught me that bolder moves usually play better with clients who’ve been struggling to find a mix presentation that inspires them. As it turned out, though, this was one area of the mix that the musicians felt was a bit overbearing when I emailed them a first draft, and a version with softer and more selective piano ducking ended up being more their cup of tea.
Although the mix balanced fine without it, Mike added additional assertive compression to the upright bass (with ReaComp) and the master bus (with Cytomic’s The Glue), with medium release times in order to emphasise the energy of the performance by introducing interactive gain-movement effects.Although the upright bass levels had been pretty stable in the mix without compression, I nevertheless gave that a good squash using a medium-release patch that introduced some audible modulation of that instrument’s drum and piano spill as well. In a similar vein, I put a gate on the piano tracks to duck them in response to the kick drum, and both those treatments helped intensify the ‘party mood’. Now, I was far from stingey with any of these dynamics processes, because experience has taught me that bolder moves usually play better with clients who’ve been struggling to find a mix presentation that inspires them. As it turned out, though, this was one area of the mix that the musicians felt was a bit overbearing when I emailed them a first draft, and a version with softer and more selective piano ducking ended up being more their cup of tea.
Full Fat
Another round of processing moves were concerned with thickening and widening the band texture as a whole, taking my lead from the band’s original mix. I felt that both the piano and drums had the potential to sound fuller, but I approached this goal in different ways for each. With the drums, I rolled out a trick I always associate with Spike Stent, and which has served me well on many previous occasions: mixing in a subtle single-tap stereo tempo delay. The object is to balance the delayed drumkit signal so that it never quite manifests itself as an audible echo, whereupon it just surreptitiously adds sustain and rhythmic complexity to the direct kit sound, and the beauty of it is that it doesn’t really distance the kit appreciably, as you might normally expect delay effects to do. Furthermore, because the delay time is tempo-related, it tends to be masked by the direct drums quite readily and (unlike reverb, say) doesn’t give its presence away by blurring or spreading the kit’s stereo image.
 The only global reverb in the mix came from a highly customised patch within Lexicon’s MPX Native, itself further processed with Voxengo’s MSED and Reaper’s ReaEQ.In this case I chose to feed the delay from just the snare and overhead tracks, and with a 100Hz high-pass filter in the return to keep the kit’s low end nice and tight. While experimenting with the effect return’s fader level, however, I discovered that the snare echoes were breaking through into my conscious awareness before I’d achieved the desired sustain enhancement, so I also processed the delay effect with a transient processor to tuck those back out of the way.
A couple more parallel compressors paid dividends too, one on the snare track, winkling out more of Barnabas’ shuffled ghost-note details, and one on the piano to lengthen the sustain for the brighter-sounding condenser-mic signals. And, finally, a single global reverb from Lexicon’s MPX Native plug-in helped transport all the instruments into a slightly larger and more flattering acoustic.
 With reverbs, I’m often able to find a preset that’s pretty close to what I need straight away, but this time it took a bit more work to get something that did the specific and subtle job I wanted. In the end, I started work from the Medium Percussion Studio preset, but switched both the Reverb Type and Reverb Attack settings to tighten up the initially slightly washy sound. Then I shortened and brightened things further with the Reverb Time and Rolloff parameters, as well as shifting the algorithm’s emphasis squarely onto its early reflections with the Reflection Level and Reverb Level controls.
 The Lexicon reverb was high-pass filtered with ReaEQ to keep the kick and bass clean.One last tweak involved increasing the default 16ms Predelay setting to 36ms, which unmasked the reverb a touch, allowing me to mix it in at a lower level for a similar degree of subjective enhancement, as well as somehow suggesting a slightly loftier space. I wasn’t quite done yet, though, because an instance of Voxengo’s MSED was also applied to widen the effect’s stereo image, while ReaEQ high-pass filtered it to keep the kick and bass clean.
Boogie Wonderland
At its simplest, the craft of mixing involves little more than resolving masking between an arrangement’s instruments so that they can be heard clearly, and then refining their relative levels to best serve the music. In the real world of project studios, though, it also frequently involves various troubleshooting chores to maximise the usability of recordings that have been compromised in some way during tracking. But don’t forget that most musicians nowadays have come to expect much more than this from a mix engineer — a range of less tangible improvements that improve their connection with the music on a purely emotional level. So don’t be afraid to experiment with more creative processing tricks, such as those showcased in this article, because at mixdown it’s often a case of “who dares wins”.
Remixed This Month
 Photo: Adam PinterThis month’s column features the music of the Balazs Daniel Boogie Woogie Trio, who have been touring an entertaining blend of top-notch traditional boogie-woogie and humorous stagecraft throughout their native Hungary since getting together in 2009.
Comprising pianist Balazs ‘Mr Firehand’ Daniel, bassist Ferenc Zink, and drummer Barnabas Koch, the band now have two CD albums to their name, which can be ordered direct online. Joining the trio on this number is singer Pleszkan Ecska.
Remix Reactions
Barnabas Koch: “I had my best friends (musicians and audio guys) visiting, and we all liked the direction you chose. I like how you’ve based the mix on the rhythmic elements of the drums, bass, and piano, whereas the old mix was based mainly on the piano’s left hand. The vocal in your mix is better too, because it’s more alive, and really delivers the energy and sexiness of our singer’s voice. The whole mix has become warmer, rounder, and a pleasure to listen to, whereas the old mix sounds a bit harsh by comparison. The structure and long-term dynamics are good too, and you managed to keep my attention from the beginning right to the end. It’s party time now! Thank you!”