To achieve success as a self‑producing voiceover artist, you need to be much more than a good recording engineer...
Do you have a great voice? Maybe you're not the world's best singer, but you might still have a good speaking voice. Couple that with a home studio, and you could consider a sideline as a self-producing voiceover artist. Making money as a voiceover artist used to mean living in a big city, mailing out demos, and sitting in traffic in between auditions. As with the music industry, though, affordable recording gear, home studios and broadband Internet have reshaped the job. A work‑at‑home mummom in Manchester can record a phone greeting for a travel agency in Rome; an actor in New York can narrate a video for a tyre company in Russia; or, to offer my own example, an American ex‑pat can record for an ESL (English as a Second Language) textbook, while his Brazilian wife lends her voice to software being developed in the Czech Republic, and all from the comfort of our house in São Paulo.
There are now more opportunities in the voiceover industry than ever before — but competition has never been so fierce — so, in this short series of articles I'll set out what you need to know to get started as a home‑studio voiceover artist, and turn it into a paying job. This month, I'll explain some differences between the voiceover and music industries, and run through the different roles you'll need to become good at. Next time, I'll discuss what makes a good voice, the sort of home‑studio setup you need, and how you can start to get the jobs coming in.
The Aims Of Voiceover
There are two main priorities in voiceover work: the message that you're being asked to convey; and invisibility — by which I mean you never want people to notice your voice. This might sound counter‑intuitive. After all, why not make your voice sound great? Well, you need the listener to focus on the message your client is paying you to get across, rather than your voice itself, so it needs to sound natural. Even for tag lines, where you might think a fuller, warmer, more compressed (or whatever) voice would be appropriate, the production house will often want to perform EQ and compression themselves. This lesson took me a long time to learn, but my clients are much happier when I send them a nice, dry recording. I simply remind myself that I'm supplying the raw material for them to add to their mix, and letting them make their magic.
Even if you're mixing yourself, it's better to add EQ and compression only when you can hear how it will sit with the soundtrack or special effects. Ultimately, it comes down to knowing what your voice will be used for and making a judgement. For instance, if I'm recording a tagline for a TV or radio advert, I'll generally run a mic into a nice preamp (where I might add slight tube warmth, and subtle EQ or compression, just to give the recording a bit of 'body'), and I may do a little de‑essing using a plug‑in when performing any edits. However, for e‑learning jobs, corporate videos and so on, I'll tend not to add any creative processing while recording or editing, and will only use the de‑esser ever so slightly.
Why the difference in approach? Lots of my e‑learning and corporate jobs are done for production houses that will be adding other voices to the mix. Ironically, if I record my voice via a great mic and preamp, and add some nice processing, it can end up standing out from the other voices, drawing attention to itself. The production house will see this as me causing them a problem, even though my recording sounds better than the others!
One Head, Many Hats
You start off each job as a producer, consulting your client and getting briefed on the project at hand. Then you become an engineer, dealing with recording gear and software, setting the mic position and levels. Next, you step up to the mic as an actor, bringing the script off the page and connecting with the listener. Meanwhile, the director in you sits behind the metaphorical glass, making sure the actor doesn't mispronounce a word or stumble through a passage of text. Then you're an editor, cleaning up the best take and sending the resulting audio to your client. You need to be able to perform all of these roles to a high standard, and the better you are at each, the more your business will prosper.
The Producer
In late 2009, my wife Simone received an email from Prague in the Czech Republic. The sender, Mirek Jirku, was heading up a project to record voice messages for the foreign‑language versions of the latest Avast! anti‑virus software. Mirek sent us eight messages to be recorded, specified the fee and deadline, and requested a slow, friendly read. He asked us to send separate stereo MP3 files (at 160kbps or higher quality) for each message, specified that we'd have to sign a non‑disclosure agreement before recording, that we'd need to invoice afterwards, and that he'd pay via a wire transfer instead of PayPal (which is often used for international payments).
In other words, Mirek gave us all the information we needed to start the job. Unfortunately, though, that's not how it usually works! Usually, you'll need to work hard to get all the information you need from your client to do the job well. If you're at all uncertain about their expectations, whether about the performance, or about technical and organisational issues such as file formats or payment procedures, save yourself time and a headache by clearing up all doubts beforehand, and don't hit the record button until your client has given you the green light by email. With that sorted, you can more easily don your other hats and get on with the job.
The Engineer
The engineering role will probably be the most familiar to regular SOS readers, and the issues of technical quality for digital audio in voiceover work are no different than they are for any other recording session. The key difference is that some clients will expect you to deliver 48kHz files instead of the 44.1kHz ones that are usually used in the music business. The 48kHz sample rate ensures that there's an integer number of audio samples for each frame of a standard 24 or 25 frames‑per‑second video recording.
As the engineer, your key job is to select and set up the recording space, choose and position the microphone, set levels and make sure you're recording a good, clean signal at a healthy level. Like music, the louder the signal you want to record, the less audible the noise floor, but you don't want to have to speak louder than sounds natural, and you don't want to overcook things when tracking: any distortion will be very noticeable on an exposed voice part, and an otherwise great take with digital clipping won't be acceptable. If you notice clipping only when you start editing, software clip restoration tools might help to make the take usable, but it's not going to be perfect. Remember that although you may have needed to record 'hot' on analogue tape and older 16‑bit digital recording systems, modern 24‑bit A‑D converters can accommodate a much wider dynamic range, so you no longer have to track so loud: you can leave much more headroom.
Finally, as you complete more work, you can end up with a lot of different files from your projects, so good 'housekeeping' of your sessions and recordings is a must. Glancing at the filename simone_kliass_avast_virus_database_neumann_tlm_103_original.wav, I can easily tell that this is the original recording of my wife's "Your virus database has been updated” message in Portuguese for Avast! on a Neumann TLM103 mic. It doesn't matter what your system is, as long as it works and you can stick to it.
The Actor
A great performance recorded on mediocre gear will always sound better than a mediocre performance recorded on great gear. By preparing well, before the session, you'll find it far easier to relax and focus on the message and the listener.  As a producer, it's important to be clear what the expected format is for the final audio file. Although there are certain 'standards', your clients' expectations will vary.Read through the script, look up any questionable words and check their pronunciation. For American English, which accounts for the majority of my work, my favourite pronunciation resource is the Merriam‑Webster on‑line dictionary (www.m‑w.com), which includes audio examples. If you don't know how to pronounce the name of a company or product, call the company's customer service centre (if anyone can pronounce it right, they can!). If you don't know how to pronounce the name of a person or city, try searching YouTube for news reports on the subject.
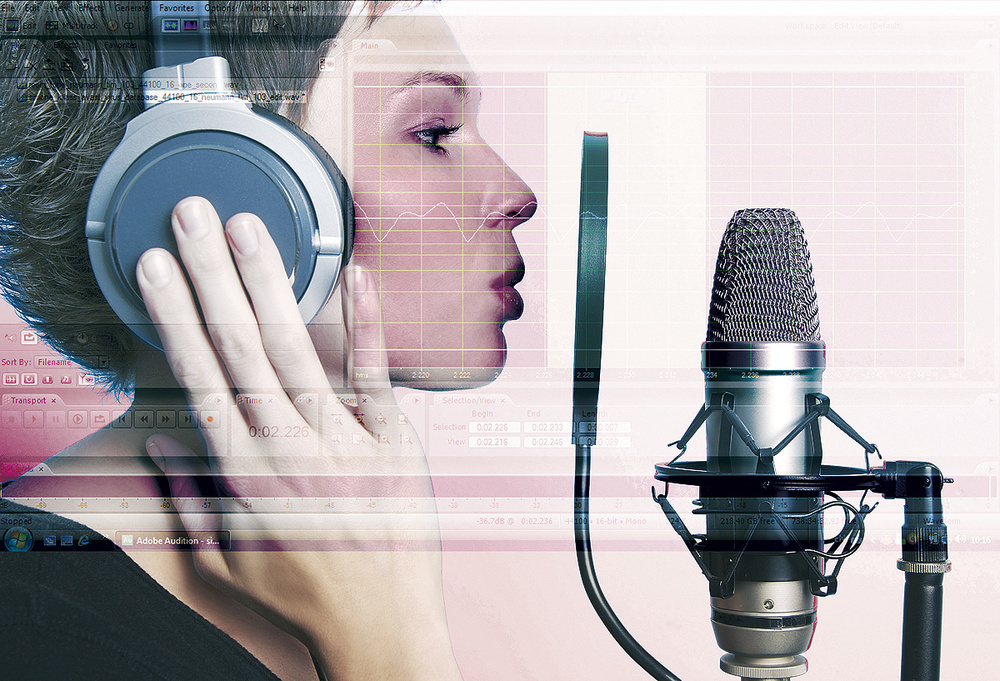
When you come to actually recording your voice, try to think of the mic as the ear of your listener. Picture your listener, have an opinion, and read the script as if the words were coming to mind that instant. The distance between your mouth and the mic should be about the same as the distance between your thumb and pinkie when making a hang‑five gesture (see the picture above). Move closer to the mic when you lower your voice and back off when you speak louder.  version as appropriate.") On‑line dictionaries such as the Merriam‑Webster one pictured here, often include audio examples which can help you clarify pronunciation. Just make sure that you use an American English or UK English (or other language!) version as appropriate. (Remember, while you have your engineer hat on, to take account of this when setting levels.) Always use a pop shield, and I'd suggest trying to work slightly off‑axis, as talking to a point just to the right or left of the mic will prevent bursts of air and drops of saliva ruining your recording. I'd also recommend wearing headphones over one ear only, as this allows you to judge volume and listen for clipping and plosives on the recording, while also hearing your natural voice, which makes it easier to focus on that message we talked about. Simone demonstrates this technique in the picture on the next page. Hhe's working slightly off‑axis and has backed off an inch or two to deliver with more energy.
On‑line dictionaries such as the Merriam‑Webster one pictured here, often include audio examples which can help you clarify pronunciation. Just make sure that you use an American English or UK English (or other language!) version as appropriate. (Remember, while you have your engineer hat on, to take account of this when setting levels.) Always use a pop shield, and I'd suggest trying to work slightly off‑axis, as talking to a point just to the right or left of the mic will prevent bursts of air and drops of saliva ruining your recording. I'd also recommend wearing headphones over one ear only, as this allows you to judge volume and listen for clipping and plosives on the recording, while also hearing your natural voice, which makes it easier to focus on that message we talked about. Simone demonstrates this technique in the picture on the next page. Hhe's working slightly off‑axis and has backed off an inch or two to deliver with more energy. Typically, you'd record with your mouth approximately the distance between your thumb and little finger from the mic, as pictured here.
The Director
 It's a good idea to record with one ear free from your headphones, as this helps you to deliver a more natural performance.When recording solo, I find the role of director the hardest to play. How can you lose yourself in the moment if you're on the lookout for mistakes? If you stop each time you mispronounce a word or use the wrong intonation, your spoken‑word recording will sound choppy and unnatural. It's for this reason that I like to record each job twice. The first time, I push the director out of the room and focus on the message. If possible, I even let the soundtrack of the video I'm narrating play quietly in my headphones, and I don't stop for mistakes any more than I would if I were telling a story to a friend. During the second take, I let the director back into the room, to make sure I pronounce everything correctly and emphasise the correct information — though I still try to keep the performance honest and natural.
Because I've prepared properly, the first take is often the one I end up editing and sending to my client. The second is simply there as a safety net, in case I need to replace any mistakes while editing. It's much better to capture such drop‑ins during the same session as the main performance, as you can be sure that the mic will be in the same place and your voice will have a similar character in both takes.
The Editor
As editor, you need to turn the raw recording into the final version of the file you'll be sending to your client. Editing during a recording session can be problematic, and particularly so if you're recording in a domestic environment. How can you expect to hear the drone of the dishwasher ruining your recording if the dishwasher is still running as you edit? I'll look in more detail at setting up a voiceover recording studio next time, but for now, if recording in a separate room or isolated booth isn't an option, at least try to edit the file the following morning (or maybe at night) when there's less noise around — because hearing your recording with a fresh ear and in a quieter environment will help you to make better editing decisions, and will reveal noises that slipped your attention earlier.
I use the Adobe Audition package to edit my own voiceover work, but the techniques described below can be used in most audio‑editing software. Start by saving a new version of your original recording. (I keep the name of the file the same, but change the extension from _original to _edit.) Next, I'll turn my attention to the end of the recording, where I stepped away from the mic after the second take and recorded about 10 seconds of silence.  Although processing is usually kept to a minimum, dealing with sibilance is important, and Eiosis' De‑esser plug‑in is much more precise than most.Wearing headphones, I can zoom in on this 'silence', turn up the volume, and listen for any background noise. If I notice any constant noise seeping into the recording, I may consider using Adobe Audition's noise‑reduction tool to capture a one‑ or two‑second profile of the silence, and then reduce the offending noise by about 75 percent throughout the recording. I should stress that this is rarely needed, and it's always a last resort, because such processing can generate swirly, metallic artifacts that draw more attention to themselves than the noise you intended to eliminate! But it's good to listen for such issues with fresh ears at the start of your editing session. If you find yourself using noise‑reduction often, that's a sign that you should find a better place to record, or improve the isolation of the space you've chosen. Don't forget that there are other ways to deal with some noise: often, a high‑pass filter is all you will need to clean up a recording, for example. Also remember that if your recording is to be mixed with music, slight background noise won't be noticeable, and that the more exposed your voice in the end product, the more problematic noise will become.
At this point — unless you're tracking for broadcast applications (where they don't work to peak levels) — consider 'normalising' your recording to an optimal level. Normalisation can be used to push the loudest peak to around ‑1dB and increase the volume of the entire recording by the same ratio. Of course, you can also tighten up dynamic range (the difference between the softest and loudest parts of your recording) by manually reducing the loudest sections of the recording before you apply normalisation. On a final note, if you do plan to use a compressor, then you might as well add gain at that stage instead of normalising.
As I've mentioned, most of our clients prefer to do post‑production work themselves, and request the raw (but edited) recordings. Sometimes, though, as in the Avast! job, the client will want the files ready to go, which might mean using slight EQ and compression. The noise floor on my recordings generally hovers around ‑54dB, but by using EQ to roll off frequencies below 80Hz and above 12kHz, I am usually able to lower the noise floor to around ‑57dB without resorting to noise reduction. Using EQ to reduce low‑end rumble and high‑frequency noise will make your recording sound better, and will be particularly beneficial if you'll be adding compression later, as the compressor's make-up gain won't be raising the level of that noise. Used moderately, compression can usefully reduce dynamic range, and thus improve intelligibility of the words, while still leaving you with a natural‑sounding result. Used excessively, it will suck the life out of a recording.
It's only after this sort of processing that I'll start cleaning up the recording and dealing with the gaps of silence between spoken passages. A noise gate (or an off‑line 'strip‑silence' function) can be used to automatically mute sections that fall below a certain level. However, if not used carefully, these tools will clip the 'T's and 'P's off the ends of words, and shut out natural breathing sounds. Worse, if your recording is noisy, a noise gate will actually draw attention to the problem, since your client will be able to hear the difference between room tone and absolute muting. Another trick is to use a downward expander to reduce the noise floor of quiet sections, rather than cut out the noise completely.
Background Room Sound
A better, more natural-sounding way to clean up a voice recording, though, is to paste in strips of 'silence' that showcase your home studio at its best. To do this, wake up early (ie. when your house is quiet), turn on your gear and set your levels for a normal job. Then record a full minute of silence at whatever bit depths and sample rates you're likely to be using. Repeat this process for each different mic you use, and save each file in a folder titled Room Tones, or something similarly suitable.
Next, run these files through any standard EQ high‑pass and low‑pass filters you use, zoom in on the waveform, and select a one‑second strip of silence from each recording. Save these strips as separate files. For instance, on my system, a one‑second strip of silence recorded at 16‑bit, 44.1kHz on a Neumann TLM103 would have this name: room_tone_neumann_tlm_103_44100_16_one_second.wav. Ideally, the noise floor of each strip will be lower than ‑60dB. Now, when you have to remove a bump or a squeak between words, you can paste in a piece of these strips instead of muting, which would draw attention to the edit.
Not all noise can be tackled in this way, though: you need to listen for clicks, plosives, digital glitches and the like. These can normally be acceptably repaired by using a 'heal' tool, or a pencil tool to redraw the waveform. Popped 'p's can often be 'fixed' using a high‑pass filter set at 100Hz. For a single glitch, you can zoom in and cut out the cycle of the waveform in which the glitch appears. Just be careful to start and end the cut where the waveform crosses the centre line, otherwise you'll inadvertently add another digital glitch. If glitches are frequent, it's likely that there's a problem with your audio interface's buffer settings — it may be just a playback issue.
Also listen for sibilance. Strong 'ess' sounds are best corrected at source, by using good mic technique, but sometimes they're unavoidable. If you hear an 'ess' that really sizzles in your recording, you can manually reduce its volume. You can, of course, also use a de‑esser, but do be careful, as applying some de‑essers to the entire audio file can alter the sound of your recording. It often works best to apply them to short sections, either offline or using automation. My preferred de‑esser plug‑in is the one sold by Eiosis (www.eiosis.com), Make sure you record some silence at the end of each take. That way, if a great performance suffers from noise issues, you have something to feed your noise‑reduction processors. Just don't rely on this technique too much! which cleverly separates the esses from the rest of the audio and allows you to manipulate them independently. If you want to learn about some more advanced strategies for de‑essing check out Mike Senior's article from SOS May 2009 (/sos/may09/articles/deessing.htm).
And Finally...
Congratulations! You should now have a finished voiceover recording. Save a final copy with the extension _master and use this version to save another copy in the format requested by the client. But don't think your job is done when you hand everything back to your producer‑self. Running a profitable home‑based voiceover business takes more than building and equipping a home studio and recording and editing audio files. You still have to design a web site, launch a marketing campaign, and secure new clients — all of which is something we'll look at another time.
Read Part 2 now.
Editing Like An Audiobook Pro
 To learn more about Nelson Mandela's Favorite African Folktales, visit www-mandelasfavoritefolktales-com.Perhaps the most experienced voice editors are those who work on audiobooks. Nelson Mandela's Favorite African Folktales won the Audies 2010 Audiobook Of The Year award, and features the voices of Matt Damon, Whoopi Goldberg, Hugh Jackman, Samuel L Jackson, Scarlett Johansson, Debra Messing, Alan Rickman, Charlize Theron and Forest Whitaker, among other artists. Recorded in New York, Los Angeles, London, Miami and Johannesburg, this audiobook was co‑produced, edited, and mixed by Michele McGonigle of New York City's Hachette Audio. I invited Michele to tell me a bit about this project and offer some advice to voiceover artists working from home:
How were performers coached for the Favorite African Folktales sessions?
"This was Alfre Woodard's audiobook directing debut, and she pulled an amazing performance from people. The big [thing] was to remember that these stories were being told in intimate settings, one‑on‑one in most cases, so the talent really needed to speak to the individual listener. An image kept in mind was stories being told around a campfire, back when folktales were passed down by spoken word.”
How many takes were required for each performance?
"We recorded two or three takes of each story, and within those takes there were some pick‑ups [overdubs] for certain lines. When I was editing, I used takes that gave the best delivery, had the least movement or other noise, and provided the most provoking images. In some cases [we used] the first take. Sometimes, after saying a line over and over, one starts to lose the meaning of the line. Pick‑ups should go back to the top of the sentence, making editing much easier.”
Can you describe your typical editing process?
"The editing process for all our titles starts with receiving the Pro Tools sessions or WAV files and the engineer's script, which has the markings of how many takes there were, and which ones the director liked best. In some cases, I use Strip Silence and add a bed of room tone to expedite the assembly edit. In others I'll add the room tone as I move through the audio. Once I had all the final takes to be used in [Favorite African Folk Tales], I went back to do a fine‑edit pass and created notes on any issues, such as misreads, mispronunciations, noises, and so on. With that list, I was able to discuss with Alfre how we would address the issues. Since the actors' schedules did not permit them to come back in to do pick‑ups I had to do some creative editing.”
How should a voiceover artist prepare for a session at home?
"When recording voiceovers at home, you have to focus on performance: keep your energy levels up, stay true to the page, pronounce words correctly and consistently, and make sure you keep to a schedule to make the deadline. Prep well so you don't waste time second‑guessing yourself, looking up words as you go, and remember to not over‑ or under‑direct yourself. Also, make sure you know your recording equipment and room well; being able to quickly make adjustments to mic placement, levels, and so on, will make you more efficient.”
What advice can you offer about mic technique?
"Ideally the talent should be seated, staying on axis, approximately a foot away from the mic, which should be angled back from the face a bit, not parallel to it. You'll need to see what angle provides the best results, usually a few degrees off from parallel works great — and located between the forehead and the nose, not directly in line with the mouth. This will help with plosives, mouth noise, and some other issues. Movement in the booth should be limited, as the microphone is likely to pick up arms flailing, hands rubbing, page turns, stomach growling, and so on. Keep the levels consistent, moving closer if the scene calls for a whisper, or moving back for a loud voice or scream. A well‑versed narrator is capable of delivering a dynamic performance without creating dynamic levels.”
How do you handle issues like sibilance and mouth noise?
"It's always best to address these issues while recording. If a person is sibilant and/or 'mouthy' (clicks, pops, whistles), there are ways to lessen and sometimes eliminate the issues all together: juice from green apples, rinsing with water, repositioning the mic and pop‑filter, and adjusting his or her way of breathing. If there are still issues, I edit out as many of the problems as possible. Often, I redraw the waveform to get rid of issues, or use plug‑ins. We have just started to make use of Izotope's RX 2 Advanced, which works wonders on clicks, crackles, and the like. What I can't fix we try to have the talent come back in to do pick‑ups.”
Have you any final advice for narrators working from home?
"You need to be able to pull the listener in, help them suspend disbelief, become a part of the world the author created, and take the journey with your voice as the guide. Practice your character voices; they must be believable and honest. Work on your accents and timing and delivery within different genres. When reading, read out loud — even if you're not recording or being paid for it. This will help you with flow and dialogue. Listen to other audiobooks and figure out what you like and don't like, then work on these factors in your own performances. Working from a home studio, you have many more responsibilities to consider. Be mindful of them, set attainable goals and know your limitations. Never over-promise and under-deliver to a client. There are many established and aspiring narrators out there, so bring your best to the table.”
About The Author
Jason Bermingham (www.jasonbermingham.com) and his wife Simone Kliass (www.abrazilianvoice.com) record for clients around the globe from the comfort of their home in São Paulo, Brazil.
Audio Examples
To hear the Avast! files and captured 'room tone' discussed in this article, visit /sos/jun11/articles/voiceover1media.htm.