 and moved this into position on the room's rear wall.") In order to create a bass trap for the booth, the team first built a large wooden frame (with corners reinforced using metal brackets) and moved this into position on the room's rear wall.
In order to create a bass trap for the booth, the team first built a large wooden frame (with corners reinforced using metal brackets) and moved this into position on the room's rear wall.
This month the team convert a small empty room into a professional vocal booth within the space of a single afternoon!
Paul Joyner is a music technology lecturer who asked for our help with creating a vocal booth, something we've never before done from scratch. Because we were able to talk to him at the planning stage, he was able to design a room that left enough space for the acoustic treatment, which many people don't adequately consider. Typically, you end up having to cover walls with between three and six inches of treatment, meaning that the room's dimensions shrink by up to a foot in each direction! A small empty booth quickly becomes an unworkable cupboard unless you factor in the space required for the room treatment.
Building A Vocal Booth From Scratch
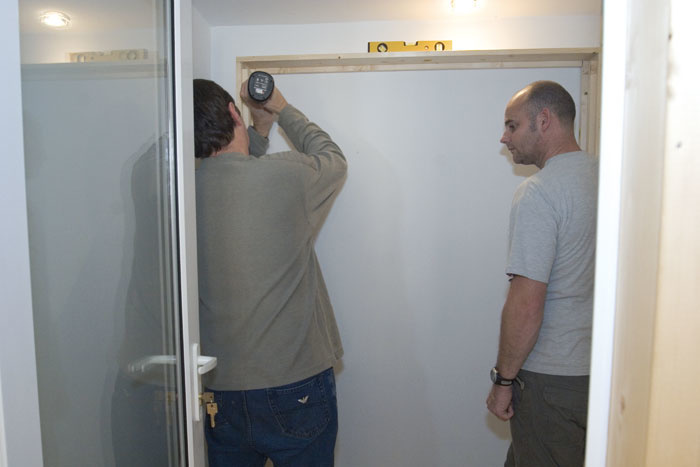
Paul's vocal booth was to be created in a space to the rear of his existing studio control room, and he had walled the area and lined it with plasterboard prior to our arrival. At our suggestion, he'd also fitted an off-the-shelf, double-glazed exterior glass door to the booth to provide a useful degree of sound isolation while still retaining a physical line of sight to the performer. Paul had sloped the ceiling up towards the door of the booth and had also fitted a carpet over his dual-skin chipboard floor, but that was as far as he had got before we arrived. So we were presented on arrival with a bare room measuring around five feet by five feet six inches, with a ceiling height ranging from under seven feet at the back to roughly eight at the front. As expected, singing in this bare room sounded like singing in a cupboard — very reverberant with a pronounced boxy effect and obvious ringing and resonance artefacts.
 Once the wooden frame had been fixed in place, using a combination of screws and cavity-wall fixings, Paul and Hugh stacked a layer of Rockwool slabs to make up the back of the trap.I know that some people have experimented with carpeting the walls of booths, but experience shows that this approach seldom produces usable results. Carpet only absorbs high frequencies, so the mid-range and low end carry on resonating as before, creating a boxy sound with no life at the top end. Then there are those who line the entire thing with Rockwool, but unless this is very thick it still doesn't deal with low-frequency problems adequately and can leave the room sounding very dead and oppressive. The same is often true of thin acoustic foam, which mops up everything above 300-400Hz but leaves the low end to run riot. What we needed was a mixture of absorption and reflection with enough low-frequency trapping to keep the room behaving evenly down to the lowest vocal frequencies and beyond.
Over the past few years, a number of acousticians have experimented using hanging sheets of barrier mat to absorb low frequencies. Barrier mat is essentially mineral- or lead-loaded vinyl, and weighs typically from 5kg to 10kg per square metre. It looks a little like linoleum, but its high mass and reasonable flexibility makes it a very useful material in all kinds of acoustics applications. The advantage of this material is that it allows a trap to be built with much less panel depth than would be required for a simple Rockwool panel, yet it still achieves similar low-end performance.
We decided to build a trap to cover most of the rear wall. We chose the back wall partly because this provided the largest single surface area for treatment, but also because it is the wall behind the singer. When using a cardioid microphone, it is reflections from behind the singer's head and body that get into the microphone and cause the most problems. Soaking up those reflections to stop them from getting back into the mic makes a huge difference. When recording in open rooms, you can clean up the sound considerably by hanging a thick duvet behind the singer, but we know that a lot of people mistakenly put the duvet in front of the singer (behind the microphone) as they intuitively feel this will help. It may help a bit, but the surface behind the singer is the most critical one.
 Here you can see the overall design of the bass trap that Paul and Hugh built for Paul Joyner's vocal booth.The trap we were planning used a high-density Rockwool slab at the back, with a hanging curtain of barrier mat plus two further curtains of high-density felt carpet underlay in front. The key point here is that the felt and barrier mat are left to hang freely within the panel, and can thus move slightly to absorb low-frequency energy. We had around six inches of depth to play with, so we built a wooden frame six inches deep, six feet tall, and four feet wide. The idea was to screw the side panels together in situ and fasten them so the rear wall before we introduced the acoustic materials. The corners of the frame were strengthened with metal brackets obtained from the local DIY shop and battens were fixed to the inside rear edges of the side panels to facilitate fixing to the wall. Barrier mat is surprisingly heavy, so reinforcing the corners of the frame and making sure the frame was fixed very securely to the wall was important.
The spacing between the battens used to fix the side panels and the wall was set at 47 inches, which is exactly right to allow a block of Rockwool cavity wall insulation slab to be wedged between them. Another set of battens was placed inside the front edge of these side panels and set back by the thickness of a batten so that we could fix a few horizontal retaining wooden strips across the front opening prior to fitting the final cosmetic covering material. These would prevent the cover material being disturbed by the felt hanging behind it, and would also provide some protection against performers leaning on the trap. Our frame also included a couple of small horizontal wooden supports at the tops of the side panels, positioned so that a couple of lengths of batten could be slid in from the front to support our acoustic curtains.
Once we'd fixed the frame to the wall using a mixture of cavity wall fixings and screwing directly into the wooden studding behind the plasterboard wall, we wedged the Rockwool in place, where it stayed securely without the need for any form of adhesive. If you have sensitive hands, you should use gloves to handle Rockwool, though the slab is rather less 'nasty' than loose loft insulation when it comes to shedding fibres. Wearing a face mask and safety goggles is a good idea, though, as loose fibres and dust tend to fill the air while you are handling the slabs. According to one major acoustic materials supplier, tests apparently show that Rockwool poses no direct health risk, although it is still an unpleasant irritant.
We needed to cut the last piece of Rockwool slab down to fit the available space, and my bandsaw did this very neatly. Paul also used it to cut any foam panels that needed modifying, but if you don't have a bandsaw, an electric carving knife is very effective. Even an ordinary bread knife works, but the results aren't quite as neat.
Once the Rockwool was in place, we took one of our hanger battens and fixed the top edge of the carpet felt to one side, and the barrier matt to the other using a basic hand stapler. The batten was one inch wide and established the correct spacing of the materials. We then used flat-headed tacks to reinforce the stapled joint — barrier mat is far too heavy to be supported by staples alone. We'd used a barrier mat that weighed 5kg per square metre and which had a built-in fabric reinforcement to prevent it deforming under its own weight (as some unreinforced barrier mats are prone to do). (Paul bought this mat from www.siderise.co.uk, which is a gold mine of studio building materials and information. However, although they'll ship orders for you, they don't accept credit cards so you need to send a cheque in advance. They can also provide very valuable telephone help and advice via their technical department.)
 Once the Rockwool was in place, layers of carpet underlay felt and barrier matting were hung from slats at the top of the trap, and were left to hang loose.
After sliding in our first 'curtain' (carpet felt to the rear, barrier mat to the front), we took a second one-inch batten and fixed another sheet of carpet felt to it. This was then inserted with the felt at the front so that it hung around one inch in front of the barrier matt. The type of carpet felt we used is the fluffy brown material around half and inch thick that smells as though it's made from recycled wet labradors! Modern foam underlays are not suitable for this application, though heavy carpet with a porous fabric backing can be used in this type of trap — as can unloved duvets! Again, handling the carpet felt generates a lot of dust, so a mask and goggles are a fairly sensible idea! From back to front, the nearly completed trap now comprised a layer of high-density Rockwool slab around two inches thick pressed firmly to the back wall, a loose hanging curtain of felt underlay, a single sheet of barrier mat, and then one further sheet of felt underlay, with one-inch gaps between each layer.

 After another layer of carpet underlay felt had been added over the barrier matting, slats were fixed across the front of the trap, with muslin stapled over them for a neat finish.To finish off the trap, we screwed a few protective battens in place across the front, one at a carefully calibrated Average Bum Height and another at shoulder height, with a few more to protect the intervening spaces. We then stretched a sheet of muslin over the frame and stapled it all the way around. You need to take some care here to ensure the fabric is tensioned evenly and has no nasty creases in it. Don't skimp on the staples! Once this was tight, we trimmed off the surplus with a Stanley knife and used PVC right-angle corner strip, again bought from the local DIY shop, to tidy up the edges. This was mitred at the corners using a cheap and cheerful mitre saw. We used a contact adhesive applied with a mastic gun into the crease of the plastic strip to hold the trim in place, and secured the corners with masking tape until the adhesive had set.
The Rest Of The Room
The finished trap did look rather good, and at this stage the room was sounding much better, but we still had the other walls to deal with. For the ceiling, we decided to try out a panel of pyramid-profile foam from Making Waves Audio, as their UK distributor had arranged for them to send some samples over. The panel was around a metre square and four inches thick, and it fitted the ceiling space perfectly without cutting, leaving a little bare plasterboard around the edge. We didn't want to cover all the plastered surface, as some mid-range and high-frequency reflection is necessary to prevent the room sounding too oppressive. We could hear the difference as soon as we fitted this, and it looked pretty cool too!
For the walls, we used some three-inch Auralex panels, which we spaced away from the wall in order to get better low-frequency absorption. However, we couldn't afford the space to use the three-inch foam spacers provided, so we cut these into one-inch slices, again using my bandsaw. We glued one in each corner and one in the centre of each panel. Even using a one inch spacing improves the effectiveness of these panels to a worthwhile extent, and the Auralex spray glue stuck them to the walls with no problem. Two 4 x 2-foot panels were fixed vertically to one side wall, but the other had a small window in it, so we fitted just one panel to that side and then used some smaller panels cut from a thinner sheet of Making Waves Audio pyramid-profile foam to break up the remaining flat surfaces around the window and on the wall around the door. These were again glued directly to the wall using Auralex spray adhesive.
Proof Of The Pudding
To test our handiwork, we set up Paul's Rode K2 microphone in the booth and then took turns to go in and speak while the others listened via the studio monitors. As we couldn't stick foam on the glass door itself, we clipped an Auralex foam 'butterfly' baffle onto the mic stand to help absorb reflections sneaking in from the direction of the door. The difference between the original bare room we started with and the treated room was huge, as we expected it would be, but we were still surprised at just how good the result was. Even pushing the mic into one corner and standing as far away from it as possible in the other corner (about three feet away) resulted in a nice clean sound with no trace of small room boxiness. At the same time, there were enough reflective surfaces left inside the booth that the sound wasn't oppressively dead, and it was quite pleasant to sing and talk in the room.
So although our trap design was to some extent experimental, the end result was as good as we could have hoped for, and it was all pretty simple to do. We left the wooden frame unfinished, to match the other bare wood surfaces in the room, but it would be simple to paint or stain the timber to produce a panel that looked very professional indeed.
 The finished vocal booth, complete with rear-wall bass trapping, side-wall and ceiling acoustic-foam treatment, and a 'butterfly' foam baffle fixed to the stand behind the mic.During our tests, we noticed that the floor of the booth was quite noisy, with a tendency to be a little boomy in response to a tapping foot. We asked Paul what he'd done there, and he revealed that he'd made the floor from two adjacent layers of chipboard , but hadn't bonded these together. Our suggestion was to add an additional layer to increase the mass if possible, but in any event to use additional woodscrews to fix the layers together more firmly. Fitting a thick underlay beneath the booth carpet would help too. Without this, there would be a risk of foot-tapping being picked up by the microphone. A thick, heavy matting made from recycled car tires is available that would be even better in this application, and you can get this from a number of acoustics- and building-product suppliers.
Paul had already fitted a couple of XLR tie points through the wall to allow him to get headphone and mic signals into and out of the booth — although only one of each. To add to the flexibility, we felt he should also provide access for guitar cables, speaker leads and so on — after all, a vocal booth is a great place to put a guitar amp if you want to sit in the studio and record while monitoring the sound over the studio monitors. An easy solution would be to drill a hole in the wall large enough to take a length of plastic waste pipe (1.25 or 1.5 inch) through which cables (and the plugs on the end of them!) could be threaded. Chunks of foam could then be pushed into the pipe at each end to prevent serious sound leakage. Paul thought this was a good idea, because he'd already found the system he'd installed was a little inflexible when he wanted to use his tube mic — the multi-pin XLR cable is very different to a regular mic cable. For our tests we had had to put the mic PSU in the booth.
The complete job took us only four hours (part of which was taken up eating Paul's chocolate Hobnobs, drinking tea, and talking shop), so a job like this is easily within the scope of anyone who feels comfortable doing basic DIY. If there's a point to stress, it is that vocal booths require a decent thickness of acoustic treatment if they're not to end up sounding boxy. However, at the same time you need some reflective surfaces to dispel the 'padded cell' vibe. The biggest part of our project was the rear wall trap, and this cost around £120 in total, though we had enough Rockwool and barrier mat left over at the end to build a second smaller trap if required. Adding the cost of the foam panels and adhesive, the total budget for all the treatment came to around £250-300 — a small price to pay for converting an empty shell into a first-class vocal booth.
Session Comments
 Paul Joyner: "The advice given by Paul and Hugh from the outset was invaluable. The bass trap has made a significant difference to the look and the feel of the room, and with the additional foam added the booth sounds a lot tighter. I've now acted on the advice about the floor area, and this has already made a difference with some foot-tapping vocalists. In all, the day was very successful, and I'm now the owner of a great little space for recording vocals and guitars."