Spectral Views
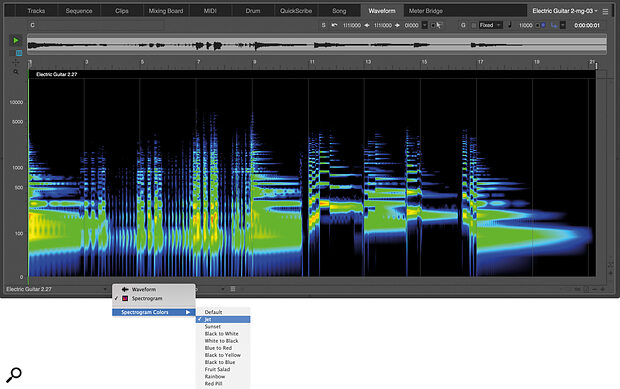
Another new feature in the Waveform Editor is the Spectrogram display (Screen 4), in which the vertical axis shows frequency, the horizontal shows time, and colour (and brightness) indicates harmonic content. (You can also see individual tracks in Spectrogram Display from the Sequence editor.) The Audio Layer is the only Layer in the Waveform menu where you can see it in colour. In the other Layers, you only see a monochrome view when you’ve selected the Spectrogram Display.
To switch to the Spectrogram view, pull down the View Mode menu, which is just to the left of the Edit Mode menu, and choose Spectrogram. From the same menu, select Spectrogram Colors and choose from one of the options in the submenu.
 Screen 4: You can use the shapes available in the Reshape tool to draw in volume effects in the Bite Volume Layer.The Spectrogram view lets you see your Soundbite’s frequency content.
Pitch & Time
In the Pitch Layer, you can apply non‑destructive (ie. non‑permanent) pitch‑correction or pitch changes, similar to doing so in the Pitch Layer for audio tracks in the Sequence Editor.
If you’re working on creating Soundbites, loops or samples, the Pitch Layer has some handy functions. For example, if you want to transpose a whole Soundbite, use the Relative Pitch option. Then you’ll see just a single continuous line representing the audio, rather than the ones that are created for individual notes in Absolute mode.
Take A Bite
The Soundbites Layer is where you can manipulate Soundbites. You can create a new Soundbite from a selection, audition it and set its Sync Point. The Sync Point is critical for determining the positioning of a Soundbite when it’s quantised or moved.
For the most part, you’ll want to set the Sync Point at the first Beat of the Soundbite (which is one of the commands available in the Soundbites Layer), but there might be times when you want to place it after the start of the Soundbite. If you do, the Quantize Soundbite function will look at the Sync Point rather than the first Beat for positioning.
You can manipulate Soundbites in the various Layers of the Waveform editor, but only in the Soundbites Layer can you move a Soundbite directly into the Tracks or Sequence Windows. Open one of those windows above or below the Waveform editor in the Consolidated Window, click on the Soundbite from its header and drag and drop it where you want it in the timeline.
Even More
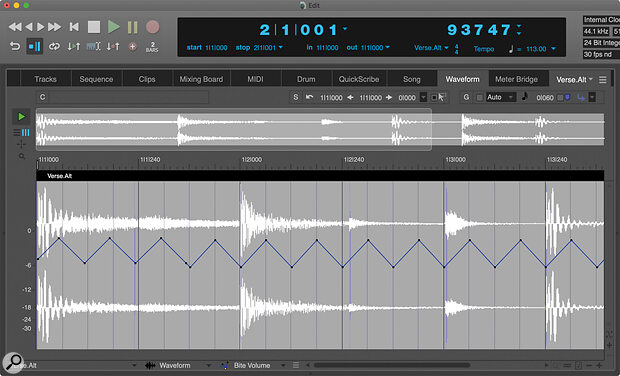
The Bite Volume Layer makes it possible to adjust the Bite Volume of the selected Soundbite. Use the Pencil Tool from DP’s Tool Palette to draw in volume changes, just like you would with volume automation or other continuous data. If you want to create some unusual volume effects, you could use the Reshape Tool and choose a shape for redrawing the Bite Volume, as in Screen 5.
 Screen 5: You can use the shapes available in the Reshape tool to draw in volume effects in the Bite Volume Layer.
The Loops Layer lets you create and manipulate Sampler loops. Open a Soundbite in the Waveform Editor, do whatever editing you want in the various Layers, then open up the Loops Layer, and you can turn it into a Loop by selecting it and choosing New Loop from Selection in the Edit Mode Options menu.
With the loop selected, right‑click it and open the Sound File Information Window. There you’ll see an Audio Loop section at the bottom where you can specify its behaviour (such as play forward or backward) when it’s triggered in a sampler, change its tuning and more.
Those are some of the essential functions of the newly redesigned Waveform Editor. Explore it yourself, and you’re sure to come up with plenty more ways to use it!
