 The hierarchy of audio clips, events and parts. In the Project window is a part containing four events. The Audio Part Editor shows those events, and in the Sample Editor one of them is ready for editing. The Pool shows that each clip is used by an event once in the Project.
We take a look at the concepts of audio files, clips, events, parts and regions in Cubase, and explain how you can manage these objects in the Pool window.
In April's Cubase Notes we looked at processing audio offline in Cubase SX/SL, including the use of the Offline Process History feature for undoing processing carried out on audio files. When you're doing this kind of work, it's important to understand exactly how audio is handled within Cubase — so if you're not sure about the differences between files, clips, events, parts and regions, this should be the workshop to clear up any misunderstandings.
Of Files & Clips
Audio that you record or import into Cubase is stored as a regular file on your hard disk. You'll notice that recorded audio is automatically stored in the Audio folder inside a Project folder, and when you import an audio file into a Project, Cubase always gives you the option of copying that file into the Project folder, so that you can keep all the files pertaining to a given Project in the one Project folder.
However, under the bonnet, rather than representing audio files within the Project Folder as a series of files in the Project itself, Cubase references every audio file used in a Project as an audio clip. The reason for this higher level reference is because of how the Offline Process History works. When you process a section of audio in Cubase, the processed section is stored in a completely different file (in the Edits folder of the Project folder) so that the original audio file isn't actually touched.
The relevant clip is updated so that playback is seamless between the unprocessed and processed files — and because Cubase only presents clips to the user, this whole mechanism for creating extra files for edits is completely transparent and is something you'll rarely need to think about. Basically, you can think of a clip as a playlist of audio files.
When you add audio to the Project window, either by recording it or by importing it, Cubase creates an audio event (which is represented by a rectangular box, as you'll have seen) that essentially triggers the playback of a clip. An audio event doesn't necessarily need to play the full clip — it's possible for the event to start and finish at any point within the clip — and you can even have multiple audio events on different tracks playing from the same clip simultaneously.
In the same way that a MIDI part contains MIDI events, an audio part is a collection of audio events. You can put a group of audio events in a track into an audio part by selecting the appropriate events and choosing Audio / Events to Part. This can be useful when you want to group a series of events into one object for moving and copying, ensuring that everything stays together in the correct positions. For example, say you create a four-bar pattern from four one-bar events and want to duplicate the four-bar pattern several times. Grouping the four Events into a Part makes this easier to manage.
Double-clicking an audio part opens the Audio Part Editor, which allows you to work with the events inside the part just as you would in the Project window. Double-clicking an audio event in the Audio Part Editor opens that event in the Sample Editor, exactly as it would if you double-clicked an audio event in the Project window. To break an audio part back into audio events again, select the relevant part and choose Audio / Dissolve Part.
Regional Variations
The Cubase manual describes a region as a section within a clip, and you can basically think of it as a kind of bookmark or internal reference point within a clip. Clips can contain many regions, and once a region has been created you can make a selection in the Sample Editor based on its start and end points, drag it to the Project window to create a new audio event, or save it to disk as a new audio file.
One instance where regions can be useful is drum tracks, where you might want to define parts of an audio event that contain a good snare drum hit, bass drum hit, or some section of audio you might need to use later on to patch up weaker areas of the same drum track with better hits. You could also apply this same example to any recording, of course, using regions to index bass guitar or vocal notes as well.
 You can define regions in the Sample Editor as reference points within an audio event. Notice how any regions defined in an event are also listed in the Pool.
There are many ways to create regions in Cubase, including manually in the Sample Editor. To do this, open the Sample Editor by double-clicking an audio event in either the Project window or Audio Part Editor (double-clicking an audio part in the Project window always opens the Audio Part Editor).
The Sample Editor always shows the complete clip that an audio event is taken from, but the parts of the clip not used by the audio event you're editing are always greyed out. You can see the list of regions for the clip being displayed in the Sample Editor by enabling the Show Regions button on the Sample Editor's toolbar. This is the second button in, to the right of the pop-up menus.
To create a new region, simply mark up the area you'd like to define as a region, select Audio / Create Region (or click the Add button in the Region List), type in a name for the region and press Return. Once the Region List is visible, you can select a region by clicking in the unlabelled column to the far left of the list.
Clicking in the Description column renames a region, and clicking in either the Start or End columns allows you to change these values by typing in new positions. The currently selected region is always shown by default in the Sample Editor and you can remove a selected region in the list by clicking Remove, or select the area in the Sample Editor defined by a region by clicking Select.
When a region is selected, you can resize it graphically by dragging the Region Start and End flags in the Sample Edit window, just as you can change the start and end points of the audio event you're editing by dragging the Event Start and End flags.
Once you've defined regions, such as drum hits, notes, or other useful sections, you can use them in your Project by dragging the region from the unlabelled column in the Region List to the Project or Audio Part Editor windows, which creates a new audio event based on that region. As a side note, regions can be automatically created when using Cycle Record Mode, to indicate different takes of the same recording if you record those takes without stopping in between each take, as discussed in November 2002's Cubase Notes.
Organising The Pool With Sub-folders
 It's easy to organise clips and events in the Pool into folders and sub-folders, although these exist only in the Pool and don't affect how the audio files are organised on disk.The Audio folder in the Pool can soon fill up with hundreds (and thousands) of audio clips, so in order to keep things nice and tidy you can create sub-folders inside the Audio folder to organise the list of clips. For example, you might want to organise all your imported drum loops into one folder, use another folder for newly recorded audio, and an additional folder for files you imported from another musician you're collaborating with.
To create a sub-folder:
- Select the folder in which you want to create a sub-folder.
- Choose Pool / Create Folder, type in a name for the folder and press Return.
- You can later rename a folder as you would a clip, by simply double-clicking it, typing in the new name and pressing Return. It should be noted that these sub-folders only appear in the Pool and aren't created in the Audio folder inside the Project Folder on your disk, so the files that the clips reference are unaffected.
Once you've created a sub-folder, it's possible to place clips in it by simply dragging them on to that sub-folder. Newly recorded clips are always automatically placed inside the Pool's Record Folder (indicated by the word Record in the Status column), which is the root Audio folder by default. When you import audio, however, the new clip is created within the currently selected folder. To change the Pool's Record Folder, simply select the folder you would like to define as the Record Folder and choose Pool / Set Pool Record Folder.
Dive In If You Want To Know
To help you manage the audio clips and associated regions used in a Project, Cubase provides the now somewhat infamous Pool, which is basically a catalogue that lists every audio clip you've recorded or imported into the Project, along with any regions you might have created within those clips. Open the Pool by selecting Project / Pool or using Control/Apple-P. By the way, it's worth noting that you can import files into the Pool without having to place them in the Project window, by clicking the Import button on the Pool's toolbar or selecting Pool / Import Medium. This is great if you have a whole set of drum loops that you might want to use in a Project, for example, but you're not sure which ones you're actually going to use. Importing all the possible loops into the Pool allows you to organise and audition them, dragging the loops to the Project window if you hear something you want to use. This saves you having to create multiple tracks in the Project window, enabling and disabling the mutes to audition the audio.
The Pool contains three folders, labelled Audio, Video and Trash. Audio clips are placed into the Audio folder, video clips are placed into the Video folder (for when you're working with desktop video files), and the Trash folder works much like the Trash or Recycle bin on the Mac or Windows desktops. Expand or collapse a folder in the Pool by clicking that folder's expand ('+') or collapse ('-') button, or collapse and expand all the folders in the Pool by clicking the Expand or Collapse All buttons on the Pool's toolbar.
 The Pool keeps track of all the audio files, clips, events and regions used in a Project, and also provides a Trash folder to help you manage deleting files from a project, in addition to keeping track of any video files and clips.
Because regions are references within audio clips, the Pool also keeps track of the regions that have been created and groups them with the relevant clips, allowing you to work with regions in almost exactly the same way you'd work with the original clips themselves. If a clip has an expand button, you can click this to see the list of regions that have been created within that clip.
You can place a clip or region from the Pool as an event on the Project window by simply dragging it, and Cubase will create an audio track for you automatically if one doesn't already exist. Alternatively, place the selected clip or region on the selected track in the Project window (at the current location of the Project cursor) by selecting Pool / Insert into Project / At Cursor. It's also possible to use the Pool / Insert Into Project / At Origin command to place a clip back into the Project window at the point it was originally recorded.
Sometimes you might want to update the Origin Time for a clip, however. Say you've recorded something but you came in slightly early. Moving the audio event that plays the relevant clip forward a little in the Project window, so that everything is in time is, of course, very easy, but doesn't update the Origin Time recorded for that clip. In other words, inserting this clip as an event in the Project window at the Origin Time will always insert it in the original, slightly early position. So to update the Origin Time of a clip or region to the current location of the Project Cursor, select the appropriate clip or region in the Pool and select Pool / Update Origin.
To save a region as a new clip (which also means as a new audio file on your disk), first select in the Pool the region that you want to save as a new clip. Now select Audio / Bounce Selection (this command is also available from the Quick Menu) and choose a destination folder in the file selector that appears (you'll probably want to select the Audio folder inside the Project Folder). A new clip is created in the Pool, referencing the new file that's been created in the Project Folder based on the region you selected. Note that the region's name is used for the clip by default, although you can change this if you wish.
Creating new clips (and so files) from regions in this way is useful when you want to make modifications to a region but you don't want to affect the clip from which the region is derived. For example, say you have a region containing one snare drum that you want to duplicate in the Project window and apply an effect to: you don't want this effect to be heard when the original clip is played back. Bouncing the region to a clip/file, as described above, and then applying the effect to the newly created clip will leave the original clip intact.
You can audition a clip or region in the Pool by selecting it and clicking the Play button on the Pool's toolbar. Clicking the Play button again while the clip or region is playing will stop the playback. If you also have the Loop button activated on the Pool's toolbar, the selected clip or region will be looped when you press the Play button, until you either press the Play button again or deactivate the Loop button. It's worth noting that the Play and Loop buttons on the Pool's toolbar are completely independent of the transport controls for the Project.
A Guide To The Pool's Columns
Media
This column is always visible and lists the name of the clips and regions used in a Project.
Used (Use Count)
The number of times an event in the Project references a clip.
Status
There are four possible icons, which can indicate whether:
- [~] The clip has been processed, and therefore plays back from multiple files.
- [?] The file references by the clip can't be found. (See the main text for info about renaming and deleting files in a Project to avoid this situation!)
- [X] The file referenced by the clip is stored externally and isn't located in the Project folder. The total number of external files is detailed in the Infoline at the bottom of the Pool when the Show Info button is active on the Pool's toolbar.
- [R] The Clip has been recorded since you last opened the Project, which is handy for seeing recently recorded clips at a casual glance.
In addition to these four icons, the word 'Record' is used to indicate the folder that newly recorded clips will be placed into.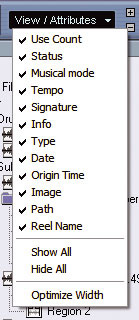
Musical Mode
This checkbox allows you to enable and disable Musical Mode (automatic, real-time timestretching) for a clip, rather than doing it in the Sample Editor, which is actually rather helpful when you're working with a large number of clips in Musical Mode, since it saves you from opening, closing and re-opening the Sample Editor multiple times. The only catch is that before you can enable Musical Mode a tempo must already have been specified: if not, Cubase will prompt you to enter a tempo before enabling the mode.
Tempo
The tempo of the clip, used by Musical Mode (see above). It's possible to change this value by clicking on it, typing a new value and pressing Return. Unless you import an Acid-format Wave file, the tempo of the audio will be unknown to Cubase and displayed as question marks.
Signature
The time signature of the clip, which is 4/4 by default (unless specified in an imported Acid-format WAV file) and can be changed in the same way as the Tempo value.
Info
Where the original file that the clip references is stored on your disk.
Type
The file format used to store the clip — for example, WAV or AIFF.
Date
The date and time when the clip was created.
Origin Time
The location in the Project at which the clip was originally created. When you're importing audio files, note that only Broadcast WAV files (not regular WAV or AIFF files) contain time-stamps to fill the Origin Time field.
Image
A visual representation of the clip or region's waveform. You can also click on this image to audition the clip or region, onwards from the point at which you clicked.
Path
The full path-name of the file, allowing you to see exactly where on your disk the file is stored. This is particularly useful when dealing with files that are external to the Project folder.
Reel Name
This field is filled only when audio files are imported from OMF files and contain a reference to a Reel Name, useful if you're importing OMF from Avid, for example, where you want to keep track of what video/film reel the clips originally came from.
Pool Management
Like the list-style view for navigating computer disks and folders on your desktop, the Pool consists of a number of columns that give you different information about clips (see the screen on page 264). You can choose which columns are displayed by toggling the options in the View pop-up menu on the Pool's toolbar, and you'll notice that there are also Show and Hide All commands available from this menu, so you can show or hide all the available columns with just one mouse-click. Optimise the width of the columns to the smallest width that's useful by selecting Optimize Width from the View pop-up menu. Should you want to, you can also change the order of the columns horizontally, by simply dragging their titles to a new position.
It's possible to organise how the list of clips appears in the Pool by clicking on the column titles, just as you might on Mac or PC desktop windows. By default, the clips are listed in alphabetical order according to clip name, which is indicated by the upwards arrow in the Media column. However, you can click on any of the other column titles to list the clips according to the data represented in that column. A second click in the same column reverses the order of the list.
As mentioned earlier, the Pool exists as a way for you to manage and keep track of the clips and regions used in a Project, so it stands to reason that there are many useful facilities available for keeping the Pool nice and tidy. To begin with, there's a handy Show Info button on the Pool's toolbar that toggles the appearance of an Infoline at the bottom of the Pool, to give an overview of the clips used. From left to right, the Infoline details the number of audio files in the Pool, the number of files used by events in the Project, the total size of the audio files used for clips in the Pool, and the number of external files referenced by clips in the Pool (external files are ones not inside the Project folder).
Renaming & Deleting
A clip always takes the same name as the file it references in the Project folder. If, for some reason, you want to rename either clip or file, you should never rename it in the Project folder in the same way you might normally rename files on your computer. If you do, Cubase will no longer be able to find the renamed audio files and recognise them as part of your Project. Instead, to rename a clip (and the actual audio file), double-click the name of the clip in the Pool's Media column, type in a new name and press Return. You'll notice that both the clip and the file on disk are updated to take on the new name, and it's worth noting that where you have a clip that references multiple audio files the first, or original source, file is the one that is renamed. Regions can be renamed in the same way, although this has no effect on the name of the associated clip or any of the files that are stored on your disk.
In the same way that you shouldn't rename audio files used in a Project from your computer's desktop, you absolutely shouldn't delete audio files from a Project Folder as you'd normally delete other computer files. Use the features within the Pool to do this instead. The Pool has a two-stage process for deleting clips (and so files) that works in much the same way as you'd delete files on your computer normally — first dragging them to the Trash or Recycle bin, then 'emptying' it.
- Select the clip (or clips) you want to delete and press Backspace. If you're trying to delete a clip that's used by an event in the Project, Cubase will warn you that the clip is still being used and ask whether you want to delete all occurrences of events that use the clip in the Project. If you do, click Remove; otherwise, click Cancel, which aborts the deleting process.
- Cubase will prompt you to specify whether you want to move these clips to the Trash folder (for deleting) or just remove them from the Pool. If you want to delete the actual audio files from the disk, in addition to removing the references to the clip (or clips) from the Pool, click Trash. If you just want to remove the clip (or clips) from the Pool, without deleting the audio files on disk, click Remove from Pool. (If your intention was always to move these clips to the Trash folder, you can also simply drag the required clips to the Trash folder.)
- Once you have some clips in the Trash folder that you want to delete, simply select Pool / Empty Trash, and Cubase will ask you again whether you want to delete the files from disk or simply remove the references from the Pool. If you want to delete the files permanently, click Erase. To simply remove the clips from the Pool, click Remove from Pool.
If you delete all the events from the Project window that reference audio clips recorded since you last opened the Project (any flagged with the 'R' record icon in the Status window), an interesting behaviour to note is that Cubase will automatically move the clips to the Trash folder for you. You can later remove them from the Pool or delete the file altogether by following the last step above.