Making multitrack live recordings has never been easier — but mixing them can still be a challenge!
From a technical point of view, recording a live show is probably simpler today than it has been at any point in the past. Digital multitrack recorders are more affordable than ever, and the likes of the JoeCo Black Box Recorder and Allen & Heath ICE 16 are designed expressly for the purpose. What's more, an increasing number of mixers now offer hassle-free multitrack recording, either to an attached computer or straight to a USB storage device. At the same time, parallel developments in the world of live sound mean that even small venues now routinely mic up almost everything on stage.
In theory, then, multitracking a live show could be as simple as plugging in a USB pen drive and pressing Record. In the real world, of course, this is rarely true and, as with any recording project, the more care and attention you can devote to capturing the audio at source, the better your results are likely to be. The practicalities of recording gigs were covered in Matt Houghton's workshop in SOS November 2011 (/sos/nov11/articles/recording-live-show.htm), so rather than repeat his wise words, I'll refer readers back to that article for detailed advice. Instead, this article will focus on some of the issues that can arise when you get your multitracks back to a DAW-based studio, and what you can do at the mix stage to get the best from a live recording.
The Starting Point
 This screen shows the two-stage approach to mixing a live set. Preparatory work has been done on the session as a whole, and I'm now working my way through mixing each song individually. These will be saved to separate new sessions.
The first stage is to find out exactly what you have. If the recording was made to a digital multitracker of some sort, that probably means a bunch of mono tracks without meaningful names, usually spanning the entire length of the band's set. Once you've lined these up in your software of choice, you'll need to go through them and figure out what each track represents. Unless you took careful notes at the gig, this can be surprisingly challenging! It's not unusual to encounter a file that apparently consists entirely of off-axis spill from other sources, or something that might be an audience mic but also seems to have picked up the banjo player scratching his arse. Just because 16 tracks got recorded doesn't mean that all 16 channels were in use on the night; but by the same token, there's not much you can do at the mix if a vital instrument was not recorded. Likewise, in an ideal world your tracks will have been recorded pre-fader, without desk EQ or compression, but we don't live in an ideal world...
With the files loaded into your DAW, it's worth scanning quickly through them for potential pitfalls. Spotting pops, thumps, clipping and bursts of white noise visually before you press Play could save you a headache, but there are also more subtle issues to watch out for. Most live sound engineers will find reason to tweak channel gains at some point during a performance, and there are even one or two who like to leave their faders at zero and use the gain knobs to mix. Alternatively, you might have been given post-fader recordings. In either case, the waveform of the resulting audio can look like a boa constrictor after several hearty meals, and it's a good idea to start by compensating for any obvious gain variations, so as to create a level playing field for the actual process of mixing.
Depending on how sudden and how frequent the variations are, there are several possible ways to do this. One is to chop the audio into a number of regions or clips and normalise them, or apply clip or object-based gain settings to bring them all into line. If the changes are gradual, though, it's often easier to use level automation to bring the track to a consistent subjective level. It can then either be rendered or bussed to a new track for mixing.
All Or Nothing
 Live sound engineers frequently adjust mic preamp gain in mid-set. Unless you are taking your recordings from a mic-level splitter, this will be reflected in the levels going to disk. In this screen, you can see where the FOH engineer trimmed the keyboard gain in several places.
Another issue that has to be faced early in the mixing process concerns how to tackle the gig as a whole. Should you mix the entire show in a single DAW project, or split it up and mix each song in its own project? There are pros and cons to both approaches. The continuity provided by the first approach can be valuable, especially if, for instance, your mixes are to accompany a film of the show. On the other hand, unless you simply start at the beginning and work your way through the gig, you'll have to be very careful that changes you make in one song don't disrupt work you've already done elsewhere; and you may well find that different songs, in fact, call for surprisingly different mix treatments. For this reason, my own preference is for a two-stage process. I'll start by doing as much as can be done to the project as a whole. This might include basic EQ and dynamics settings for each track, grouping and routing, setting up reverbs and other auxiliary effects, and any problem-solving processes that need to be applied throughout.
With this done, I'll use the Marker track in Cubase or Pro Tools to identify the start and end of each song within the set. When I've chosen the song I want to mix first, I'll do a 'Save As...' and save it as a fresh project, but still containing the entire set. Once that one's mixed, that project can in turn serve as the starting point for a new 'Save As...' and another song, and so on. This means that each song in turn inherits any refinements I've made to the basic mix template, but changes made in a new project won't affect songs that have already been mixed unless destructive offline processing is applied. (Remember that clips or regions in DAW projects are simply placeholders for files on disk, so there are no disk-space costs associated with having multiple projects that reference the same entire gig-length files.)
You could begin your mix with the first song of the set, but this can often turn out to be a special case which is different from the rest of the performance musically, or which suffers from start-of-set technical gremlins. I prefer to dive somewhere into the middle and look for something representative; if it's a rock band, that means not choosing the one lighters-in-the-air ballad in the set, nor the one where they all swap instruments, for example.
Magic Moments
 to tame the bottom end. As you can see from the disabled EQ bands, though, I couldn't control the honky mid-range frequencies adequately with an equaliser, and ended up having to use multi-band dynamics (right-hand side of the screen).") Controlling the overall spectral balance of a live recording can be challenging. Here I'm using a conventional EQ (left) to tame the bottom end. As you can see from the disabled EQ bands, though, I couldn't control the honky mid-range frequencies adequately with an equaliser, and ended up having to use multi-band dynamics (right-hand side of the screen).
Controlling the overall spectral balance of a live recording can be challenging. Here I'm using a conventional EQ (left) to tame the bottom end. As you can see from the disabled EQ bands, though, I couldn't control the honky mid-range frequencies adequately with an equaliser, and ended up having to use multi-band dynamics (right-hand side of the screen).
The fundamental goal of mixing is, of course, the same whether you're dealing with a studio recording or a live multitrack: to achieve a pleasing balance of the various sources. However, there are a number of ways in which live multitracks often differ from studio recordings, and the focus of this article will be on the specific issues that arise in mixing a live show. Because live recordings are very different, it's worth tracking down some good commercial examples to use as references while mixing, rather than relying only on studio tracks. If the band you're mixing have good studio recordings, they can be very valuable mix references too.
Any recording studio worthy of the name should have well-controlled acoustics, and any recording engineer worthy of the title will spend time choosing microphones and positioning them and the musicians within the space, in pursuit of the best possible recorded sound for each individual instrument. In a studio recording, separation between sources will usually be pretty good even if they're recorded simultaneously, and will be absolute with anything that's overdubbed. Studio performances are usually well controlled, and are frequently edited or otherwise doctored to bring pitch and timing into line.
By contrast, the acoustics of live venues can be extremely variable, and in a live setting, the band will be crammed together in a relatively small part of the overall space, and will be playing with more vigour and less refinement than in the studio. Mic choice is often dictated more by what is available than by what sounds best, while default placement is often simply as close as possible to the source — despite which, unwanted spill is inevitable, not only from other instruments and their amplifiers, but from monitor wedges, front-of-house speakers and reflections from all of the above bouncing about in the room. The only instruments that will be miraculously spill-free will be those that were amplified, and hence recorded, through DI boxes: most keyboards, acoustic guitars, electric violins, and so on. Very often the bass guitar signal will have been acquired through the amp's DI output, too.
 Live vocals almost always contain spill from other sources, especially drums. As a consequence, you're unlikely to be able to use heavy compression as an effect, and instead, you may need to do detailed fader rides, as shown here. Note that in the sections where there is no singing, the vocal mic signal is attenuated but not completely muted. This helps to avoid too abrupt a change in the sound of the mix as a whole when the vocal and its spill are brought up.When we record and mix a band, we are creating an illusion. In the studio, that might mean replicating the impression of having the band straightforwardly perform to the listener; but it frequently does not, and we all have an arsenal of mixing tricks that can make sources sound 'big' rather than necessarily 'real'. With a live recording, by contrast, the aim is usually to capture the experience of being there in front of the band. As anyone who's ever recorded a gig using a handheld recorder will know, there can be a huge difference between a convincing live multitrack mix of a gig, and a faithful capture of what it actually sounded like in the audience. However, it's important not to lose sight of what you're trying to achieve at the mix. If you rely only on close mics and clean up your sources too much, it's possible to end up with a technically good balance that completely misses the point. Your aim is to bottle and refine the excitement of a live event, not to polish it completely away. The excitement in a live show is happening out in the room, not half an inch from the front of an amplifier grille, so you need to find a way to bring it out in your mixes.
Utter Midness
 A de-esser can be surprisingly effective for reducing the apparent level of drum spill onto other mics.
The inevitable spill that happens when you have so many loud sources in close proximity can contribute to the 'live' feel of your mix, especially if you don't have good recordings from audience or room mics. Under most circumstances, however, spill is usually more of a curse than a blessing, and it's a rare multitrack live recording of a loud band that doesn't require some action to try to control problematic leakage. Even relatively benign spill often leads to a frequency build-up of some sort or another, skewing the overall tonality of your mix. The classic problem is that when things get loud, reflections in the room begin to get out of control; add to this the honkiness of a small PA struggling to keep up, the dubious off-axis response of most directional mics and the fact that you have lots of them open in a fairly small space, and it's no surprise that spill is more often our enemy than our friend.
When things get loud in a small space, there is almost invariably an ugly build-up of harsh 'clackiness' somewhere in the upper mid-range. Larger stages in larger venues are less prone to this, but things can get boomy or muddy fast. Problems with the general tonality of a recording are easy to overlook unless you frequently reference against something that's a known quantity, because the ears get accustomed to them very quickly. Live recordings are particularly prone to this sort of issue, and it's well worth checking whether anything is untoward at an early stage in the mix. Because you are usually dealing with a dynamic performance in a less than ideal space, moreover, the overall tonality can change a lot throughout a set.
I find that dealing with these off-kilter frequency balances is often the single most difficult part of mixing a live recording, especially where spill is causing an excess of honky or harsh mid-range frequencies. An obvious starting point is to EQ the master bus. This can help, but unless you automate the EQ, it won't reflect the way in which the problem varies with level: very often the frequency balance will be more or less OK in the quieter sections, and aggressive equalisation is only appropriate for the louder sections. A fluctuating frequency balance can be controlled to a certain extent using parallel compression, with the side-chain of the compressor filtered so that it's triggered by the problem frequencies. This can be surprisingly transparent, but is often not enough on its own. More drastic problems can call for a multi-band compressor or dynamic equaliser, though it's rare to find one that operates inaudibly. Where the problem is severe, it will probably be necessary to process both the master bus and individual instruments or groups of instruments.
Ultimately, it's worth keeping in mind that you don't necessarily need to match the smoothness of a studio recording in order to deliver an acceptable mix: on many playback systems, a slightly harsh or spiky mid-range might actually help to convey a sense of the excitement of live performance. Likewise, it can be hard to achieve the best compromise between a full sound in the low mid-range and an ill-defined mess of mud, and you might decide that a slightly leaner tonality overall is the better option.
Context Is Everything
 This live recording was made in a very nice-sounding wooden chapel, but unfortunately there were no room microphones or audience microphones to pick up the ambience. To try to recapture the atmosphere, I've set up a reverb that resembles the chapel acoustics, and nearly all of the sources are being sent to it. There is also a non-linear reverb to thicken up the drums, but no additional effects on the voices and instruments, apart from a short slap delay.
Where spill on individual sources is contributing to an overall mix problem, it makes sense to do what you can at the source level. The flip side of this is that when you apply processing to improve the sound of an individual source, you need to keep in mind its context. Applying high-end boost to bring out the air in the female lead vocal might be counter-productive for the mix as a whole if it emphasises cymbal spill on the vocal mic. Likewise, there's little point in soloing the drum bus for hours to craft a drum mix that works well in isolation, if defeating the solo again will see it obliterated by hi-hat spill from other mics.
In general, it's better to put up with compromises in the sound of individual sources in pursuit of a cohesive mix than to pursue the converse approach. For example, the tonality of the drum kit often becomes alarmingly splashy when all the vocal and instrument mics are up. Ultimately, you might well have to accept that the best interests of the mix as a whole are served by cutting the problem frequencies on the drum bus rather than removing all the treble from the vocals. Alternatively, it might turn out that an otherwise unnatural balance of close drum mics against overheads works better in the context of the surrounding spill. Likewise, I'm not usually a fan of drum sounds where the overheads are high-passed so that the low end comes entirely from the close mics, but that might be the best option if there's a lot of bass spill and rumble on the overhead mics. And although you might be able to deal very effectively with spill problems in certain parts of the set by muting the vocal mics when no-one's singing, this might actually make the problems more obvious when the mics are unmuted and spill suddenly rushes in — better, perhaps, to choose a more consistent mix over one which is alternately clean and not-clean. Finally, where an instrument is particularly problematic, you might just have to accept that it can't be made as loud in the mix as you'd like. With that in mind, however, there are ways in which you can try to reduce the negative impact of spill.
High-pass filtering: One tool that tends to get quite a workout in any mix of a live show is the high-pass filter. Bass has a way of getting everywhere, and you can often clean up a mix quite considerably by filtering out the low end on afflicted mics.
Low-pass filtering: Less obviously, you might find that low-pass filtering can also have its benefits. Few guitar or bass amplifiers put out much above 6kHz or so, so rolling off the top end can sometimes ameliorate nasty cymbal and snare spill without having too much effect on the guitar sound. Even acoustic instruments can sometimes be treated in this way, especially if they play sustained sounds. The core frequency range of an accordion, for example, is quite narrow, and it's surprising how much top and bottom can be removed before it stops being recognisable as an accordion (God knows, I've tried).
Dynamic EQ/compression: As well as EQ, de-essers or other dynamic equalisers can often be pressed into service to quieten drum spill onto other mics; I've had excellent results with FabFilter's Pro-DS in this role. Where spill is coming mainly from one particular instrument, it might pay to use something like a multi-band compressor with a side-chain signal taken from that source. That way, for instance, you could have things set up so that the low end on an acoustic guitar is ducked when the bass plays, but is otherwise left intact.
Singing Defective?
 Not having any ambient mics also means you have to be creative about presenting the audience's response to the music. In this case, the backing vocal and trumpet were not singing or playing towards the end of the song, so I've copied the audio from their mics to two new tracks at the bottom. Once these have been equalised, raised in level and hard-panned, they do a fair job of conveying the audience's enthusiasm.
If there's one source that usually can't be compromised in favour of everything else, it's the lead vocal. And if there's one source that's likely to sound radically different in a live situation compared with a studio, it's the lead vocal. The extra performance energy that singers tend to inject can be welcome, and can help to emphasise the liveness of the recording; but it can also be accompanied by questionable tuning, or degenerate into shouting or hoarseness. Very often, there will be too much spill for pitch correction to be a viable option, and there are no extra takes that could serve as a basis for a comped performance.
Additional factors that come into play are the choice of mic and the way the singer uses it. There are two kinds of singers in this world: those who sound good on an SM58, and those who don't sound good on an SM58 but usually end up singing through one anyway. And while we're pigeonholing singers, there are also two schools of thought with regard to mic technique. Some believe that the mic grille should be permanently wedged against their tonsils, while others assume that as long as they're somewhere in the same postal district as the microphone, their vocals will magically come through with perfect clarity.
Each group poses their own problems for the mix engineer. Singers who swallow the mic often generate plosive pops, even using stage mics with built-in low-end roll-off. Some of them also manage to produce surprisingly fierce sibilance. Singers who wander around, meanwhile, require lots of dynamic correction, from compression or fader rides, which inevitably varies the level of the spill from other sources; and if they get too far from a mic designed for close-up use, they can end up sounding very thin.
Plosive pops and sibilance are, as ever, most effectively dealt with manually, by automating the cutoff frequency of a high-pass filter and the channel volume respectively, but if you're dealing with an hour-long set, this can be a monumentally tedious exercise, so it might be worth seeing if you can get away with using a multi-band compressor and/or a de-esser. Failing that, you could try simply copying and pasting the relevant bits of automation from one pop to the next, or cutting the affected sections out and treating them with destructive EQ.
If your singer has simply been recorded through a mic that doesn't suit them, you could perhaps try using Antares' Mic Modeler plug-in or some sort of 'match EQ' to conform its frequency response onto that of a better mic, but most of us would probably reach first for the EQ. The SM58 strongly emphasises the upper mid-range from 2kHz upwards: if your singer sounds nasal or honky, try a cut in the lower part of this region, while thin-sounding or sibilant vocals might benefit from being cut at slightly higher frequencies. When a singer gets very close to the mic, some low-mid cut is also often appropriate, and if your singer moves around, it can be necessary to vary EQ settings quite a lot throughout a set. Again, a multi-band compressor can sometimes be a more flexible alternative, or you could split the lead vocal into two or three tracks with different EQ settings.
Back In The Room
 Spill between tracks makes editing the timing of individual parts much more difficult in a live recording than in one composed from overdubs. Here, I needed to fix a guitar intro that was played along to stick clicks from the drummer. The only way it could be done was to mute all the other tracks during the intro, which detracts from the live feel of the recording.
Studio vocals are often processed with compression, reverb and delay. You're unlikely to be able to get away with heavy compression as an effect on anything that's got spill on it, so be prepared to do more fader riding in a live mix. Likewise, any reverb or delay you apply will process the spill as well as the wanted audio, which can be very disconcerting, particularly when delays pick up drum spill. In this situation, remember that you can often get away with being pretty drastic with automation and with processors such as de-essers, expanders, filters and so on when they're applied only to the signal being sent to the reverb or delay, and not to the vocal itself.
Even if you're lucky enough to have a pretty clean vocal without obnoxious spill, you might want to consider rather different effects treatments compared with a studio mix. When much of what you've recorded bears the imprint of a small rock venue, trying to impose a completely different hall or plate algorithm on the lead vocal can sound incongruous and undermine the impression that we're hearing a live recording. Better, perhaps, to try to come up with a subtly 'improved' virtual version of the real space, or a slapback echo.
Riding the level of a vocal a lot can produce obvious and disconcerting variations in the amount of room sound that's audible. The problem is compounded where there are multiple vocalists, or miked instruments that need automation to keep the wanted sound at a consistent level. In extremes, one trick I've tried here is to identify one or more mics on stage that aren't being used much, but which have picked up a comparatively pleasant balance of spill. (It's surprising how often you can find a little-used backing vocal mic, or perhaps something that was set up for the support act but got recorded anyway.) These can then be equalised to sound as good as possible, and used as 'filler' stage mics to be faded up when needed to balance the overall level of spill.
I'm assuming here, of course, that you don't have the luxury of good-sounding dedicated room mics to lean on. The reason I say this is that, in my experience, it's often difficult to set up room mics in small venues, and that even if you can, the results frequently disappoint. You may be luckier, in which case a contribution from the room microphones might well help to mask the ugliness and changeability of the spill onto other mics.
One area in which having room mics — or, better still, dedicated audience mics pointing from the stage outwards — helps is, of course, in capturing the response of the crowd. (Assuming, that is, that there is a crowd, and that they respond. If there isn't or they don't, perhaps the gig wasn't worth recording.) But if you don't have proper audience mics, all is not lost, because, again, it's usually possible to find a couple of on-stage mics that don't have people yelling 'Thank-you-very-much-that-one's-going-to-be-our-next-single' into them after each song. With a bit of creative EQ, these can be repurposed as crowd mics. I tend to cut out the between-song sections and copy them to new tracks, so they can be equalised, faded and so on without affecting any musical content captured by those mics elsewhere.
If All Else Fails, Cheat
 The Flux IRCAM Tools Spat plug-in provides one way of softening harsh DI'd signals and pushing them away from the front of the mix, although a conventional reverb set 100 percent wet can also work.
Producer Tony Visconti famously admitted that, apart from the drums and the audience, most of the other parts on Thin Lizzy's Live And Dangerous album were replaced afterwards by the band in the studio. Similar tales abound with respect to any number of other supposedly 'live' albums, and there are also high-profile artists who deliberately use live multitracks as basic starting points for overdubs. In extremis, there are obviously ethical issues with passing off something as a live recording when it patently is not. However, if you find yourself in a situation where an otherwise good recording is ruined by an out-of-tune acoustic guitar, a vocalist with a heavy cold, a violin that failed to record, or whatever, it's surely better to try to salvage it if possible. Likewise, there are situations in which replacing the backing vocals might drastically reduce spill problems without completely ruining the illusion of a live show.
The usual advice is to record any overdubs, if possible, with the same mic and in the same space as were used on the original recording, but common sense should prevail. If you're overdubbing with an SM58 used close up, it's unlikely to pick up enough room sound to be a huge problem if you're not in the same space, while if you're replacing something because it didn't sound very good in the first place, you'll obviously want to do it differently! In general, it's surprising what you can get away with, provided your overdub is sufficiently in sync with the original to mask any spill.
Using samples to replace or augment the drum close mics is a mixing technique we've all become familiar with in recent years, and it's one that can be valuable in a live context. If the original drum sound is good but there are spill problems, you could try to source your replacement samples from a section of the original recording where there's nothing but drumming going on, in the hope of achieving a natural result. Often, though, the problems with the kick and snare close mics will concern placement, mic choice and tuning as well as spill, in which case you will need to look for some better samples. Either way, drum replacement is usually successful only if carried out with a lot of attention to detail. Work on small sections at a time, and take great care to check that your samples are triggered only where they should be, as the chances are that a live recording contains enough spill to confuse your drum-replacement plug-in. Above all, err on the side of too little rather than too much sample augmentation, or you risk losing that live feel you've worked so hard to retain.
Other forms of cheating that we're used to in studio work can be harder to employ on live recordings. If one player is out of time or out of tune, for example, the chances are that any correction will be problematic if there is significant spill either onto or from that instrument. Assuming the material makes it possible, it might be better to fix mistakes by copying and pasting sections of the entire performance rather than attempting to isolate the offending instrument. Again, take care not to cross the fine line between fixing obvious mistakes and watering down the natural variations in tempo and so on that are often characteristic of a live performance.
Nobody Said It Would Be Easy
Working on live recordings can be a great discipline for practising and improve your mixing. Your resources are limited, both in terms of the tracks available to you and the processing that can be applied. You can't rely on the crutches of endless comps and overdubs, excessive compression, or drowning everything in effects, yet you still need to produce something that captures the excitement and vitality of a live performance. If you can do this and make it sound good into the bargain, chances are you'll really have earned your mix credit.
Finally, knowing how to mix live recordings can also be a useful skill from the point of view of networking and furthering your career. Bands often like to hear how they sound on stage, and decent live recordings are always useful as bonus tracks, fan downloads and so on. Get an 'in' at a small local venue, and you could get the chance to record and mix bands you'd never otherwise work with. They'll be names on your CV, and if they like what you've done, who knows where it could lead?
Dealing With DIs
If the problem with miked signals in gig recordings is that they often pick up too much of what's going on around them, DI'd tracks are the exact opposite. A direct injection box presents an instrument in splendid isolation, with absolutely no sonic cues as to context whatsoever. And where the signal originates from a pickup, particularly an under-saddle piezo pickup or other contact device, it all too often sounds plain nasty, with only a tangential relationship to the sound of the instrument itself. Add to this occasional problems with gain structure, interference, flat batteries and so forth, and there are plenty of ways in which DI'd signals can give mix engineers a headache.
With acoustic guitars and other instruments recorded using piezo pickups, the frequency content and dynamics of the recorded signal don't sound very much like those of the source instrument, and there are various hi-tech approaches to dealing with these problems. One is to convolve a recording made with a piezo pickup using an impulse response taken from the body of a guitar or other wooden instrument, with the aim of putting back the natural body resonances that are lost by under-saddle pickups. Alternatively, you could try using a plug-in like Paul Frindle's Dynamic Spectrum Mapper to reshape the frequency and dynamic content of the source signal, taking a good recording of an acoustic guitar (or whatever) as your model. Fishman's Aura technology works in a similar fashion, and can certainly improve the 'quackiness' of piezo pickups. If these sophisticated tools aren't available, most such recordings benefit from a swingeing EQ cut somewhere in the mid-range, and transient shapers or other dynamics processors can sometimes help to tone down the aggressive note attacks.
Even if you can massage the frequency content and dynamic profile of your DI'd signal to make it less obnoxious, or you're working with a respectable-sounding source such as a keyboard or backing track, you still face the problem of how to make it fit in the mix. Because DI'd signals are completely dry, they tend to stick out awkwardly from the rest of the instruments, no matter how much you experiment with levels, equalisation, reverb and so on.
The very best tool that I've found for dealing with this is the Flux IRCAM Tools Spat plug-in, which uses sophisticated psychoacoustic processing to position sources within a virtual space. Again, the trick is to use not a massive hall or plate reverb but something roughly comparable to the venue in which the gig was recorded. Each source is represented by a blob which can simply be dragged around within the virtual room until you achieve the right impression of depth. (Better still, I suppose, would be re-amping the relevant signal through a good PA speaker in a good space, but one rarely gets the chance to try it.)
The fly in the ointment here is that Spat is very expensive, but you can achieve some of the same results using a conventional reverb set to 100 percent wet. Try using a fairly short impulse response taken in a studio live room or on a stage in a small venue.
Continuity Errors
When you're mixing a number of live tracks, it's worth thinking, prior to the mastering stage, how your recordings are going to be presented. Traditionally, a live album would be presented in a gapless format on CD or other physical media, in order to preserve the illusion of a continuous live concert — even if the track listing was actually taken from several different concerts! Where songs are preceded by spoken introductions, or lengthy bursts of applause, mastering engineers would often choose to place these before the CD track's 'official' starting point. On a Red Book CD, this is done by placing index points 0 and 1 in different places: namely, at the start of the introduction and at the start of the music. Then, when a CD is played from start to finish, the CD player will not treat the intros as separate tracks, but will count down (rather than up) to the 'official' track start points. However, when you skip directly to a track on such a CD, the track will start to play without the intro. Creating a disc like this is beyond the scope of typical consumer CD-authoring tools, but most decent professional editing and mastering packages will allow you to position index points within tracks.
As consumption of music on physical media declines, though, questions arise about how best to present a continuous performance in a downloadable delivery format. If the tracks are going to be presented individually, as they might if used to accompany YouTube videos, for example, then obviously you will need to apply fades in and out. Where things get murky is if you want your mixes to play back seamlessly as an album in a player such as iTunes. The illusion of continuity will be ruined if the applause fades in and out, or if the player inserts unwanted gaps between tracks; but glitches and clicks are equally unacceptable.
It's probably impossible to ensure that an album plays back exactly as intended in every one of the myriad players on the market, but the best advice I've found is to keep the entire album as a continuous project for as long as possible during the mastering stage, only dividing it up into individual tracks once all necessary processing, sample-rate conversion and gain changes have been applied. That way, you at least know that the resulting tracks won't click or glitch when butted together continuously — although, sadly, you have no control over whether the listener's player will do this, nor over what will happen when they are converted to MP3 or other data-compressed formats.
Audio Examples
Two excellent bands who have performed for The Beach Sessions in Waterbeach, near Cambridge, have very kindly given us permission to share recordings from those gigs.
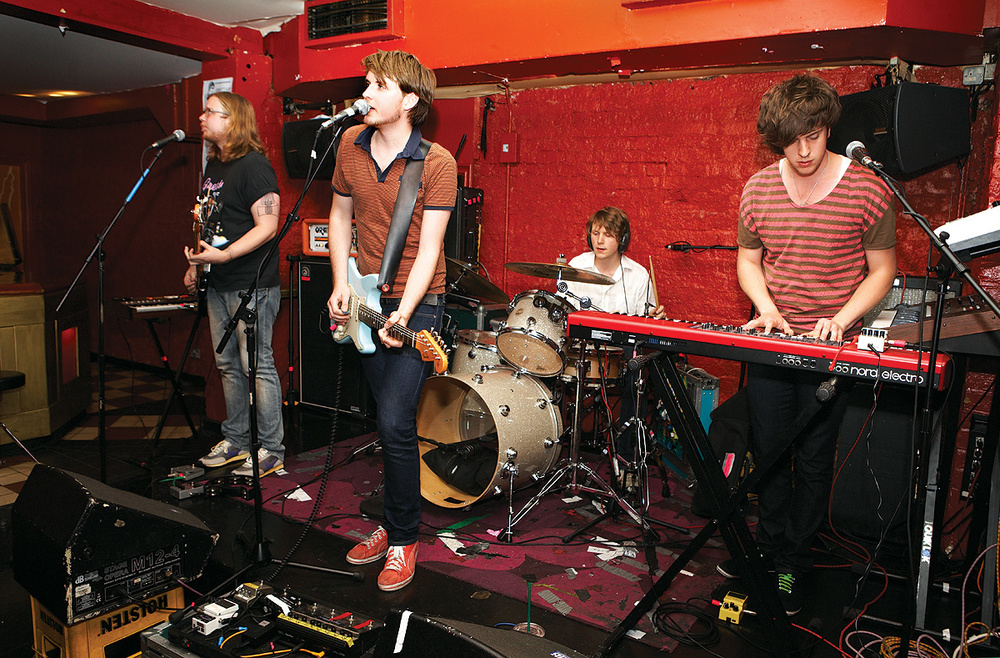
The Slow Show (www.facebook.com/theslowshow) will already be familiar to quite a few readers from their appearances at festivals and on programmes such as Radio 2's Dermot O'Leary Show. They recently signed to Rough Trade Publishing and are working on a debut album, to be released later this year. In December 2012 they played a sold-out show at the 200-capacity Waterbeach Baptist Chapel, and at the last minute, we decided to record it to my trusty Zoom R16 digital multitracker. Although it was a great show in a lovely space, the recordings were quite problematic, not least because 15 desk channels were in use and the R16 can only record eight tracks at once! As a result, there were no ambient mics or tom mics, one of the two overheads was not recorded, and all the drum close mics, percussion and sampler tracks had to be bounced to a single track using an aux send on the desk. A further problem was that the insert outputs from the desk were too hot for the R16's line inputs, so clipping occurred in a number of places.
Straw Bear (www.strawbear.com), meanwhile, sent us one of the best CDs we've ever heard for the Playback column, and have since gone on to bigger and better things, including a session for Tom Robinson's radio show, so I was very excited to get the chance to do live sound for them. This gig, in March 2013, was recorded to an Allen & Heath ICE 16, which meant that every track could be captured, and this time there were no problems with clipping. However, this venue was not a beautiful Victorian chapel but an upstairs room at a pub, with a cramped stage, muddy acoustics and a very low ceiling, so the recordings suffer from the coloration that is typical of small venues.