We explain how to get the best practical results from equalisation by understanding the true frequency ranges of most instruments and voices.
 An understanding of the variety of different equalisation tools at your disposal can help in choosing the most suitable type of processing for any situation. However, using equalisation is about much more than just selecting the correct unit and this month, we will be looking at how best to employ equalisation techniques in music production.
The first challenge when equalising musical sounds is in deciding which area of the frequency spectrum corresponds to which element of a sound's timbre. If you're wanting to emphasise the click of a bass drum, where should you boost? Alternatively, if your guitar sounds boxy, where can you cut most effectively?
Pitch & Frequency
One thing that can help a little in deciding this is to know what frequencies correspond to the fundamentals of each musical pitch. For a start, this allows you to define the lower limit of the range of frequencies generated by pitched sounds. Figure 1 shows how the pitch ranges of various common instruments, and hence how the ranges of their fundamentals, relate to frequency. You can see from this that you're not likely to get much in the way of useful tonal change if you try to EQ a violin part below about 150Hz, for example. The most noticeable effect of boosting most instruments below their fundamental frequencies will probably be an increase in the level of any noise lurking in the depths. Indeed, there is a lot to be said for using a high-pass filter to cut any unused low-frequency range, in order to prevent unwanted noise from obscuring other recorded parts in your mix.
 Figure 1 shows how the pitch ranges of various common instruments, and hence how the ranges of their fundamentals, relate to frequency. Knowing the frequencies corresponding to certain pitches can also be useful when attempting to remove unwanted pitched elements, such as hum, from sounds. If you know the frequency of your mains hum (50Hz in the UK) then you can apply cut with a narrow peaking filter to notch out the 50Hz fundamental or its most prominent harmonics. In such cases it's worth bearing in mind that real-world pitched sounds usually have appreciable levels of harmonics, and that these occur at multiples of the fundamental frequency, so you'd want to experiment with notching at 100Hz, 150Hz and 200Hz as well, if you were going to seriously reduce the hum in this example. (Having said this, serious hum problems are very difficult to solve even using multiple peaking filters, as their EQ notches are often insufficiently narrow to avoid damaging wanted components of the sound. In these cases, a dedicated digital noise removal device or software package will probably be more successful and produce fewer audible side effects.)
Similar EQ'ing techniques can also be used to emphasise pitched elements in percussive instruments — some producers find that this can lend these sounds greater punch. The trick is to decide what pitch the instrument suggests most strongly, and then to array a set of very narrow peaking filters to boost the fundamental and harmonics of this note.
Exploring Instrument Timbres
However, there is only a limited amount of practical use for the table in Figure 1 when learning about how to EQ. It's not the pitch associated with a given EQ frequency which is normally of primary concern, but rather the tonal change which is associated with boosting or cutting in that region. And the only way to learn about this effectively is through running some sounds through an EQ unit or plug-in and experimenting yourself.
The easiest way of identifying the frequencies corresponding to particular timbral characteristics is to crank up the boost control of a peaking filter, with its Q value set to about three or four, and to sweep it through the spectrum listening as each element of the range is boosted. It can also be useful to stop the peak over a particular area and then to switch the EQ in and out to get a feel for the effects of boost in that region. With a little practice using different sources, you ought to start getting a feel for the unique characteristics of each sound.
As a guide in learning about the effects of different EQ frequencies on different instruments, check out the boxes which appear throughout this article. These compare the frequency balance of similar instruments within different well-known commercial tracks, and therefore can provide a point of reference for you when recalling which frequencies you need to address for your own recorded sounds.
Setting EQ Gain
Getting to know the frequency ranges associated with different elements of an instrument's timbre is useful, but what you really want to know is how to use that information to best effect when applying EQ to real signals. Perhaps the first basic piece of advice to take on board is that it's best to apply as little EQ as you can when sorting out tonal problems, especially if you don't have access to a really nice-sounding equaliser. Any processing you use has the ability to degrade the sound just by dint of the extra processing components within the signal path, so it's important to make sure that the cure is better than the disease! If you only have access to budget equalisation (whether hardware or software), it is usually worth taking extra care to get sounds right at source, rather than having to rely on dodgy-sounding processing to fix anything in the mix.
Consider trying out different equalisers if you have a choice. All equalisers sound subtly different even with the same nominal settings, and you will find that different models respond in different ways to the same signal. The difference between digital and analogue equalisers is a good case in point. Because good analogue equalisers induce musically useful phase changes in the audio passing through them, they can cause a significant tonal change even with less than a decibel of boost applied. On the other hand, digital equalisers can be designed to leave phase relationships almost unchanged, so large gain settings can be made less noticeably.
A second general rule is that it's usually better to apply EQ cut than EQ boost if you want to avoid the processing being too obtrusive. This is especially relevant when using high-resonance peaking filters for treating narrow sections of the audio spectrum — the filter will have a tendency to 'ring', unnaturally emphasising and extending sound at its centre frequency. It follows, then, that you should try EQ cut to solve localised problems, using a bandwidth narrow enough to achieve the desired effect without unduly altering adjacent frequency ranges, whereas EQ boost should be over wider bandwidths and using as little gain as will suffice. For example, getting rid of an unwanted vocal resonance may need several decibels' cut with a fairly narrow bandwidth, whereas adding high-end gloss to a mix needs only about a decibel of high-frequency boost with a wide bandwidth setting.
Boosting with EQ is best kept to a few decibels if you're after natural results, but narrow-band cutting can be made much deeper to get the desired result. In fact, if the maximum cut provided by a single peaking filter is not enough, you can even set a second peaking filter to simultaneously cut the same frequency for a deeper notch. It is worth mentioning here, however, that EQ cut has just as much impact on the internal headroom of your equaliser circuitry (or algorithm) as EQ boost, so a poorly designed equaliser might well produce undesirable sonic artefacts if you layer two peaking EQ bands in this way.
As we saw in SOS July 2001's Equalisers Explained article, a filter can affect the levels of frequencies well beyond its centre or cutoff point. If you find that a deep notch at one frequency is also attenuating nearby wanted components, then try applying a little boost with another fairly narrow peaking filter to the affected area as a way of compensating.
While you're working towards the best possible setting, keep using the equaliser's bypass switch to compare the sound of your processing with the unprocessed original sound. If you're EQ'ing at mixdown, you'll also want to evaluate your EQ changes in the context of the mix, rather than while the sound in question is soloed. After all, it's no use getting individual parts sounding brilliant in isolation if they don't work together in the mix. Bass guitars are particularly prone to disappearing in the mix even when they sound amazing on their own.
Equalisation Or Enhancement?
A mistake often made by newcomers to recording is to try to brighten an inherently dull sound by applying large amounts of treble boost. This rarely achieves more than an increase in background noise and grittiness. The finger of blame is then often pointed at the equaliser when the real problem is a lack of understanding. An equaliser can only boost high frequencies where they exist in the first place. A synthetic sound with no top end, or a miked Fender Rhodes piano played through a dull-sounding amp with limited bandwidth speakers, will not respond well to high-frequency boost because that frequency contains mainly noise and interference.
In such cases, using a psychoacoustic enhancer may yield better results, because it processes the frequencies that are present in the original signal (usually via compression, filtering and controlled distortion) to produce extra high-frequency harmonics designed to augment the existing signal. Because the added harmonics are related to the existing signal, the ear accepts them as being 'real', and a part of the sound as a whole. Although enhancers need to be used sparingly, to avoid producing a harsh or unnaturally abrasive result, they can often rescue sounds that EQ cannot deal with.
Loudness & Distance
Many musicians don't realise that equalisation can also affect the apparent loudness of an audio signal, especially when you're EQ'ing submixes and complete mixes. This is because the frequency response of the human hearing system changes depending on the overall level of sound reaching the ear. Take a look at the graph in Figure 2, which shows curves of equal loudness on a graph of sound intensity (in dBSPL) against frequency (in Hz). The plots show that, for example, a 1kHz tone at 100dBSPL will be heard as being subjectively as loud as a 100Hz tone at about 103dBSPL, while a 1kHz tone at 50dBSPL will be heard as being subjectively as loud as a 100Hz tone at 60dBSPL. The lowest points of each curve are where the hearing system is most sensitive, and you can see that our ears are noticeably more sensitive to mid-range sounds than to frequencies at the extreme high and low ends of the spectrum, though we don't actually notice this because the brain compensates for it.
 against frequency (in Hz).") Figure 2 shows curves of equal loudness on a graph of sound intensity (in dBSPL) against frequency (in Hz).
Figure 2 shows curves of equal loudness on a graph of sound intensity (in dBSPL) against frequency (in Hz).
The important thing about the curves of equal loudness is that they show that the hearing system's frequency response changes with intensity. On a general level, this means that it's important to monitor at a realistic volume when applying EQ, because the perceived effect may be quite different at higher or lower listening levels. However, the fact that the ear gets more sensitive to high and low frequencies the higher the intensity of the sound, means that the brain tends to interpret any sound which is comparatively rich in these frequencies as loud. Therefore, if you want music to sound louder at low listening levels, then it makes sense to boost at the extremes of the frequency range — exactly what the Loudness switch on some hi-fi systems is designed to do. This is the reason why you so often see graphic equalisers in playback systems set up in a 'smile' curve — with a dip in the mid-range and a little boost at the frequency extremes. However, if you're going to use this type of overall EQ, it's best to leave it to the mastering stage, and then to add only a couple of decibels at most.
Another psychoacoustic effect which can be manipulated with EQ is the perception of distance. This is because the air damps high-frequency sounds more than low-frequency ones. If a sound source is very close, this effect is negligible. However, the further a sound has to travel through the air, the more the high frequencies are damped. Therefore, if you roll off a little high end from a sound, it seems further away. This technique is often used to bring a lead vocal to the front of a mix otherwise dominated by backing vocals, for example. The backing vocals are cut a little above 10kHz or so, while the lead vocal is given more energy above this frequency.
Mixing With EQ
When it comes to the mix, equalisation has two main functions. The first of these is to adjust the tone of each sound to your own tastes, though this should mostly have been sorted out during the recording process. The second function of EQ in the mix is to make sure that everything that needs to be heard can be heard. Much of this type of EQ is concerned with cutting away unimportant areas of the frequency spectrum from individual recorded parts, so that important frequencies in other parts can be heard. This can be as simple as using a high-pass or low-pass filter on specific tracks to remove any unwanted noise or hum, or it may require subtle cutting and boosting on every channel. The ease with which this can be done will often depend on how well the track has been arranged.
It is not uncommon to find that you need to take a lot of bottom end out of acoustic guitars or synth pad parts, for example, otherwise the low end of your mix can get muddy. Usually you can get away with taking quite a lot of low end away from such sounds before they start to sound thin in context, and this can allow important bass instruments and kick drums to come across much more clearly.
Similarly, if you have an instrument that doesn't need to be at the front of the mix, try rolling off a little high end so that it doesn't compete with the sounds that really need to stand out. You could use a shelving equaliser to do this, or a steep low-pass filter if you're after more surgical removal. This can be particularly successful on rhythm guitar parts, as it focuses the guitar sound and leaves more space for other instruments.
As a general rule of thumb, electric guitars and synthesizers usually cope pretty well with being shaped to fit in with the mix, because they have no inherently 'natural' sound of their own. Even if EQ places heavy emphasis on a particular frequency range, it may not be a problem, as pronounced resonances are characteristic of both these families of sounds.
Finally, it's worth mentioning that stereo mixing can confuse matters a little in terms of equalisation during mixdown. This is because panning, like EQ, can create a certain amount of separation between sounds. However, there are still plenty of environments where playback systems work pretty much in mono, and in such cases your mix will lose the benefit of any panning separation, and may sound confused. It is for this reason that it's a good idea to check the tonal balance of your track in mono as well as in stereo, so that you don't get caught out.
Practice Makes Perfect
There are no hard and fast rules regarding the successful use of EQ. However, the advice set out here ought to have you well on the way to proficiency. With practice you'll not only be able to get the sounds you want when you record, but you'll also be able to make them work together to produce a more polished mix.
The Drum Kit
BASS DRUM
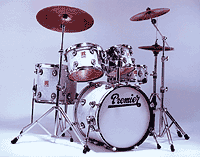 The punch component of most bass drums lies between about 80 and 100Hz, and meaty kicks such as those in AC/DC's 'Back In Black' and Britney Spears' 'Baby One More Time', tend to have a lot of energy in this range. Below this area, you'll mostly feel, rather than hear, any boost, and it's easy to overdo. Warmer kick sounds, such as those in James Brown's 'I Got You (I Feel Good)' and Stevie Wonder's 'Sir Duke', major on the 200-300Hz region. Where the kick needs to cut through on smaller speakers, then you might also consider a boost in the region of 2.5-6kHz, which will tend to emphasise the click of the beater. As an illustration of the sort of effect this has, compare the lack of any bass-drum click in the James brown example with the aggressive kick sound in the Madness single 'My Girl'.
SNARE DRUM
The fatness of the snare tends to reside between 120 and 400Hz, and the aforementioned AC/DC and Britney Spears examples are both powerful in this area. A boxy sound, such as that on the Guns & Roses song 'Sweet Child Of Mine' is indicative of comparatively high energy in the 800Hz-1.2kHz range, whereas the resonances of the drum's ringing reside above this, between about 2-4kHz — a frequency region showcased in the snares of Bob Marley's 'Get Up Stand Up' amongst many other reggae tracks. The crispness of the drum's attack tends to reside more in the 4-8kHz region, and the Sister Sledge track 'We Are Family' heavily emphasises this frequency on its otherwise fat snare sound.
TOM-TOMS
Floor toms can be made fuller around 100Hz, while rack toms respond in a similar way up to about 300Hz — the 'Sir Duke' toms are characteristic of boost in this range. The ringing or rattling of the skins occurs at about 1-3kHz, as is evidenced on Iggy Pop's 'Lust For Life' and the drum solo in the Beatles 'The End'. The Iggy pop example also emphasises the attack of the toms, which is higher up the frequency range between about 4 and 8kHz.
CYMBALS
Although Cymbals are associated with high frequencies, a boost between 100 and 300Hz can help to emphasise the clunk of the stick on a ride cymbal or hi-hat, something particularly noticeable in Donovan's 'Mellow Yellow', for example. The ringing overtones of crash and ride cymbals can be brought up within the 1-6kHz area, an area characteristic of the sound in Led Zeppelin's 'Rock & Roll', while the sizzle of any of the cymbals can be emphasised in the 8-12kHz range — check out Metallica's 'Enter Sandman' or Michael Jackson's 'Billie Jean' for examples of this.
Guitars & Basses
ACOUSTIC GUITARS
Boosting at around 80-120Hz gives a low-end weight, such as in The Beatles' 'Yesterday', whereas the sound gets more of a boom to it a little higher at 200-300Hz, as in Nirvana's' 'Polly'. This latter song is also a good example of boost in the 2-5kHz range, which is good for clarity in rhythm guitars as it brings out the strumming. The 1-1.5kHz area, prominent in The Jam's 'That's Entertainment', can tend to sound a little nasal, while the 5-10kHz range emphasises the jangle or sparkle of steel-strung guitars in particular, Natalie Imbruglia's 'Torn' being a notable example.
ELECTRIC GUITARS
Electric guitars are rather a law unto themselves, as their tonal balance varies so drastically from style to style. However, there are a few general principles to bear in mind. The first is that there will be little other than hum and noise below the guitar's fundamental frequency, so it's often worth filtering below about 80Hz. However, most guitar sounds can be warmed up with a boost at around 125-250Hz, as you can hear from the guitars in Metallica's 'Enter Sandman'.
The other main thing to take into account is that the frequency response of most guitar speaker cabinets rolls off pretty steeply above 4kHz, and so your best choice for emphasising the crispness and attack of guitar sounds is a boost at 3-5kHz — frequencies to the fore in Nirvana's 'Smells Like Teen Spirit' and Chuck Berry's 'Johnny B Goode', for example. Any boost well above this is likely to increase only noise levels, so if you want an even more cutting lead sound, such as that in Guns & Roses 'Sweet Child Of Mine', you might consider using a psychoacoustic enhancer as well.
BASSES
Basses get most of their weight from the 80-100Hz region, and pop ballads such as Shania Twain's 'Still The One' will usually pack a punch in this range. For a more overtly warm sound, the 100-300Hz region can be boosted. Extreme examples of this quality include the electric bass parts in The Beatles 'Come Together' and Bob Marley's 'I Shot The Sheriff', as well a the upright bass in Ben E King's 'Stand By Me'.
Greater attack, though not without a little boxiness, is available at around 500-1500Hz. The Temptations 'Papa Was A Rolling Stone' and The Strangler's 'Peaches' exemplify boost in this region for fretted bass, while Paul Simon's 'Graceland' and The Cure's 'Lovecats' show it off on fretless and upright basses respectively. A more jangly sound with emphasis on string and fret noise, such as in Nirvana's 'Lounge Act' or the Red Hot Chili Peppers' 'Give It Away', can be found by boosting between about 2 and 5kHz. A high shelving boost above about 2kHz might be more suitable if you're after string noise and an airy tone with upright bass parts, though, as in Lou Reed's 'Walk On The Wild Side'.
VOCALS
Vocals tend to boom when boosted around their fundamental frequencies, with 'Exit Music (For A Film)' by Radiohead and 'Peach' by Prince exemplifying the effects of such processing. Plosives and handling noise can be reduced by cutting below about 100Hz, though this improvement needs to be balanced against the side effects for the rest of the vocal sound.
Nasality can be addressed at around 1-3kHz, while the 4-5kHz range can be boosted for more presence. If the extremes of the frequency spectrum are removed to leave only these tonal areas, then you can get the 'telephone' special effect which will be familiar from tracks such as White Town's 'Your Woman' and Space's 'The Female Of The Species'.
The 7-12kHz region will emphasise sibilance and breath noise, a characteristic trait of Sheryl Crow's voice in 'If It Makes You Happy' and Seal's backing vocals in 'Kiss From A Rose'. The 16-18kHz region, on the other hand gives a crispness to vocals that helps pull out details in the recording. The Radiohead vocal, while boomy, also has a lot of energy in this region as well. Shania Twain's voice on 'Still The One' is another example of a vocal with lots of extreme high-frequency energy, though this is more likely to be due to psychoacoustic enhancement; a common processing choice for pop vocals.
Strings & Brass
STRING SECTIONS
The 200-300Hz range is great for giving a string section a fuller sound, characteristic of tracks such as The Beatles 'Eleanor Rigby' and The Rolling Stones' 'As Tears Go By'. Much of the mid-range timbre will depend on the forces used, so it's difficult to generalise here. However, in the high-frequencies, the 7.5-10kHz range emphasises bow and string noise, as in The Beatles 'Yesterday', and larger, smoother string sounds, such as that on Massive Attack's 'Unfinished Sympathy', may benefit from cut in this area.
BRASS SECTIONS
Recordings of brass sections can be warmed up by boosting between 200 and 400Hz, and Donovan's 'Mellow Yellow' exhibits a sound characteristic of this. A more honky sound, such as on Aretha Franklin's 'Respect' can be found at 1-3.5kHz, whereas the rasp in Stevie Wonder's 'Sir Duke' resides in a range higher than this, at about 6-8kHz. Swing Out Sister's 'Breakout' also has a lot of rasp, but with additional shrillness in the 8-12kHz region as well.
SOLO TRUMPET & SAX
The warm sound of the trumpet in The Kinks' 'Dead End Street' has a lot of energy in the 200-400Hz region, as does the warm sax solo in James Brown's 'I Got You (I Feel Good)'. By way of contrast, the solo sax in The Stereo MCs' 'Connected' is lacking in this region, with extra boost in the nasal 1-3kHz range. The solos in Dire Strait's 'Your Latest Trick' demonstrate the brightness that can be added at 6-8kHz, while Touch & Go's 'Would You' is almost painfully shrill as a result of high energy in the 8-11kHz region.