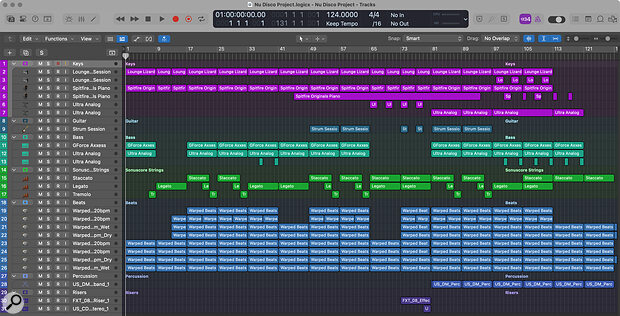
 An overview of the Logic project for the first stages of our nu‑disco track, the composition of which is explained in the main text.
This month, we set ourselves a real‑world challenge: compose and release a new tune, using the tools provided in an SOS FOR ARTISTS subscription!
The last few SOS For Artists (SOSFA) workshops have been orientation sessions really, to take you through some of the key features of the platform. This time, we decided we should get more hands‑on, so we set ourselves a challenge: use only the tools available as part of SOSFA to create a track from start to finish — right through to mixing, mastering, release and promotion. As we do that, we’ll dig deeper into the many tools provided in SOSFA. You can find an audio example detailing the progress made this month on the SOS website at: https://sosm.ag/sosfa-1025
The brief we gave ourselves was to create and release a nu‑disco track, but obviously the principles apply more widely and we’ll also be working with other genres in future workshops.
Since lots of us are familiar with Apple’s Logic Pro, we’re using that as the host DAW for this project, but pretty much everything we do here can be achieved using the ‘Lite’ versions of Cubase and Ableton DAWs included as part of your SOSFA subscription — or, for that matter, any other DAW.
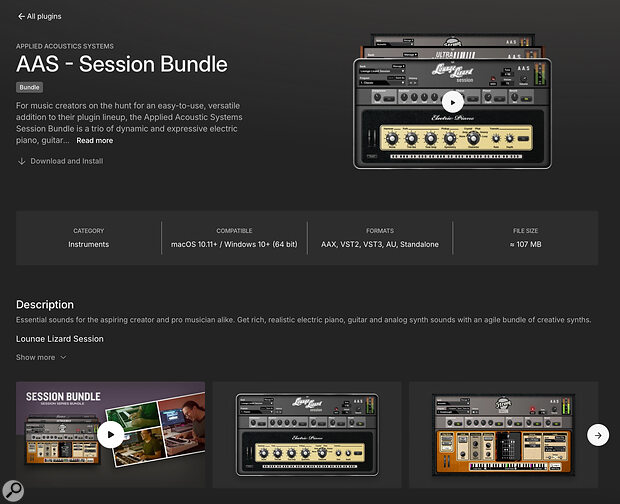 The AAS Session Bundle, included with SOS For Artists, had a lot to offer for this project!
Electric Piano
Every good nu‑disco track needs a funky electric piano (EP), and that’s catered for by the excellent AAS Lounge Lizard Session 4 plug‑in, which is part of the AAS Session Bundle in SOSFA. So the first task is to get that installed. Installation is quick and painless (it took us less than five minutes and just 66.6MB of drive space). It’s probably worth noting at this point that to download and authorise the plug‑ins that feature in your subscription, you’ll need to create an account on the relevant manufacturer’s website if you don’t have one already. We found that it made the EP more fun to play in this genre if we dialled in a touch of the built‑in room reverb, and added a little bite to the sound by increasing the Hammer and Fork settings.
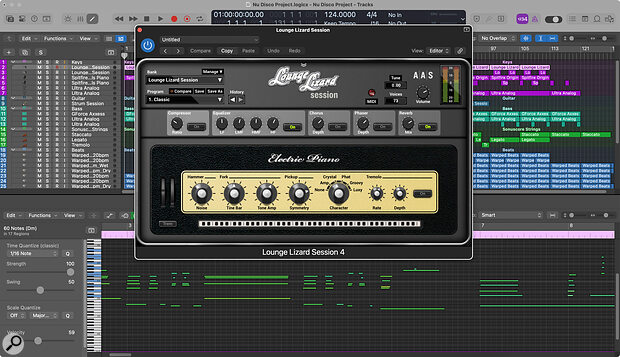 The Lounge Lizard settings used for the electric piano sound described in this article.
Into The Groove
With Lounge Lizard up and running, our next step was to build a groove and sketch out some chords. The quickest way? Grabbing a few beats from the Sample section of the SOSFA dashboard. At this stage, you probably want to get something together quickly so you have something solid to write to — so your choices don’t necessarily need to make the final edit. In terms of tempo, 124 bpm seems to be around the sweet spot for nu‑disco that will keep it club‑friendly and not seem out of place alongside other tracks in the genre.
There’s so much content in the SOSFA Samples section that it’s a good plan, in the Search tab, to select the Advanced Filters to narrow your search options down. For this particular search we filtered by drums only, dance genre and a tempo in the range of 118‑128 bpm. To make the search quicker, we then homed in on Disco and House, which returned three pages of options — with more time you might want to rummage through a few more genres to get some fresh ideas, but you get the point. We set the search to ‘loop’, so as to exclude one‑shots — again, the aim is to be quick and keep the creative juices flowing, and you can always come back and select some one‑shots later for the final beat construction, or even use the sampler to chop up the chosen loops, as we did in last month’s workshop.
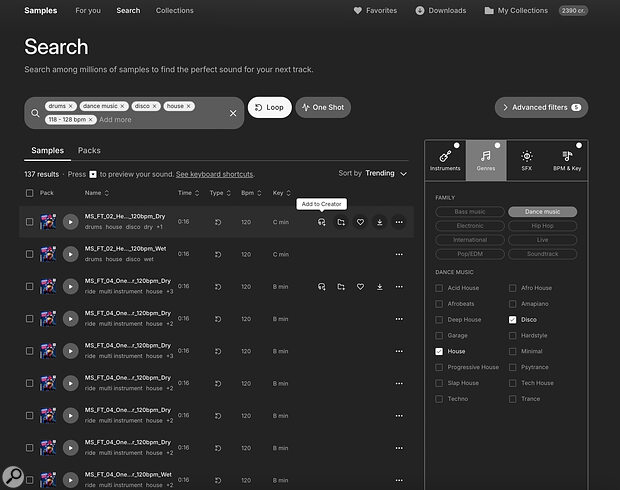 Using the advanced filters in the SOSFA sample search narrowed down the results, making it easy to find suitable loops.
Auditioning beats is quick and easy, and a couple stood out right away, so we dropped them into the Creator section at the bottom of the SOSFA Samples page, just to hear how well they worked together. Once the first sample is added to that panel, you can switch the bpm to match your project. You can load up to eight samples at once in the Creator section, and while you’re audition them it’s a great time to mark good loops as favourites, and add them to specific collections for later use. If you get into this sort of habit, writing should become even quicker over time.
We ended up with eight loops for this project, and although the kicks in a couple of the samples didn’t quite gel, on balance we had a great‑feeling groove, so we decided to move on, and made a note to address any clashes in the DAW later on.
With your sample auditioning complete, you need to download and import your loops into your DAW, and you have a couple of options. You can just download the original stereo files, to get started quickly. Alternatively, you can download the processed tracks from the player, in which case they’ll already be at the correct tempo for your project. Since one of the best tools for warping tracks is Ableton Live, and we have a version of Ableton Live Lite right here in the SOSFA dashboard, we decided to grab the unprocessed samples by dropping them into the Collections folder in our account, and download them from there.
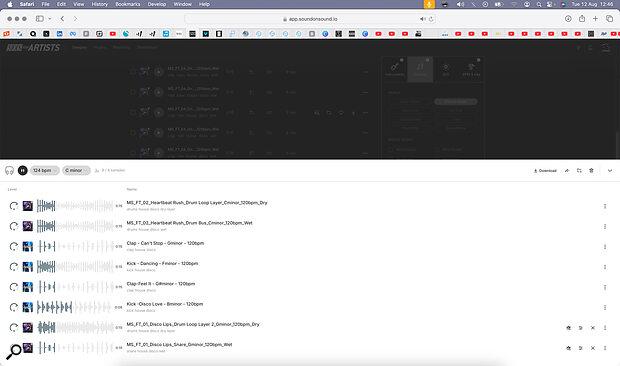 The Creator tab lets you audition multiple samples from the SOSFA online library together. You can match their tempo, and figure out what works well and what doesn’t before downloading.
Handily, the Creator is still showing up at the bottom of the screen when you go into your Collections tab, so it’s easy to cross‑reference and make sure that you’ve got everything. You can also clearly see what you’ve already favourited and downloaded as the icons become highlighted, so there’s no duplication of effort now or in the future.
Warped Thinking
Although beat warping can be done in other DAWs, the simplicity and cleanliness of doing this in Ableton is hard to beat. With the beats stored in a folder, it was quick to drag them each onto their own track in Ableton. As luck would have it, the original tempo for all of them was 120 bpm, so they could be warped in one go. Selecting all tracks, warping in Beats mode and using the command Warp From Here (start at 124 bm) had this lot sync’ed in seconds at the new tempo. Then, it was a matter of exporting the Warped beats into a new folder in the main project, and shifting the original beats to the main Samples folder for future use (keep everything tidy like this, you’ll thank yourself later!). These were then dropped onto their own tracks in Logic, and grouped into a Summing Stack (again, keeping everything tidy to make processing easier). A happy side‑effect of the warping process was that it seemed to tidy up those clashing kicks.
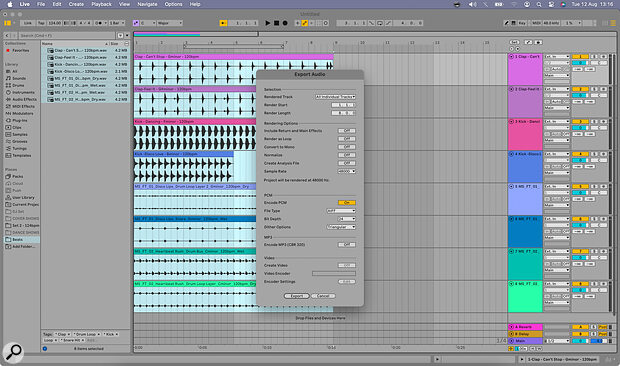 The version of Ableton included in SOSFA provides a quick and easy way to time‑stretch your samples.
Chord Sequence & Electric Piano Groove
This beat now gave us a groove to play with — something to noodle over for the next few hours. Of course, it would be possible to speed this process up by grabbing some EP loops from the Samples tab and develop them, but for this project we wanted to come up with an original groove and chord sequence; really, that’s the fun part, isn’t it? For some of you, it might help to drop a looped bass line in to groove over too.
In the interests of getting this project done by the deadline for this article, we opted for a very simple four‑bar pattern as the main groove, and later added a B and C section for variety. Heavily quantising keyboard parts can kill that live performance feel, so here we just used it to tweak the odd notes, to bring them into alignment where they part clashed with others. Another trick to help retain the all‑important vibe is to shift whole chords at once, rather than individual notes, making sure that the prominent note of the chord hits close to the beat.
Put The Bass In
The next part of creating our groove would normally be to structure the entire piece, write out the chord sequence and then bring in a real bassist... And we have tools coming soon that can help you with that. But in the interests of demonstrating what you can do with SOSFA’s tools already, we created a synth bass line using the GForce Axess plug‑in. We kept to a fairly simple bass line, just to flesh the track out a little, and developed it more during a dedicated arrangement stage, once other parts had been added. To add thickness, we doubled this part using another sound from the AAS Ultra Analog plug‑in. During the mixing stage, the Axess handled more of the sub frequencies, and the Ultra Analog some of the higher, more tonally distinctive frequencies, to make sure that the bass line remains audible even on phone‑speaker playback.
A String Arrangement
No nu‑disco track would be complete without a string part, and we found just the tool for the job in the form of Sonuscore Elements. This runs in NI’s Kontakt sampler, and while it’s a cut‑down version, it still offers us plenty of useful options. We ended up using three articulations — the Staccato, Legato and Tremolo options — which added some nice variety to the part. The legato strings are actually doubled with the staccato, the latter set at a lower velocity, just to give a faster start to the legato note. That’s not always necessary, but can help when working in an uptempo genre like this.
Structure & Arrangement
Next, it was time to start developing the structure of the track, so it was a matter of copying and pasting the beat to last for around three and a half minutes, then dropping the various parts across it to create plenty of variety, and prevent the track from feeling repetitive. There’s still a lot of work to do on the arrangement, and things will change further still during the mixing stage, where we can start bringing in some fun effects. The beat was continued for four bars at the end of the track too, with DJ transitions in mind, although you can also provide the track stems during release for this purpose.
One of the first things we wanted to do was to bring in a piano part to double up on the EP for thickness, and to add some nice, jazzy incidental parts. The Spitfire Originals piano is perfect for this. Some piano plug‑ins can sit very low in the mix so, for now, we just gave it a boost using the Dynamics control, duplicated the EP groove to the piano track, then added a further track for incidental parts.
The main string riff is played three times in this track, and we wanted this section to build with the inclusion of new, different parts each time. Normally we’d suggest hiring a real guitarist to add a new part, but since the brief was to demonstrate what’s available in SOSFA, we turned to the AAS Strum Session plug‑in, to see if it could introduce more rhythm in the second and third instances of the main riff.
This great little plug‑in has a bank each of electric and acoustic sounds, and a selection of strum patterns that you can add to each. We used three MIDI notes to trigger a chord sequence, a minor key (Cm in this instance) and the chosen loop pattern. Although there are full strumming patterns available, we opted for a fairly sparse one, partly because it suits the genre but also because it allowed us to blend the part in more easily, to disguise the fact that it’s not a real guitarist! The rhythm it provided really lifted the main section, and drove things along nicely. When we get around to adding some effects to this part, it should sound reasonably convincing to the untrained ear.
Next up, to increase the energy and sense of build‑up even more, we decided to add a synth part towards the end of the track. Since we already had the AAS Ultra Analog plug‑in loaded, we used this. There are some really useful presets in this plug‑in, and we opted for a multitimbral one that worked well for both pad and lead parts — a great starting point, though some slight tweaking was required to get it to sit nicely alongside the other sounds. A fresh part was created to lift the original chord sequence and fill in any gaps in the arrangement. A short riff created for the B section was pasted into the Strum track to see how it would sound doubled and the result almost sounds like a vocoder in the mix — a happy accident that worked, so we decided to keep it!
...we quickly scanned through the Samples section again, and downloaded a percussion loop. Although it was OK ‘as is’, we ended up starting it on beat 2 of the bar, just to get a little more swing...
At this stage, just two more elements were missing: percussion and risers. For this, we quickly scanned through the Samples section again, and downloaded a percussion loop. Although it was OK ‘as is’, we ended up starting it on beat 2 of the bar, just to get a little more swing, with a view to tweaking it more later as the arrangement develops. Likewise, we found a couple of risers, one quite a high, swooshing sound and another deeper sound. These were dropped in just before the final instance of the main groove and will be developed further using effects and cymbal crashes at the end of the sounds to mitigate the abrupt endings.
Next Time...
And that brings us up to date. For now, the main structure of the track is built, and we have a very rough mix balance — albeit one with parts that currently overlap too much in terms both of frequencies and stereo positioning. The next stages will be to further develop the beat, and then dive into the mixing and mastering using the plug‑ins available in SOS For Artists.
The final steps on this project will be to go through the process of creating artwork, adding metadata, releasing the track and promoting it. That’s not an easy feat without the assistance of a major‑label budget, but there are a few tricks that we can use! See you next time.

