It's heartbreaking when an otherwise great recording is ruined by a poorly set up drum kit. The engineer needs to know as much as the drummer about getting this instrument ready for a session...
Apparently, it has been 'scientifically proven' that drum heads are responsible for 80 percent of the sound of a drum. So, while the materials used in a drum, the thickness of the shell and its size are all relevant, tuning and controlling the sound from the heads is of vital importance, and is worth special attention. Most drummers and engineers have experienced difficulties in getting the right sound from a kit: with all the different heads, snare wires, cymbals and mics around, every action in a drum kit will inevitably create a reaction somewhere else. All drummers will have battled at some time or another with excessive ring, overtones, snare buzz and sympathetic resonance, but when recording, these problems can prove especially frustrating, because you're going to hear every little mistake again and again and again. So it pays to get things right in the studio, even more than when playing live.
What follows is a bit of advice on getting a drum setup right, with suggestions for ways to to tackle the aforementioned problems, to make sure your drums are in tune, and to help them to stay in tune.
Although you can pick and choose mics and processors to shape the sound of a drum, my main goal with the setup of the drums themselves is to allow them to retain as much of their 'natural' and intended sound as possible. There are numerous external damping devices on the market, from manufacturers like Evans and Protection Racket, but I think it is preferable to minimise the need for such devices — because by damping the sound, you'll tend to reduce the quality of tone, and you may only be masking a problem rather than curing it. After all, you wouldn't normally damp guitar strings (except with the fingers or palm of the hand when needed), so why should a drum be any different?
Preparation
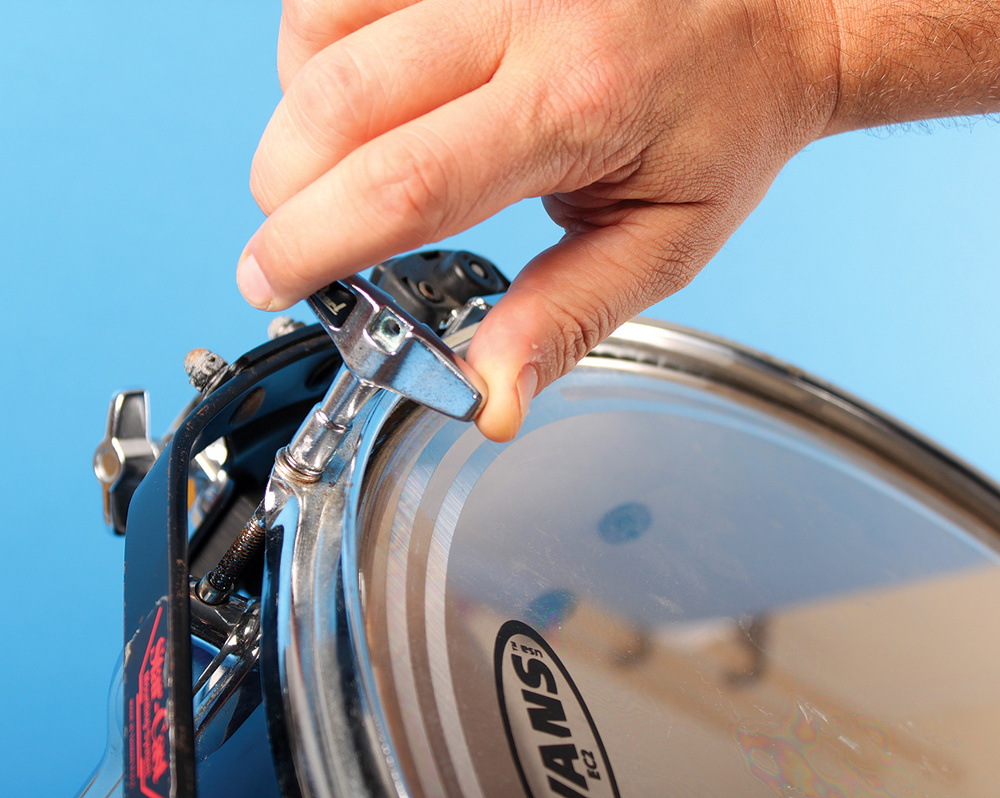
 When fitting a head, don't be scared to stretch it a little to help keep a constant tuning. Maintain some pressure, and tune until the wrinkles have gone.
It may be an old cliché that time is money, but whether you're paying for a studio, or just want to spend time making music, time does come at a cost of some sort, so it pays to prepare. At the very least, a kit should really have seated heads, ready for final tuning, before a session — because undertaking the tuning process from scratch can take some time. Do bear in mind, though, that if your heads are in a severely worn state, it's likely that they've been overstretched and will sound 'dead'. Personally, I'd recommend using fresh, but 'bedded in' heads. For example, if you're a drummer, fit and tune brand-new heads and use them for a rehearsal the day before your recording session — and if you're an engineer, encourage your drummer to do that! This will help stabilise the heads, and will result in a more consistent sound.
For the best sound, though, before you even reach this stage, your preparation should involve choosing the right drum heads. This can seem a daunting task for the uninitiated, given the variety of heads now available — and you might even find that a different set of heads performs better in a live situation compared with a recording session. Unfortunately, the differences — especially with pre‑damped heads — can be subtle, which means that trial and error is often the only reliable way to discover what works best for you. For the less experienced, an un‑damped head may prove to be the best option, simply because this will allow for more adjustments later.
What I would say is that you should take time to think about the style of music, what sticks you use and how you play, before you consider the head types and other materials used in the drums. It doesn't hurt to try to find out what other drummers are using in their setups, either. Obviously, some players already do this, in an attempt to emulate the sound of a particular drummer, but even if you don't want to mimic the sound exactly, it's a good way to learn.
As a general rule, I tend to think of drum heads in simple categories: they'll be single‑ply, two‑ply, or pre‑damped heads, and will come in either clear or coated form. Here's a brief guide:
- Single‑ply heads: These are thin and are formed of a single layer, generally resulting in higher resonance, longer sustain, a brighter tone and more projection, retaining most of the natural tone of the drum. However, they're less robust, and more care is needed in a miked-up situation, as the 'ring' is left unchecked.
- Double‑ply heads: These have two layers, which create a thicker playing surface, and tend to offer 'warmer' tones. The sound is slightly damped and there's less projection, so they have to be worked harder if not miked. However, they're also more robust.
- Pre‑damped heads: These offer different degrees of damping, from subtle control of resonance to total tone restriction. Types of damping include integral foam rings (such as a Super Kick or Evans' Emad bass‑drum heads), thin metallic rings (such as Evans' EC range, allowing subtle control of ring on toms), 'dots' (usually on snare drums, to provide more focus and durability), and reverse dots (beneath the head, to give a smooth upper surface while retaining the focus). With experience, it's sometimes possible to set up a drum using these heads with little or no external damping.
- Clear versus coated heads: Clear heads provide a clearer, brighter sound, while coated ones result in more warmth, and for snares, in particular, the texture can be useful (when playing with brushes, for example).
Finally, it's worth noting that although head choice and all the other materials used in a drum will affect the tone you'll get from it, they won't affect the basic principles of tuning the drum — and, with this in mind, let's move on to that important skill.
Basic Tuning Principles
 Manufacturers go to great lengths to develop mounting hardware that allows the drum to ring and resonate naturally, so it seems a shame to kill that sound with damping devices, such as the one pictured above right.
Pitch, tone and projection from a drum kit are very personal things, and, as with any instrument, it's important to work with the musician to get the right sound for recording — but the musician may not always be aware that there are artifacts that are not desirable for recording purposes, or that they can be controlled. It pays for both the drummer and the engineer to understand the nature of these undesirable artifacts, and how to control them.
Snare drums, bass drums and toms all have their own idiosyncrasies, which I'll look at in more detail later, but the basic principle of tuning a head is the same whatever type of drum you're tuning. (If you're not familiar with drum terminology, see the 'Jargon Buster' box on the next page before going further.)
The first job is to ensure the head is 'centred': check that the drum's bearing edges run true (are flat and smooth), and that all hoops and 'circles' that create the cylindrical shape of the drum are well aligned. Much of the seating process is actually taken care of as the heads are tightened. TraditionaIly, toms in particular would be tuned by alternately turning lugs on opposite sides, but because modern drums are better made, this approach is now not normally required.
Next, 'finger tighten' the head: apply gentle pressure (more on a bass drum head, and be careful on snare‑drum resonant heads, as they're very thin), then re-check the lugs and make sure that they are still finger-tight. Then, while applying a little pressure, tighten the lugs in a clockwise direction using small (for example, quarter) turns until the wrinkles have gone — and that's most of the work done. Indeed, for some drummers this would be enough to give an acceptable tone. If you want more punch, focus, or simply a higher pitch, tighten as required.
It's important to ensure that the tuning around the drum is even. The usual process is to apply gentle pressure at the centre of the head with your hand or a suitable object and tap two to three inches from each lug, adjusting each one until they're at a common pitch. Try not to be too fussy, and remember that each adjustment may affect surrounding lugs, so you need to go back and check each one more than once.
Snare Drums

Snare drums are a little special when it comes to tuning, because they also have snare wires. Some people prefer to tighten snare batter (top) heads right up as part of the seating process, and then take the lugs back down to finger‑tight before retuning, the reason being that a pre‑stretched head is less likely to shift later.
With snare drums, it's common to have the bottom head slightly higher in tension than the top. If you're in any doubt, there's an easy way to ensure you've got it right: preferably before you fit the snare springs, check for a harmonious pitch by muting one head while tapping the other. (Placing the head you intend to mute face‑down on a drum stool is an easy and convenient way to mute one head.)
It's common worry for a snare drum to have 'ring', especially near the edge, and it can be tempting to try to damp this. But again, remember that the ringing is a natural part of the drum's sound: they're supposed to do that! So try to minimise damping if you can, and if you're not getting the sound you want, always try adjusting your tuning as a first port of call — or you could even consider selecting a different snare that can give the sound you're looking for (check out Mike Senior's feature on kick and snare recording in SOS June 2008 at /sos/jun08/articles/kickandsnare.htm for some recording‑specific recommendations).
Adjust the snare wires to suit your style of playing, and test if they're too tight by turning the snare off, and then back on. If the wires snap on before the lever is at its resting position, the wires are most likely too tight. Another indicator of wires being too tight is when tapping the drum produces a choked snare sound.
Post‑setup Problems
 Don't forget to check the state of the heads: a worn or pitted head, as on this snare drum, won't lend itself to good tuning!
No matter how much preparation you do, there will inevitably be times when you need to retune, alter pitches or solve problems after a drum has already been set up. Assuming the head has been seated, it's fine to make adjustments, tweaking the pitch of toms or snare‑wire tension to suit a particular song, for instance.
One of the most common issues you'll encounter is 'sympathetic vibration': the snare buzzing when other drums are struck. To counter this, try loosening the two lugs either side of each end of the snare springs on the resonant/bottom head, and compensate for this by raising the other lugs slightly. If you experience sympathetic vibrations from another drum (more often than not, the smallest tom), the pitch is probably too close to the drum that's causing it to resonate. The solution is to retune one or both drums — but if all the other drums cause the snare to rattle, it's more likely to be the snare that requires attention. It's best to try to address such issues first by tuning the drums, although if you've tried and tried again, and are still not satisfied, you may have to resort to a damping device — which may be as simple as some good old duct tape!
Kick Specifics
Some ideas you'll hear about tuning drums are really nothing more than urban myths, so try to keep an open mind if confronted with unsolicited advice! If you want to apply internal damping to a kick drum, for example, giant duvets are not a good idea: if you put a small, rolled towel in the drum, touching both the front and back heads — but try not to have items pressed heavily against them, as it will choke the sound — you should get all the damping you need. Alternatively, if that feels a little rough‑and‑ready, there are ready‑made pillows available from various manufacturers that do the same job.
With kick drums, I generally start by tuning the batter head, taking it to the point where the wrinkles have gone (which is adequate for many players), but then tuning up higher for a more 'bouncy' feel, which you should get after another half turn or so. I personally would tune the front head quite high too, as this will provide some extra 'punch'.
If the drum has a port-hole, this will help the drum to project more, but at the cost of a little tone. If you're fitting one of these, try to keep it small and off‑centre — and if it gets too large, or you have multiple holes, then really you may as well remove the front head altogether, as it will no longer have any useful resonance.
As I mentioned earlier, there are a number of bass‑drum heads that have damping integrated, and these appear to be very successful. For instance, I use a clear, single‑ply 'Emad' batter head from Evans, with very little internal damping, and the bass drum has great tone and is incredibly powerful. The reason I use this is partially because of years of experimentation, but I find that it is able to control the ring of the drum gently and in a consistent way, while allowing the drum to retain more of its natural tone than a device or pillow inside the drum itself. It's really a modern take on what drummers of the past did by affixing a strip of felt behind the heads.
Tuneful Toms
 Don't rush to tighten everything up with a drum key. From finger‑tight, use the key in quarter‑turns. Working your way clockwise around most modern drums should be fine.
As with the other drums, the heads of each tom‑tom should be well seated before you start tuning. Again, tune gradually, in a clockwise motion. When the wrinkles have gone, the head will carry a basic tone. What you're looking for is an even sound: if it 'flutters', that means that the head is too loose. Now turn the drum over, and seat the other head in the same way.
At this point, you may find the pitch of the drum to be a little low for playing. If you were to now increase the pitch of the bottom (resonant) head alone by, say, two full turns on each lug, you'd find a more choked sound, with an after‑ring caused by the resonant head — which will not tend to suit recording too well. Now imagine increasing the top head to the same pitch so that the entire tom is tuned very high. Here you will find a punchy, but shorter sound, and there will also be more projection.
Finally, if you were to lower the bottom head back down to where it was but leave the top head high, you would notice a 'doink' sound from the drum, meaning that the bottom head was not lending any resonance to the sound. Again, this gross mismatch is not desirable — so although you can lower the bottom head slightly to control the resonance, try not to overdo it.
The Right Pitch
 Matt Seymour
A drum will usually be happiest if the heads are in tune with each other, and with the drum itself, and the closer you can get to that, the happier the drum will be. When it comes to pitch separation between toms, again it's down to personal preference, but a pitch separation of 'thirds' is the most common setup. Personally, I would aim first to get an even pitch difference between them — because if each tom is close to its natural pitch, then the separation will already be more or less achieved without any additional tweaking required.
As with the other drums, I would try to muffle the toms as little as possible, as the ring from them is often important to the perception of pitch and can help you achieve a nice, melodic feel from them. If you do need to muffle them, try to do so in small amounts at first, perhaps using a little tape on the resonant head. If your high tom, in particular, is making the snare ring and buzz in sympathy, try to adjust its pitch first, and then adjust the resonant (bottom) head down slightly to remove a little of the ring. There will always be a little bit of ring from drums, but that's fine: it's not normally necessary to remove every last bit, and toms can always be gated during the mix.
Finally, practice makes perfect, so take every chance to have a go. Tuning a drum kit may seem challenging at first, but you'll soon get used to it — and be rewarded with better‑sounding recordings!
Jargon Buster
If you're relatively new to drums and find some of the terms unfamiliar, this jargon buster should get you up and running:
Heads: Formerly referred to as skins, a drum's heads form the playing surface and allow you to tune a drum.
Batter head: A batter head is the top head that is struck with your sticks (or hands, brushes, Hotrods and so on).
Resonant head: This is the bottom head, and it affects the drum's resonance, sustain and timbre. Most modern kits are fitted with these.
Bearing edge: The top edge of the shell, which may be rounded or angled, and must be flat and smooth if the heads are to be properly seated.
Hoops: These are the metal or wooden rings that hold and pull the head down to form the playing surface.
Lugs: These are the bolts that attach the hoops to the shell and allow you to tune a drum.
Shell: The shell is the main body of a drum, and may be made from wood, metal or acrylic materials.
Drum key: The small key that's used to tighten the lugs on a drum (shown in the header photo of this article).
About The Author
Matt Seymour is a professional drummer and drum tutor based in Cambridgeshire. If you'd like help on the topics in this article or other areas of drumming, contact him at matt@seymourdrums.com.
Key‑tuning Drums
A fascinating, yet possibly surprising idea for tuning a drum kit is to tune its various different pieces to suit the key of a specific song. It's even possible to use chromatically tuned toms and cymbals (by choosing appropriately pitched cymbals or buying pre‑matched sets), so that the drums become a pitched instrument. Terry Bozzio is one of the best-known adherents of this idea.
If you can afford the time, the idea of tuning a kit to a song's key is, in principle at least, perfectly sensible, since the kit will, in theory, sit more harmoniously with the rest of the song. Indeed, this is already quite a common concept for orchestral percussion. It's not an unusual idea in terms of recording, since it's just another tool to make songs sound the way we want.
However, it can be a little time-consuming and requires a good ear for pitch. If you're interested in experimenting with this, I'd suggest that you consider the time factor, and perhaps the style of music you're playing. For instance, if you're playing a piece that is heavily tom‑oriented, there will be more opportunity to fit in harmonically, which might make all the time and effort worthwhile, whereas with a drum & bass track that predominantly features kick, snare and hi‑hats, there'll be rather less point!