: these are pitch-shifted down and fed through a non-linear reverb.") My first step in trying to add variety to the original drum parts was to use the editing tools in Pro Tools to chop up and selectively mute the audio tracks. Note the two duplicate snare tracks (yellow and mauve): these are pitch-shifted down and fed through a non-linear reverb.
My first step in trying to add variety to the original drum parts was to use the editing tools in Pro Tools to chop up and selectively mute the audio tracks. Note the two duplicate snare tracks (yellow and mauve): these are pitch-shifted down and fed through a non-linear reverb.
Sometimes it’s better to revisit musical decisions than to persevere with a troublesome mix — even if that means recording new parts.
Music production is one of those processes where every new step depends on what’s gone before. If you’ve got a good song, creative arrangement ideas come naturally; and when you have good musicians with decent instruments to play those ideas, capturing them is usually a pleasure. Once you have a collection of well played, well recorded tracks, mixing should be straightforward — and when a mix works well, it shouldn’t detain a mastering engineer for long.
Forty years ago, a seasoned producer and engineer would have been on hand during the record-making process, to ensure that each stage was working well as the foundation for the next. Today’s musicians recording their own material at home don’t have the luxury of that safety net, and without the experience and disinterested perspective that outside input can bring, it’s very easy to go astray without realising. The upshot is that you find yourself at what should be the end of the process, struggling to mix something that simply doesn’t want to be mixed. And, almost inevitably, it turns out that it’s not your mixing skills that are responsible, but decisions taken at an earlier stage in the production.
This month’s Mix Rescue is a good example. Paul Thorne’s song ‘Emma’ was 100 percent self-produced and self-recorded, and he contacted SOS because he was struggling to get his mix on a par with the reference tracks he’d chosen. In fact, he’d identified a number of different areas where he felt his mix was falling short. He was concerned that his own mix lacked dynamic variation and depth, and was stymied by the challenges of “Making my vocal sound present and making it fit and blend with the rest of the track; making the mix sound big and punchy — it is a rhythmic track, but it isn’t quite having the impact I would like; [and] creating energy in the chorus and contrasting it with the verse.”
Rescued This Month
Paul Thorne is a Southampton-based songwriter and composer. He has recently been studying music production in London and is working on a portfolio of music for different media including TV, film and radio. He writes and produces in a range of styles including acoustic pop and contemporary electronic genres.
Rough Diamond
On first listen, there were a few things that struck me about the track. The first was that Paul is a seriously talented musician and songwriter! His guitar playing was precise and just right for the musical style, his vocal performance was excellent and, most importantly, the song itself was a gem: a quirky and very catchy indie-pop track, boasting some African influences in the manner of Vampire Weekend. However, Paul’s mix did indeed feel a bit underpowered. The overall tonality was a little bloated at the low end and soft in the upper mid-range, and the mix balance pushed the guitars right to the front at the expense of the programmed drums and percussion, which chattered along apologetically in the background. And although Paul had introduced some nice arrangement touches, such as the breakdown in the middle eight with its filtered drums, the whole thing felt too sparse. In other words, it sounded more like a good demo than a finished track that was ready to mix.
This impression was reinforced when I loaded the multitrack project into Pro Tools. The recording quality of the vocal track didn’t quite do justice to the performance, with a slightly thin and honky tone, occasional clipping and a whiff of bedroom ambience. Perhaps more of a problem, though, were the drums. Used as a supporting element, as in Paul’s own mix, they sounded OK; but when I asked them to take more of a leading role in things, they weren’t having any of it. The snare sound was as dull, dead and synthetic as that of the hi-hat, and the cymbals were super-bright and lively, and the further I pushed the faders up, the less they sounded like they belonged to the same kit. To his credit, Paul had steered well clear of the obvious clichés of drum programming, but his unusual tactic of doubling the kick and snare throughout sounded a bit clumsy when mixed loud, and there wasn’t enough variety in the patterns or the sounds to maintain interest when the drums were used as a ‘feature’ part.
The other principal elements of the track were two electric guitar parts, both DI’d and re-amped through NI’s Guitar Rig, and a synth bass. These all sounded quite good, if a little lacking in mid-range bite, but from a production point of view, none of them showed a great deal of change or development through the song.
 Paul’s original mix was dominated by two guitar parts, which are also prominent in the remix. Again, I duplicated both of them and applied slightly different effects.
True Grit
Treating it initially as purely a remix project, I felt I was able to make worthwhile improvements in some of these areas through fairly standard mixing techniques. For example, a combination of dynamic EQ, fader automation and saturation helped to make the vocal sound meatier, and a slapback delay helped to mask the room sound and increase its perceived size. Likewise, I used slightly different amp simulator settings, all of them bussed through a resonant filter, to generate a grittier and more present guitar sound; and I split the synth bass onto several tracks with different EQ and distortion settings so that it would cut through in the more dense parts of the arrangement.
 The original bass was supplied as a stereo audio file. To add some interest, I duplicated it and added different plug-in effects to the two parts, then used automation to balance them against each other and the overall song dynamic.
All of this helped to bring the overall tonality of the mix into line, and brought in some much-needed presence and impact. In doing so, however, it laid bare some of the limitations of the original arrangement, especially the programmed drums.
I attempted first to tackle this by applying aggressive processing to bring the drum sounds into the same sonic world. I used Avid’s classic Lo-Fi effect to rough up the hi-hat and roll off the incongruously hi-fi top end, while SoundToys’ Radiator took care of the brutal high end on the cymbals, and the kick drum got some slightly milder mistreatment from the SansAmp PSA1 plug-in. I also used a multi-band expander to add some low-mid thump to the kick and snare sounds, and the dull-sounding handclap part received a huge treble boost. This gave me something less like a disjointed assortment of drum sounds and more like a coherent kit, if admittedly rather a lo-fi one, but I still felt that the drum programming and limited sound palette needed extending.

Although striking, Paul’s original drum groove still came across as lumpy and repetitive when pushed to the front of the mix. There wasn’t much variation in either the sound of the drums or the patterns, and neither was there sufficient ‘ear candy’ in the shape of fills, drops and so forth. Finally, and perhaps most fundamentally, there was something of a disparity between these programmed drum tracks and the drum parts in his main reference, Vampire Weekend’s Contra album. Although Vampire Weekend do make skilful use of programming in their tracks, it’s usually in support of more organic, live-sounding drums and percussion, which was notable by its absence here.
Bend Me Shape Me
From this point on, what began as a Mix Rescue slowly turned into something that would be better titled Production Rescue, as our attention shifted from the sonics of the track to its musical content. Rather than try to replace Paul’s drum part entirely, I first decided to investigate the ways in which the existing parts could be twisted to add variety. I didn’t have the MIDI parts, but Paul had sent each drum track as a separate audio file; and in Pro Tools (or indeed any DAW) it’s easy to chop up drum tracks and mute or move individual hits. It’s also straightforward to apply offline processing such as pitch-shifting, and to slide drum hits onto their own audio tracks with different EQ settings and so forth.
A couple of hours’ work in this sort of vein did quite a bit to alleviate the general relentlessness of the original drum part. On a large scale, chopping up and muting parts like the hi-hat for entire verses helped to create contrast between song sections, while by playing around with individual snare hits, I was able to create fills, add some splendidly ’80s gated reverb and introduce much-needed variety into the basic pattern.
Even then, this was only getting the drum programming part of the way to where it needed to be. No matter how I warped the original snare sound, it remained recognisably the same sample; the busy hi-hat part didn’t really lend itself to being chopped up into individual notes and reworked; the song’s choruses still stood in need of a further lift; the cymbals just sounded clumsy whatever I did with them; and, above all, the drums still lacked the organic quality that a more real-sounding kit and part can bring.
EZ Does It
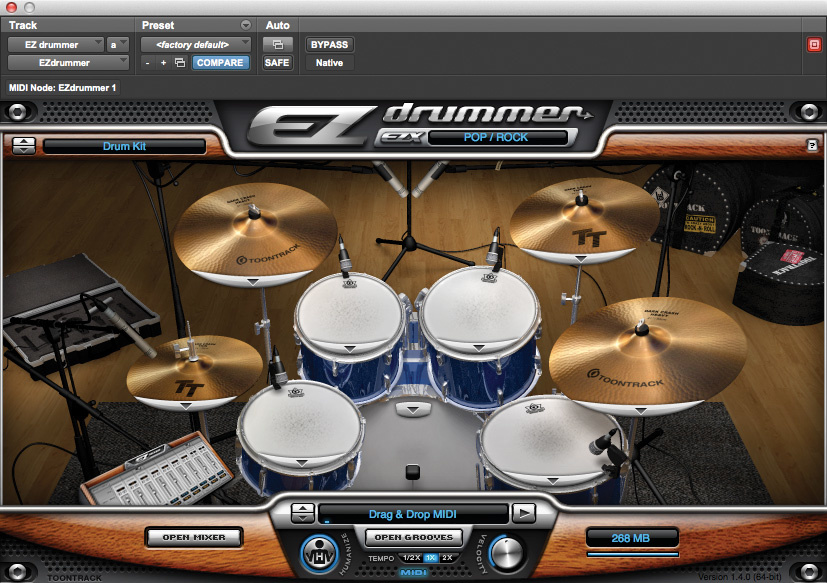
The ideal way to restore this would, of course, have been to add some real drums. However, I didn’t have a tame drummer handy, so turned instead to a basic pop/rock kit in Toontrack’s EZ Drummer. First of all, I added minimal tom and snare patterns to double the important drum hits in the verses, and then created a much more sophisticated and ‘real-sounding’ drum part for the choruses. This, I felt, made a big difference, lifting the choruses dynamically and also adding a real sense of urgency that propelled them forwards.
Inspired by this success, I started to wonder whether there was further potential for development within the verses. The song structure was, roughly speaking, AABAABCAAB, so the natural approach was to use contrasting drum patterns to differentiate the two ‘A’ sections that made up each verse. Leaving the drums in the first half of each verse very sparse meant that the programming in the second half could be a bit busier without undermining the contrast with the chorus. In the event, I ended up creating quite different patterns for the second half of each verse: I retained the primitive, pounding tom and snare rhythm in the first verse, but replaced this with a busy marching snare tattoo in the second, while in the third, I opted for a gentler ride-cymbal pattern. I also introduced fills where appropriate and made sure that my programming fitted the tricksy stop-start guitar chords at the end of each chorus.
In my experience, people often agonise too much over the minutiae of different drum sample libraries and virtual instruments, when it’s time spent on programming that makes the difference. The best drum samples in the world will still sound amateurish if they are employed with lazy copy-and-paste arrangement, clumsy patterns, inattention to detail or unnatural repetition; and the flip side of this is that if you put the hard yards in on the programming front, you can coax musical results from even a relatively modest drum instrument. I’m no drum-programming ninja, but even so, the half a day or so I devoted to detailed work on the drums probably made more difference to the finished track than any aspect of the actual mix.
 This screen shows the second verse and chorus MIDI data for the new drum track I added in Toontrack’s EZ Drummer.
Two Heads
After a day or so’s work, my new version of ‘Emma’ was probably too far removed from Paul’s original to be considered just an alternative mix. The radically reworked and augmented drums changed the feel of the song substantially, not least because I felt they could stand being much louder in the mix than the original parts. There were other obvious changes, too, like the ear candy effects and moving filter added in the middle section, and the tape-stop cutoff right at the end of the track; while from a purely sonic point of view, there was now no shortage of punch and impact in the mid range.
 Some fairly extreme processing was required to bring the original drum sounds into a coherent sonic universe.
Hopeful that the track was moving in the right direction, I bounced out an MP3 file and send it to Paul, along with a lengthy email explaining why I’d done what I’d done.
The worry with this sort of thing is that the artist will feel you’ve ruined their precious song, but this wasn’t at all the case here. Instead, Paul picked up the production baton himself and flew out of the blocks with it. I explained that the liberal use of slapback delay in my mix was partly an attempt to mask the deficiencies of the original vocal recording, and Paul took this on board straight away. Calling in a favour from Mike Taylor, owner of Mutant Lab Studios in Southampton, he re-recorded the lead vocal using a tasty Avantone tube mic. Back at home, he then followed up my suggestion that some vocal harmonies on the chorus would help to add production gloss. What’s more, his re-recorded vocal matched the original performance with uncanny accuracy, and none of his vocal parts needed any pitch correction whatsoever. Impressive — but that wasn’t all...
 Paul re-recorded his lead vocal at Mutant Lab Studios in Southampton using a tasty Avantone tube mic.
I’d also suggested to Paul that one of the things holding back his original recording from sounding like a finished track was its very sparse instrumentation. The synth bass and guitar parts were good, but a modern pop track needs a lot more by way of variety and ear candy to sustain the listener’s interest. I’d added a little of this, but Paul went much further, flying in some really excellent keyboard and percussion parts just where they were needed. Once we’d resolved a few awkward issues with timing differences between Ableton Live and Pro Tools (see box), I felt we really did have a track that was ready to mix.
A New Mix
Most of the new parts slotted in with relatively little processing — I particularly liked the tuned percussion part that had been labelled ‘Tiles’. The bulk of my mix work was about balancing the new, much denser arrangement and presenting Paul’s re-recorded vocal in the best light. Key to the former was some fairly aggressive use of mutes and fader automation, to ensure that all the elements came and went in different combinations rather than fight each other for space.
 HOFA’s IQ-Reverb provided the plate reverb on the lead vocal.
My eventual mix configuration for the lead vocal, meanwhile, involved no fewer than six dedicated aux channels in Pro Tools. Paul has quite a ‘light’ vocal tone, and to beef it up, I sent from the lead vocal track to a SansAmp effect, mixed in quite low.

 Numerous effects were applied to Paul’s excellent lead vocals including SoundToys' Primal Tap.
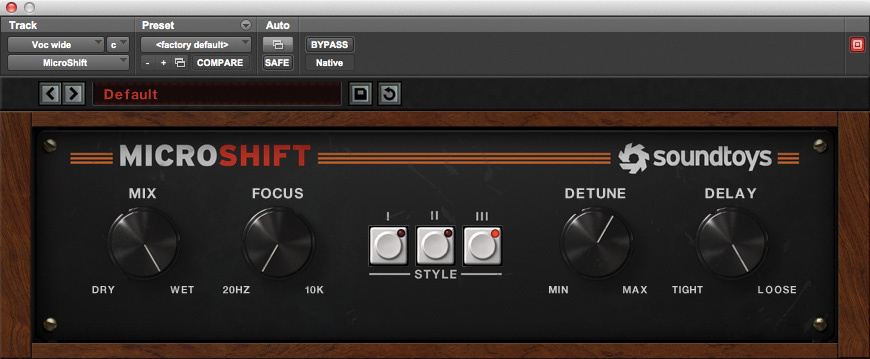
I retained the original slapback delay, albeit at a lower level; this was augmented by a plate reverb (HOFA’s IQ-Reverb) and two separate stereo-widening effects, one from SoundToys’ Microshift and the other from a short delay fed through an Eventide Harmonizer plug-in.

Finally, to get the mix sounding as punchy as possible, I used a dynamic EQ to push the all-important mids, and fed this to Audified’s rather coloured U73b compressor and a Slate Digital tape emulation.
I am, of course, passing over a lot more detailed mix work that might normally have merited a mention in a Mix Rescue column, partly because I’ve written about the same techniques in previous articles, but mainly because I want to focus on what’s really important. As I mentioned at the start of this article, when you’re attempting to do everything without outside input, it’s alarmingly easy to find yourself stuck with a ‘finished’ song that turns out to be unmixable. And when this happens, it’s almost never the mix itself that’s the problem. The answer is always to get things right at source, even if that sometimes means rewinding the production process further than you’d like!
Live To Tools (And Back)
One of the perennial issues that arises when projects are mixed remotely is how best to send them. It’s easy enough if both the tracking engineer and the mix engineer use the same DAW, but awkwardness can develop in trying to move between different programs or platforms. That’s doubly true when, as in this case, a project ends up travelling back and forth several times.
Paul Thorne, this month’s Mix Rescuee, works in Ableton Live, and in order to generate suitable files for me to mix in Pro Tools, had very sensibly bounced each instrument as a stereo audio file. He’d used Live’s tap tempo function to set a suitable tempo for his initial recording of ‘Emma’, which ended up not being an integer value in bpm. Initially, this wasn’t a problem, and I was able to use the Identify Beat function in Pro Tools to figure out what the tempo was, so that I could work to a grid.
However, problems began to arise when I sent Paul my first mix, and he loaded it back into Live in order to add his overdubs. I had introduced an extra bar’s rest before the middle section as a production ‘hook’, and when Paul reimported my file into Live, it attempted to warp it to fit the original shorter project length. And even after this had been sorted out, when Paul exported his re-recorded vocals and other overdubs for me to mix, they were no longer at the original tempo. In the end, I had to ask Paul to re-export the entire project, as it just didn’t seem possible to resolve the tempo drift that had occurred. I never quite got to the bottom of why this was happening, but I suspect it’s a product of Live’s very fluid approach to tempo.
Mix Reaction
“Sam’s work on the drums added a lot more energy and dynamic variation to my song. I now realise what well thought-out and detailed drum programming can do for a track. I was very impressed by the quality of the programming and the drum sounds themselves, which to my ear do not sound obviously programmed, but could well have been performed live.
“In my original arrangement I had decided on a ‘less is more’ approach, in the hope of getting a clear, uncluttered mix. However, having Sam’s perspective on the arrangement gave me the confidence to create a much more dense and lively arrangement and I had a lot of fun adding piano, synths, tuned percussion and backing vocals. In hindsight, my original showed too much restraint in terms of layering instruments and adding variety to each part.
“I am really pleased with how sonically rich and powerful the track now sounds and I think the new overdubs were mixed in very tastefully by Sam to not distract from the song itself, but complement it nicely.”
Hear The Results
Download the audio files and hear for yourself what Sam is describing in the article.
Download | 115 MB