 To give you an idea of the versatility of Clipping windows, here's one containing a wide range of data relating to a recent recording of mine: effects settings for hardware processors dumped as SysEx, patch info, lyrics, audio drum fills, aliases pointing to my audio storage drive, pitch‑bend settings... the list goes on.
This month, Digital Performer's useful but little‑known Clipping window falls under the Performer Notes spotlight. Plus tips on where to find top VST freeware plug‑ins for use with DP, and advice on setting up side‑chain access to MOTU plug‑ins.
<!‑‑image‑>The Clipping windows in DP rank among its least glamorous features, but they're potentially one of the most useful. At their most basic, they can behave as storage or 'archive' areas for data such as MIDI phrases, audio files and soundbites, or even entire sections of music consisting of a variety of data types. But they can also store or 'point to' data and files outside the DP environment, holding PDF‑format manuals, or documents from other applications like audio editors and music scoring programs.
Clipping windows are really just 'views' of folders located on your hard drive. To get a better grasp of this idea, try opening a DP project which already has some MIDI or audio data in it. Under the Windows menu, select 'Clippings' and choose 'New Project Clipping Window' from the submenu that appears. A little Clipping window should appear, with its title bar highlighted ready to be renamed. Enter a name for it, and then double‑click the title bar. A standard Mac OS window opens in the Finder with the same name as your Clipping window. If you look around in the Finder to see where this new window is located on your hard drive, you'll see that DP has automatically created a 'Clippings' folder inside your project's folder, and that the new Clipping window's folder is inside that. There is also a 'New Digital Performer Clipping Window' option, which creates a folder in a similar way, although this time inside a 'MOTU Clippings' folder located inside your Mac's Preferences folder. As you might guess, the difference between 'Project' and 'Digital Performer' Clipping windows is that data stored in a Project Clipping window is available only to the project in which it was created, but anything stored in a Digital Performer Clipping window is available to any project that you open.
Once you've created Clipping windows, you can copy MIDI or audio data to them from DP's Tracks window with the 'Copy To Clipping Window' option under the Edit menu, selecting the precise Clipping window you want from the submenu. Once your window has data in it, you can pull copies back into the Tracks window at any time by simply dragging the Clipping icon from the window with the mouse, although obviously you can't pull MIDI Clippings into Audio tracks and vice versa.
<!‑‑image‑>The 'Copy to Clipping Window' option is one of the main ways of adding items to Clipping windows, and if you're clipping data from the Tracks or Graphic Editing windows it's the best option. Another method, often used for clipping external files or folders, is to drag Finder file icons directly into the Clipping window. If you drag a folder, or even your hard drive icon, into the Clipping window, DP simply creates an alias to it which works in exactly the same way as an alias in the Finder — double‑clicking on the alias in the Clipping window will even open the folder or drive in the Finder.
Finally, you can also drag files into a Clipping folder's window via the Finder, whereupon they will then show up in Clipping windows in DP as normal. In general, though, it's better to let DP automatically create aliases for your files — that way you don't need to worry about accidentally erasing something important if you delete a clipping or its window.
So, what can you actually do with these windows once you've set them up and filled them with clippings? Users who find Performer's metronome inflexible or clumsy often store MIDI click tracks they've created as clippings, as they can be easily dragged into and deleted from sequences when necessary, and, of course, very complex, irregular click tracks can be produced and stored if required. As I mentioned previously, Clipping windows can provide easy access to PDF instruction manuals, or linked word processing documents containing song lyrics or production ideas, settings information for outboard equipment, or perhaps diagrams of studio layouts or mic positions (see screen grab, above left). You can also drag web site addresses into clipping windows, most easily from Internet Explorer, by dragging entries in the Favorites window into the Finder, and then from the Finder to the Clipping window.
A different use for clippings is to store entire song sections, allowing you to completely restructure pieces with just a few drag‑and‑drop manoeuvres. You could even record System Exclusive dumps from your equipment into a sequence and then gather them all together into one Clipping window for later recall in other sequences — ideal for quickly creating easily accessible libraries of synth patches. Automation data, too, can be copied to Clipping windows and quickly replicated on other tracks. If you think about it, there's bound to be some way in which you could speed up the way you work by using clippings.
Using Plug‑in Side‑chains
 Accessing the side‑chain on the MOTU Dynamics plug‑in.
A number of DP's MAS effects plug‑ins include side‑chain inputs, allowing audio signals routed to them from elsewhere in DP to control or influence some aspect of their operation. The most familiar application of this side‑chain routing is 'ducking', often heard when radio DJs do voiceovers at the end of songs. Here, the DJ's mic signal is patched into the side‑chain input of a compressor or limiter through which the song is being played, so that every time the DJ speaks, the compressor activates and the song audio 'ducks' to a lower level so that the DJ's voice is audible. The same effect can easily be set up in DP, but there are many more interesting possibilities too. MAS plug‑ins offering side‑chain routing include Dynamics (compressor, limiter, expander and gate), Multimode Filter, Sonic Modulator and Ring Modulator, and in all cases, audio must be routed to the side‑chain inputs via one of DP's busses (or a buss pair).
Setting up the side‑chain input in the Dynamics plug‑in is quite straightforward. Just above the control level meter there's a Control Signal pop‑up menu which defaults to 'Input' when the plug‑in is activated for the first time. This is perfectly logical, because normally, if you're compressing a lead vocal (for example), it's the level of the original vocal recording (the plug‑in's input) that should be controlling the amount of compression which is applied. But the Control Signal pop‑up can allow a 'side‑chain' buss input to control the amount of compression applied to the audio passing through the plug‑in. Note that this side‑chain input is purely a control signal — it will remain inaudible unless routed to an output somewhere else in DP. So to get that DJ ducking effect in DP, you'd place a Dynamics (compressor) plug‑in on the song's audio channel, and then set up an aux send on the DJ's mic channel. By setting the Control Signal pop‑up on the Dynamics plug‑in to the same aux send buss (see the screen grab below right), the mic signal will act as control signal for the compressor. Providing you've dialled appropriate settings into the plug‑in, you should hear a drop in the song's volume every time there's a signal present on the mic channel.
Using the same kind of routing, you could try inserting compressor or gate plug‑ins on channels carrying audio with a fairly constant level (like a synth pad, for example), and instantly give them some dynamic variation or even an aggressive 'chopped up' quality by routing percussion or other rhythmic parts to the plug‑ins' 'Control Signal' inputs. There are numerous records that use this effect extensively — a recent example is the single version of David Gray's 'Babylon', the string part of which is gated with a rhythmic side‑chain input opening and closing the gate [although not within DP — Tracks Ed].
Both the Sonic Modulator and Multimode Filter plug‑ins have side‑chain inputs, allowing their onboard envelope generators to be triggered remotely. So you could, for example, apply Multimode Filter to an electric guitar track, and use its side‑chain input to trigger filter sweeps from a live vocal part for wah‑type effects. As a final example, consider the Ring Modulator plug‑in, which normally bases its sum‑and‑difference frequency calculations on the tones produced by its internal oscillator. But by choosing other options from the 'modulation source' pop‑up, it's possible to select a buss input or even the carrier itself as the control signal.
With experimentation, it's possible to get some amazing effects using this kind of setup. Robin Bigwood
Quick DP3 Tips
If you're creating lots of Clippings and putting them in the same Clipping window, you can speed things up by selecting 'Copy to Clipping Window' for the first clipping, and then simply using the keyboard shortcut Shift‑Apple‑C after that.
You can rename a clipping at any time by holding down the Alt key and clicking on the name of the clipping. This Alt‑and‑click renaming technique works on all sorts of titles within DP, including track names, marker names and soundbites.
If you need to bypass lots of MIDI or MAS effects quickly, hold down the Alt key and click on their names in the Mixing Board's insert slots. To quickly copy an effect from one channel to another, drag it from its insert slot whilst holding down the Alt and Apple keys.
Storing Plug‑in Effects Settings
One of the best uses for Clipping windows is the storage and management of settings for DP's MAS effects plug‑ins. Although new or modified effects presets can be saved by selecting 'Save Settings...' from any MAS plug‑in's mini‑menu, these presets are normally only accessible from the project they were created in. But by holding down the Apple key and dragging plug‑ins containing new presets from the Mixing Board's insert slots into a Digital Performer Clippings window, a library of user presets can easily be built up. You could create separate Clipping windows for each MAS effect, or perhaps have one window of favourite presets encompassing lots of different plug‑ins.
Freeware VST Plug‑ins
<!‑‑image‑>There are some truly great freeware VST plug‑ins out there that will work with DP under Pluggo or VST Wrapper. Here are some that I turn to most often:
- SILVERSPIKE
RM844, which works under Pluggo, is an exceptional reverb plug‑in that's good at creating believable small spaces and also more 'creative' reverbs. Ruby Tube, a valve amp and limiter simulator is also well worth having. For both, visit www.silverspike.com" target="_blank.
- ARBORETUM
Whilst the H‑VST Low Pass and Ring Modulator plug‑ins available from www.mda‑vst.com" target="_blank seem fairly average at first glance, astonishing effects can be achieved by automating them under Pluggo in conjunction with their unique control surfaces. Exercise caution if you value your hearing...
- MAXIM DIGITAL AUDIO
There's a huge number of plug‑ins to be had at www.mda‑vst.com" target="_blank, but the best, which all run under VST Wrapper, are the handy mda Piano, the JX10 synth, and RoundPan, a great psycho‑acoustic panner.
- SMART ELECTRONIX
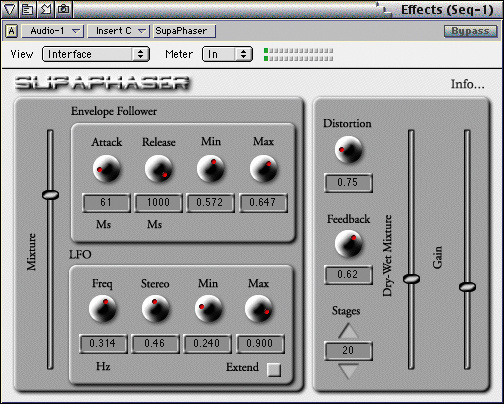
I've not come across many phasers as genuinely useful as SupaPhaser (pictured below) from www.smartelectronix.com" target="_blank. This is a superb, rich‑sounding plug‑in, with both LFO and envelope trigger modulation options.
- PROSONIQ
North Pole, from www.prosoniq.com" target="_blank, is such a good 24dB‑per‑octave filter that when I first downloaded it, I suspected I'd unwittingly acquired a hacked version of a commercial product. But it's all above board (I checked), and works perfectly in DP under Pluggo.
- DREAMPOINT
Dreampoint's FreeVerb is a classic, and though it has relatively few parameters and no graphical user interface, it makes a nice noise. It's a touch heavy on the processor under VST Wrapper, but worth it. Surf to home.onet.co.uk/~jzracc/freeverb.htm" target="_blank to download a copy for yourself.