 Here, Revoice Pro is sync’ed to Cubase via the unassuming-looking Revoice Pro Monitor plug-in, which acts as both a transport link and a virtual instrument, playing RP’s stereo mix on the brown/grey channel.
We dive deeper into Synchro Arts’ powerful pitch-processing and audio-alignment software.
In Part 1 (http://sosm.ag/revoicept1) I took you through some Revoice Pro 3.2 basics: you should now be able to transfer audio between RP and your DAW, apply alignment and fake-double presets, and make simple tweaks to Doubler settings. This time, I’ll explore the pros and cons of DAW-sync’ed playback, explain how to edit pitch, time and level manually, and discuss making tweaks to your APT Processes settings. Again, you can find some videos on the SOS YouTube channel.
Sync’ed Playback
To set up RP to play back in sync with your DAW, fire up a DAW project and a fresh RP project (it’s not essential, but I recommend you use the template downloadable with last month’s article.) Don’t forget to make sure your RP project settings match those of your DAW — if you import audio before you do that, RP’s playback will lag behind your DAW’s and you’ll end up scratching your head, swearing angrily or otherwise wasting valuable minutes, before eventually deciding to start from scratch!
Transfer a vocal part into RP and apply a stereo Doubler preset, as we did last month, to give you one Guide, one Dub and one stereo Output. Now, ensure the little orange jack-plug icon (bottom right of the GUI) is lit; this diverts RP’s stereo mix to the Revoice Pro Monitor plug-in, speaking of which...
In your DAW project, create a new track and insert the Revoice Pro Monitor virtual instrument plug-in. Still in your DAW, mute whichever parts you transferred to RP (you don’t want the two versions playing simultaneously), and hit play. RP should play along with your DAW, with its audio signal appearing on the track on which you inserted the Monitor plug-in.
With the audio still playing (loop the section if you need to), switch from your DAW to RP using your OS’s standard Cmd+Tab (OS X) or Alt+Tab (Windows) command. You can use the mute and solo buttons on the Track Groups we set up last time to audition different combinations of Guide, Dub and Output. But if you’ve not used the template and haven’t set up Track Groups, here’s a useful shortcut, which I only stumbled upon after part one went to press: you can use the number keys at the top of your computer keyboard to toggle solo for the first 10 tracks in your project. For simple projects such as this Doubler example, that’s really helpful, as are the A, S, D, F and G shortcut keys we discussed last time. But for more ambitious projects, I find the Track Groups more useful.
It’s worth noting that the DAW is the master in this relationship, and RP the slave. This means you’ll need to be in your DAW to start/stop playback, switch to RP to make your tweaks, and return to your DAW to halt playback. You can still operate RP independently of your DAW, though, and you can click the jack icon at any time to break/restore the link with the DAW. But the one thing you cannot do is control your DAW from RP.
Best Of Both Worlds
That very simple example covers how to sync RP with your DAW, but why would you want to? After all, last month’s copy-and-paste and drag-and-drop techniques were fairly hassle-free, and they offer the advantage over sync’ed playback that, because you copy each Output back into your DAW, you can apply insert and send processing to them individually.
Well, a significant advantage of slaving RP to my DAW is that when I’m applying Processes I can hear the results in context, and that’s essential when making manual pitch and time adjustments. (You could, I suppose, render and import a mix-in-progress ‘snapshot’ to RP as a backing track — and if you were farming out your pitch processing/alignment work to someone else that may be a good idea — but I find that less convenient.) What’s more, I can try out different Process variations in RP without littering my DAW project with audio files at every stage. Still, for simple jobs, drag-and-drop is indeed easier, so I’ve adopted a hybrid workflow...
During the initial mix-prep phase of a project, I’ll use RP hooked up to the Monitor plug-in. This is when I’m more likely to be doing lots of work in RP, and tweaking the results of my Processes quite a bit. Then, once I’m satisfied, I’ll commit to the result and drag/copy all the Outputs to my DAW. I’ll save and close RP, so I can revisit things should need to but can meanwhile focus solely on my DAW session. Most things I want to do in RP later will be minor tweaks, and for that I’ll typically drag-and-drop the short section that requires attention.
The only real downside to working this way is that I lose any pan settings I’ve created in RP. Generally, though, I’ll have set up panning on the DAW tracks before exporting to RP in the first place, and will bring the aligned Outputs on to those same tracks (see the ‘Take-away’ Tip box).
That said, I don’t always want control over each individual part in the DAW: to me, one of the most important pre-mix processes is whittling down all those multi-mic setups, vocal stacks and double tracks to leave a manageable number of tracks to work with in the mix. And so sometimes, I’ll simply record the stereo feed from RP into my DAW.
Whether you choose to keep each part separate or to capture the stereo feed, it’s a good idea to bring every part into your DAW eventually. Not only does this lighten the load on the computer (you don’t have to run the two applications in tandem), but it’s handy for archival: experience tells me that the fewer applications you have to trust to open should you need to revisit the project in a few years’ (and probably OS versions’) time, the better.
Warp Factor!
It’s high time we examined RP’s editing, pitch-shifting and time-stretching facilities. First, though, note that RP is not a DAW, and for basic edits you’ll have better tools in your DAW. For example, to delete a section of audio, you must position the playhead (click on the timeline), right-click at the start of the region you wish to separate, and select Split Region At Playhead — and repeat the process at the end of the clip before selecting it and hitting delete. Nonetheless, RP boasts particularly powerful pitch, time and level manipulation facilities, as I’ll explain below.
With an audio part on an RP track, we need to make sure we’re in the right mode and can see everything clearly. Click on the track’s ‘hamburger’ icon (a line with a triangle above and below) so the track fills the screen. Horizontal lines should appear, representing musical notes, as listed on the left. Next, select the audio you wish to process, right-click and select Make Warp Region. You’ll see a pitch overlay in front of the waveform — a bunch of white/grey blocks represents each note, and squiggly lines show the pitch variation within each block. If you can’t see that, use your trackpad/scroll wheel or the scrollbar to bring the overlay into view. See those white lines on the scroll bar?  Note blocks, with their internal pitch traces, are displayed as an overlay that can be scrolled to avoid obscuring the waveform beneath. Also note the white lines on the scroll bar, which make it easy to locate the note blocks if you’ve scrolled too far.These indicate the pitch range, making the notes easy to find, and if you’re struggling to fit the whole range on screen, click the slider icon above the scroll bar to zoom vertically. (If you’re still not seeing the overlay make sure the drop-down menu located top-right is set to Pitch, not Audio or Energy). You can move this pitch trace up and down, to prevent it obscuring the waveform, for example to identify edit points.
Click on a note block using the (default) selector tool, and you’ll hear a tone at the block’s central pitch. Click in the middle of the block and you can drag it up or down to change the pitch, and the tone will change accordingly. The tone isn’t the nicest sound but it ‘cuts through’ most material, which is helpful when tuning things by ear. It also alerts you if you’ve selected and moved a block inadvertently — but it can be turned off via Preferences/Enable Tuning Preview. The Cut tool, used to cleave note blocks in two.
 Using the selector tool with some modifier keys to tilt the pitch downwards.
You can also manipulate the timing of notes by dragging left/right. Obviously, being able to drag on two axes creates the potential for accidental moves, and to guard against this when you wish to change only the pitch or the time, you can engage a vertical or horizontal lock. To do so, use the double arrows at the top-right corner of the GUI (shortcuts: H and V), which turn red when the lock’s engaged.
Placing the cursor elsewhere on the block accesses different functions. At the top or bottom of the block, the cursor changes to a flat line with an up or down arrow and this allows you to compress or expand the pitch variation within the note block (ie. shrink or stretch the note vertically). You can even invert the pitch curve in this way, which offers some interesting sound-design potential! Place the cursor on the left or right of the block and you can do one of two things: before you’ve made any time changes, hover on the outside edge and the cursor changes to a line with an arrow on both sides, allowing you to drag the boundary between this note and the adjacent one, stretching/shrinking the two notes accordingly. But positioning the cursor slightly inside the block’s edge gives you a line with only one arrow, with which you can shrink/stretch the note without affecting its neighbour, though you can’t stretch a block so that it overlaps another. If instead you place the cursor at the block’s corners, you can perform time and pitch stretching in a single motion. Finally, you can tilt a block’s pitch curve: hover over the right or left edge and hold Alt/Option (Mac) or Ctrl (Windows), then drag up or down — a line appears indicating the tilt away from the note’s ‘natural’ pitch.
Tool Tips
We managed all this using only the Selector tool, but there are various other tools, as revealed by right-clicking, and you’ll want to learn their shortcuts. The Cutter tool (shortcut: I) allows you to cleave a note in two. Try it: click to split a note, hit O for the Selector tool, and move one note up or down by a couple of tones. Play back the result, which should sound decent (RP’s pitch shifting is among the best I’ve heard) but the pitch change will be somewhat abrupt! To remedy this, hit ‘M’ for the Smooth Join tool and lasso the two notes — the first note should now flow much more ‘naturally’ into the next. (If not, and you didn’t have the horizontal lock engaged, you’ve may have dragged the notes ever so slightly apart). The Smooth tool is essential to a good result when you’re splitting and moving notes — see how the pitch trace flows more smoothly in the right-hand ‘after’ screen.
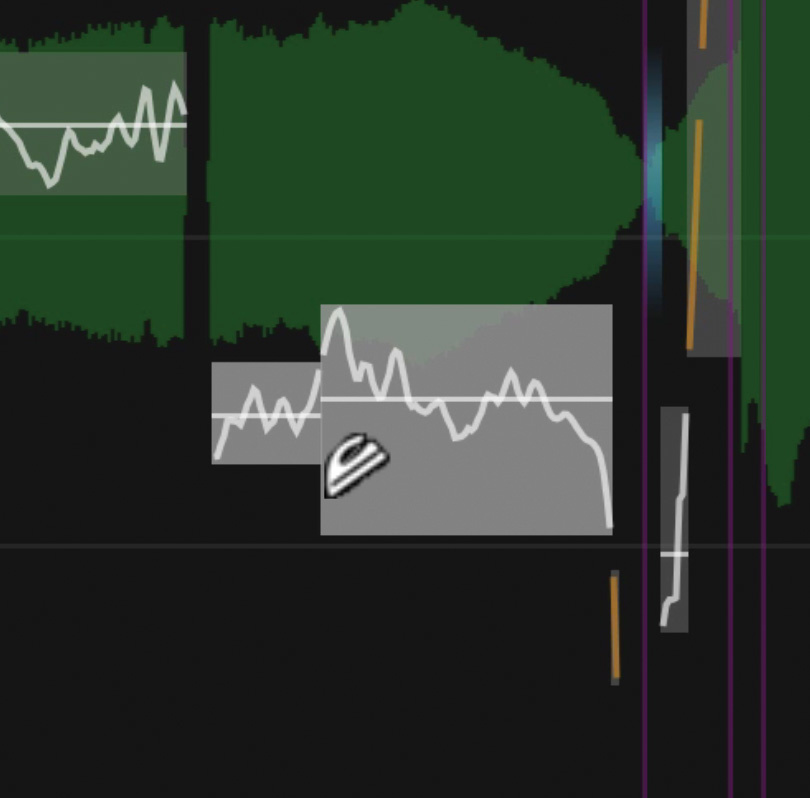
The Join tool (shortcut: J) allows you combine two or more blocks into one. Having split and tweaked the pitch of two sections, then, you could glue them together, allowing you to manipulate them as one; to do this, hover the tape icon over the boundary of the two clips and click. But there’s a more versatile approach to grouping notes: select the notes, right-click and choose Group/Group Selected Values. This allows you to, say, tilt the pitch of a whole phrase up or down, and then ungroup in a single action afterwards.
The L key brings up the Pencil tool, which allows you to manually draw in a pitch curve. I’d recommend this more for surgical work at high zoom levels than for broad-brush correction, though you can certainly have a lot of fun experimenting with more creative ideas!
At this juncture, it’s worth pointing out that the level can be manipulated in much the same way as the pitch — select a Process, then right-click and navigate the pop-up menu to choose the Process’s Edit Level command.
 For quick pitch correction, the aptly named Correct Pitch tool is indispensable.One of the tools I use most frequently is the Correct Pitch tool (shortcut: K). This takes the form of a slider which applies correction to the nearest semitone, from 0 (no movement) to 100 (full correction) percent. I often use this on the whole Guide track before applying an APT process to align doubles: hit Cmd+A (Mac) or Ctrl+A (Windows) to select all and slide this to quantise the pitch of the entire part. That corrected pitch will by default be cascaded to the APT Output parts.
By default, the Correct Pitch tool corrects to the nearest semitone in concert pitch, but next to the jack icon at the bottom is a menu labelled ‘All Notes’. Select ‘Scales...’ and a window will allow you to specify a scale, to offset the pitch, and to choose from a generous menu of different tunings.
 The Warp tool will be familiar to most DAW users: as with most such tools, it’s often useful to create three or four warp points before moving any of them.The final tool in the list is the Warp Point tool (shortcut: full stop/period key). This allows you to place/delete markers, around which audio can be warped (stretched/compressed in time) via click and drag. Shift-clicking adds a warp point at the cursor, and the same action deletes a warp point under the cursor. I find that the best approach is generally to create at least three or four warp markers — one at the beginning and end of the section, which you won’t move (as it would affect the audio outside the markers too), and one or two in between, which you will. A dedicated command is intended to help here: select a note, right-click and choose Add Three Warp Points. However, I prefer to add them manually, using the waveform as a guide, as the command places the middle point right in the middle of the note, which isn’t usually where I want it!
Complex APTs
Let’s turn our attention back to the APT and Doubler Processes. Last month, we applied an APT Process to time-align backing vocal Dubs to a lead vocal Guide; we opted for time-alignment only, as the backing parts sang slightly different melodies. Let’s consider a more sophisticated approach to the same example, incorporating some pitch processing: we’ll aim to set up RP to align all the parts in time, but lock only certain parts to the same pitch. In terms of the raw audio, we have a lead vocal, a lead vocal ‘double’, and a pair of backing vocal parts singing the same melody as each other in the same time as the lead but with a different melody.
First, pitch-quantise the lead vocal: select it, right-click and choose Make Warp Region. Then hit Cmd+A to select all and then K to bring up the Pitch Correct tool. Slide it to, say, 50 percent. Repeat this for the lead’s double. Next, align the lead vocal’s double and the first backing vocal to the lead — follow last month’s instructions to apply this time-only APT Process. With that done, pitch-correct the first backing vocal if that’s required. Then, using the first backing vocal as a Guide, apply a separate pitch-and-time APT preset to align the second backing vocal. This way, any time tweaks you make to the lead vocal will ripple through to all tracks, and the pitch of the backing vocals will be tighter, but no single Output has multiple Processes attached (something which can cause user-confusion).
Tweaking Processes
While that’s a fairly complex APT setup, with one Process dependent on the Output of another, you can tackle much more complex problems if required — you just have to think through your approach to keep things tidy. Also, we’ve still only used the factory presets, and there may be times you want to exempt certain sections from a Process. So let’s get tweaking...
First, select the Process in question: select the relevant Output and the Processes will light green on the Guide and Dub tracks. With the Process selected, hit P to bring up the Process Settings dialogue box. There are three main sections in the APT Settings dialogue — Timing, Pitch and Energy — each of which offers various sliders and tick boxes that govern what the algorithm will do. I won’t explain every parameter here, as I have only so much space and they’re all described in the manual, but I’ll discuss what I think are the most useful ones to reach for in the first instance:
 The APT Process Settings window.Timing: the Tolerance slider can be thought of as a threshold control; the further towards zero it’s dragged, the more changes will be triggered. Opposite this is the Max(imum) Shift slider, which is one of the most useful things to tweak; as the name implies, it allows you to limit how far any errant phrases are moved from their original positions. I’ve never found a need to adjust the Protect Transients slider when working with vocals, though it’s useful for other sources, as I’ll discuss in part three.
Pitch: Even if you’ve only applied a timing-based preset as we did last month, you can add pitch characteristics by ticking the Pitch box. The Process will render immediately, but you’ll more than likely want to make tweaks. Again, the Tolerance control acts as a sort of threshold, and the Transfer Strength determines how closely the processed notes will follow those of the Guide. There are also a few optional rules governing how the algorithm will approach changes in pitch: Nearest Octave will transfer the exact pitch while still allowing natural octave jumps, making this a sensible default; Absolute will transfer the exact pitch, which I find is required very rarely; Relative changes the pitch relative to the Guide’s pitch; and Monotone (for which I’ve yet to find a sensible use!) forces all notes to the average pitch.
While the Advanced Algorithm and High Res Mode may look tempting, they’re not necessarily better than the standard mode and may, in fact, make things sound worse, depending on the material in question. So approach these with caution: think of them as options to try only if you notice problems using the standard settings.
Level: again, engage this section by ticking the box. There are the now-familiar Tolerance and Transfer Strength sliders. The Offset control is useful, as it enables you to make balance adjustments between, say, a lead and backing vocal part, and unlike using the track’s fader, these changes will be included in the Output you transfer back to your DAW. The self-explanatory Keep Dub’s Average Level box is handy too!
There’s a handful of other parameters outside the window’s three main sections. At the top, a lock button prevents automatic updates to a part after you’ve made manual edits, and a Compare facility allows you to capture the current settings to one of up to 26 presets — this allows you to experiment with Process tweaks without losing your settings, and as the rendered result is stored with the preset, it speeds up comparison too. The Pinned tick box allows you to view multiple process settings windows simultaneously, which I’ve found to be an indispensable feature! And at the bottom, tick boxes determine which characteristics are displayed over the waveform.
Working In Sections
 The Playback Range doubles up as a means of selecting regions, and can be locked in size, dragged and deleted by right-clicking.So far, to keep things manageable, we’ve only applied Processes to entire tracks, but they can also be applied to short selections and can be copied along the timeline. What’s particularly useful is that sections can be made immune to Processes.
You can select a clip or use the playback range as the basis for any Process. Click on the grey strip above the uppermost track and drag to create a playback range, and move the range’s end markers to adjust it. Right-click on the yellow bar, and you can make it ‘permanent’ (which fixes the range’s length but allows you to drag it along), lock it to prevent accidental changes, put its start/end at the playhead position, or delete it entirely. If you then apply a new Process, choose (via the Initial Input Start And End menu) Selected Playback Range — the Process won’t apply to any audio that falls outside the range.
You can also drag a Process along, and adjust its start/end points. In fact, in one of the videos accompanying Part 1 of this series, you can see me do this to avoid a problematic first word that had confused the APT algorithm somewhat. But there’s actually a better way to exempt a section of audio: with a Process selected, right-click on the Dub track you wish to protect, select Add Protected Area, then choose Protect Pitch And Timing, Protect Pitch or Protect Timing, as desired. A red region appears over the waveform — zoom in and drag/adjust this to cover only the area you wish to protect, and right-click on it to change or remove the zone. If you want to achieve perfect results, it’s essential that you learn to wield this tool! Adding a Protected Area, to make certain sections of audio immune to the effects of Processes.
Finally for this month, the ability to Alt-click and drag to duplicate a Process to another part has some intriguing potential. For example, it proved a very efficient means of accenting certain words with a suitable Doubler, to fake a sort of Beastie Boys feel on a rap track!
Next Time
I can hardly believe we’re two thirds of the way through this series already: it feels like we’ve just scratched the surface, so I hope you’re finding it useful! Next time we’ll explore, amongst other things, tempo import, automation-style envelopes to change Process parameters over time, and some much more creative applications for Revoice Pro.
ReVoice Pro 3.2 Masterclass (Part 1 of 3)
ReVoice Pro 3.2 Masterclass (Part 2 of 3)
ReVoice Pro 3.2 Masterclass (Part 3 of 3)
Take-away Tip
Something I’ve found helpful once I’ve returned Outputs from RP to my DAW is to use my DAW’s take/comping facility: instead of bringing the Outputs on to new tracks in my DAW, or overwriting the original parts, I’ll place the Outputs as alternative takes on the same track(s). I can use that facility to compare the before and after versions of several tracks simultaneously (which is great for stacked vocal parts), or perhaps to audition different Doubler variations. What’s more, if I hear artifacts in an APT process that I didn’t notice when in RP (a rare scenario, admittedly!) I can comp the best result between the aligned and original versions without leaving the DAW.
Paste Pitch
A useful feature when editing an event using the Selector tool is the ability to copy and paste pitch information from one note to another — you could think of it as the audio equivalent of MS Word and Excel’s ‘paste format’ feature. While there are obvious creative applications in rewriting melodies, this also has potential for correcting the odd errant note: by copying the pitch profile from a correct word/note from elsewhere on to the offending phrase, the two will both be in tune but each retain its own timbre.