The Live III is the most powerful and flexible MPC yet...
Akai have reclaimed their position in the sampling workstation game over the last few years, with the portable MPC Live, the classic‑format X, the affordable One and two keyboard models all hits, not to mention a steady stream of feature updates and plug‑ins. The competition has struggled to answer these in terms of horsepower (Maschine+) and functionality (Push 3). Now, the Live III appears to pull comfortably ahead of the pack with significantly upgraded internals and connectivity.
But it’s not all about hardware. The recent version 3 OS, and now the Live III, bring big changes to the way MPCs work. Could this put off long‑time users and make the MPC overly complex, or is it a much needed refresh that propels the platform forward for a new generation?
Live Rundown
There’s so much new stuff to cover here, but let’s recap quickly. The modern MPCs are versatile production stations with an open, DAW‑like track structure hosting drum and one‑shot kits, multisampled instruments, plug‑in instruments, effects, MIDI and CV tracks. They are unique in the category in offering open‑ended linear audio tracks.
You can create or perform with an MPC on its own, but they are also great as hubs for other MIDI, USB, CV and audio devices. You can even connect audio and MIDI interfaces to extend their I/O. Today’s MPCs are capable standalone devices, but they can also work as control interfaces for the MPC app/plug‑in.
The MPC has its own terminology and ways of working that connect back to the original units, with Tracks, Programs (kits/instruments) and Sequences (song sections) and lots of pad and screen modes for doing myriad things. These concepts are still part of the MPC, but there have been many developments in the last year. Now, back to the Live III...
Function Over Form
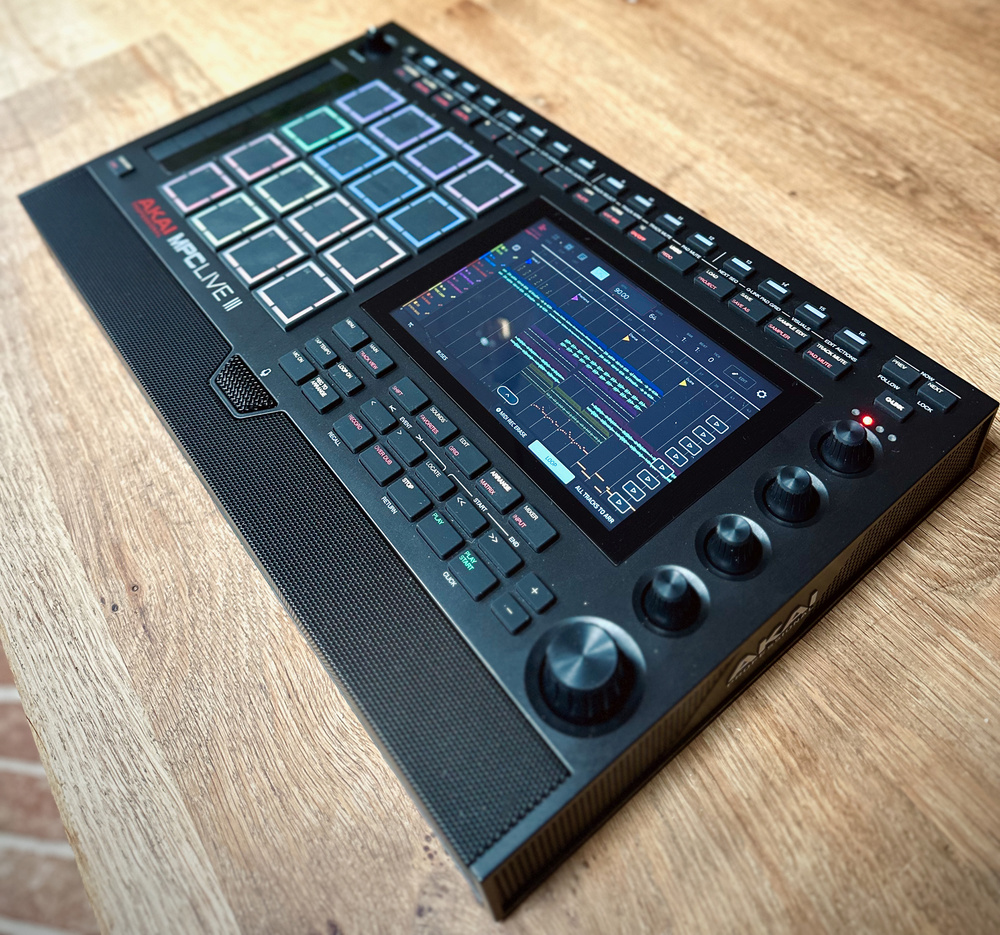
The new MPC has sprouted a host of additional buttons, and is slightly wider to accommodate a touch strip like the MPC Studio. I’ve seen some body‑shaming around its busy appearance, but would you prefer fewer controls so it looks slicker? More dedicated mode buttons like on the X and One is good news. A 16‑button strip adds (among other things) a step sequencer array to the MPC for the first time. Here I’ve read opinions insisting this should be along the bottom like on a traditional drum machine. Think again: an instrument that’s primarily going to be finger‑drummed has no business having buttons in front of its pads.
The Live has always been chunky. It’s not really backpackable, but you can pick it up, move it about and play with it on your lap. The internal battery makes all the difference, and it’s a great safety net in a live situation. The speaker array is perfectly usable for jamming and there’s now a built‑in mic, so you really could show up in many situations and create tracks and demos with just the Live III. Even better, my top wish for the I and II has been granted: a combi input with mic pres and phantom power, so you can plug ‘proper’ mics in as well as line sources.
 The Live III measures 435 x 256 x 67mm and weighs in at 3.9kg.
Otherwise the panel has the same display, indented data wheel, and four touch‑sensitive encoders. The buttons are the clicky rubberised designs that I like. Most buttons have a primary and secondary function, the latter of which can be reached with the Shift button, or more easily with a double‑tap.
Internally, the Live has had a phenomenal power‑up. It’s now built around an eight‑core ARM processor with 8GB RAM, compared to the II’s quad‑core and 2GB. Everything is significantly snappier, like you’re working in controller mode with a computer. The horsepower raises the limit on audio tracks from eight to 16, and plug‑in instrument tracks from eight to an incredible 32. Total polyphony jumps from 64 to 256 stereo voices. The largest 22‑track demo session hovers just over the 20 percent CPU mark.
Internal storage is 128GB compared to the II’s 16GB. You can still install an additional SATA drive in a bay underneath. This seems mostly unnecessary now with so much standard capacity, but I popped my 160GB SSD in mainly as an instant way to bring in my existing samples and expansions.
Corner Kicks
The Live III debuts new trigger pads with distinctive, segmented corner lights. These are dubbed ‘MPCe’, presumably a play on MPE and with the ‘e’ also standing for ‘expressive’. These feel quite different to the previous generation. They have the familiar grippy texture, but are slimmer and more sensitive. The key new feature is that they know where on the pad they are being pushed or struck, an ability that’s been exploited in a number of clever ways in MPC drum programs, but not in any other areas of the workstation so far.
You can trigger different samples from the corners of the pad, so you could treat the 4x4 layout like an 8x8. You can also trigger a different sample from the centre of a pad to the corners. And drum programs support eight samples per pad, which you can layer among the zones as you wish. The zones don’t have to be discrete — you can crossfade samples in various ways across the pads. You could set up a varied response that simulates hitting a drum head in different places — like a snare moving to a rim shot.
You can also treat the pads like X/Y modulation generators, mapping the coordinates to any parameters in the drum channel as two expression inputs in addition to pressure. A multi‑page mod matrix in the program editor lets you configure this in detail. Absolute X/Y positions are just one option, you can also track the distance from the pad centre, or from the point where you hit the pad. Position can scale other mods as well as performing them directly.
The potential of the new pads is showcased in the demo patches in the dedicated MPCe Expansion. It is distinct from MPE as we know it, and it’s not currently possible to access the modulation outside of drum programs. However, Akai plan to extend the functionality to plug‑ins and keygroups later on, and the pads have the potential to do MPE if implemented in the future.
Another innovation that takes advantage of the new pads, but which is still available on older models, is Articulations. This is just brilliant. Pads, or corners, can be assigned articulations, which trigger different playing techniques or accents like rolls, flams and ratchets. There are scores of these to choose from. Every flavour and timing of note repeat you can think of can be dropped in as well as paradiddles, flams, pitch ramps and tons more. Expect to hear these spicing up the hi‑hats and snares on beats over the next year.
Radical Steps
The other big story of this release is an embracing of drum machine and production workflows not typically associated with the MPC. Step sequencing was available before via a screen/pad mode, but now you can work in classic TR style using the 16‑button strip. Tap a pad to target a sound/note and drop in gates from the buttons.
You can also hold active steps and use the touch strip to set velocity: a fast and simple way to input dynamics. All other per‑step settings are tweaked in a dedicated Step Edit mode. Tapping a step here brings up a set of available step parameters with the basic options — velocity, ratchet, probability and timing — set from the encoders.
A second set of ‘modifiers’ include envelope adjustment, filter control, and sample slice selection for quickly tweaking sequenced chops. There’s also tuning, which brings a fast way to program melodic sequences in drum programs without converting the channel to a Keygroup track. Maybe unique is the choice over whether step automation affects parameters in absolute or relative fashion.
While step edit offers a new way to quickly write a limited set of key parameters, it’s still possible to use the legacy step sequencer view to enable and set automation for any other track or mix parameter. This is one of the examples of how the MPC has layers of overlapping functionality that have built up over generations.
Note Seq mode uses the SH‑101 convention of advancing the step position as you tap in each note, except it’s polyphonic and ideal for entering chords. A cool feature of this mode is that with Timing Correct off, the exact timing of each note in a chord will be captured, offset from the first played note. I was less enthusiastic about how Step Edit and Note Length modes work for note sequences. It feels a bit unintuitive and non‑visual how to find and adjust individual notes. I found using a combination of the step sequence buttons and regular grid mode helpful. It’s easy to see what’s going on in the grid and make adjustments, but selecting notes is still the weakest area of the touch UI, and the buttons help here. I still wish we had a select mode for the wheel as on Maschine, or even Bluetooth mouse support.
What Is The Matrix?
The other big lean into modern production and performance workflows is Matrix mode, aka the clip launcher. This represents the final unification of the Force and MPC OSes, with both devices now incorporating the other’s previously contrasting workflows. The Matrix uses Ableton’s clip grid convention to capture, organise and play multiple MIDI and audio clips per track.
You can load loops and audio files into clip slots, record and overdub directly into clips with a fixed or open length, or create clips and use the step sequencer or grid editor to populate them. This is a very fluid way to jam, write or perform compared to the structured, traditional MPC approach of working in Sequence blocks.
 The Matrix page is central to Live III’s new clip‑based workflow.
Matrix mode is richly spec’ed, with advanced options like Insert and Capture Scene to copy currently playing clips into a new row, and Follow Actions for rows, which allow you to set up chains, songs or fills. Tracks can be isolated from row launching, which is awesome if you’re recording, say, a vocal while progressing through other scenes. My other big ask from Force 1.0 was a single operation to duplicate the clip you’re currently working on and have the new version take over recording — a really fluid way to build variations. This feature is included within the Main page.
Something I’m going to use to death is scene snapshots. Each row can store a snapshot of all parameters across your tracks and mixer, recalled on launch. What’s more, all the submix, return and output channels appear in the Matrix on a separate page, so you can add mix automation clips.
Feature‑wise the Matrix is incredible. Usability‑wise it has room for improvement. Navigation in the Matrix is clunky, via on‑screen arrows. Can we not use a two‑finger drag or use the data wheel to scroll up and down? All operations on clips are via a touch‑hold contextual menu. This is snappy, but I’d love to be able to use button modifiers like Copy and Erase, be able to select multiple clips, and to just move clips by dragging.
We’re also missing individual Clip Stop for tracks, and an integrated track mute modifier (holding the Track Mute button brings up the old‑school option to mute by pads). All this feels like gaps from porting this page over from the Force, which has dedicated buttons. Another issue is that the grid doesn’t respond to multi‑touch, so you can only trigger one clip at a time. Again, this works on Force so is hopefully a software oversight rather than a hardware limitation.
Clip and row launching can be assigned to the main pads or the 16‑button strip, the latter being especially useful. I did mention to Akai that it would be cool if you could connect an APC64 or other 8x8 launch controller and take over the Matrix, and they agreed, so fingers crossed.
A New Arrangement
At the start of 2025 Akai released the MPC3 firmware for existing models, with many of the features we see here on Live III. It included the linear arranger, which the Force got a while before, and adopted the Force’s one‑track‑per‑program model. Before, MPCs had a separation between tracks and sound sources (Programs). Multiple tracks could link to the same program, and different Sequences could use different track structures. Now programs live on particular tracks like inserts in a DAW. You can still route MIDI between tracks, but this was a big change that unsettled some long‑time users.
The Arranger is essentially what has always been the Sequence layer on MPC, but displayed in full multitrack glory like in the MPC desktop software. And MIDI and audio tracks can now mingle together freely in this view, instead of being partitioned.
Arrange view is something like a traditional DAW view on the MPC. You can capture MIDI and audio straight into the timeline, in fact one of my favourites uses for an MPC is as a multitrack recorder. Normally this would be tracking in a hardware synth jam for later editing, but for fun I also tried a singer/songwriter style test. I plugged my guitar into one combi input, a capacitor mic into the other, and armed the built‑in mic to capture room sound. I then set about desecrating a Beatles classic. It works really well (talent aside). You can add some reverb for vocal tracking and some guitar tone (I like the AIR Flavor plug‑in for this).
Particularly powerful is the ability to capture clip‑launching performances from the Matrix into the Arranger, like you can in Ableton Live. Set the Arranger recording and arm automation, and anything you do from launching clips and scenes to tweaking mix and effect parameters all gets recorded into the Arranger. And because the Arranger is basically a (long) Sequence, you can create multiple timelines.
Editing in the Arranger is not as straightforward as in a DAW as you can’t interact directly with things in the tracks. Instead, tapping a track opens it in the Editor view at the bottom of the screen, which is a mini version of the regular Grid view. The MPC still has no concept of MIDI clips or containers at the Sequence (ie. Arranger) level: everything in a track is one long piano roll. To make larger‑scale arrangement changes you have to use the Sequence edit tools familiar from older versions. This means setting an in/out point, choosing an operation and dialling in bar numbers, often without visual reference to the timeline. This can feel alien, although it’s actually an effective and precise way of getting things done.
Choose Your Own Adventure
The big challenge for Akai has been to harmonise all these old and new ways of working. An example is the makeover of the Main view. Main is still a place where you can jump between tracks and sequences, control the main properties of tracks, and get on with live recording beats. Now though it has a display that toggles between a sample or patch view depending on track type, and a view and controls for the current clip or arrangement track you’re working on.
 The redesigned Main view now gives you a focused view of the clip or track you’re working on.
The clip‑based and Arranger workflows work in partnership. Like in Live, any track can be playing from the Matrix or the Arranger. The top row of the Matrix is dedicated to flipping tracks to the Arranger, although you can hide this if you’re fully working in clip mode. (I’d like an option to keep this pinned as it scrolls out of view).
The Live III has a dedicated ‘Rec To Arrange’ button that toggles whether your next recording will go to the Sequence or to the Matrix. It does take some learning and focus to stay on top of these details, and it’s easy to get a bit lost with the comings and goings of the two domains.
And this really is the question about the MPC Live... is it too much? There are so many different ways of doing things that a new user could get overwhelmed and lost. We’re used to hardware instruments having a fairly standardised workflow. MPC is more like a mature DAW, with features accreted in layers. Akai have walked a fine line not to break muscle memory for veteran users, while still keeping up with new production styles. This gives the MPC a crowded set of tools, but allows different users to find their own path: work in the old way, work entirely with new tools, or pick and mix. To Akai’s credit there’s enough overlap between old and new to make this work: for example, you can build in Sequences with a bit of clip assistance, structure in classic Song mode and finesse in the Arranger.
Conclusion
I’ve had a complicated relationship with the MPC in recent years, seduced by its unmatched power and scope as a standalone workstation for making music, but sometimes frustrated by its internal structure and occasionally clunky interface. The Live III steps up with a one‑two punch of a hardware boost that is frankly trolling the competition, and the clip‑based workflow that for me is a much more open and fun way to work.
If you want a deep, one‑stop‑shop for writing, recording and performing, it’s right here.
There are still some rough corners to round off but Akai’s recent track record on software updates is good. And these are weighed against the fact that no other standalone offers things like a freeform timeline arranger with mix automation and linear audio recording, desktop‑class instruments and effects with full UIs, and all this connectivity. If you’re looking for a simple, elegant groovebox that does one or two things well, this might not be for you; but if you want a deep, one‑stop shop for writing, recording and performing, it’s right here.
Box Of Delights
With big themes of new hardware and workflows, it would be easy to overlook the many additional treats in the Live III and MPC3.6 firmware. New plug‑ins like AIR Reverb Pro and Visual EQ take advantage of the internal power to bring pro mixing tools to standalone mode. Likewise the Live III has a high‑quality Pro Stem Splitter, and new ‘Super’ warp algorithm. As well as a top‑notch set of included sounds, there’s a growing catalogue of add‑on instruments and effects that run standalone with touch‑optimised UIs. Jura and Iona are gorgeous, and there’s a bunch of NI Play series instruments to collect. Be warned: these can be activated as demos on the unit to get you hooked, and are priced just in the “oh go on then” range.
I love the new performance mapping mode where you can assign snapshots and macros to the 16‑button strip and encoders. As well as the obvious triggering of the DJ‑style Touch FX, this can be used for mutes and mix recalls, all of which can be performed live, or captured into the Arranger.
Most of these features plus the Matrix can be added to earlier MPCs and the Force via a paid upgrade that Akai are calling the Pro Pack.
Powerful Connections

MPCs were always well connected, and the Live III pushes this to new heights. Expanding on the previous model’s dual MIDI I/O, six audio outputs, USB host ports and turntable inputs, the MkIII gains two combi inputs with preamps and phantom power, and a USB‑C port that can connect 24 channels of audio both ways with your computer or iOS devices. The eight CV channels have been given new powers with the ‘CV Playground’: a set of sequencing and modulation modules available on CV tracks. The only things still unique to the MPCX are dedicated Hi‑Z instrument inputs.
Pros
- Massive hardware spec boost.
- Clip Matrix and step‑sequencing workflows.
- Articulations.
- Mic inputs.
- 24x24 USB I/O.
Cons
- Matrix mode has some gaps.
- The UI is still quite fragmented.
- On‑screen note editing still feels clumsy.
Summary
The MPC Live III is an incredible upgrade in power and functionality; it’s hard to think of any other dedicated, standalone device this capable for end‑to‑end music production.
Information
£1399 including VAT.
$1699
When you purchase via links on our site, SOS may earn an affiliate commission. More info...
When you purchase via links on our site, SOS may earn an affiliate commission. More info...