
Last month we explained how to get a sense of front‑to‑back depth in your mix. Now we examine the left-right axis, as we suggest ways to get the best from stereo mixing.
Recorded sound is an illusion, and stereo doubly so. We tend to take the stereo pan pots in our mixers and DAWs for granted, but they're one of the key tools available for crafting your mix. So how should they best be used to build a convincing stereo mix — and, come to that, is panning always the best way to create a stereo soundscape?
The reality is that our ears use a number of sonic clues to determine the direction of origin of a sound and the relative level difference between the two ears is only one of them, yet this is all a simple pan-pot can replicate. In real life, sounds coming from the left arrive at the left ear slightly earlier than they do at the right ear, and when they do arrive at the right ear their tonality is changed because they're being masked by the listener's head. To complicate matters further, the frequency‑response curve of the human ear is different depending on what angle the sound source comes from — and this is one of the ways we can tell whether a sound comes from in front or behind. So there's obviously a lot we can do to fake the sensation.
Of course, you don't have to rely solely on panning to separate the sounds in a busy mix. For example, I sometimes like to get the mix elements sounding good in mono, using EQ, dynamics processing and level‑adjustments, before then using panning to further enhance the listening experience. But in this article, I'm going to take you through a few tips and tricks to help you get the most out of panning and manipulation of the stereo panorama.
Low‑down Centre
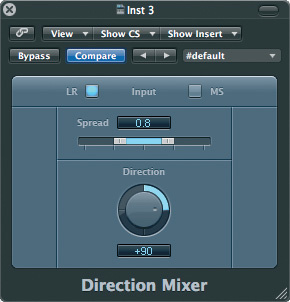
 you can select different setups in the mixer, whereas in Logic you'd insert the Direction Mixer (right) on the track.") DAWs have different ways of setting the panning for stereo tracks: in Cubase (above) you can select different setups in the mixer, whereas in Logic you'd insert the Direction Mixer (right) on the track.
DAWs have different ways of setting the panning for stereo tracks: in Cubase (above) you can select different setups in the mixer, whereas in Logic you'd insert the Direction Mixer (right) on the track.
Low‑frequency sounds contain the most energy in a typical pop music mix and therefore use up the most headroom. The lower the frequency, the less easy it is to determine the point of origin of a sound (which is why subwoofers don't have to be placed in the centre of your listening system). Following from this, it makes sense to pan bass sounds to the centre of your mix so that both speakers share the load of reproducing them. If you also happen to be into vinyl, this is particularly important, as panned bass (or bass treated with a heavy modulation effect such as flanging) can cause cutting problems.
Panning Bass
If you do need to pan a bass sound for artistic reasons, I'd suggest that you try to find some way to split the signal into two frequency-bands (for example, by copying to two audio tracks and using two different filters set the same frequency, one high‑pass and one low‑pass), so that everything below, say, 150Hz stays in the centre and anything above that gets panned as desired. The ear will lock onto the positional information in the higher part of the spectrum but you'll still keep the majority of the sound energy in the centre — meaning that the speakers will share the load. The Drawmer 2476 Masterflow processor is perfect for this, as it includes a three‑band panner. You can find a software equivalent in Izotope's Ozone, or PC users could look at Otium FX's freeware BassLane VST plug‑in, which is dedicated to this purpose.
Vox Populi
The vocal line is, with very few exceptions, the most important part of any song, so it needs to be kept in focus and is traditionally panned centre. Yes, I know about those early Beatles songs... but when you only had four tracks to work with, you took what panning options you could get! However, backing vocals can usually be panned anywhere that your artistic fancy takes you. Where there are multiple backing-vocal parts, panning them left and right of the main vocal can spread the sound nicely — and it also provides some useful spatial separation between the main and backing parts.
Stereo Instruments
Stereo instruments such as pianos, synths and drum kits usually come on stereo tracks, which have balance pots rather than pan pots. Depending on how the instrument was recorded, it may sound unnaturally wide if left to its own devices, so it's worth thinking about inserting a plug‑in that allows you to reduce the stereo width. If you think about it, a piano or drum kit panned hard left and right will sound as wide as the whole stage, which is quite unnatural. There are no hard and fast rules here, though — especially when working with samples, as you have no idea how they were recorded or mixed. You just have to close your eyes and then adjust the stereo width until you like/believe what you are hearing!
Getting The Hump
 As well as controlling the panning of send-effect returns, you can dictate where in the stereo panorama you send a signal to the effect channel's inputs. Different DAWs give you different ways of accessing this functionality. In some it's hidden, but most offer it.
In the introduction, I mentioned that sounds arriving at our two ears are tonally different when they originate from one side than when they originate from the other. You can emulate this (either in conjunction with panning or not) by using EQ to put a hump of a few dBs in one channel (the one you want to make the sound source appear to be coming from) at 3‑5kHz, and put a mirror‑image dip in the other channel. This can enhance the sense of directionality, and because the opposite processing is used on both channels, the sound shouldn't suffer if it has to be summed to mono, as it may on radio or TV, for example. If you experiment with the EQ frequency and amount, you can sometimes even make the sound source appear to be wider than the physical spacing of your monitor speakers.
Mono To Stereo
If you want to add width to a mono sound source, you could opt to use reverb, but another option is to use a mono‑to‑stereo plug‑in. Essentially, these use comb filtering to separate the source into two channels, with one side the inverse of the other (so that they sum back together when played in mono).
It's A Phase Thing
 Otium FX's BassLane freeware PC VST plug‑in allows you to narrow the stereo width of the frequencies below a defined threshold, in order to distribute LF energy more evenly between speakers.
Another way to make a stereo sound‑source appear wider than the monitors is to feed a polarity-inverted version of the left channel into the right channel, and vice versa. You can do this by copying the individual left and right tracks and clicking the 'phase' button in your mixer track or inserting a polarity‑inverting plug‑in. If you want to work with a stereo track, you'll need a plug‑in that can swap the left and right channels as well as one that can do polarity inversion. As you increase the level of out‑of‑phase components, the impression of width increases until the in‑phase and out‑of‑phase sounds are at the same level, although, in practice, the best subjective effect is achieved before you reach this point. Once you pass this point, the left and right channels reverse position, so don't overdo the effect: be sure to use your ears. If you sum the mix to mono, opposing phases cancel, so you'll have no comb‑filtering problems, although the subjective level of the treated tracks may change, especially if you used a lot of the out‑of‑phase components in your mix.
Out Of Time
You can make a sound appear to be coming from one side or the other simply by sending the same sound to the left and right speakers, but delaying one of them by around a millisecond or so, to emulate the time of arrival difference between the two ears. The channel that isn't delayed provides the ear with its directional clue, although the effect can be further enhanced by slight level‑panning and by using the 'opposing EQ‑hump' trick that I described earlier. Note, however, that any form of processing that involves delaying one channel will result in comb‑filtering (a subjectively 'phasey' sound) when the mix is summed to mono — which means that playback on a simple transistor radio or mono TV may be compromised.
Sense Of Balance
 Jimi Hendrix's Axis Bold As Love is a rare example of a successful rock album that uses extreme panning effects.
It's important to try to achieve a fairly symmetrical balance of energy in your mix, so that your main stereo meters read more or less the same each side for most of the song. If you pan too many high‑energy things to one side you can end up with an off‑balance mix. A Goniometer‑style 'jellyfish' meter can help determine the mix balance visually, but your ears and output meters can also do the job perfectly well. At this stage you can also check that sounds occupying the same part of the audio spectrum, such as two electric guitars, are panned to opposite sides, to further enhance the sense of separation.
Just For Effect
Most reverb plug‑ins or processors take a mono input and create a stereo output, which is what you'd get if you played a mono sound source in a real reflective space and then listened from a few metres away. Reverb outputs can be panned hard left and right (which will create the greatest sense of space), but as in real life, large amounts of reverb tend to mask the direction of the original source. One popular trick, especially in surround recording, is to add a mono reverb to specific sound sources and pan it to the same position as the original sound so that it reinforces its position rather than masks it. The simplest way to do this is to insert a mono reverb into a mono audio track, set the reverb balance using the plug‑in, and then pan the channel to its desired location in the mix.
Panning Effects
However, there are more options open to you with reverb and delay. For example, you could set up a stereo reverb, and instead of panning the reverb return itself, pan the signal that you send to it (there's usually a separate balance control for each aux send on your DAW channels). If the stereo effect is effectively set up as two mono channels, you can route several differently panned tracks to the same send effect.
Mono‑cool
Always check that your mix sounds good in mono when you're done. It isn't always critical if the sound of some of the 'ear candy' elements of the mix change when heard in mono: listen carefully in stereo and mono and you'll notice just how many commercially successful tracks make compromises here — it's a deliberate trade‑off. But all the main elements, especially the rhythm section and the vocals, need to work just as well in mono as they do in stereo. You might be tempted to point out that real‑life isn't mono compatible, and so ask why should our recordings try to be — but the reality is that there are still people out there who listen in mono, who will be happy to tell other people how awful your music is, so they need looking after!
A Moving Experience
Your pan pots needn't be static, of course: DAW automation makes it easy to move your parts around the panorama, although it's a trick that was around long before software (listen to the opening track of Jimi Hendrix's Axis Bold As Love, for example). But be careful not to overdo it: it can be great for some genres, but for most, while the odd bit of automated panning can create great spot effects, and be effective on sound effects, you can have too much of a good thing. In the case of most instruments, it's often advisable to park them where you feel they want to be, moving them only when you want to make a 'feature'.
Another effect that has been, erm, 'panned' by some for its over-use is the Autopanner. However, I find that it can be a wonderful effect to apply on a reverb return for a special effect: you keep the source sound (say, a guitar) in the centre, and autopan a subtle reverb. This results in the delightful‑but‑strange sensation that the sound is moving around, even though the focus remains in the same place.
Stereo Enhancers
Most DAWs include a stereo imaging plug‑in with which you can increase the apparent stereo width of a mix or a stereo element within it. There are two basic types, and while they may do good things in stereo, they have different audible results when listening in mono. If you use MS‑based (Mid/Side) wideners, the width is increased by increases in the proportion of the Side (difference) signal. But the mono listener doesn't hear that — they just get the Mid signal. So if you push more source elements into the Side signal to make them wider, the balance might change for the mono listener, but that's all. With time‑delay‑based wideners, the balance doesn't change — but the original and time‑delayed signals mix to produce comb‑filtering effects, resulting in a coloured, phasey character in mono. So this really is an area you need to check in mono — one approach being to see how far you can acceptably push the width control while listening in mono, before pulling it slightly back and listening in stereo.
Cardinal Rules?
 Terry Manning, who swears by his 'Cardinal Points Law'.
Producer Terry Manning proposed the 'Cardinal Points Law' technique for panning, whereby he pans monaurally recorded material to extreme left, centre, or extreme right as a starting point for a mix (stereo sources already have a natural place when hard-panned left and right). Although this may at first sound rather like checking things in mono, his reasoning is that you can save the 'No Man's Land' in between these points to place details in the arrangement that you want to leap out of the mix, without necessarily having to resort to EQ or level changes.