 Clip Gain is an excellent first port of call when it comes to achieving a consistent vocal level.
Get your vocal levels just right in Pro Tools with these handy tips.
Vocal production has changed enormously since the start of the DAW era. While not every production requires the big, bright, and ultra‑processed sound common in pop productions, even the most natural styles today exhibit a level of polish that simply wasn’t there a couple of decades ago. If the vocal isn’t right, its failings will let the whole production down. So, what’s the difference between an ‘OK’ and a ‘great’ vocal sound, and how can Pro Tools help users get there?
This article won’t focus on tuning and timing nudges, which are often integral to modern vocal production. Instead, we’ll focus on levelling vocals, because if this isn’t handled correctly, no amount of further processing can hide that fact. We’ll look at four contrasting and complementary approaches. While these techniques can be performed in any DAW, we’ll highlight specific ways to achieve them in Pro Tools using stock features and plug‑ins, as well as third‑party tools where appropriate.
Next Level
Vocal levelling is the process of managing a vocal track’s volume to reduce inconsistencies in level over time. This might sound like dynamic range compression, and indeed, compression is a part of it. However, there’s a distinction between managing the differences between words and phrases, which can often be done manually, and the faster, syllable‑level adjustments that require compression or detailed automation.
While it might seem tempting to rely solely on a compressor to control amplitude variations, compressors always leave their sonic fingerprint to some degree. Even so‑called ‘transparent’ compressors alter the sound, and overuse can leave a vocal sounding squashed. This is why combining different levelling techniques is essential for a polished and professional result.
Clip Gain
Clip Gain can help you to manage your vocal levels in the first instance, before you move onto further processing (in fact it’s best to perform initial Clip Gain adjustments without any compression, as the compressor will affect how your Clip Gain adjustments sound). In Pro Tools, this feature allows you to adjust the level of audio clips at the pre‑mixing stage, much like setting channel gain on a console. However, Clip Gain offers much more precision by allowing dynamic adjustments within a clip, such as addressing loud breaths or inconsistent phrases.
To use Clip Gain efficiently, make an Edit Selection across the area you wish to adjust, then use Control+Shift (or Start+Shift on Windows) with your scroll wheel to trim the level up or down. Unlike the Pro Tools mixer’s fader, which has only 12dB of boost available, Clip Gain has up to 36dB, so large changes up as well as down can be accommodated. For more precision, display the Clip Gain line using Control+Shift +minus (Start+Shift+minus on Windows) and draw in your changes directly. These adjustments can be used to handle issues such as mouth clicks, loud consonants, or even basic de‑essing.
While Clip Gaining entire phrases or words can be effective, don’t overlook the ability to create ramps for smoother transitions. This approach is especially useful for levelling dynamic performances. Don’t obsess over exact decibel values during this stage; focus on creating a natural‑sounding vocal by auditioning changes as you work. Later tweaks can refine these adjustments.
Compression
Compression is the quickest tool for controlling vocal dynamics, but it’s important not to expect a single compressor to do all the work. Over‑compression can rob a vocal of its natural dynamics, making it sound overly processed. Consider using multiple stages of light compression for a more transparent result.
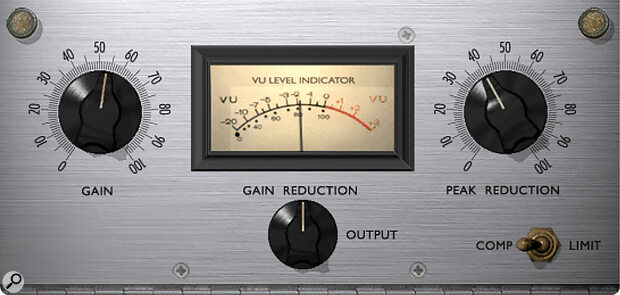
 When it comes to compression, the BF‑2A optical compressor is great for natural, smooth vocal level control.
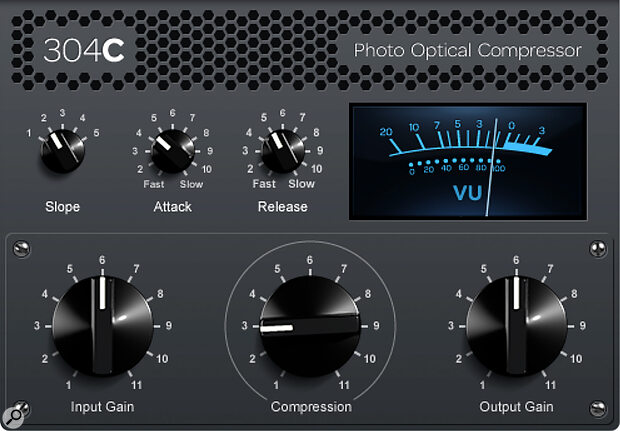
For gentle, natural levelling, start with an optical compressor like the LA‑2A. Avid’s included BF‑2A emulation is a great option, offering a smooth response that’s easy to dial in. Set the threshold to achieve a few dB of gain reduction and let the compressor handle broader level inconsistencies. For an alternative and very natural sound, the 304C (an updated version of the Joe Meek compressor plug‑in) has a helpful behaviour where beyond a certain amount of gain reduction it stops compressing, which can help keep the results sounding natural.
 Another good choice is the 304C, which only applies gain reduction up to a point, helping to avoid over‑compression.
Compressors like the Pro Compressor or Avid Channel Strip provide advanced features for more precise compression. Use a soft knee and slower attack and release times as a starting point for subtle levelling. If your aim is to shape the sound’s envelope, add a second, faster compressor for additional control. This combination of slow and fast compression has been a trusted technique for decades.
If tonal balance is an issue, multiband compression can help. For example, Pro Multiband Dynamics allows you to compress the high frequencies without affecting the lower frequencies. This is particularly useful when dealing with sibilance or overly bright performances. A quick tip: hold Shift while adjusting a parameter to temporarily link all bands, making global tweaks faster.
Compression is a powerful tool, but use it wisely. Think of it as just one part of the levelling process, complementing manual techniques like Clip Gain and volume automation.
Volume Automation
Volume automation remains the most precise way to get a vocal to ‘sit’ perfectly in the mix. Despite all the software solutions available, automation still offers unparalleled control over vocal dynamics. Top mixers rely on detailed automation rather than heavy‑handed compression to maintain a vocal’s natural energy.
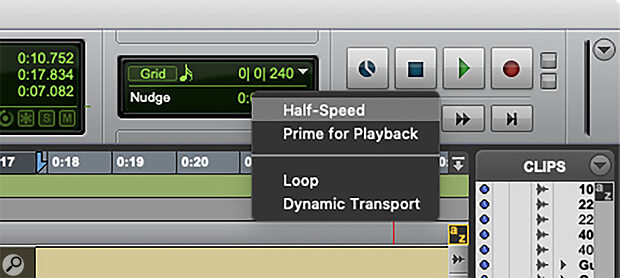
In Pro Tools, automation can be written in real time by riding a fader, or drawn manually in the automation lane. For detailed control, focus on words or syllables that need emphasis, ensuring the vocal remains consistent yet expressive. While drawing automation is great for precision, using a physical fader on something like an Avid S1 (or Avid Control on a tablet) provides a better way to judge decisions in context, because you can react immediately to what you’re hearing. If a move is too tricky to perform in real time, writing moves in Half‑Speed Playback (Shift+space bar) allows for better accuracy.
 If you’re finding it tricky to perform automation in real time, try setting playback to Half‑Speed mode.
Pro Tools Studio and Ultimate users have advanced automation features that make this process even easier. If you need to test a specific adjustment without overwriting your existing automation, try using Preview Mode, which lets you experiment freely before committing changes. Once you’re satisfied, Trim Automation can be used to make subtle global adjustments without rewriting your original automation, providing as it does a second layer of automation which can, if desired, be coalesced with the existing automation, freeing up the Trim Automation for further tweaks.
Automation may seem time‑consuming, but it gives you complete control over the vocal’s dynamics. Rather than relying on compression alone, automation enables a vocal to respond to the song’s emotional flow.
A good tip is to use Back and Play (you can set up a custom keystroke for this in the Keyboard Shortcuts menu) to quickly rehearse automation moves and refine them until they’re just right.
Specialist Tools
For those looking to speed up their vocal levelling, there are several third‑party tools that can complement or even replace traditional methods. One popular option is Waves Vocal Rider, which automates volume levelling in real time. You set a target level and adjustment range, and it adjusts the vocal level dynamically to maintain consistency while retaining its natural feel. Automation created by Vocal Rider can be fine‑tuned afterwards so no control is lost. The same idea was pioneered by Quiet Arts’ WaveRider TG, which offers a similar approach to automating the creation of automation tracks.
Another excellent tool is Sound Radix POWAIR, which separates levelling from compression by employing a loudness‑based leveller and compressor that can be controlled independently. This makes it ideal for situations where subtle levelling is needed without affecting the vocal’s tone.
For more detailed adjustments, Melodyne Studio’s Levelling Macro offers a way to graphically balance dynamics. While Pro Tools includes a basic version of Melodyne, upgrading to the full version unlocks these more advanced features.
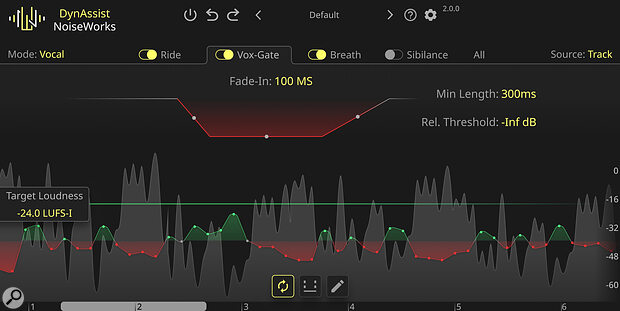
 NoiseWorks’ new AI‑powered vocal levelling tool DynAssist was recently demo’ed running in Pro Tools using ARA, so expect full compatibility soon.
As Pro Tools continues to evolve, content‑aware AI‑based tools, such as NoiseWorks’ DynAssist, which Avid previewed working under ARA in Pro Tools at the 2025 NAMM Show, promise even greater efficiency in vocal levelling. It represents an excellent way of streamlining vocal workflows, though as with any AI assistance, careful checking of the results will always be required and even with these tools, critical listening and manual tweaks are essential to achieving the best results.
There’s no single ‘best’ approach. These techniques are complementary and should be combined as needed for your project.
Which Approach Is Best?
Unsurprisingly, there’s no single ‘best’ approach. These techniques are complementary and should be combined as needed. For instance, Clip Gain is excellent for correcting large inconsistencies, compression helps control dynamics and add character, and automation ensures the vocal works musically in a mix.
Pro Tools has everything you need to get the job done, but exploring third‑party tools can offer valuable speed and flexibility. Whichever methods you choose, always prioritise the vocal’s role in the song and let that guide you. Experiment with these methods to find a workflow that suits your style and project needs. Remember, great vocal production is more to do with careful listening than it is about the tools you use.
