This third article of our stereo mini‑series explores how to manipulate the perspective obtained from coincident mic pairs.
In Part 2, I explained how Alan Blumlein invented Intensity Stereo in the early 1930s, and that its key innovation was that differences purely in amplitude between signals, fed to two loudspeakers placed at two points of an equilateral triangle, could be converted into inter‑aural time differences (ITDs) for a listener located at the triangle’s third point. Many people argue that this concept and implementation is the true origin of stereophony, but we’ll see as this series progresses that most modern recordings push Blumlein’s theoretical boundaries quite a long way! Nevertheless, there is still more to explore in Blumlein’s Intensity Stereo idea...
We closed last month with a description of Blumlein’s initial setup, using coincident (aka X‑Y) figure‑8 microphones set with a mutual angle of 90 degrees, and I explained how that arrangement gave a Stereo Recording Angle (SRA) of about 76 degrees. You’ll hopefully remember the significance of the SRA: sound sources arranged within that 76‑degree region in front of the microphones in the recording environment are ‘mapped’ onto the 60‑degree angle between the loudspeakers in the replay environment, and their relative positions are preserved in the stereo image.
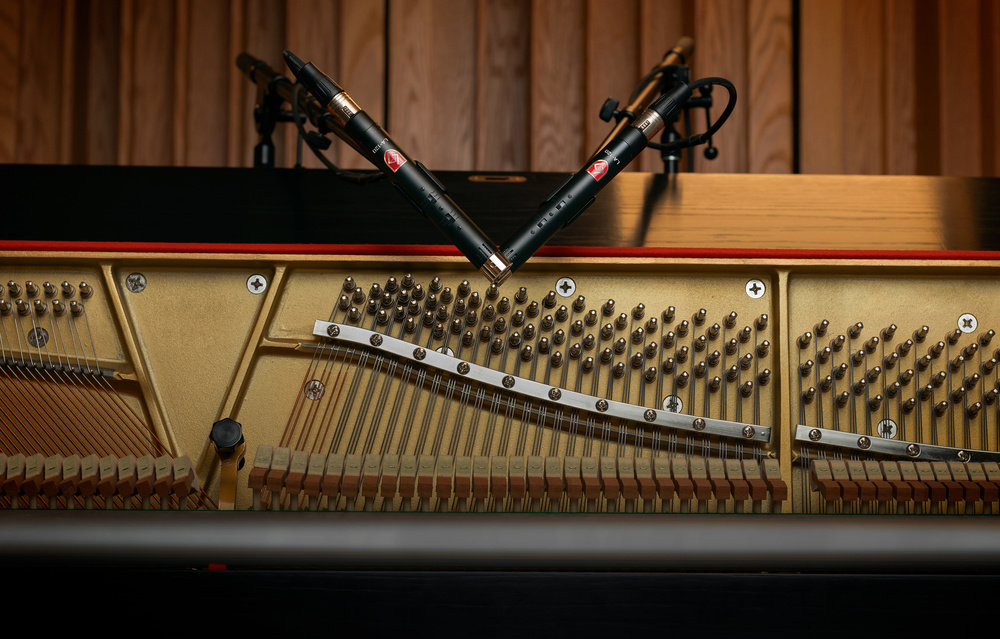
To demonstrate this microphone arrangement, I recorded a small choir using coincident figure‑8 mics set up in the Blumlein format (audio example 1 in the accompanying files: https:sosm.ag/this-is-stereo-media), with the choir arranged to almost fill a 76‑degree arc in front of the microphone. If you listen to that track on loudspeakers in a reasonably well‑treated acoustic, the choir should be spread almost fully across the sound stage, and with quite clearly focused images of each singer; hopefully, you should feel as if you could point at each individual voice. In fact, this impression of precise, focused sound positioning within the stereo image is a major strength of most coincident microphone techniques. If I were to offer a visual analogy, I’d suggest a comparison with a photorealistic painting, for example.
Perspectives
However, stereo recording is about much more than just the left‑right imaging; the perspective of sound sources is critically important too. By ‘perspective’, I mean the perceived distance or depth of each singer within the full sound stage, and the balance between direct and reverberant sound.
In example 1, the (empty) church is quite reverberant, yet the captured perspective is quite acceptable in the context of the Tallis piece I recorded. But what if we wanted a drier and closer sound? That would obviously require the microphones to be moved closer to the choir. But if we were to do that, the singers at the outer edges of the choir would be outside of the 76‑degree SRA of the Blumlein array.
The audible result depends on just how far outside the SRA the outer singers become, but at best they would appear bunched into the loudspeakers, and at worst they would be captured with opposite polarities in each channel, and thus attenuated, upsetting the balance in a mono downmix and appearing rather phasey and unfocused in stereo. In other words, the positional information within the stereo image would become distorted compared to the actual source positions in front of the microphones — a little like the optical distortion you see when a very wide‑angle camera lens is placed close to the subject.
To maintain a representative spread of singers across the full stereo image in a closer perspective, a much wider SRA will be required — this way, we can accommodate the greater stage width relative to the microphone’s closer position — and, fortunately, there are a couple of ways of achieving a wider SRA. The first is to alter the mutual angle of the microphones. For example, by angling the mics inwards (ie. reducing the mutual angle), achieving a given amplitude difference between channels (and thus establishing a specific stereo image position) requires sound sources to move further away from the centre line than before — so the SRA is increased. This gives us Rule 1, when it comes to tweaking stereo mic arrays: reducing the Mutual Angle increases the Stereo Recording Angle.
Applying this idea to our Blumlein array, if the mutual angle of the microphones is reduced to 70 degrees (instead of 90) the SRA increases to 96 degrees. That wider SRA allows the mics to be moved closer to the choir, giving a drier perspective, but with the stereo image still spread nicely between the speakers without bunching at the edges, as shown in Diagram 1. Note, though, that while in this case a 20‑degree reduction in mutual angle provides a 20‑degree increase in SRA, the proportions vary with other stereo mic arrays. For example, reducing the mutual angle of X‑Y cardioids by 20 degrees causes a 30‑degree increase to the SRA.
, the closer the mics can be placed to the source. The letters above the figures on the diagram represent the singing range of each vocalist, ie. S = Soprano, T = Tenor, B = Bass and A = Alto.") Diagram 1: The wider the stereo recording angle (SRA), the closer the mics can be placed to the source. The letters above the figures on the diagram represent the singing range of each vocalist, ie. S = Soprano, T = Tenor, B = Bass and A = Alto.
Diagram 1: The wider the stereo recording angle (SRA), the closer the mics can be placed to the source. The letters above the figures on the diagram represent the singing range of each vocalist, ie. S = Soprano, T = Tenor, B = Bass and A = Alto.
Of course, there’s only so far you can realistically reduce or increase the mutual angle before other imaging and tonality complications start to intrude...
Other Polar Patterns
An alternative option is to keep the 90‑degree mutual angle, but change the microphone polar patterns to some other directional shape instead, such as hypercardioid or cardioid. Since these patterns have much broader frontal pickup regions than figure‑8s, a sound source will need to move even further away from the centre line to generate a significant amplitude difference between the channels, and so these polar patterns inherently have wider SRAs. The extreme would be coincident omnidirectional microphones, which would have an SRA of 360 degrees (and no stereo imaging at all — everything would appear to be in the phantom centre!).
Diagram 2 compares the SRAs for coincident figure‑8s, hypercardioids and cardioids (all coincident, with a mutual angle of 90 degrees). These configurations deliver SRAs of approximately 75, 135 and 196 degrees, respectively.
 Diagram 2: How the polar pattern affects the SRA.
So, if the stereo microphone array stays in the same physical location, but the polar patterns are adjusted between those three options, the changing SRA alters the perceived stereo width of the choir because it then occupies a different proportion of the resulting SRA, as shown in Diagram 3. If the choir fully occupies the stereo image width with the figure‑8s Blumlein array, it will be a little narrower with the hypercardioids, and a lot narrower with the cardioids. Note that the room’s reverberation always fills the entire stereo width in all three cases (shown here as the purple background).
 Diagram 3: While the width of the source might be different, the reverb fills the stereo stage in all cases.
The first three audio examples demonstrate these changing image widths with different microphone polar patterns. example 1 uses figure‑8s, while for example 2 the mics were switched to hypercardioids, and for example 3 to cardioids. Note how the church acoustic fills the space between the monitor speakers in all three examples, but that the choir occupies a reducing portion of the image width as you compare figure‑8s to hypercardioids and cardioids.
The relatively strong reverberation in these demonstrations tends to make the difference less clear than in a drier acoustic, so for an alternative demonstration, example 13 is a recording I’ve borrowed from some stereo training material created in the BBC back in the late 1980s; I trust the BBC won’t mind me sharing it here in the interests of public education!
In this example another small choir is singing in a well‑damped studio in front of a stereo mic (I suspect an AKG C422). The microphone polar patterns were switched at 30 second intervals from cardioid to hypercardioid to figure‑8, and I have inserted short tone bursts between the three sections to make their identification easier. The order here is the reverse of my church examples, so the image starts off fairly narrow with cardioids, then gets wider with hypercardioids, and finally fills the entire image width with figure‑8s. Diagram 4 (right) illustrates what you should hear as the track plays.
 Diagram 4: An illustration of the differences you should hear when listening to audio example 13.
Choosing different polar patterns for the coincident stereo array allows for a much wider range of SRAs than can be achieved just by adjusting the mutual angle, giving far greater flexibility in positioning the microphones to achieve required perspectives. To demonstrate this, examples 4, 5, and 6 were also recorded with the Neumann SM69FET microphone, but this time I changed both the mic’s physical position and its polar patterns to try and maintain a constant, full image width but with very different perspectives.
 Diagram 5: The SRAs of a Neumann SM69FET with its capsules set to different polar patterns.
As you’d expect, the balance is much drier for the cardioids placed very close to the choir (example 6), and far more reverberant with the figure‑8s far away (example 4). The hypercardioids offer a half‑way option (example 5), and Diagram 5 (overleaf) shows the relative mic locations. Diagram 6 is an attempt to indicate the perspective by showing the amount of reverberation as the purple background, with the darker colours indicating more reverberation or a more distant perspective, and the lighter colour meaning less reverb and a closer perspective.
 Diagram 6: Different polar patterns set up to ensure the source fills the sound stage will give you different amounts of reverberation, and thus a different sense of distance.
Pros & Cons of Coincident Mic Arrays
As I’ve already mentioned, the overwhelming strength of most coincident mic arrays is the precision of stereo imaging — the focus, detail and stability. This is largely due to the X‑Y arrangement capturing only intensity or amplitude differences between the two channels, allowing the loudspeakers to convert them into ITDs (inter‑aural time differences) with very little ambiguity for the listener. So, coincident mic arrays are, without doubt, the optimal format for conventional stereo loudspeaker auditioning, if ultimate stereo imaging precision is the aim.
Not all X‑Y mic arrays are born equal! In particular, the coincident cardioids format is a challenge to employ...
That said, not all X‑Y mic arrays are born equal! In particular, the coincident cardioids format is a challenge to employ because, with an SRA of around 196 degrees, it must be placed extremely close to the sound sources in order to fill the stereo image. Consider recording an orchestra, for example: to capture a full‑width image the stereo microphone array has to be placed directly above the conductor! The inevitable result in this case is that the front desks of strings will be far louder than the more distant desks because of their relative distances from the mics, and so the overall balance of the orchestra is exaggerated, and additional mics are likely to be needed to allow a more natural balance to be achieved in a mix — with all the attendant problems that involves.
A coincident hypercardioid array doesn’t suffer from this exaggerated balance issue because its SRA of 135 degrees permits a more distant placement where the mics can ‘see’ all instruments at similar distances — and it’s the same for coincident figure‑8s with a 76‑degree SRA, but here the even more distant mic array might be a problem in a very reverberant space.
Another aspect that counts against coincident techniques in general is that many listeners perceive them to lack a sense of ‘spaciousness’ or to be overly clinical, preferring instead systems which introduce some level of inter‑channel timing differences in addition to the inter‑channel level differences — a complex topic that I’ll explore in depth in a future article.
This spaciousness aspect relates mainly to the degree of correlation between channels at low frequencies, and the cause is the divergence between theory and practice! In theory, a cardioid mic is cardioid at all frequencies, for example, but in practice it tends to become more omnidirectional at low frequencies (red outline in Diagram 7) — and the same is true for most directional microphones.
 Diagram 7: A cardioid mic isn’t truly cardioid across all frequencies!
What this means is that a given sound source location might create a certain inter‑channel level difference at mid frequencies, but at lower frequencies where the polar pattern tends towards omni, the level difference becomes much less. So, the low‑frequency components tend to be reproduced towards the centre of the stereo image, and this gives the impression of little spaciousness. Fortunately, this issue can be fixed, and I’ll return to suitable corrective processing in a later article, although the solution is based on another of Blumlein’s original ideas!
Interestingly, the real‑world lack of directionality at low frequencies doesn’t apply to ribbon figure‑8 microphones, which is perhaps why the original Blumlein array works so well and delivers such a reliably pleasing stereo sound.
Stereosonic Shuffling
Another common issue with real‑world microphones differing from the theory is an extension of the same problem. Not only do many directional mics lose their directionality at low frequencies, but they also tend to become more directional (or ‘beamy’) at higher frequencies (the blue pattern in Diagram 7). The effect is to generate increased inter‑channel level differences at high frequencies compared with mid and low frequencies, which means that the high‑frequency components of a sound source will appear to come from a wider position in the stereo image than lower‑frequency components, effectively smearing the stereo image (Diagram 8). For another visual analogy, it’s a bit like a poor‑quality camera lens where the red and blue light travels along slightly different paths through the lens, resulting in unintended colour fringing, making the picture look slightly blurred.
 Diagram 8: Because of the increasing sensitivity of directional mics to higher frequencies arriving on‑axis, the stereo image can appear slightly blurred on playback. Thankfully, though, this can be addressed with a Stereosonic Shuffler process.
This exaggerated HF image width is compounded further by another real‑world issue concerning stereo loudspeaker monitoring. The conversion of amplitude differences between the speakers to perceived time‑of‑arrival differences at the listener (Blumlein’s core Intensity Stereo concept that we discussed earlier in this series) relies on both ears hearing the same level from both speakers, but at different times due to relative distances. That concept works perfectly at frequencies below about 700Hz, but above that frequency, the presence of the head between the ears causes some sound‑shadowing, causing the sound level reaching the more distant ear to be slightly lower than it should be. Again, this results in a greater perceived time‑of‑arrival difference for high‑frequency components, which therefore appear to be at wider locations than intended.
I’m sure Alan Blumlein would have addressed this complication if he’d had the chance, but he was seconded to work on the development of airborne RADAR during the Second World War, and his life was tragically cut short in an accident during airborne trials. However, his former colleagues at EMI did get to address it after the war, with a corrective system they called the Stereosonic Shuffler — a facility that was built into EMI’s stereo mixing consoles through the 1950s and early ’60s.
I should clarify that there are at least two different forms of Shuffler: Blumlein created the first in the 1930s and I alluded to it above as a fix for the spaciousness problem; it has been suggested that his former colleagues reused the term in his honour when they came up with the Stereosonic Shuffler, since it uses similar concepts. In simple terms, the Stereosonic Shuffler converts the left‑right stereo signal into the Mid‑Sides format, and introduces around 3dB of attenuation into the Sides channel above 700Hz, before converting back to the left‑right format. This processing has the effect of reducing the stereo image width at higher frequencies, thereby compensating both for the microphone polar pattern beaming effect in the recording stage and the head‑shadowing effect in the listening stage. (If this Mid‑Sides terminology furrows your brow, fear not; I’ll explain it in enormous detail in Part 4!)
Sadly, the complexities of analogue Mid‑Sides signal processing in the 1950s meant that EMI’s Stereosonic Shuffler introduced as many compromises as it fixed, and thus the idea had been abandoned by the mid‑1960s. Today, UK niche manufacturers Phaedrus Audio currently make a product called the Shuphler that recreates the Stereosonic Shuffler process in a rather better‑engineered way, avoiding the shortfalls of the original design. The same stereo processor also offers a variety of other stereo correction modes for different microphone and replay formats. It’s a unique and very interesting product which I’ll come back to later...
In Part 4...
In the next instalment of this series I´ll be looking at some practical ways of calculating and visualising the SRAs for different mic arrays, and taking that dive into the Mid‑Sides mic array concept — an intriguing and useful variation of the coincident format.