We conclude our primer on coincident arrays by exploring the theory and practice of Mid‑Sides miking.
In Part 3 we continued our exploration of coincident (X‑Y) stereo microphone arrays, and looked at how the Stereo Recording Angle (SRA) can be altered, either by changing the mutual angle between the two mics, or by changing the mic polar patterns. In this instalment, I’ll delve into another form of coincident mic array — the mysterious Mid‑Sides format — and discuss some tools that can help visualise and calculate the SRAs of different stereo arrays. As always, you can find the audio examples that accompany this series at https://sosm.ag/this-is-stereo-media
Mid‑Sides
The term Mid‑Sides seems to induce fear or confusion in many recordists and, because the explanations often use equations, some seem to think it will be hard work! But Mid‑Sides is really nothing more than the conventional left‑right (L‑R) stereo format viewed through a different lens, and in practice it’s very easy. L‑R and M‑S both carry exactly the same information, and are completely interchangeable through a simple ‘matrix’ process.
Diagram 1 illustrates how audio information is portrayed in each channel in both formats.
 Diagram 1: M‑S and L‑R are both stereo formats, and carry exactly the same stereo information, but different parts of the signal are conveyed on each of the two channels.
In the L‑R format (top), a fully‑left sound source is carried only in the left (red) channel. But as soon as it starts to move towards the right, some left‑channel information is also carried partly in the right (green) channel too. The further the source moves right, the stronger it gets in the right channel. A central sound source is carried equally in the left and right channels, of course.
For the Mid‑Sides format, the Mid channel carries everything, no matter where it is positioned in the stereo image. But a central sound is 6dB louder than if that sound was fully left or right, because the same signal exists in both channels (if you add two identical signals the result is 6dB louder). The Sides channel, as the name implies, is strongest for signals that exist only in one channel (whether left or right) at either side of the stereo image. The signal strength falls as the source moves towards the centre, and a central sound source is not carried in the Sides channel at all. And all of this behaviour is defined by two simple equations:
- Mid = Left + Right (the sum of both channels).
- Sides = Left — Right (the difference between channels).
Hopefully you can see that, since you’re adding the left and right, the Mid channel is exactly the same as a conventional mono sum. The Sides channel, on the other hand, essentially carries all the stereo‑width ‘goodness’ that you lose when summing to mono — the wider a sound source in the stereo image, the stronger it will be in the Sides channel. Importantly, exactly the same sum and difference matrix processing converts the other way, too:
- Left = Mid + Sides (sum)
- Right = Mid — Sides (difference)
Consequently, whatever format you feed into an M‑S matrix, the opposite format will appear at its output. L‑R becomes M‑S, and M‑S becomes L‑R; it’s the same process for both conversions. There’s a small but important caveat, though!
Imagine you want to convert L‑R to M‑S to adjust the stereo width, and then convert the narrowed/widened signal back to L‑R (this is precisely what most stereo‑width controls do in mixers). The first matrix outputs an M‑S signal that we route into another matrix that outputs L‑R. The stereo channels L and R that we start with become M (=L+R) and S (=L‑R). Those M‑S signals go into a second matrix to derive L and R again (L=M+S and R= M‑S). But look what happens if we substitute those M and S terms in the second matrix for the Left and Right terms that we started out with:
- Left output = M+S = (L+R)+(L‑R) = 2L
- Right output = M‑S = (L+R)‑(L‑R) = 2R
As you can see in the rightmost part of those two equations, we now have twice as much output signal level as we started with. Put another way, the output of the second matrix is 6dB louder than the original signal. Sometimes that won’t matter, as it’s not difficult to adjust the signal level manually, but usually we need to preserve unity gain and headroom throughout a signal chain. A simple solution is widely (but not universally) adopted: each matrix is designed with 3dB attenuation at both its outputs. That way, when two matrix processes are combined, the overall signal maintains unity gain. If you notice a slight (3dB) loss in level when passing a signal through a single matrix, this will be why!
The main advantage of the M‑S format is that varying the ratio of the Mid and Sides components adjusts the width of the stereo sound stage.
Practical Benefits Of Mid‑Sides
OK, enough of all the maths! What is M‑S actually useful for in practice? The main advantage of the M‑S format is that varying the ratio of the Mid and Sides components adjusts the width of the stereo sound stage. With no Sides signal you’re left with pure mono. And as the Sides level is increased, the stereo width increases with it. Full (100 percent) width is when the Mid and Sides signals are exactly equal in level, and pushing the Sides level higher still creates an ‘out‑of‑phase’ effect, whereby sounds appear to come from ‘outside’ the speakers, but do so in a very unstable (and, often, arguably unpleasant) way.
The Mid and Sides signals can also be processed independently too, and a very powerful technique is to boost and/or cut the level of the Sides signal using an equaliser. This allows the stereo width to be adjusted in a frequency‑selective way. For example, rolling off the low end in the Sides leaves all the bass in the Mid channel only, so it’s all in the centre of the stereo image — this is a standard process for cutting vinyl records. Alternatively, using a high‑shelf cut in the Sides channel narrows the stereo image slightly at high frequencies, and that’s exactly how EMI’s Stereosonic Shuffler works (Diagram 2), as mentioned last month in Part 3.
 Diagram 2: EMI’s Stereosonic Shuffler employs a high‑shelf cut in the Sides channel to narrow the stereo image slightly at high frequencies.
Mid‑Sides Stereo Array
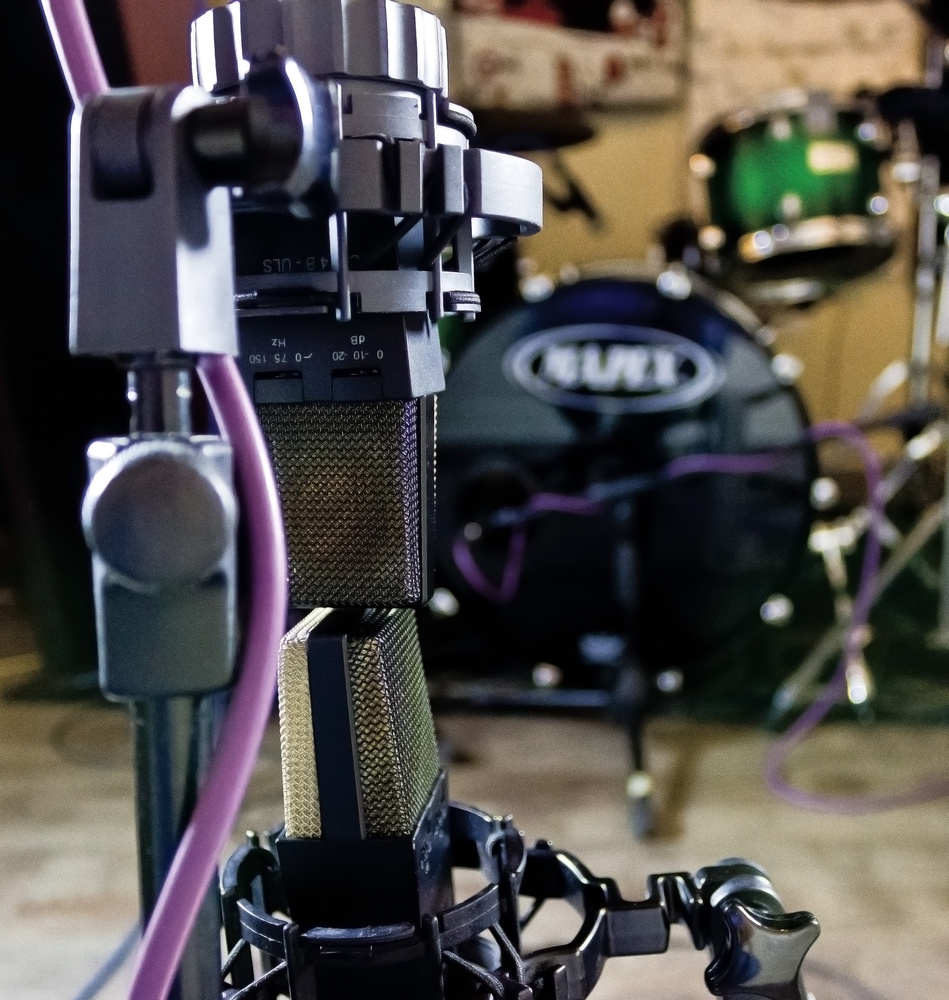
So far, I’ve discussed creating Mid‑Sides signals from left‑right stereo using a matrix process. But we can also capture M‑S stereo signals directly at source, using a pair of microphones — an idea that Alan Blumlein came up with almost a century ago. Like conventional L‑R stereo, two microphones are required, and they must be mounted coincidently, such that they capture only amplitude differences between the two channels (ie. with no time‑of‑arrival differences).
The Mid signal can be captured using any desired polar pattern that ‘hears’ all the sound sources consistently, and provides a suitable perspective (in terms of the direct sound:reverberation ratio). Blumlein originally used a figure‑8 ribbon mic for this technique, but hypercardioid, cardioid and even omnidirectional patterns are now common options, too. The Sides mic must reject sound sources at the middle of the stereo sound stage, so must have a polar pattern with a null facing forwards, but good pickup to either side. The perfect candidate for that role is obviously the figure‑8 pattern, and the fact that its front and rear lobes inherently have opposite polarities is essential in making the maths work when decoding the M‑S signal to L‑R — those opposite polarities uniquely identify which sound sources are on the left or right.
 Diagram 3: A Blumlein Mid‑Sides array, matrixed to create a ‘virtual’ L‑R stereo array.Blumlein’s original M‑S array comprised a forward‑facing figure‑8 mic for the Mid channel, and a sideways‑facing figure‑8 mic for the Sides channel. Importantly, the face of the Sides mic facing left must have the same polarity as the front of the Mid microphone — in other words, the front of the mic should face left and its rear should face right. If it doesn’t, then the decoded stereo image will be left‑right reversed.
Diagram 3 illustrates how the different polarity lobes of the two figure‑8 mics add and subtract through the decoder to create a virtual L‑R stereo mic array (which, in this case, happens to be a conventional Blumlein array).
A central sound source will only be ‘heard’ by the Mid mic because it’s precisely in the null of the Sides mic. However, as that sound source moves off to the left, the Sides mic starts to pick it up and the Sides output level rises. At the same time, the Mid mic’s output level falls, as the source moves progressively off axis — there are pure amplitude differences between the Mid and Sides channels.
Use the M‑S equations I set out earlier, and you’ll find that when the sound exists only in one channel (eg. left only), it’s true that Mid=L and Sides=L. In other words, when a sound source is at the extreme edge of the array’s SRA — as far left or right as it can be — the Mid and Sides channels will have equal amplitudes. Put simply: M=S.
It follows that if the level of the signal captured by the Sides mic is then increased at or after the preamp stage, then a central sound source won’t need to move as far left or right to generate the same output level in the Sides channel as it does in the Mid mic. In other words, the SRA is reduced! Conversely, if the Sides mic level is reduced, a central sound source needs to move much further out from the centre to generate the same signal level captured on the Mid mic, so the SRA increases.
Diagram 4 illustrates this using a cardioid Mid microphone with lines drawn from the coincident centre of both mics out to where the Sides and Mid patterns meet. These lines define the edges of the SRA and, as you can see, their position is dependent on the relative sensitivity of the Sides mic.
 Diagram 4: Adjusting the relative sensitivity of the Sides microphone moves the points where the Mid and Sides polar patterns are equal in amplitude, which defines the edges of the SRA and thus the perceived stereo width of sources placed in front of the M‑S array.
While it is certainly possible to decode the outputs from an M‑S array to record a normal left‑right stereo signal, the real benefit of the M‑S format is obtained by recording the M‑S signals directly, and decoding them to left‑right in post‑production, during the mix, when the appropriate stereo image width can be determined, or even adjusted dynamically.
Example 7 in the associated choir audio files was captured using an M‑S array and is recorded in the M‑S format. The output from a forward‑facing cardioid mic (a Sennheiser MKH 40) is on channel 1, and a sideways figure‑8 mic (MKH 30) on channel 2. When these tracks are loaded into a stereo track in a DAW, the resulting raw material will sound noticeably left‑dominant, because the Mid mic in the left channel is facing the choir whereas the Sides mic in the right channel isn’t. Inserting an M‑S decoder plug‑in into the stereo track will decode the signal to normal left‑right stereo, and produce a stereo image similar to that from the coincident hypercardioids used in Example 5. If the level of the Sides channel is adjusted (whether using the decoder plug‑in’s controls, or the right channel’s input gain), the stereo image width can be varied all the way from mono (phantom centre) up to ‘outside the speakers’.
Equivalences
 Diagram 5a: The equivalent L‑R pickup pattern for an M‑S setup with Mid mics of different polar patterns.When a figure‑8 mic is employed for the Mid channel in an M‑S array, the equivalent left and right ‘virtual’ mics are a classic Blumlein array, as already illustrated. But if an omnidirectional mic is used instead, the decoded virtual mics turn out as back‑to‑back cardioids, with a mutual angle of 180 degrees — a handy format for capturing ambient atmospheres. More commonly, though, cardioid or hypercardioid patterns are employed for the Mid mic, creating virtual left‑right mics which are a little more directional than the real Mid mic’s pattern, and with a mutual angle determined by the ratio of Mid and Sides levels through the decoder (see Diagrams 5a and 5b).
In addition to being able to adjust the SRA during or after the recording, another important advantage of the M‑S array is that central sound sources are always directly on‑axis to the Mid microphone. The relevance of this is that, as already mentioned, most directional microphones get more directional with increasing frequency. With conventional left‑right coincident arrays, a central source is always inherently off‑axis to both mics, and therefore potentially coloured due to the imperfect polar pattern frequency response. This is especially true where very wide mutual angles or highly directional polar patterns are employed. Using the M‑S format guarantees that a central source — which is usually the most important element — is captured with the mic’s ideal on‑axis frequency response.
 as the X‑Y arrays shown on the bottom row.") Diagram 5b: The M‑S arrays on the top row give the same SRA (indicated in grey) as the X‑Y arrays shown on the bottom row.
Diagram 5b: The M‑S arrays on the top row give the same SRA (indicated in grey) as the X‑Y arrays shown on the bottom row.
SRA Visualisation Tools
When rigging any stereo microphone array, it should be clear by now that two key parameters are paramount: the sound‑stage perspective (the direct/reverberation balance), and the width of the sound sources across the stereo image. The first is dependent on the room’s acoustics and the mic array needs to be moved closer or further away from the sound sources to achieve the preferred perspective. Once that position is known, the stereo recording angle that’s needed in order to encompass all the sound sources can be assessed. But how, then, can a specific mic array setup be found to match that SRA requirement?
 Diagram 6: Neumann’s Recording Tools app.
When it comes to working out how to achieve a specific SRA, or trying to visualise how changing polar patterns and mutual angles interact, there are a couple of interactive tools that I find particularly helpful (though note that neither have options for M‑S arrays). When working on location, I mostly use the Neumann Recording Tools app (Diagram 6), which I reviewed in SOS August 2018. It’s free and available for both Android and iOS. This is actually two apps in one, with one section offering a comprehensive gain and signal level calculator for the entire recording chain. The second section is the part that’s relevant here — it’s an SRA calculator, allowing the user to select and adjust polar patterns, mutual angle, and capsule spacing, with the resulting SRA illustrated graphically, along with indications of the relative proportions of inter‑channel level and timing differences. This app is both accurate and easy to use and, by holding the phone horizontally you can squint across the top of the screen to see if the SRA is adequate for the sound sources in front of the mics.
The second option I’d recommend is a web page on the very comprehensive Seng Piel audio tools website (https://sengpielaudio.com/HejiaE.htm). Called ‘Visualisation of all Stereo Microphone Systems with Two Microphones’, it is similar to the Neumann app, but has some useful additional features (see Diagram 7). For a start, it has presets for a number of well‑established stereo mic arrays, which are selectable from a drop‑down box on the left‑hand side. Alternatively, polar pattern, mutual angle and capsule spacing options can be entered manually.
 Diagram 7: The Seng Piel audio tools website: a wonderful resource for visualising two‑mic stereo arrays.
The graphic display shows the selected mic polar patterns in red, and their mutual angle can be adjusted by dragging one of the circles at the top edges of the individual patterns (or by entering a value in the corresponding data box to the right). Similarly, the capsule spacing can be adjusted by dragging the circle in the centre of the mic array (or by entering a value in the data box). The grey outline surrounding the red mics is the equivalent polar pattern if the two channels are summed to mono (so equivalent to the Mid mic), while the blue‑grey wedge indicates the SRA for the combination of selected microphone array parameters.
Five coloured bars arced across the SRA region represent notional (orchestral) sound sources in front of the mics, and their spread angle can be adjusted either by dragging the outer bars or entering a value in the Orchestra Angle data box. These virtual sources are mapped between the loudspeakers above, indicating any spatial distortion generated by the particular mic array parameters. The SRA for the displayed mic array is given in another data box on the right, along with the maximum inter‑channel amplitude and timing differences, and their contributions to the overall imaging positions.
I find it highly instructive to experiment with both of these applications to help develop a mental picture of the way adjustments to the physical parameters of a stereo mic array impact the stereo recording angle. With practice, adjusting mic array parameters will become instinctive if you need to increase or decrease the mutual angle to compensate for moving the mic closer or further away, for example.
That concludes this month’s instalment. Next time, I’ll explore what happens where the microphones in a stereo mic array aren’t coincident, and some of the popular arrays that deliberately exploit this technique.
M‑S Matrix Technologies
: A traditional M‑S matrix, using a transformer for each channel with a single primary coil and two secondaries. Diagram 8b (below): The electronic equivalent.") Diagram 8a (above): A traditional M‑S matrix, using a transformer for each channel with a single primary coil and two secondaries. Diagram 8b (below): The electronic equivalent.
Diagram 8a (above): A traditional M‑S matrix, using a transformer for each channel with a single primary coil and two secondaries. Diagram 8b (below): The electronic equivalent. Diagram 8b.Converting from L‑R to M‑S (or vice versa) can be achieved in a variety of ways, but originally it was performed passively, using transformers. Each channel used a transformer with a single input (primary) winding and two secondary output windings, typically with a ratio of 1.4:1:1. Each of the matrix outputs are derived by wiring a secondary in each transformer in series, either in the same polarity (for the sum output), or in opposite polarities (for the difference output), as shown in Diagram 8. However, this is a bulky and expensive solution, and analogue matrix systems today typically use op‑amps to add and subtract the input signals (Diagram 8b), usually achieving better frequency and phase responses, too.
The same conversion processes can also be achieved by routing signals around an analogue console using channel pan pots and polarity inversions to add and subtract the Mid and Sides signals en route to the left‑right stereo bus outputs (remembering that mixing two signals together when one is polarity‑inverted is mathematically the same as subtracting one signal from another). There’s a more detailed explanation of these arrangements in the ‘Decoding M‑S Mic Arrays In A Mixing Console’ box, and I’ve included a couple of examples on the SOS website.
The same console signal routing concepts could be employed within the virtual mixer of a DAW, of course, but why would you when it’s so much easier to use an M‑S decoder plug‑in. Most DAWs include this functionality but, if not, Voxengo’s MSED plug-in is free, very easy to use, includes useful stereo metering, and is highly recommended.
 Diagram 9: Voxengo’s enduringly useful MSED plug‑in.
Decoding M‑S Mic Arrays In A Mixing Console
The key to decoding Mid‑Sides signals through an analogue mixing console is to keep in mind the core equations: Left = M+S and Right = M‑S. The act of mixing signals together is the equivalent of adding them, and while subtraction isn’t a standard feature of a mixer, a little algebraic rearrangement gives us: Right = M+(‑S). In practical terms, that minus sign simply indicates a polarity‑inverted signal — in other words, we simply need to mix a polarity‑inverted Sides signal with the Mid.
With all this in mind, the simplest console setup to decode an M‑S mic array to the L‑R stereo bus output is to start by setting the Mid channel’s pan to the centre, thus ensuring that it contributes equally to both the left and right outputs. The Sides signal feeds the left output, where it is summed with the Mid — so the Sides channel must be panned fully left. We also need the polarity‑inverted Sides signal summed to the Mid at the right output. The classic way to achieve this is to duplicate the Sides channel, put this duplicate on a third channel whose polarity‑inversion (erroneously called ‘phase’ on many mixers) button is engaged, and pan it hard‑right. The faders of both the original and duplicated Sides channel need to be linked so that both are moved together when adjusting the stereo width.
 Diagram 10: The classic way of accommodating a Mid‑Sides array on a mixer, with a splitter allowing the Sides mic to feed two channels. It works, but is not ideal!
This arrangement (Diagram 10) works perfectly well, especially with line‑level sources. But if decoding an M‑S mic array, splitting the Sides mic across two channels isn’t the best idea because it halves the input impedance seen by the mic. The arrangement also occupies three adjacent mixer channels and relies on perfect tracking of the two Sides faders.
A better‑engineered solution is to connect the Mid and Sides mic outputs to a pair of mono channels in the normal way, with the Mid channel panned to the centre, and the Sides channel panned hard‑left, as before. To generate the inverted Sides signal, use a post‑fader aux send and connect the corresponding aux master output to a spare channel somewhere out of the way on the desk. That channel should have its polarity‑inversion button engaged and be hard‑panned to the right, as before, but its fader should be set to unity and taped down so it can’t move!
The next stage is simply to match the aux send signal with the Sides channel’s level so that the +S and ‑S contributions to the left and right outputs are perfectly balanced. To achieve that, set the Sides channel’s aux send and the corresponding aux master to their unity reference levels. Open the Sides channel fader to 0dB, and switch the console monitoring to mono. Now adjust the aux return (‑S) channel’s gain for the deepest possible null, indicating a perfect balance of the +S and ‑S contributions to the stereo L‑R mix. Once set, you will not need to touch the aux controls of the ‑S channel gains again — but don’t forget to deselect the mono monitoring!
 Diagram 11: A better M‑S approach on a console is to connect the Sides mic’s preamp to one console channel, and use a unity‑gain post‑fader aux send to mult the signal to a unity‑gain channel elsewhere on the console.
This alternative arrangement (Diagram 11) makes it easier to adjust the Sides level without having to worry about ganged faders, and it also presents both mics in the array with standard mic input impedances. In situations where you are using more than one M‑S array, this arrangement also saves channels as each new array just needs two (one for Mid and another for Sides). The aux return channel already set up will also generate the ‑S contributions from the second array! Just fine‑tune the post‑fader aux send level from the second Sides input while listening for a mono null.